[Spring Boot] 파라미터 값 보내기 / 값 받기 / @RequestParam , @ResponseBody, @ModelAttribute
0
[springboot]
목록 보기
8/27

🗝️ HttpServletRequest request, HttpServletResponse response
- 파라미터로 요청보내기
http://localhost:9090/request-param-v1?username=test&age=20
@RequestMapping("/request-param-v1")
	public void requestParamV1(HttpServletRequest request, HttpServletResponse response) throws IOException {
		String username = request.getParameter("username");
		int age = Integer.parseInt(request.getParameter("age"));

		System.out.println("username : " + username);
		System.out.println("age : " + age);
		response.getWriter().write("ok");
	}


- 리턴타입 없이 void라면 view단 조회를 하지 않겠다는 의미이다.
🎈 @ResponseBody
- view 조회를 무시하고, Http message body에 직접 해당 내용 입력하여
화면에 return 값 출력 - viewResolver를 무시하고 화면에 출력하겠다는 의미
✨ @RequestParam
- 파라미터 이름으로 바인딩
- name 속성이 파라미터 이름으로 사용
@ResponseBody
@RequestMapping("/request-param-v2")
public String requestParamV2(@RequestParam("username") String username,
				@RequestParam("age") int age) throws IOException {
	return "username : " + username + "</br>age :" + age ;
	}
- 네임값 "username" "age" 으로 넘어온 파라미터값을
String username, int age 변수와 매핑된다.

👌 @RequestParam 생략
- 변수이름 생략
- Http 파라미터 name 속성 이름이, 변수 이름과 같으면 @RequestParam
("변수이름")생략가능 - 파라미터 :
username=test3&age=30 - 변수 : String
username, intage
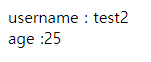
@ResponseBody
@RequestMapping("/request-param-v3")
public String requestParamV3(@RequestParam String username,
    	@RequestParam int age) throws IOException {
	return "username : " + username + "</br>age :" + age ;
	}


- @RequestParam 어노테이션 생략
- String, int 등 단순 타입이면 @RequestParam 어노테이션 생략 가능
- 어노테이션 생략 시, MCV내부에서 required = false를 적용한다.
	@ResponseBody
	@RequestMapping("/request-param-v4")
	public String requestParamV4(String username, int age)
    throws IOException {
		return "username : " + username + "</br>age :" + age ;
	}

- 어노테이션 생략 시 required = false 적용
- required = true : 반드시 파라미터 값이 들어와야한다. 에러발생O
- required = false : 파라미터 값이 반드시 넘어올 필요는 없다. 에러발생X
-> 에러발생 x -> null로 값이 넘어온다.
-> null값이 넘어와야하기 때문에 타입을 rapper class로 설정해줘야 한다.
-> required가 false인 age를 Integer로 선언해줘야 파라미터 값 없을 시 null로 받아올 수 있다.
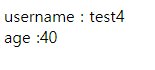
@ResponseBody
@RequestMapping("/request-param-required")
public String requestParamRequired(@RequestParam(required = true) String username,
		@RequestParam(required = false) Integer age) throws IOException {
		return "username : " + username + "</br>age :" + age ;
	}
- 파라미터 값 모두 넘어왔을 경우


/request-param-required-> 파라미터 안넘어 왔을 경우
-> username은 required = true로 필수이므로 에러발생!
/request-param-required?username=-> 값만 안넘어 왔을 경우
->값이 넘어오지 않아도,스프링 부트가빈 문자열로 반환하여에러는 발생하지 않는다.
/request-param-required?username=hello-> age 파라미터가 없을 경우
-> required= false 이기 때문에 파라미터가 없어도 에러발생X
-> rapperclass인 Integer로 받기 때문에 null값으로 받을 수 있다.

🎈defaultValue
- 파라미터값이 없는 경우 defaultValue를 사용하면 기본 값을 적용할 수 있다.
- 기본값이 있기 때문에 required는 의미가 없다.
- 빈 문자열에도 적용
@ResponseBody
@RequestMapping("/request-param-defualt")
public String requestParamDefault(@RequestParam(required = true,
			defaultValue = "guest") String username,
			@RequestParam(required = false, defaultValue = "-1") Integer age)
            throws IOException {
		return "username : " + username + "</br>age :" + age ;
	}


🗝️ @Request Map<>
- 파라미터로 넘어온 값을 Map의 key, value 형식으로 저장해준다.
- 값을 꺼낼때는 name값으로 꺼낼 수 있다.
@ResponseBody
	@RequestMapping("/request-param-map")
	public String requestParamMap(@RequestParam Map<String, Object> paramMap)
    throws IOException {
		return "username : " + paramMap.get("username") + "</br>age :" + paramMap.get("age") ;
	}


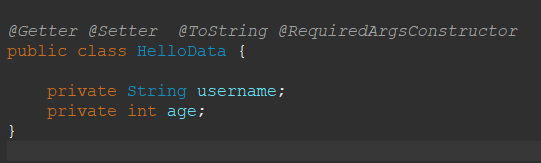
🎈@ModelAttribute
- 파라미터를 받아서 필요한 객체를 만들고 그 객체에 값을 넣어주는 과정을 자동화
- 파라미터값을 받아서, Model객체 생성 후, getter에 담아주는 역할까지 해준다.
- 파라미터 받아서 setter에 담고, getter로 꺼내기 ->
@ModelAttribute 사용 전
@ResponseBody
@RequestMapping("/model-attribute-v1")
public String modelAttributeV1(@RequestParam String username,
								@RequestParam int age) {
		HelloData hello = new HelloData();
		hello.setUsername(username);
		hello.setAge(age);

		return "username : " + hello.getUsername() + "</br>age :" + hello.getAge() ;
	}


@ModelAtrribute 사용
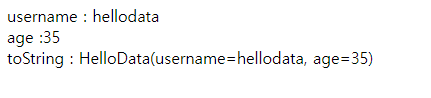
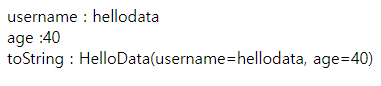
@ResponseBody
@RequestMapping("/model-attribute-v2")
public String modelAttributeV2(@ModelAttribute HelloData hellodata) {
		return "username : " + hellodata.getUsername() + "</br>age :" +
        hellodata.getAge() + "</br>toString : " + hellodata.toString() ;
	}
- 위의 코드와 비교해보면, @ModelAttribute 어노테이션을 사용하면서
파라미터를 받아와서 HelloData 객체의 프로퍼티를 찾는다.
- 프로퍼티의 setter를 호출해서 파라미터 값을 담아준다.
- Model 객체에도 자동적으로 객체가 추가된다.

- @ModelAttribute 어노테이션 생략가능
String, int와 같은 단순 타입일 경우 스프링은@ RequestParam 이 생략되었다고 판단객체일 경우@ModelAttribute가 생략되었다고 판단
-> 가독성과 혼란을 방지하기 위하여 어노테이션은 사용해주는 것이 좋다.
@ResponseBody
	@RequestMapping("/model-attribute-v3")
	public String modelAttributeV3(HelloData hellodata) {
		return "username : " + hellodata.getUsername() +
        "</br>age :" + hellodata.getAge() ;
	}

👌 @ModelAttribute가 메서드에 선언될 때
- Controller를 호출할 때 (어떤 메서드가 호출이 되던간에)
- model에 자동으로 해당 내용이 담기는게 보장된다.
@ModelAttribute("regions")
	public Map<String, String> regions(){
		Map<String, String> regions = new LinkedHashMap<String, String>();
		regions.put("SEOUL", "서울");
		regions.put("BUSAN", "부산");
		regions.put("JEJU", "제주");
		return regions;
}
- model에 attribute될때 "regions"가 key값이 되어 데이터가 넘어간다.

웹 개발자 공부 중