파일 업로드 : multipart/form-data MIME 타입
1단계 - 게시글 첨부 파일 테이블 생성
- /doc/model.exerd :
- app_board_file 테이블 생성: 첨부파일번호/ 파일경로 / 게시글 번호
- /doc/ddl.sql 변경
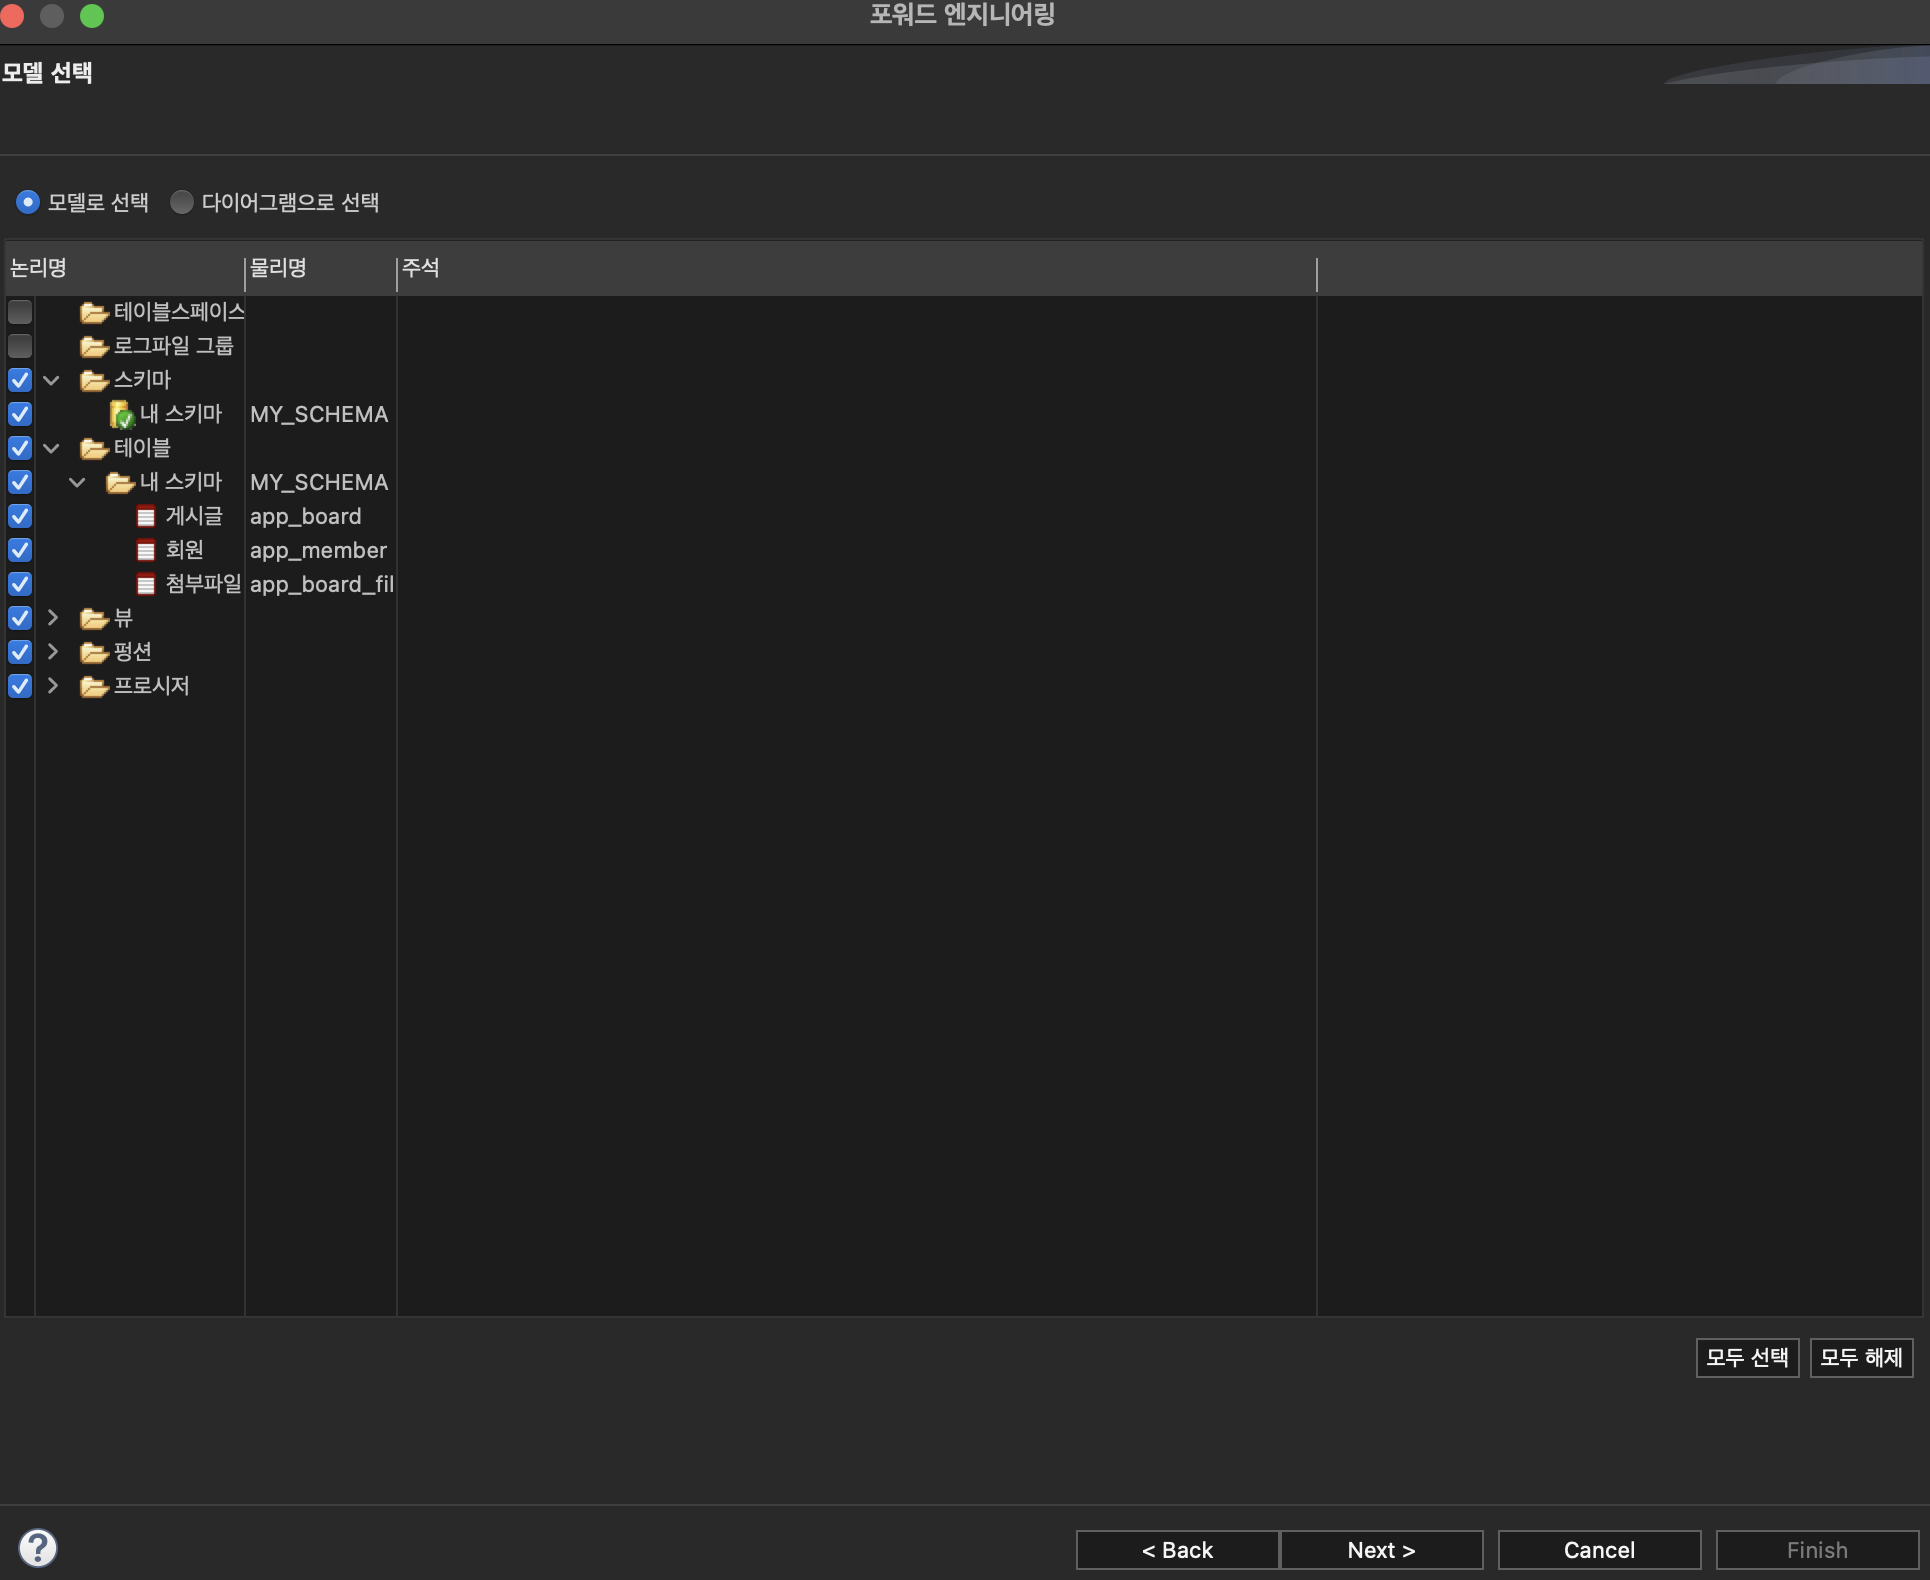
- eXERD / 포워드엔지니어링 / 생성 옵션 확인 /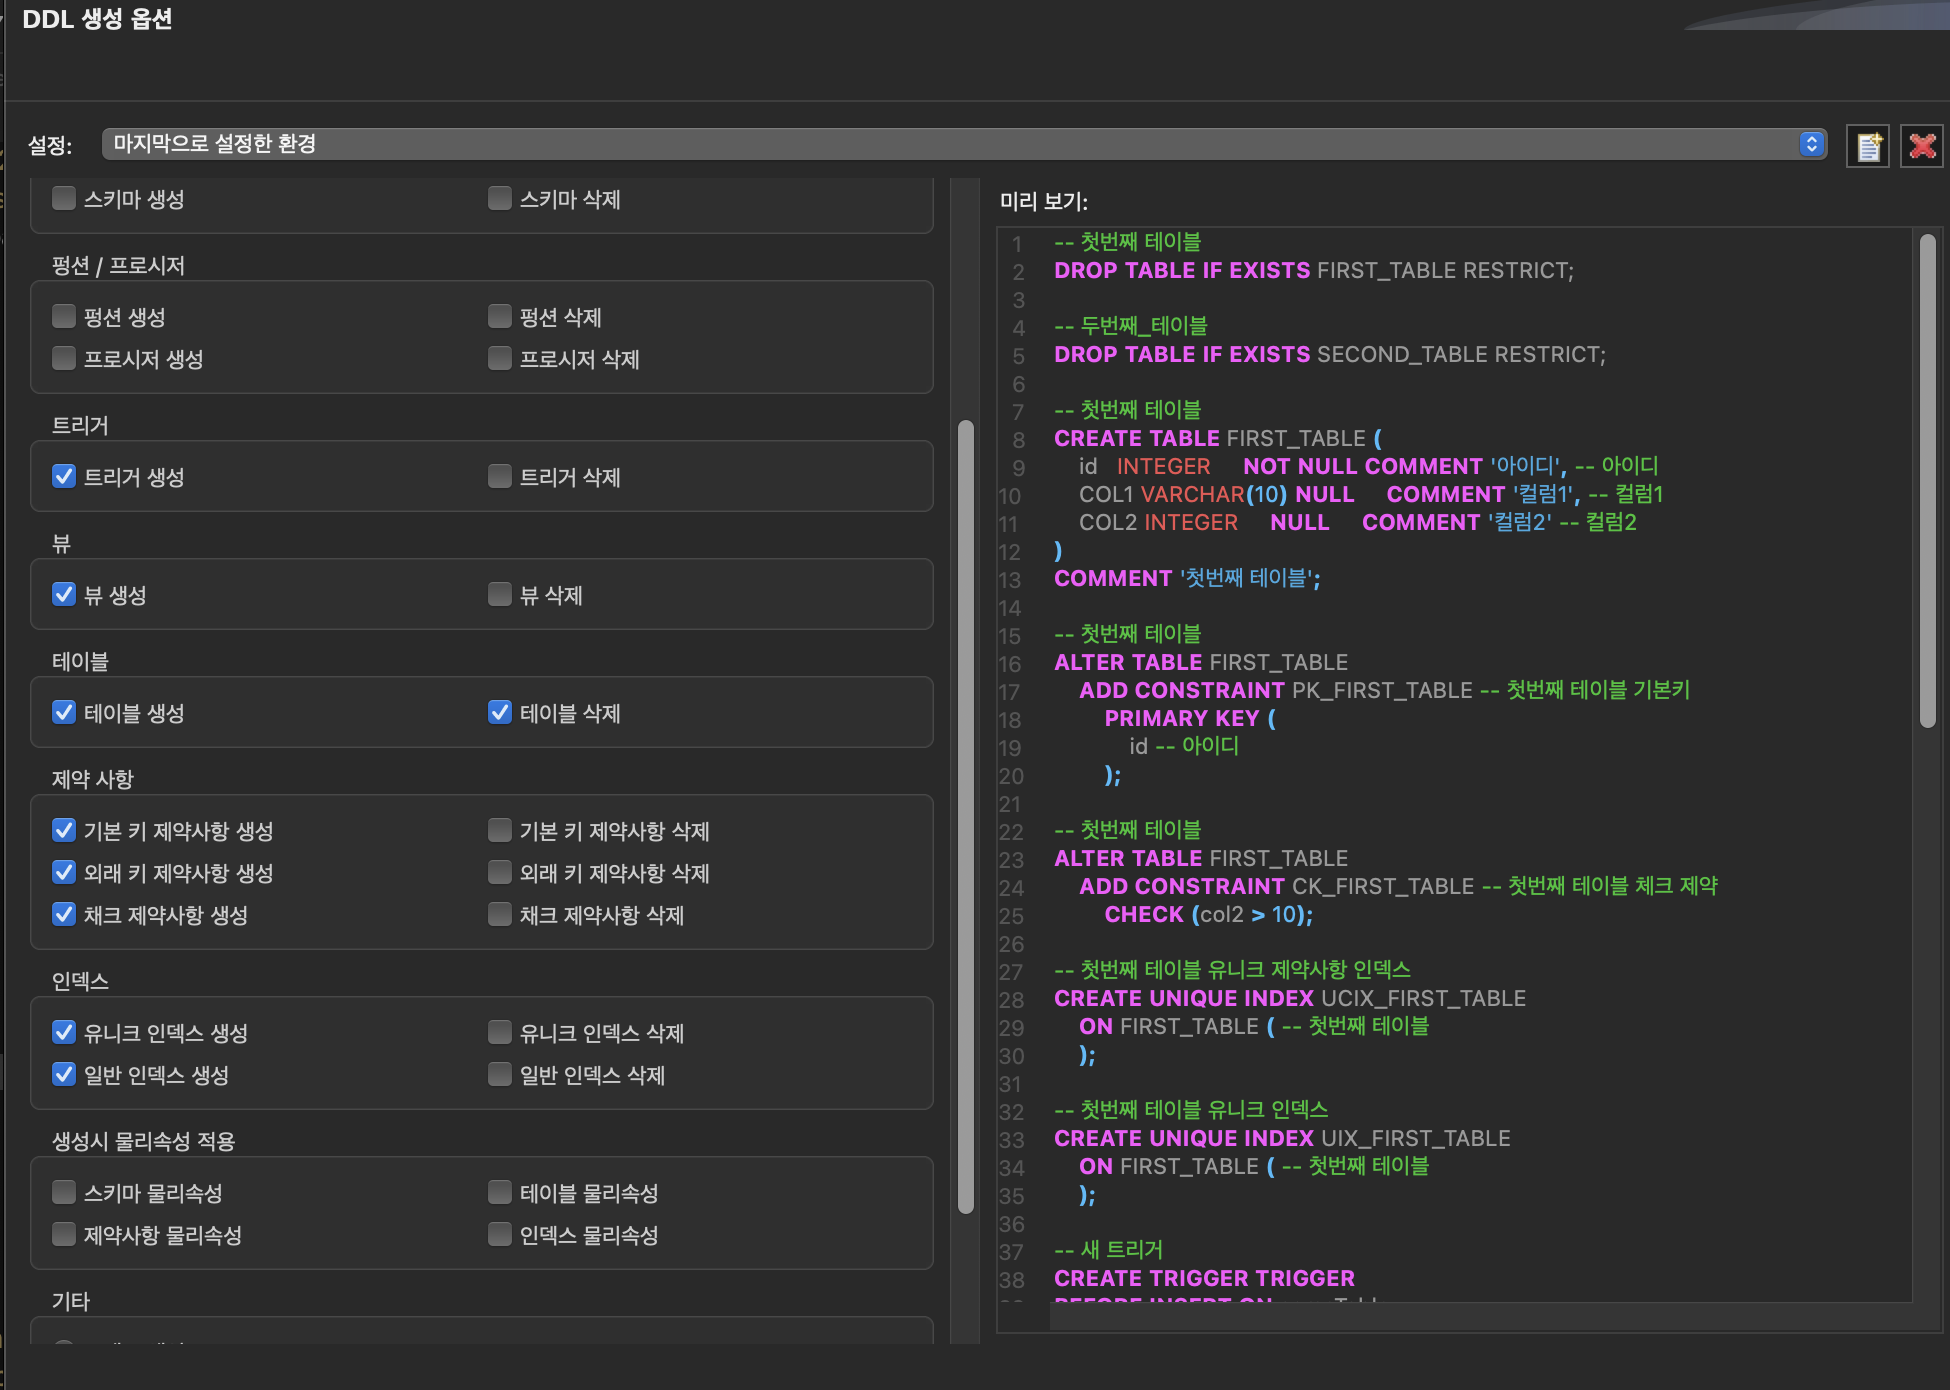
- next / 내스키마 구조 확인
- 클립보드 복사-> ddl.sql 로 붙여넣기 후 터미널에서 테이블 생성 확인
2단계 - 게시글 등록 시 파일 첨부
- /webapp/board/form.jsp 변경
<%@ page language="java"
    contentType="text/html; charset=UTF-8"
    pageEncoding="UTF-8"%>
<!DOCTYPE html>
<html>
<head>
<meta charset="UTF-8">
<title>bitcamp</title>
</head>
<body>
<h1>게시글 입력-JSP</h1>

<form action='add' method="post" enctype="multipart/form-data">
<table border='1'>
  <tr>
    <th>제목</th><td><input name='title' type='text' size='60'></td>
  </tr>
  <tr>
    <th>내용</th><td><textarea name='content' rows='10' cols='60'></textarea></td>
  </tr>
  <tr>
    <th>첨부파일</th><td><input name='files' type="file" multiple></td>
  </tr>
</table>
<p>
  <button type='submit'>등록</button>
  <a href='list'>목록</a>
</p>
</form>

</body>
</html>
(변경 전)
<form action='add'>(변경 후)
<form action='add' method="post" enctype="multipart/form-data">- method="post": 반드시 POST형식으로 요청
- enctype="multipart/form-data : MIME 타입 설정
: 첨부파일은 단순한 문자열이 아니고 0과 1로 이루어진 바이너리 데이터이기 때문
- application/X-www-form-urlencoded : 기본 형식
: 전송 한 값들은 request.getParameter()메서드를 통해서 얻어낼 수 있다
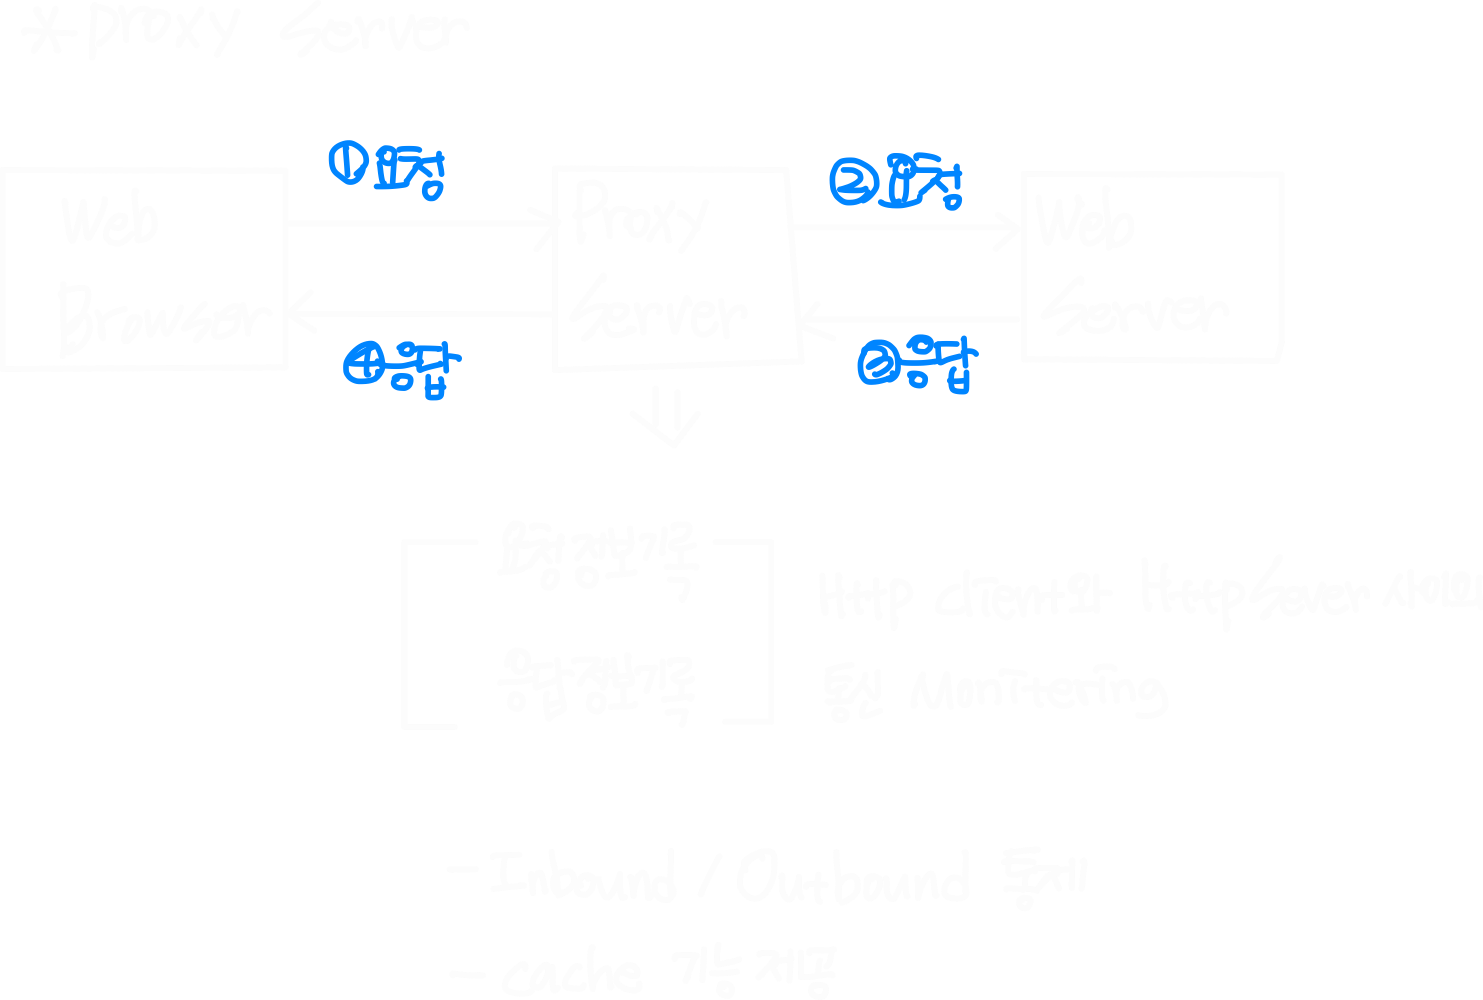
: HTTP 요청 메시지의 Body 부분: name=value&... 형식의 text데이터를 의미- charlesproxy 프로그램으로 multipart/form-data 형식으로 넘어가는 프로토콜 확인
3단계 - 멀티파트 형식으로 업로드된 데이터를 처리
- apache의 commons-fileupload 라이브러리를 프로젝트 추가
implementation 'commons-fileupload:commons-fileupload:1.4'4단계 - 게시글을 조회할 때 첨부파일 목록을 출력
- /webapp/board/detail.jsp 변경
<%@ page language="java" contentType="text/html; charset=UTF-8"
    pageEncoding="UTF-8"%>
<%@ taglib prefix="c" uri="http://java.sun.com/jsp/jstl/core"%>
<!DOCTYPE html>
<html>
<head>
<meta charset="UTF-8">
<title>bitcamp</title>
</head>
<body>
<h1>게시글 상세 정보(JSP + Servlet + EL)</h1>
<form action='update' method="post" enctype="multipart/form-data">
<table border='1'>
  <tr>
    <th>번호</th><td><input name='no' type='number' value='${board.no}' readonly></td>
  </tr>
  <tr>
    <th>제목</th><td><input name='title' type='text' value='${board.title}' size='60'></td>
  </tr>
  <tr>
    <th>내용</th><td><textarea name='content' rows='10' cols='60'>${board.content}</textarea></td>
  </tr>
  <tr>
    <th>조회수</th><td>${board.viewCount}</td>
  </tr>
  <tr>
    <th>작성자</th><td>${board.writer.name}</td>
  </tr>
  <tr>
    <th>등록일</th><td>${board.createdDate}</td>
  </tr>
  <tr>
    <th>첨부파일</th>
    <td>
      <ul>
      <c:forEach items="${board.attachedFiles}" var="file">
        <li>
          <a href="files/${file.filepath}">${file.filepath}</a>
          [<a href="fileDelete?no=${file.no}">삭제</a>]
        </li>
      </c:forEach>
      </ul>
      파일 추가: <input name='files' type="file" multiple>
    </td>
  </tr>
</table>
<p>
  <button type='submit'>변경</button>
  <a href='delete?no=${board.no}'>삭제</a>
  <a href='list'>목록</a>
</p>
</form>
</body>
</html>- Core 태그 라이브러리 사용하기
<%@ taglib prefix="c" uri="http://java.sun.com/jsp/jstl/core"%>
- 톰캣에서는 JSTL 라이브러리를 기본으로 제공하지 않기 때문에 반드시 JSP 페이지 상단에 taglib 디렉티브 태그를 추가하여 톰캣에게 알려주어야 한다

     <c:forEach items="${board.attachedFiles}" var="file">
        <li>
          <a href="files/${file.filepath}">${file.filepath}</a>
        </li>
      </c:forEach>
- c:forEach items="반복할 객체이름" var="변수이름"