
📍 lib 파일 업로드
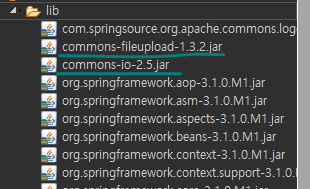
스프링에서 지원하는 파일 업로드 방식. jar 파일을 lib 폴더에 추가해서 넣어 준다.
네이버 클라우드에도 추가해 둠.
📍 fileUpload.html
<!-- fileUpload.html -->
<html>
<head>
	<title>파일업로드Test</title>
</head>
<body>
	<div align="center">
		<hr color="green" width="300">
		<h2>파 일 업 로 드 테 스 트</h2>
		<hr color="green" width="300">
		<form name="f" action="fileUpload_ok.do" method="post"
									enctype="multipart/form-data">
			<table border="1" width="500">
				<tr>
					<th>올린이</th>
					<td><input type="text" name="name"></td>
				</tr>
				<tr>
					<th>파일명</th>
					<td><input type="file" name="filename"></td>
				</tr>
				<tr>
					<td colspan="2">
						<input type="submit" value="파일업로드">
						<input type="reset" value="다시작성">
					</td>
				</tr>
			</table>
		</form>
	</div>
</body>
</html>
파일 업로드 html.
중요한 점은 method 가 반드시 post 방식어야 하고, enctype 은 multipart/form-data, input type 은 file 로 받아주는 것만 기억하면 된다.
📍 testSpring-servlet.xml
<?xml version="1.0" encoding="UTF-8"?>
<beans xmlns="http://www.springframework.org/schema/beans"
	xmlns:xsi="http://www.w3.org/2001/XMLSchema-instance"
	xsi:schemaLocation="http://www.springframework.org/schema/beans http://www.springframework.org/schema/beans/spring-beans.xsd">

	<bean id="viewResolver"
					class="org.springframework.web.servlet.view.InternalResourceViewResolver">
		<property name="prefix">
			<value>WEB-INF/</value>
		</property>
		<property name="suffix">
			<value>.jsp</value>
		</property>
	</bean>

	<bean name="/test.do" class="test.TestController">
	</bean>

	<bean name="/fileUpload_ok.do" class="test.FileUploadController">
	</bean>

	<bean id="multipartResolver"
				class="org.springframework.web.multipart.commons.CommonsMultipartResolver"/>
</beans>
서블릿 파일에서도 별거 없다. fileUpoad_ok 컨트롤러를 등록해 주고 나면, multipartResolver 를 등록해 준다.
그러면 이제 multipartResolver 클래스를 사용할 수 있게 된다.
📍 FileUploadController.java
package test;

import java.io.File;

import javax.servlet.http.HttpServletRequest;
import javax.servlet.http.HttpServletResponse;

import org.springframework.web.multipart.MultipartFile;
import org.springframework.web.multipart.MultipartHttpServletRequest;
import org.springframework.web.servlet.ModelAndView;
import org.springframework.web.servlet.mvc.Controller;

public class FileUploadController implements Controller {

	@Override
	public ModelAndView handleRequest(HttpServletRequest req, HttpServletResponse resp) throws Exception {
		MultipartHttpServletRequest mr = (MultipartHttpServletRequest)req;
		MultipartFile mf = mr.getFile("filename");
		String filename = mf.getOriginalFilename();
		System.out.println("filename = " + filename);

		String path = req.getServletContext().getRealPath("/file");
		File file = new File(path, filename);

		mf.transferTo(file);
		System.out.println("파일전송 끝!!");
		System.out.println("path = " + path);
		return new ModelAndView();
	}
}
경로에 파일도 만들어 주기/.
사용 방식은 이렇다. MultipartHttpServletRequest 이 클래스를 사용해 주고, realPath() 메서드를 사용해 파일 경로를 알아 보자.

경로를 따라 들어가면?

조이가 있는 것을 확인할 수 있다.

자바 백엔드 개발자 개인 위키