
1. mavenStudent 만들기
file - new - Spring Legacy Project
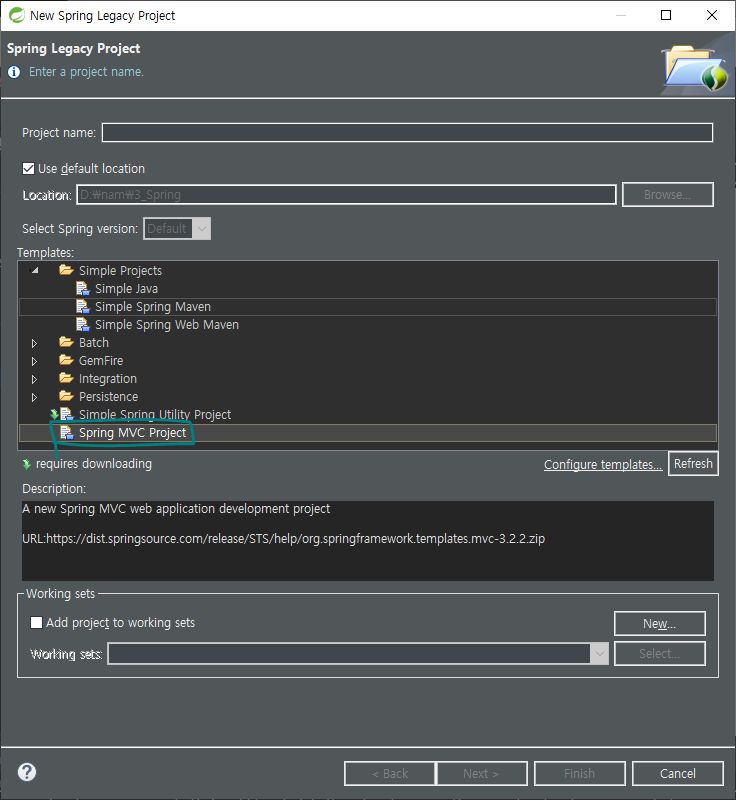
Spring MVC 프로젝트를 체크한 후 next를 눌러 다운로드 받아 줘야 한다.
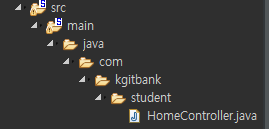
2. 이름 만들어 주기
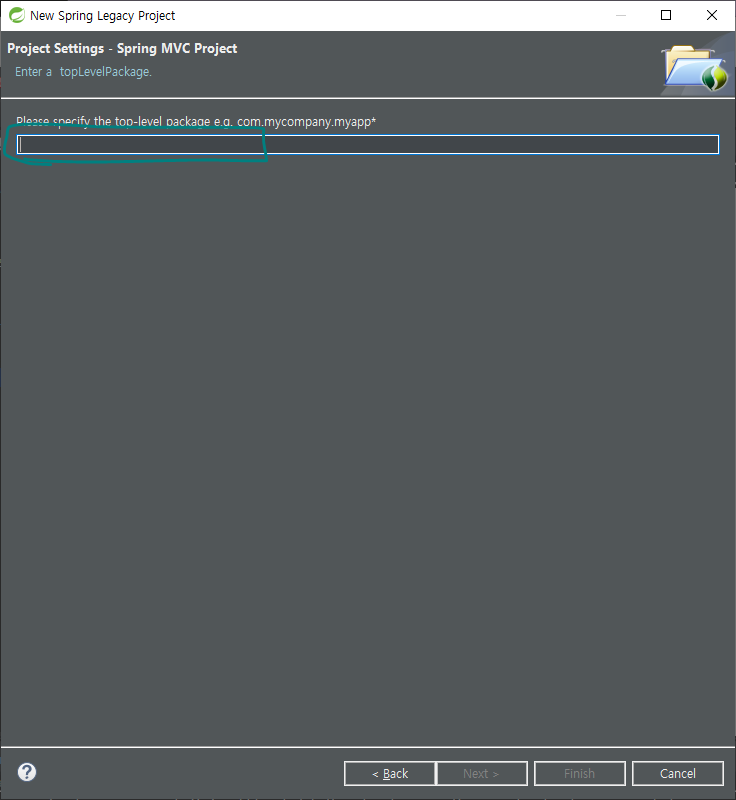
이름은 이름 공식에 따라 만들어 준다.
com.kgitbank.student
3. 서버 실행
run as - run on server
좀 걸린다.
4. pom.xml 하는 역할
C:\Users\user.m2\repository\org\springframework\spring-web\3.1.1.RELEASE
버전 관리를 하기 위해 만들어진 폴더이다.
기존에는 lib 폴더에 모두 붙여 넣기 하여 만들었지만,
이제는 제작자들이 인터넷상에 있는 repository 에 올려 두고, 우리는 그것을 가져와 사용한다.
참고로 오라클은 따로 등록해 주어야 한다. 마이바티스는 웹에서 다운 받아 주기만 하면 쉽다.
5. 자바 BuildPath 수정해 주기
📍 library 버전
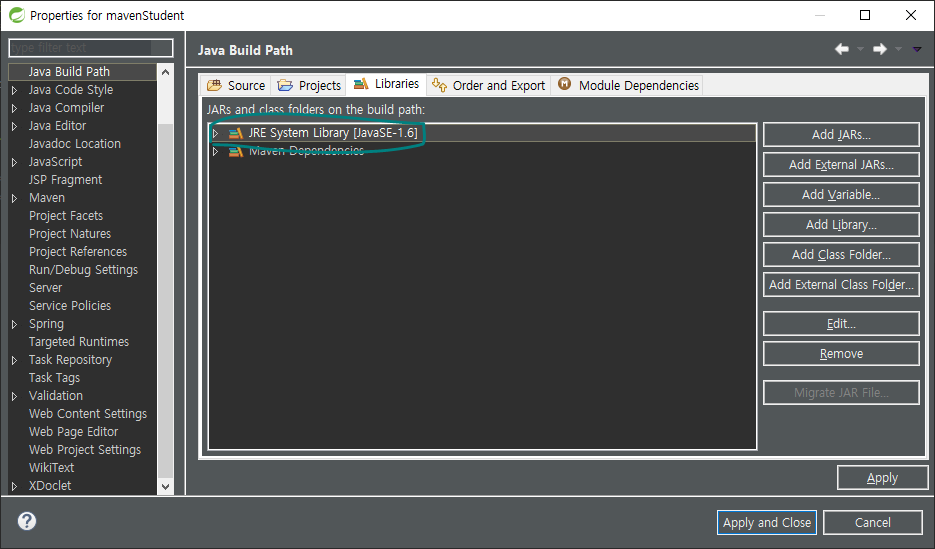
더블클릭
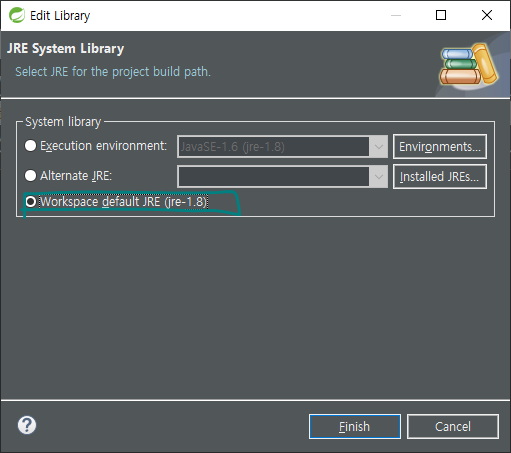
libra1.8 버전 선택
📍 compiler 버전 수정
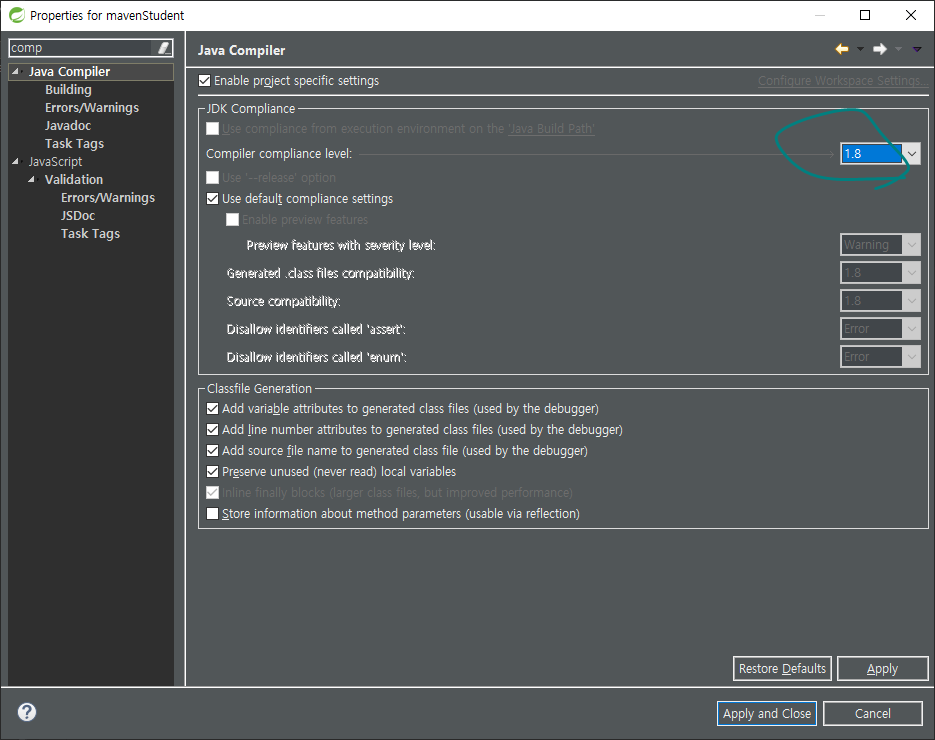
1.8 버전 선택
📍 project Facets 수정
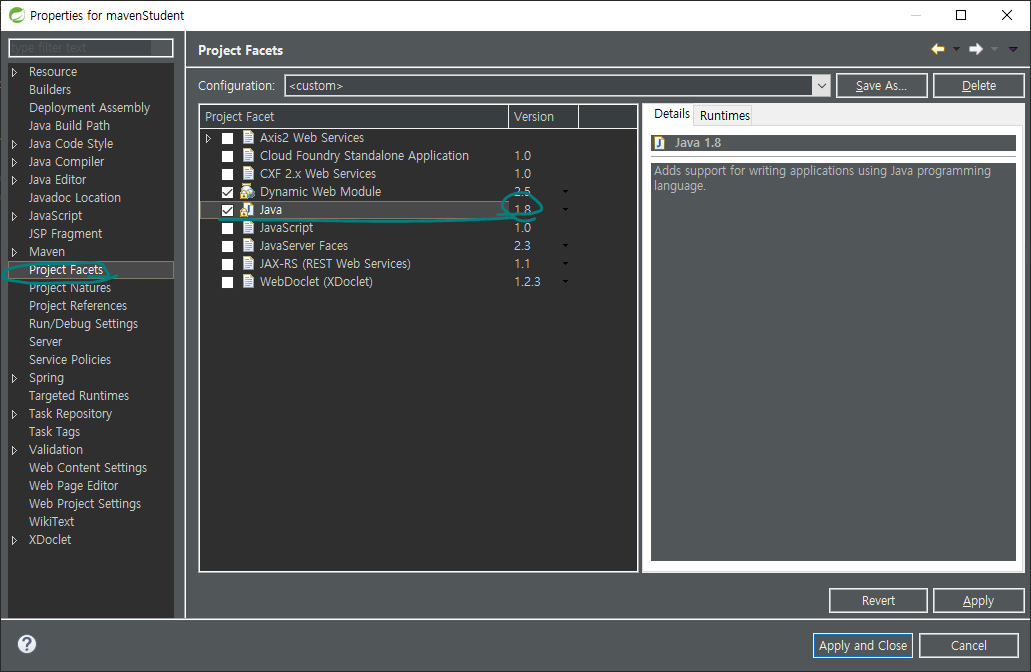
1.8 버전 선택
📍 pom.xml 수정
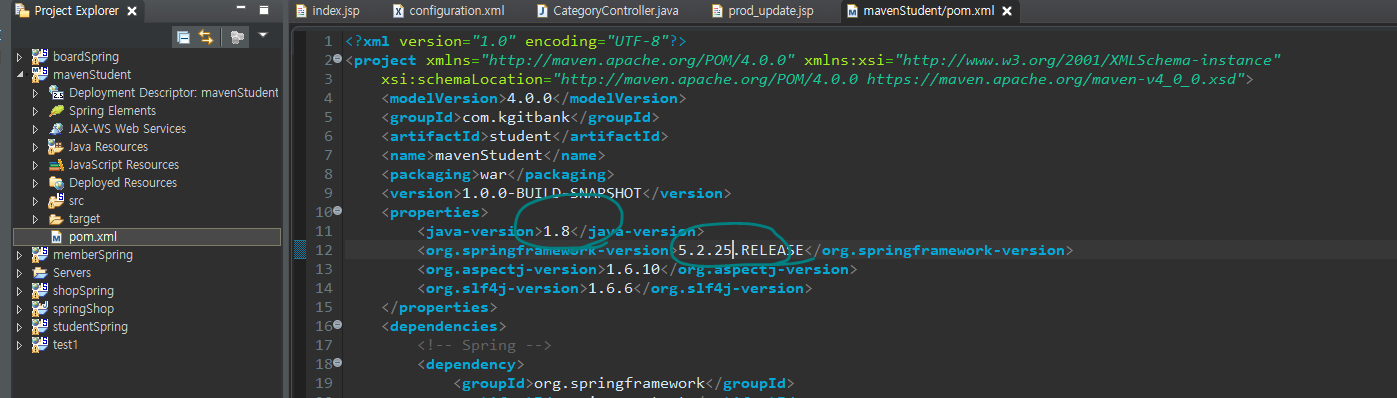
5.2.25 (최신 버전)
	<properties>
		<java-version>1.8</java-version>
		<org.springframework-version>5.2.25.RELEASE</org.springframework-version>
		<org.aspectj-version>1.6.10</org.aspectj-version>
		<org.slf4j-version>1.6.6</org.slf4j-version>
	</properties>
📍 확인
C:\Users\user.m2\repository\org\springframework\spring-web\5.2.25.RELEASE
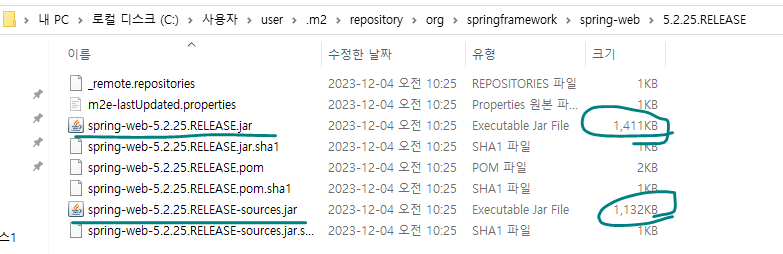
jar 파일과 용량이 정확하다면 잘 깔린 것
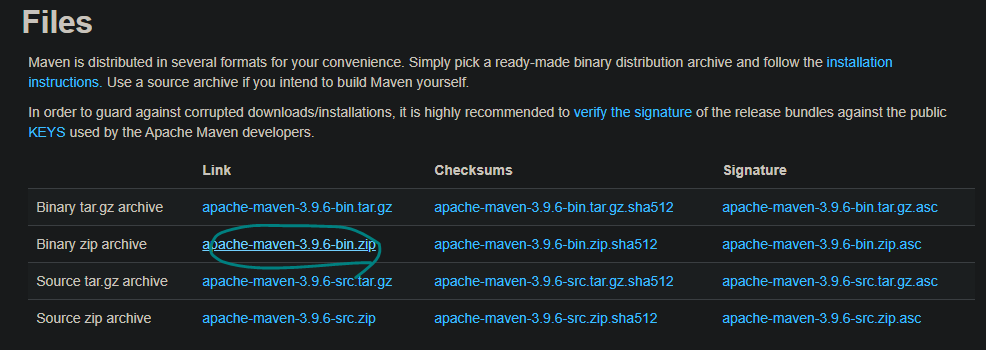
📍 메이븐 깔기
https://maven.apache.org/download.cgi
6. oracle 설정
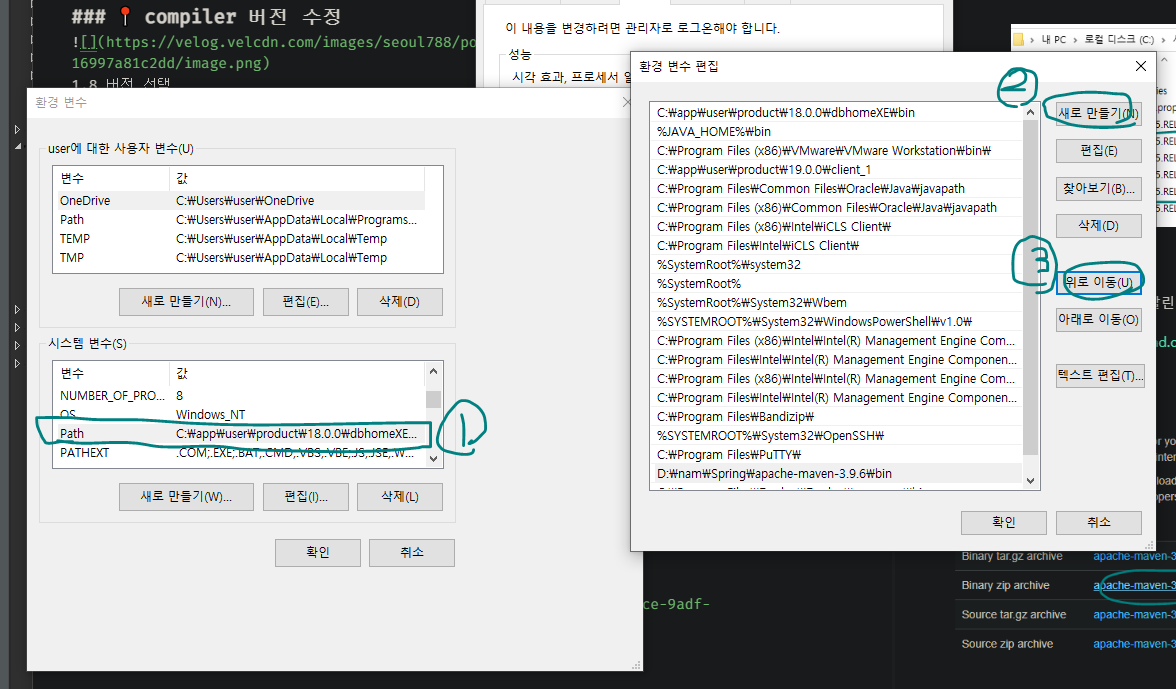
📍 고급 시스템 설정 가서 path 설정해 주기
제어판 - 시스템 - 고급 시스템 설정
D:\nam\Spring\apache-maven-3.9.6\bin
📍 환경 변수 맞는지 확인
환경 변수
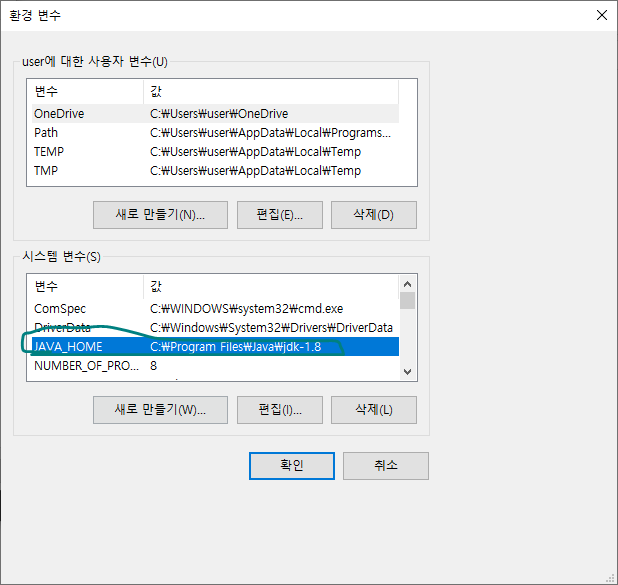
📍 java_home 도 확인해 주기
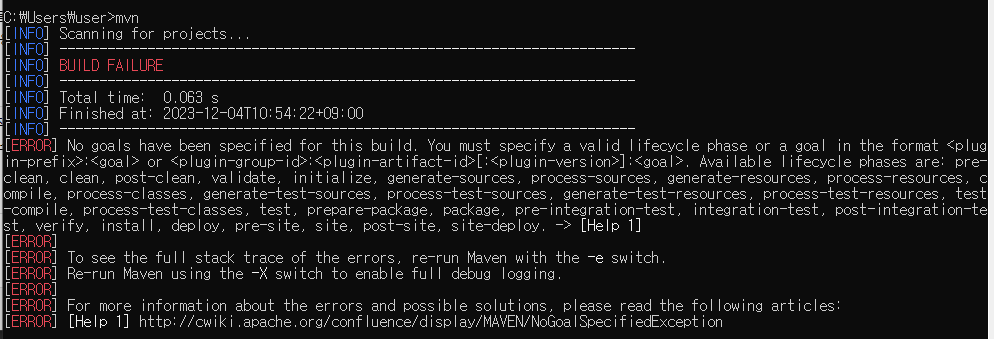
📍 cmd 에 mvn 쳤을 때 failure 나오면 성공!
📍 cmd 명령어 확인
mvn install:install-file
-Dfile=(ojdbc8.jar파일 경로)
-DgroupId=com.oracle
-DartifactId=ojdbc8
-Dversion=18.0.0
-Dpackaging=jar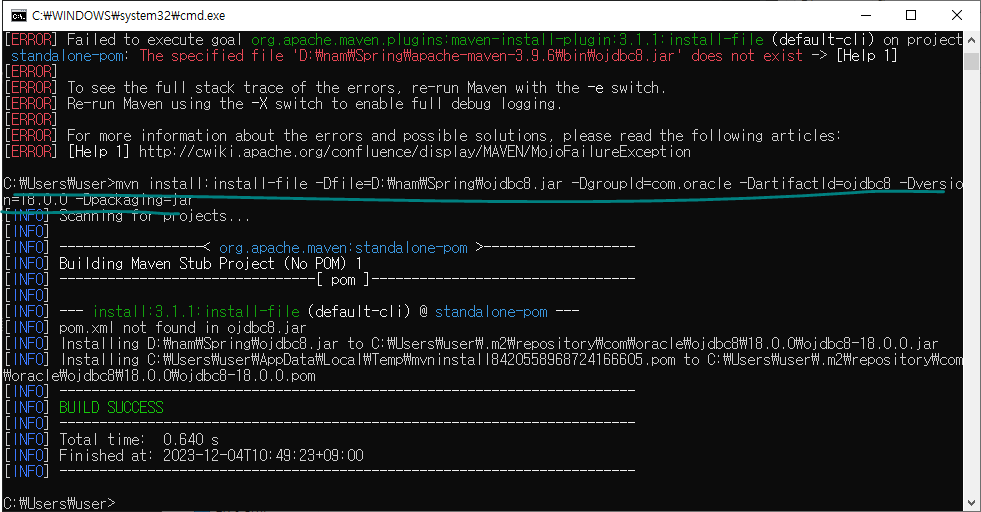
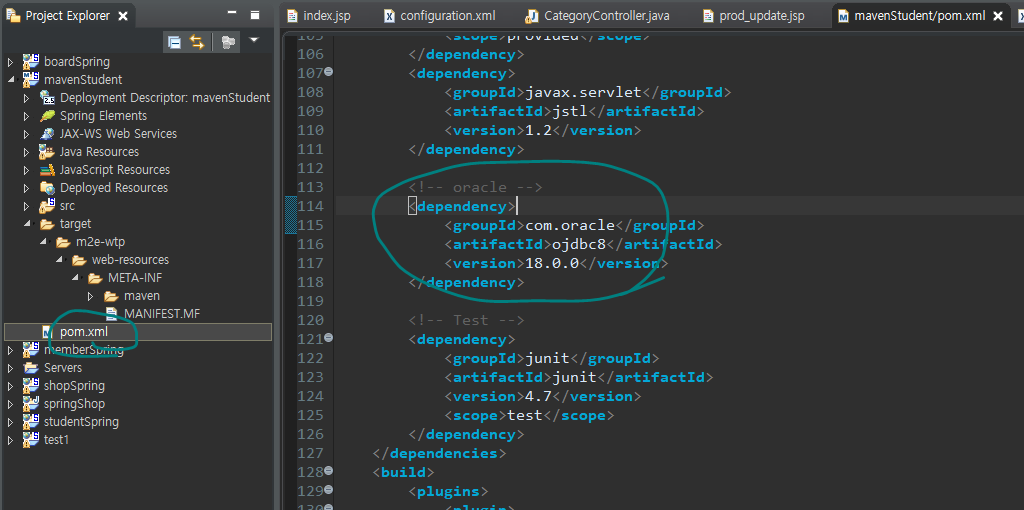
📍 pom.xml 에 등록해 주기
7. mybatsis 설정
📍 MyBatis
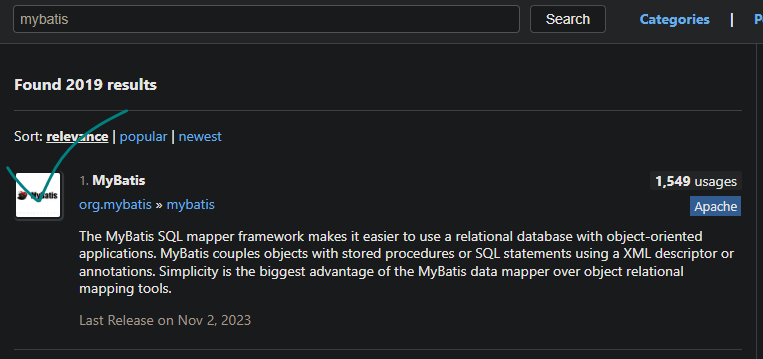
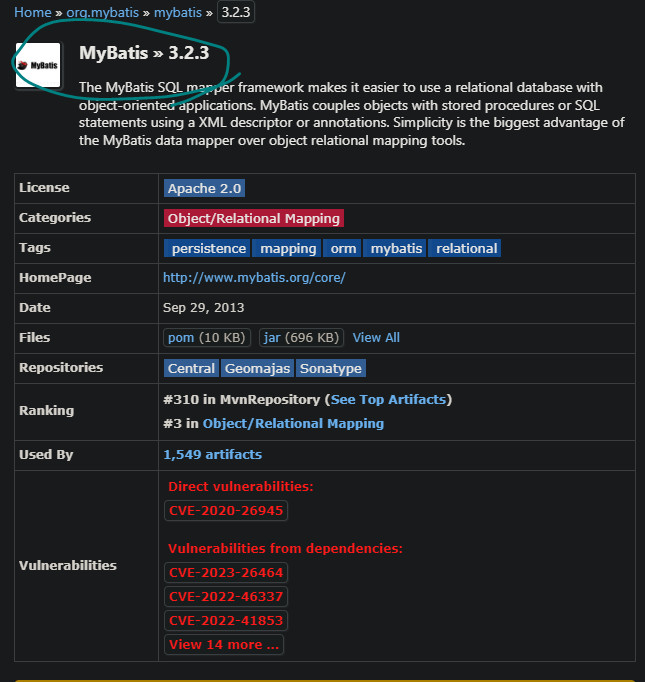

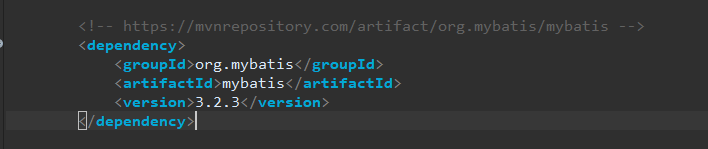
3.2.3 버전으로 pom.xml 에 등록해 두면 바로 사용 가능
📍 MyBatis Spring
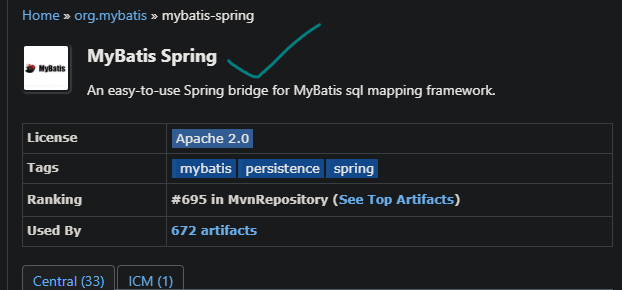
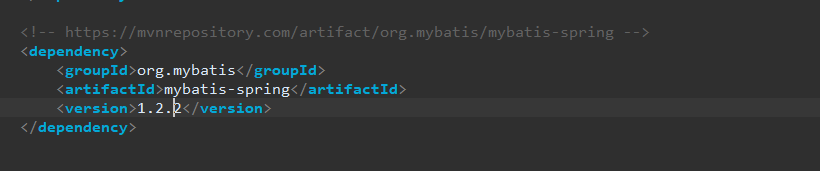
같은 방식으로 등록
		<!-- https://mvnrepository.com/artifact/org.mybatis/mybatis -->
		<dependency>
		    <groupId>org.mybatis</groupId>
		    <artifactId>mybatis</artifactId>
		    <version>3.2.3</version>
		</dependency>

		<!-- https://mvnrepository.com/artifact/org.mybatis/mybatis-spring -->
		<dependency>
		    <groupId>org.mybatis</groupId>
		    <artifactId>mybatis-spring</artifactId>
		    <version>1.2.2</version>
		</dependency>
8. 프로젝트 기본 설정
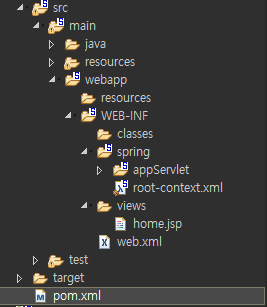
📍 web.xml
내부적인 것 관리 : web.xml
<?xml version="1.0" encoding="UTF-8"?>
<web-app version="2.5" xmlns="http://java.sun.com/xml/ns/javaee"
	xmlns:xsi="http://www.w3.org/2001/XMLSchema-instance"
	xsi:schemaLocation="http://java.sun.com/xml/ns/javaee https://java.sun.com/xml/ns/javaee/web-app_2_5.xsd">

	<!-- The definition of the Root Spring Container shared by all Servlets and Filters -->
	<context-param>
		<param-name>contextConfigLocation</param-name>
		<param-value>/WEB-INF/spring/root-context.xml</param-value>
	</context-param>

	<!-- Creates the Spring Container shared by all Servlets and Filters -->
	<listener>
		<listener-class>org.springframework.web.context.ContextLoaderListener</listener-class>
	</listener>

	<!-- Processes application requests -->
	<servlet>
		<servlet-name>appServlet</servlet-name>
		<servlet-class>org.springframework.web.servlet.DispatcherServlet</servlet-class>
		<init-param>
			<param-name>contextConfigLocation</param-name>
			<param-value>/WEB-INF/spring/appServlet/servlet-context.xml</param-value>
		</init-param>
		<load-on-startup>1</load-on-startup>
	</servlet>

	<servlet-mapping>
		<servlet-name>appServlet</servlet-name>
		<url-pattern>/</url-pattern>
	</servlet-mapping>

</web-app>
이름을 따로 정의해 줌. servlet 이름을 따로 만들었기 때문에.
만약 프로젝트 실행했다? web-xml 로 간다.
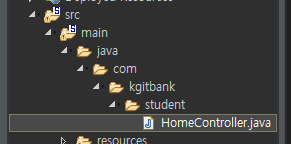
package com.kgitbank.student;

import java.text.DateFormat;
import java.util.Date;
import java.util.Locale;

import org.slf4j.Logger;
import org.slf4j.LoggerFactory;
import org.springframework.stereotype.Controller;
import org.springframework.ui.Model;
import org.springframework.web.bind.annotation.RequestMapping;
import org.springframework.web.bind.annotation.RequestMethod;

/**
 * Handles requests for the application home page.
 */
@Controller
public class HomeController {

	private static final Logger logger = LoggerFactory.getLogger(HomeController.class);

	/**
	 * Simply selects the home view to render by returning its name.
	 */
	@RequestMapping(value = "/", method = RequestMethod.GET)
	public String home(Locale locale, Model model) {
		logger.info("Welcome home! The client locale is {}.", locale);

		Date date = new Date();
		DateFormat dateFormat = DateFormat.getDateTimeInstance(DateFormat.LONG, DateFormat.LONG, locale);

		String formattedDate = dateFormat.format(date);

		model.addAttribute("serverTime", formattedDate );

		return "home";
	}

}
views 파일은 web/inf 안에 있기 때문에 그냥은 실행이 안 된다.
앞으로는 index 없이 폴더채로 실행할 것이다.
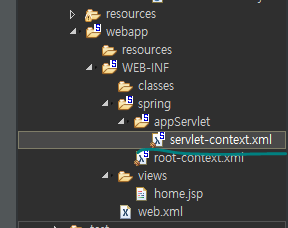
📍 컨트롤러 등록
<?xml version="1.0" encoding="UTF-8"?>
<beans:beans xmlns="http://www.springframework.org/schema/mvc"
	xmlns:xsi="http://www.w3.org/2001/XMLSchema-instance"
	xmlns:beans="http://www.springframework.org/schema/beans"
	xmlns:context="http://www.springframework.org/schema/context"
	xsi:schemaLocation="http://www.springframework.org/schema/mvc https://www.springframework.org/schema/mvc/spring-mvc.xsd
		http://www.springframework.org/schema/beans https://www.springframework.org/schema/beans/spring-beans.xsd
		http://www.springframework.org/schema/context https://www.springframework.org/schema/context/spring-context.xsd">

	<!-- DispatcherServlet Context: defines this servlet's request-processing infrastructure -->

	<!-- Enables the Spring MVC @Controller programming model -->
	<annotation-driven />

	<!-- Handles HTTP GET requests for /resources/** by efficiently serving up static resources in the ${webappRoot}/resources directory -->
	<resources mapping="/resources/**" location="/resources/" />

	<!-- Resolves views selected for rendering by @Controllers to .jsp resources in the /WEB-INF/views directory -->
	<beans:bean class="org.springframework.web.servlet.view.InternalResourceViewResolver">
		<beans:property name="prefix" value="/WEB-INF/views/" />
		<beans:property name="suffix" value=".jsp" />
	</beans:bean>

	<context:component-scan base-package="com.kgitbank.student" />


</beans:beans>
베이스 패키지라고 등록하여 우리가 컨트롤러만 등록해 주면 알아서 컨트롤러로 인식하겠다는 뜻이다.
base-package="com.kgitbank.student"
이 안에 들어있는 java 파일이면 컨트롤러 어노테이션만 붙여 줘도 된다.
📍 CSS 등록 파일

<resources mapping="/resources/**" location="/resources/" />css 등록하는 파일
📍 root.context.xml jdbc 등록해 주기
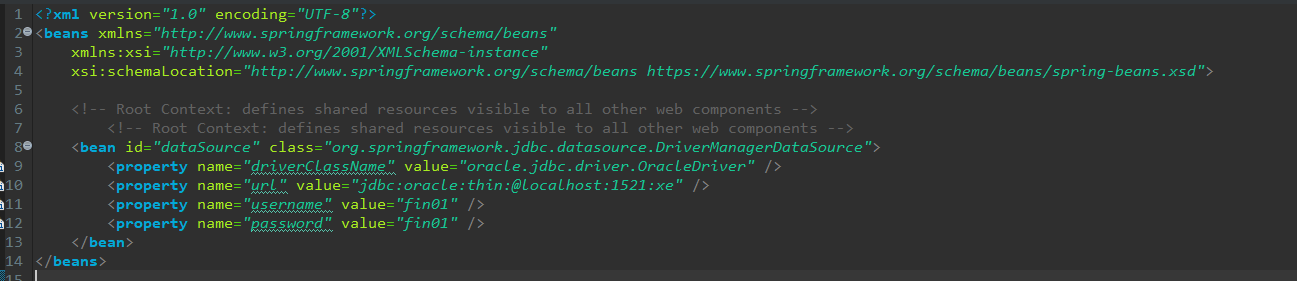
<?xml version="1.0" encoding="UTF-8"?>
<beans xmlns="http://www.springframework.org/schema/beans"
	xmlns:xsi="http://www.w3.org/2001/XMLSchema-instance"
	xsi:schemaLocation="http://www.springframework.org/schema/beans https://www.springframework.org/schema/beans/spring-beans.xsd">

	<!-- Root Context: defines shared resources visible to all other web components -->
		<!-- Root Context: defines shared resources visible to all other web components -->
	<bean id="dataSource" class="org.springframework.jdbc.datasource.DriverManagerDataSource">
		<property name="driverClassName" value="oracle.jdbc.driver.OracleDriver" />
		<property name="url" value="jdbc:oracle:thin:@localhost:1521:xe" />
		<property name="username" value="fin01" />
		<property name="password" value="fin01" />
	</bean>
</beans>
📍 pom.xml jdbc 등록해 주기

		<!-- oracle -->
		<dependency>
			<groupId>com.oracle</groupId>
			<artifactId>ojdbc8</artifactId>
			<version>18.0.0</version>
		</dependency>

		<!-- jdbc -->
		<dependency>
			<groupId>org.springframework</groupId>
			<artifactId>spring-jdbc</artifactId>
			<version>${org.springframework-version}</version>
		</dependency>

		<!-- https://mvnrepository.com/artifact/org.mybatis/mybatis -->
		<dependency>
		    <groupId>org.mybatis</groupId>
		    <artifactId>mybatis</artifactId>
		    <version>3.2.3</version>
		</dependency>

		<!-- https://mvnrepository.com/artifact/org.mybatis/mybatis-spring -->
		<dependency>
		    <groupId>org.mybatis</groupId>
		    <artifactId>mybatis-spring</artifactId>
		    <version>1.2.2</version>
		</dependency>
📍 서블릿 버전 바꿔 주기
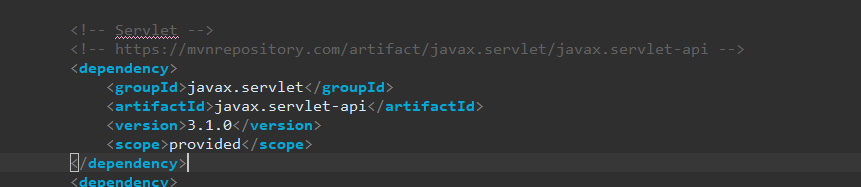
		<!-- Servlet -->
		<!-- https://mvnrepository.com/artifact/javax.servlet/javax.servlet-api -->
		<dependency>
		    <groupId>javax.servlet</groupId>
		    <artifactId>javax.servlet-api</artifactId>
		    <version>3.1.0</version>
		    <scope>provided</scope>
		</dependency>
		<dependency>
			<groupId>javax.servlet.jsp</groupId>
			<artifactId>jsp-api</artifactId>
			<version>2.1</version>
			<scope>provided</scope>
		</dependency>
		<dependency>
			<groupId>javax.servlet</groupId>
			<artifactId>jstl</artifactId>
			<version>1.2</version>
		</dependency>
서블릿 버전이 맞아야 파일을 저장할 때 폴더명으로 잘 간다.
서블릿 버전 : 확인해야 할 것
- form 태그 설정 (post)
- input 타입 설정
- jar 파일 2개 => pom.xml
		<!-- fileUpload -->
		<dependency>
    		<groupId>commons-io</groupId>
    		<artifactId>commons-io</artifactId>
			<version>2.5</version>
		</dependency>
		<dependency>
			<groupId>commons-fileupload</groupId>
			<artifactId>commons-fileupload</artifactId>
			<version>1.3.2</version>
</dependency>- bean 등록 => 형 변환하기 위해 a, c로 가는데 b class 가 없기 때문에 알려 주어야 한다.
serlvet-context.xml
	<beans:bean id="multipartResolver" class="org.springframework.web.multipart.commons.CommonsMultipartResolver">
      <beans:property name="maxUploadSize" value="10485760" />
</beans:bean>- 넣는 방법
@RequestMapping("/insert_student.do")
public String insertStudent(HttpServletRequest req, @ModelAttribute StudentDTO dto) {
String path = req.getServletContext().getRealPath("/resources/files");
String filename = "";
int filesize = 0;
MultipartHttpServletRequest mr = (MultipartHttpServletRequest)req;
MultipartFile file = mr.getFile("filename");
File target = new File(path, file.getOriginalFilename());
if (file.getSize()>0) {
try {
file.transferTo(target);
}catch(IOException e) {}
filename = file.getOriginalFilename();
filesize = (int)file.getSize();
}
System.out.println("filename = " + filename);
System.out.println("filesize = " + filesize);
HttpSession session = req.getSession();
session.setAttribute("filename", path + "/" + filename);
int res = studentMapper.insertStudent(dto);
return "redirect:list_student.do";
}
이러면 등록은 끝난다.
