앞서서 카프카 구동까지 확인한 이후, 이제 스프링에 적용을 해보는 과정을 진행하겠습니다.
의존성 추가
implementation 'org.springframework.kafka:spring-kafka'
testImplementation 'org.springframework.kafka:spring-kafka-test'
WebSocketConfig
@RequiredArgsConstructor
@Configuration
@EnableWebSocketMessageBroker

public class WebSocketConfig implements WebSocketMessageBrokerConfigurer {

    @Override
    public void configureMessageBroker(MessageBrokerRegistry registry) {
    	registry.enableSimpleBroker("/chatting/topic");
        registry.setApplicationDestinationPrefixes("/chatting/pub");
    }

    @Override
    public void registerStompEndpoints(StompEndpointRegistry registry) {
        registry.addEndpoint("/ws-chat")
                .setAllowedOrigins("*");
        registry.addEndpoint("/ws-chat").setAllowedOrigins("*").withSockJS();
    }

}- registry.enableSimpleBroker("/chatting/topic")
메모리 기반의 브로커를 활성화하고, "/chatting/topic"으로 클라이언트에게 메시지를 보냄.
- registry.setApplicationDestinationPrefixes("/chatting/pub")
클라이언트에서 해당 경로의 메시지 브로커에 전송.
- registry.addEndpoint("/wschat").setAllowedOrigins("*");
- registry.addEndpoint("/wschat").setAllowedOrigins("*").withSockJS();
WebSocket의 엔드포인트를 설정 + SockJs를 지원.
KafkaProducerConfig
@EnableKafka
@Configuration
public class KafkaProducerConfig {

   @Value("${spring.kafka.bootstrap-servers}")
   private String bootstrapServers;
   @Bean
   public ProducerFactory<String, ChatDto> producerFactory() {

       Map<String,Object> configs = new HashMap<>();
       configs.put(ProducerConfig.BOOTSTRAP_SERVERS_CONFIG, bootstrapServers);
       configs.put(ProducerConfig.KEY_SERIALIZER_CLASS_CONFIG, StringSerializer.class);
       configs.put(ProducerConfig.VALUE_SERIALIZER_CLASS_CONFIG, JsonSerializer.class);
       return new DefaultKafkaProducerFactory(configs);
   }
   @Bean
   public KafkaTemplate<String, ChatDto> kafkaTemplate() {

       return new KafkaTemplate<>(producerFactory());
   }
}- bootstrapServers: Kafka 브로커의 주소를 설정
- KEY_SERIALIZER_CLASS_CONFIG: 메시지 키의 문자열을 직렬화.
- VALUE_SERIALIZER_CLASS_CONFIG: 메시지 값을 JSON 형식의 문자열로 직렬화.
- return new KafkaTemplate<>(producerFactory()) : Kafka 프로듀서를 사용하기 위한 KafkaTemplate을 생성
직렬화
직렬화란 자바 또는 외부 시스템에서 사용 가능하도록 바이트 형태로 데이터를 변환하는 기술.
KafkaProducer
@Service
@Slf4j
@RequiredArgsConstructor
public class KafkaProducer {


    private static final String TOPIC = "chatting";
    private final KafkaTemplate<String, ChatDto> kafkaTemplate;

    public void sendMessage(ChatDto message) {

        ListenableFuture<SendResult<String, ChatDto>> listenable = kafkaTemplate.send(TOPIC, message);
        listenable.addCallback(new ListenableFutureCallback<SendResult<String, ChatDto>>() {
            @Override
            public void onSuccess(SendResult<String, ChatDto> result) {
                log.info("Successfully sent message: {}", message);
            }
            @Override
            public void onFailure(Throwable ex) {
                log.error("Failed to send message: {}", message, ex);
            }
        });

        log.info("Produce message: {}", message);

    }
}- ListenableFuture<SendResult<String, ChatDto>> listenable = kafkaTemplate.send(TOPIC, message);
Kafka 템플릿을 사용하여 지정된 토픽으로 메시지를 비동기적으로 전송.
KafkaConsumerConfig
@EnableKafka
@Configuration
public class KafkaConsumerConfig {

    @Value("${spring.kafka.bootstrap-servers}")
    private String bootstrapServer;

    @Bean
    public ConsumerFactory<String, ChatDto> consumerFactory() {
        return new DefaultKafkaConsumerFactory<>(
                consumerConfigurations(),
                new StringDeserializer(),
                new ErrorHandlingDeserializer<>(new JsonDeserializer<>(ChatDto.class))
        );
    }

    private Map<String, Object> consumerConfigurations() {
        Map<String, Object> configurations = new HashMap<>();
        configurations.put(ConsumerConfig.BOOTSTRAP_SERVERS_CONFIG, bootstrapServer);
        configurations.put(ConsumerConfig.GROUP_ID_CONFIG, "my-consumer-group");
        configurations.put(ConsumerConfig.KEY_DESERIALIZER_CLASS_CONFIG, StringDeserializer.class);
        configurations.put(ConsumerConfig.VALUE_DESERIALIZER_CLASS_CONFIG, ErrorHandlingDeserializer.class);
        configurations.put(JsonDeserializer.TRUSTED_PACKAGES,"*");
        configurations.put(ConsumerConfig.AUTO_OFFSET_RESET_CONFIG,"latest"); // earliest: 전체 , latest: 최신 메시지
        return configurations;
    }

    @Bean
    public ConcurrentKafkaListenerContainerFactory<String, ChatDto> kafkaListenerContainerFactory(){
        ConcurrentKafkaListenerContainerFactory<String, ChatDto> factory = new ConcurrentKafkaListenerContainerFactory<>();
        factory.setConsumerFactory(consumerFactory());
        return factory;
    }
}- Consumer Config 역시 Producer 와 마찬가지로 부트스트랩 서버를 연결하지만, 반대로 역직렬화 과정을 거침.
이때, ErrorHandlingDeserializer를 사용하여 역직렬화 과정에서 틀린 형식을 전송시 에러 반환. -> 해당 에러 핸들링을 하지 않으면, 컨슈머가 중단될 수 있음. - JsonDeserializer.TRUSTED_PACKAGES : JsonDeserializer가 신뢰하는 패키지를 설정
- AUTO_OFFSET_RESET_CONFIG는 컨슈머가 처음 실행될 때, 브로커에서 현재 오프셋을 찾지 못한 경우 어떻게 시작할지(최신 메시지) 설정.
KafkaConsumer
@Service
@Slf4j
@RequiredArgsConstructor

public class KafkaConsumer {

    private final SimpMessagingTemplate template;
    @KafkaListener(groupId = "my-consumer-group" ,topics="chatting")
    public void listenChat(ChatDto chatDto){
        log.info("Received message: {}", chatDto);

        try {
            template.convertAndSend("/chatting/topic/room/" + chatDto.getRoomId(), chatDto);
            log.info("Message sent to WebSocket");
        } catch (Exception e) {
            log.error("Error sending message to WebSocket", e);
        }
    }

}- SimpMessagingTemplate : 메시지 전송 템플릿
- @KafkaListener() : Kafka에서 메시지를 수신하기 위한 어노테이션
- template.convertAndSend("/chatting/topic/room/" + chatDto.getRoomId(), chatDto); : 해당 경로로 메세지 전송
ChatController
@RestController
@Slf4j
public class ChatController {

    private ChatRoomService chatRoomService;
    private ChatService chatService;
    private final KafkaProducer producer;

    @Autowired
    public ChatController(ChatRoomService chatRoomService, ChatService chatService, KafkaProducer producer) {
        this.chatRoomService = chatRoomService;
        this.chatService = chatService;
        this.producer = producer;
    }

    @SecurityRequirement(name = "bearerAuth")
    @MessageMapping("/message")
    public void sendSocketMessage(ChatDto chatDto) {
        if(!chatRoomService.existsRoom(chatDto.getRoomId())){
            return;
        }
        ChatDto savedMessage = chatService.saveChatMessage(chatDto);
        producer.sendMessage(chatDto);

    }
DB에 메세지 내역을 저장하고, producer를 통해 kafka에 메세지 전송
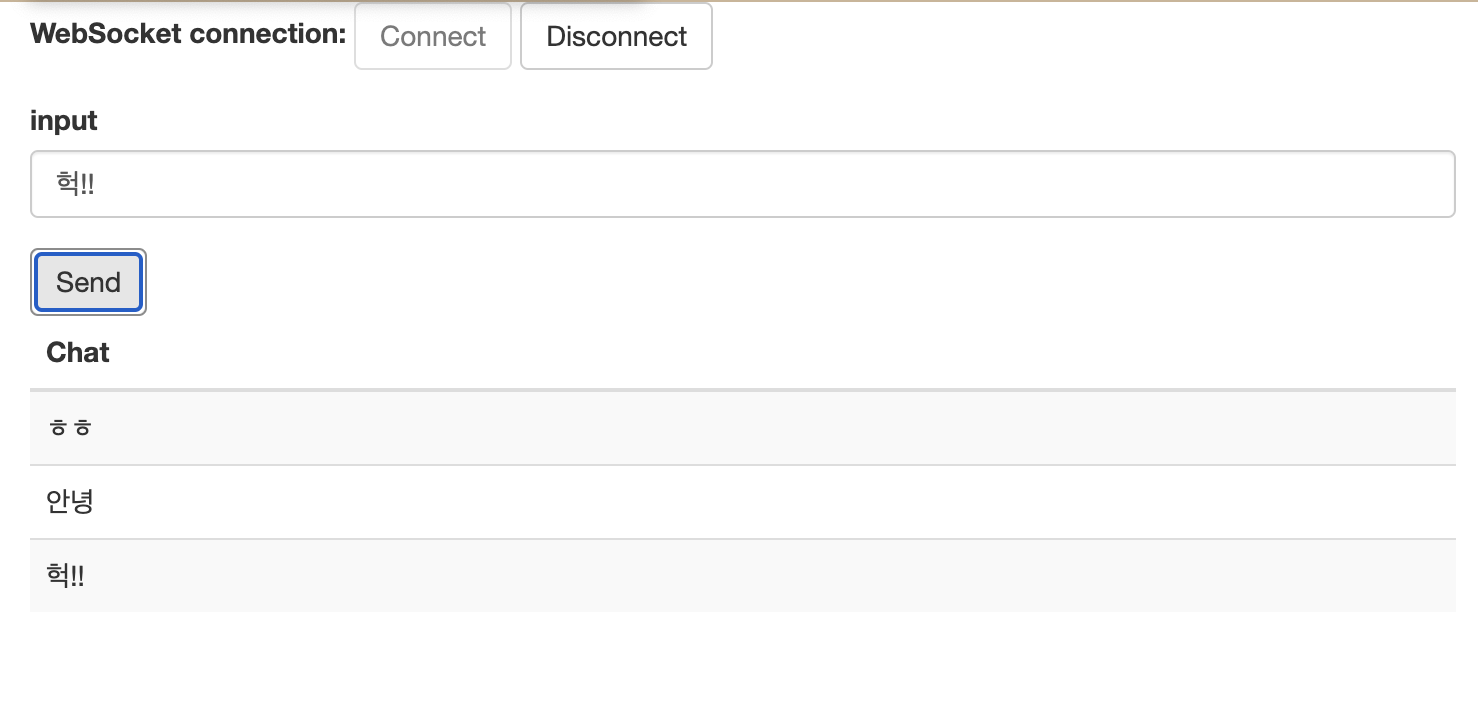
결과
스프링 공식 홈페이지를 참고하여, 연결과 전송확인을 위한 html과 js를 간단하게 구축하였다.
html
<!DOCTYPE html>
<html>
<head>
    <title>Hello WebSocket</title>
    <link rel="stylesheet" href="https://maxcdn.bootstrapcdn.com/bootstrap/3.3.7/css/bootstrap.min.css" integrity="sha384-BVYiiSIFeK1dGmJRAkycuHAHRg32OmUcww7on3RYdg4Va+PmSTsz/K68vbdEjh4u" crossorigin="anonymous">
    <link href="/main.css" rel="stylesheet">
    <script src="https://code.jquery.com/jquery-3.1.1.min.js"></script>
    <script src="https://cdn.jsdelivr.net/npm/@stomp/stompjs@7.0.0/bundles/stomp.umd.min.js"></script>
    <script src="/app.js"></script>
</head>
<body>
<noscript><h2 style="color: #ff0000">Seems your browser doesn't support Javascript! Websocket relies on Javascript being
    enabled. Please enable
    Javascript and reload this page!</h2></noscript>
<div id="main-content" class="container">
    <div class="row">
        <div class="col-md-6">
            <form class="form-inline">
                <div class="form-group">
                    <label for="connect">WebSocket connection:</label>
                    <button id="connect" class="btn btn-default" type="submit">Connect</button>
                    <button id="disconnect" class="btn btn-default" type="submit" disabled="disabled">Disconnect
                    </button>
                </div>
            </form>
        </div>
        <div class="col-md-6">
            <form class="form-inline">
                <div class="form-group">
                    <label for="chat">input</label>
                    <input type="text" id="chat" class="form-control" placeholder="Your name here...">
                </div>
                <button id="send" class="btn btn-default" type="submit">Send</button>
            </form>
        </div>
    </div>
    <div class="row">
        <div class="col-md-12">
            <table id="conversation" class="table table-striped">
                <thead>
                <tr>
                    <th>Chat</th>
                </tr>
                </thead>
                <tbody id="chatlist">
                </tbody>
            </table>
        </div>
    </div>
</div>
</body>
</html>
js
const stompClient = new StompJs.Client({
    brokerURL: 'ws://localhost:8080/ws-chat',
});

// Set up event handlers
stompClient.onConnect = onStompConnect;
stompClient.onWebSocketError = onWebSocketError;
stompClient.onStompError = onStompError;

// Function to handle Stomp connection
function onStompConnect(frame) {
    setConnected(true);
    console.log('Connected: ' + frame);
    // 구독
    stompClient.subscribe('/chatting/topic/room/1', (greeting) => {
        const content = greeting.body;
        showChatlist(content);
    });
}

// Function to handle WebSocket error
function onWebSocketError(error) {
    console.error('Error with WebSocket:', error);
}

// Function to handle Stomp error
function onStompError(frame) {
    console.error('Broker reported error: ' + frame.headers['message']);
    console.error('Additional details: ' + frame.body);
}

// Function to set the connection status
function setConnected(connected) {
    $("#connect").prop("disabled", connected);
    $("#disconnect").prop("disabled", !connected);
    $("#conversation").toggle(connected);
    $("#greetings").html("");
}

// Function to connect to the WebSocket
function connect() {
    stompClient.activate();
}

// Function to disconnect from the WebSocket
function disconnect() {
    stompClient.deactivate();
    setConnected(false);
    console.log("Disconnected");
}

// Function to send a message
function sendChat() {
    stompClient.publish({
        destination: "/chatting/pub/message",
        body: JSON.stringify({'message': $("#chat").val(), 'roomId': 1})
    });
}

// Function to display a greeting message
function showChatlist(message) {
    try {
        const parsedMessage = JSON.parse(message);
        const content = parsedMessage.message;
        console.log('content',content)
        $("#chatlist").append($("<tr><td>" + content + "</td></tr>"));
    } catch (error) {
        console.error('Error parsing WebSocket message:', error);
    }
}

// Set up event listeners
$(function () {
    $("form").on('submit', (e) => e.preventDefault());
    $("#connect").click(() => connect());
    $("#disconnect").click(() => disconnect());
    $("#send").click(() => sendChat());
});
레퍼런스
https://spring.io/guides/gs/messaging-stomp-websocket/
https://javapp.tistory.com/306
