Database setup
mysite/settings.py 파이을 열어보자. Django 세팅을 보여주는module-level 변수가 있는 평범한 파이썬 모듈이다.
For more information on this file, see
https://docs.djangoproject.com/en/3.0/topics/settings/
For the full list of settings and their values, see
https://docs.djangoproject.com/en/3.0/ref/settings/
기본값으로 SQLite를 사용하도록 설정되어있다. 데이터베이스를 처음 해보거나 장고에서 데이터베이스를 경험해보려면 SQLite가 가장 쉬운 옵션이다. SQLite는 파이썬에서 기본으로 제공하기 때문에 따로 설치할 필요가 없어서 가볍게 시도해보기 좋다. 하지만 튜토리얼 말고 제대로된 프로젝트를 시작할 때는 PostgreSQL처럼 좀 더 확장성 있는 데이터베이스를 사용하는 것이 좋다. 데이터베이스를 중간에 교체하려면 골치아프기 때문이다.
다른 데이터베이스를 사용하려면, 장고 튜토리얼에서는 적절한 database bindings 를 설치하고, DATABASES 'default'의 항목을 다음의 키값으로 바꿔주라고 한다.
-
ENGINE -- '
django.db.backends.sqlite3', 'django.db.backends.postgresql', 'django.db.backends.mysql', 또는 'django.db.backends.oracle'. 그 외 서드파티 백엔드 참조 -
NAME -- 데이터베이스의 이름. 만약 SQLite를 사용 중이라면, 데이터베이스는 당신의 컴퓨터의 파일로서 저장됩니다. 이 경우, NAME 는 파일명을 포함한 절대경로로 지정해야 합니다. 기본값은
os.path.join(BASE_DIR, 'db.sqlite3')로 정의되어 있으며, 프로젝트 디렉토리 내에db.sqlite3파일로 저장됩니다.
SQLite 를 데이터베이스로 사용하지 않는 경우, USER, PASSWORD, HOST 같은 추가 설정이 반드시 필요하다고 한다. 자세한 내용은 DATABASES 문서를 참조.
TIME_ZONE
mysite/settings.py를 편집할 때 TIME_ZONE도 설정할 수 있다. 기본값은 'UTC' 이며, 이 타임존이 꼭 서버의 타임존일 필요는 없다. 예를 들어, 한 서버가 장고로 동작하는 여러 웹을 돌릴 때 각 사이트마다 타임존을 다르게 설정할 수 있다.
TIME_ZONE = 'Asia/Seoul'위와 같이 설정해보았다. 위키피디아 타임존 리스트 참조
Note💡
Django cannot reliably use alternate time zones in a Windows environment. If you’re running Django on Windows, TIME_ZONE must be set to match the system time zone.
INSTALLED_APPS
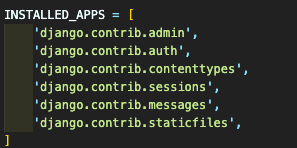
mysite/settings.py 파일 윗쪽에 다음과 같은 리스트가 있다.
이 리스트는 장고 어플리케이션들의 이름을 포함하고 있고 이 장고 인스턴스에서 활성화된 앱들은 다수의 프로젝트에서 사용될 수 있으며, 다른 프로젝트에 사용될 수 있도록 패키징하거나 배포할 수도 있다.
각 문자열은 위와 같은 형태인 아래 리스트에 대해 dotted Python path여야 한다.
- an application configuration class (preferred), or
- a package containing an application.
Learn more about application configurations
위의 이미지에 있는 앱들이 기본값이고 앱의 설명은 다음과 같다.
- django.contrib.admin – 곧 사용할 관리자 사이트
- django.contrib.auth – 인증 시스템
- django.contrib.contenttypes – 컨텐츠 타입을 위한 프레임워크
- django.contrib.sessions – 세션 프레임워크
- django.contrib.messages – 메세징 프레임워크
- django.contrib.staticfiles – 정적 파일을 관리할 프레임워크
기본 앱들중 일부는 최소 하나 이상의 데이터베이스 테이블을 사용하기때문에, 이 앱들을 사용하기 전에 데이터베이스에 테이블을 만들어줘야한다.
- 다음의 명령어를 입력하여 테이블을 만들어보자.
python3 manage.py migrate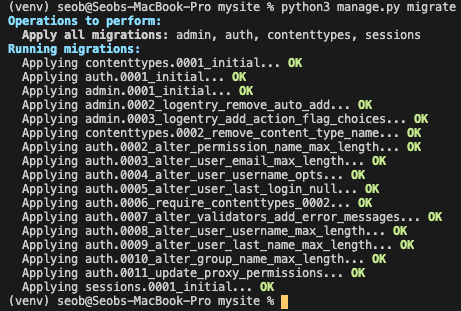
migrate 명령어는 INSTALLED_APPS 세팅을 보고, mysite/settings.py파일 안에 데이터페이스 세팅에 따라 필요한 데이터베이스 테이블을 생성한다. 위의 이미지의 내용처럼 각 migration이 적용되는 메세지를 출력한다. If you're interested, run the command-line client for your database and type \dt (PostgreSQL), SHOW TABLES; (MariaDB, MySQL), .schema (SQLite), or SELECT TABLE_NAME FROM USER_TABLES; (Oracle) to display the tables Django created.
처음에 불필요하다고 생각되는 앱을 주석처리하거나 지워버리면 원하는 앱만
migrate할 수 있다.
admin 페이지에 접속해본 모습
Creating models
본질적으로, 모델이란 부가적인 메타데이터를 가진 데이터베이스의 구조(layout)를 말한다.
장고 안의 모델은 객체의 특별한 종류로, 이 모델을 저장하면 그 내용이 데이터베이스에 저장된다.
Philosophy
A model is the single, definitive source of truth about your data. It contains the essential fields and behaviors of the data you’re storing. Django follows the DRY Principle. The goal is to define your data model in one place and automatically derive things from it.
This includes the migrations - unlike in Ruby On Rails, for example, migrations are entirely derived from your models file, and are essentially a history that Django can roll through to update your database schema to match your current models.
Don’t repeat yourself (DRY)
Every distinct concept and/or piece of data should live in one, and only one, place. Redundancy is bad. Normalization is good.
The framework, within reason, should deduce as much as possible from as little as possible.
설문조사앱을 만들기 위해서 모델 2개가 필요하다.
- 질문 : 질문 내용, 질문한 날짜
- 선택 : 선택을 할 내용(텍스트)이 표시될 부분, 득표 수를 집계할 부분
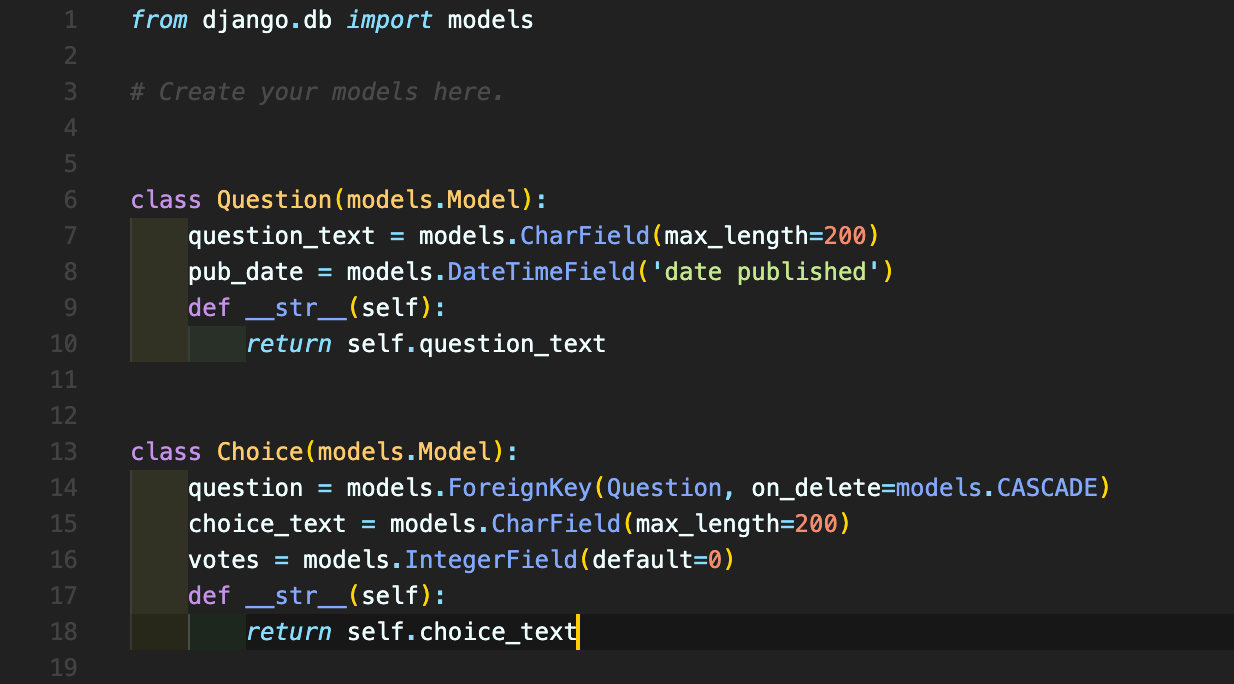
위와 같은 개념을 파이썬 클래스로 표현하기 위해 polls/models.py파일을 다음과 같이 수정한다.
from django.db import models


class Question(models.Model):
    question_text = models.CharField(max_length=200)
    pub_date = models.DateTimeField('date published')


class Choice(models.Model):
    question = models.ForeignKey(Question, on_delete=models.CASCADE)
    choice_text = models.CharField(max_length=200)
votes = models.IntegerField(default=0)class: 객체를 정의하는 키워드Question: 모델의 이름(특수문자, 공백 안됨), 항상 대문자로 시작해야 한다.models:Question이 장고 모델이라는 것을 의미하고, 데이터베이스에 저장되어야 한다고 알려주는 부분.
속성을 정리하는 부분은 다음과 같다.
-
models.CharField: 글자수가 제한된 텍스트를 정의할때 사용한다. 글의 제목과 같이 짧은 문자열을 저장할때 사용한다. [CharField]- (긴 문자열을 저장할 때는 TextField를 사용하는 것을 권장한다.)
- 만약 다른 데이터베이스에서도 사용할 목적이라면 database backend notes를 참조하여 최대 길이 제한을 확인하는 것이 좋다.
-
models.DateTimeField: 날짜와 시간을 의미한다. [DateTimeField] -
models.ForeignKey: 다른 모델에 대한 링크를 의미한다. [ForeignKey]- 이 예제에서는 각각의
Choice가 하나의Question에 관계된다는 것을 Django 에게 알려준다. Django 는 다-대-일(many-to-one), 다-대-다(many-to-many), 일-대-일(one-to-one) 과 같은 모든 일반 데이터베이스의 관계들를 지원한다.
- 이 예제에서는 각각의
-
models.IntegerField: 정수 부분. -2147483648 부터 2147483647 까지가 장고가 지원하는 모든 데이터베이스에서 안전한 범위이다.[IntegerField] -
이 예제에서는 투표값의 기본값을 0으로 설정했다.
class Model
Model field reference
Activating models
이 짧은 모델 코드가 장고에게는 많은 정보를 넘겨주고, 이 정보를 가지고 장고는 다음과 같은 일을 할 수 있게 된다.
- 이 앱에 대한 데이터베이스 스키마생성 (CREATE TABLE statements)
Question,Choice객체에 접근하게 할 파이썬 데이터베이스 접근 API 생성
하지만 현재 프로젝트에
polls앱이 설치되었다는 것을 먼저 알려야한다.
Philosophy
장고에서 앱들은 어느 특정 웹에 묶여있지 않기 때문에, pluggable 해서 하나의 앱을 여러 프로젝트에서 사용할 수 있고 앱을 배포할 수도 있다.
위에서 만든 앱을 프로젝트에 포함하기 위해서는 INSTALLED_APPLS 세팅 안에 있는 앱의 configuration class에 레퍼런스를 추가해야한다. PollsConfig class는 polls/apps.py 파일 안에 있으므로 INSTALLED_APPS 세팅 에 대한 dotted path는 다음과 같다.
mysite/settings.py
INSTALLED_APPS = [
    'polls.apps.PollsConfig',
    'django.contrib.admin',
    'django.contrib.auth',
    'django.contrib.contenttypes',
    'django.contrib.sessions',
    'django.contrib.messages',
    'django.contrib.staticfiles',
]
이제 장고에 앱을 추가할 수 있다. 다음 명령어를 입력해보자.
python3 manage.py makemigrations polls
위와 같은 결과가 나올것이다.
makemigrations 명령어를 실행함으로써, Django에 지금까지 만든 변경사항을 알려주는것과 같다. (이번 경우에는 새로운 것을 만듦) 그리고 이 변경 사항들을 migration으로서 저장시킨다.
migration은 Django에서 변경사항과 데이터베이스 스키마를 모델에 저장하는 방식이다. 원한다면, 이 migration파일을 읽어볼 수도 있다. 이 파일의 경로는 다음과 같다.
polls/migrations/0001_initial.py
하지만 이 파일을 항상 열어서 읽어볼 필요는 없다. 이 파일들은 장고가 변경하는 것들을 사용자가 수동으로 직접 수정하고 싶을 때 수정할 수 있도록 사람이 읽을 수 있는 형태로 저장된 것이다.
사용자와 데이터베이스 스키마를 위해 migration을 동작시키는 migrate라는 명령어가 있지만 지금은 일단 migration이 어떤 SQL을 동작하는지 알아보자.
sqlmigrate명령어는migration이름을 인수로 받고, SQL에 반환한다.python3 manage.py sqlmigrate polls 0001
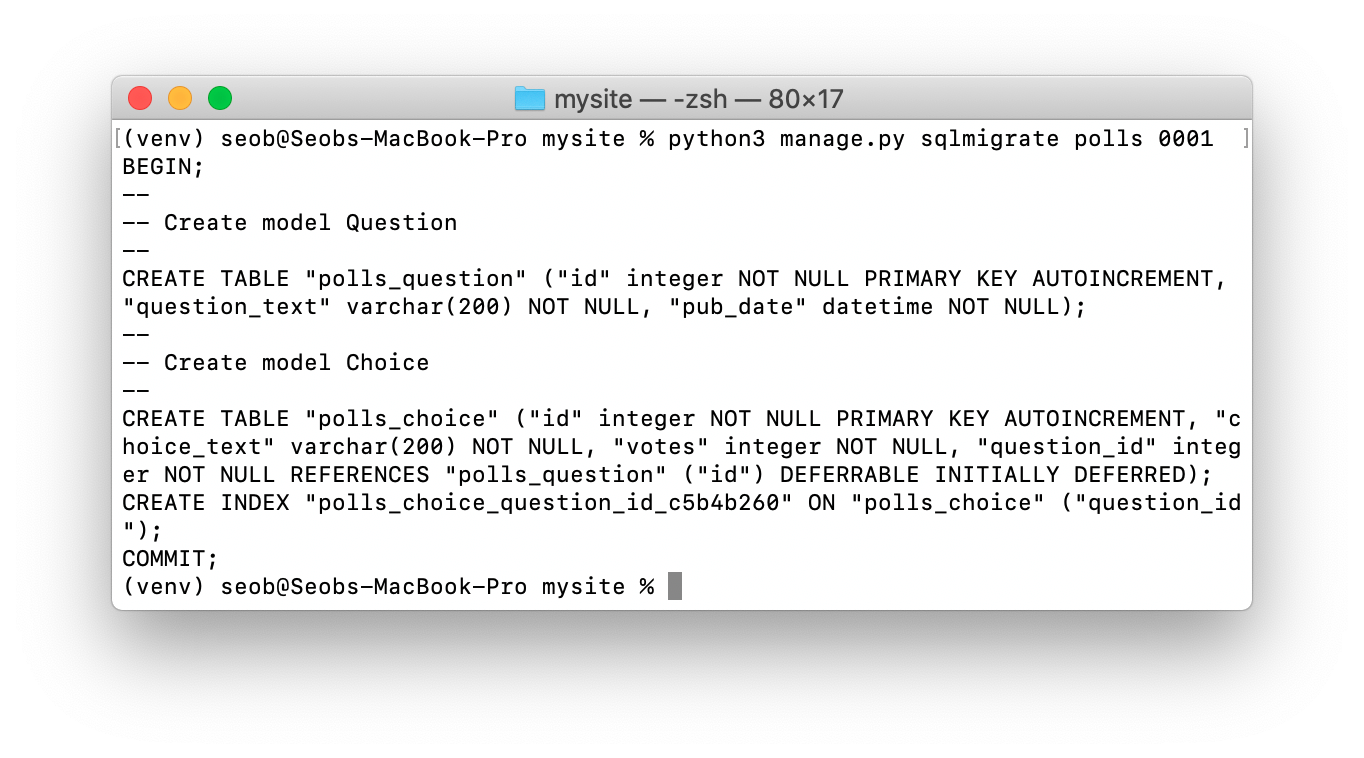
명령어를 입력하면 위와 빗슷한 결과를 볼 수 있다.
Note
- 정확한 결과는 사용자가 사용중인 데이터베이스에 따라 다를 수 있다. 위의 이미지는 SQLite를 사용했다.
- 앱의 이름들과 해당 모델의 소문자 이름을 병합함으로써 테이블의 이름들은 자동으로 생성된다. (
question,choice) - 이 동작은 override 될 수 있다.Primary keys (IDs)는 자동으로 추가된다. ( 이것도 오버라이드 할 수 있음.)- 관습적으로, Django는 "
_id"를foreign key field name에 덧붙인다. (이것도 오버라이드 가능)- 이것은 사용자가 사용하는 데이터베이스에 맞춤화되어있다.
auto_increment(MySQL),serial(postgreSQL), 혹은integer primary key autoincrement(SQLite) 와 같은 특정한 데이터베이스 필드타입은 자동으로 사용자에 맞게 처리된다. 필드명의 쿼팅에도 마찬가지로 같이 적용된다 ("쌍따옴표", '홑따옴표')sqlmigrate명령어는 사실 데이터베이스에migration을 실행하는게 아니라 이것을 사용자가 무엇이 필요한지 볼 수 있도록 스크린에 Django가 필요하다고 판단되는 부분을 출력한다. Django가 앞으로 어떤 작업을 할지 아는것이나 사용자가 변화에 대한 SQL 스크립트를 요구하는 데이터베이스 관리자를 갖고 있는지 아는것은 유용하다.
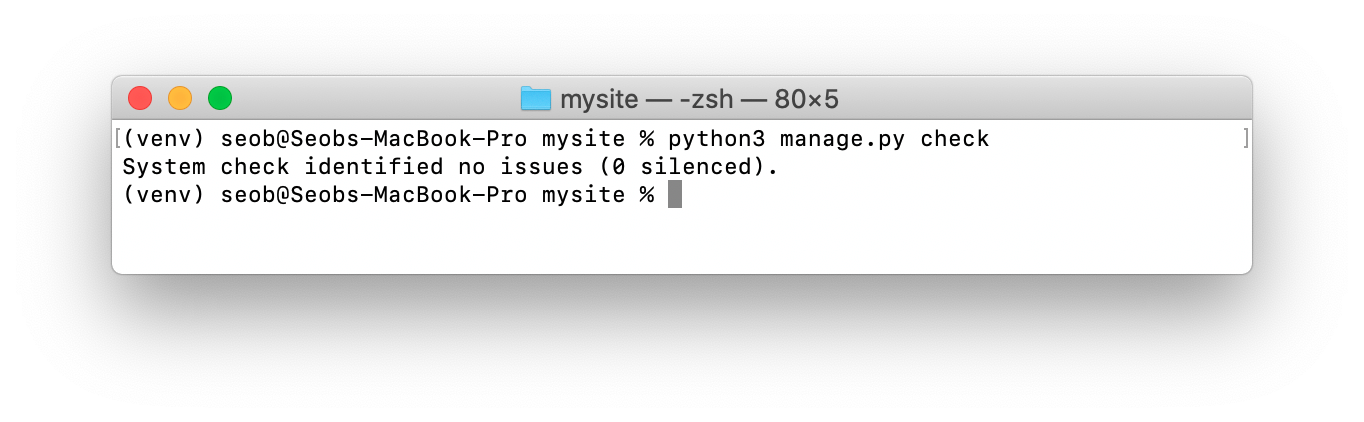
python3 manage.py check위의 명령어를 입력하면
migration을 하거나 데이터베이스를 건들지 않고도 프로젝트에 어떤 문제가 있는지 체크할 수도 있다.
이제 다시 migrate 를 해보면 이 모델 테이블을 데이터베이스에 만들 수 있다.
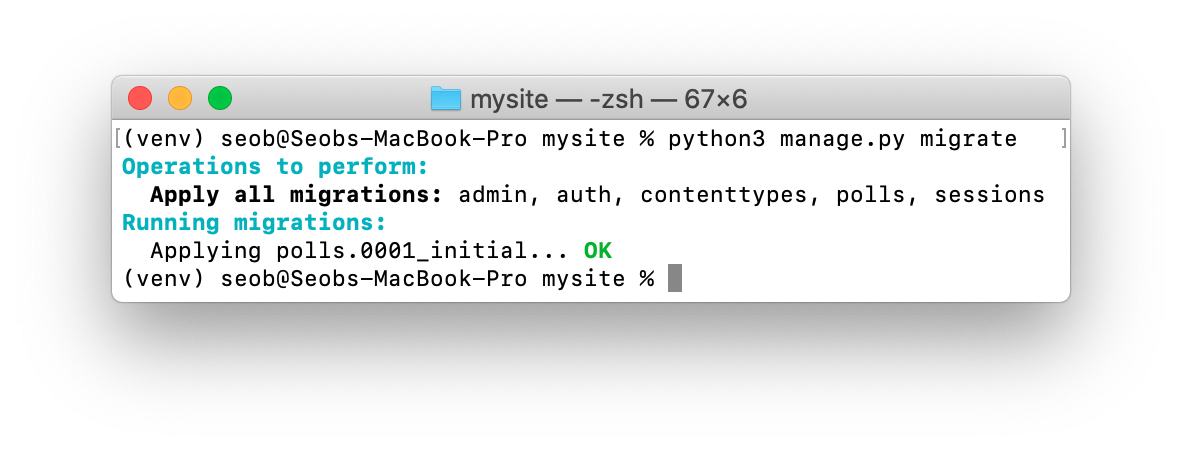
migrate 명령어는 아직 적용되지 않은 모든 migrations을 다룬다. (Django는 데이터베이스속에 django_migrations라는 특별한 테이블을 사용해서 어떤것이 적용되었는지 추적한다.) 그리고 본질적으로는 데이터베이스에 있는 모델과 스키마의 변동사항을 동기화시켜준다.
Migrations는 매우 강력하다. 프로젝트를 개발하면서 데이터베이스나 테이블을 지우거나 새로운 것을 만들 필요 없도록 모델을 수정할 수 있도록 해준다. - 이것은 데이터베이스에서 데이터를 잃지 않고 실시간으로 업그레이드하는 것에 특화되어있다. 이 부분은 나중 튜토리얼 파트에서 더 깊게 다뤄볼 예정이다.
하지만 지금은 모델에 변경사항을 만드는것에 대한 가이드는 3단계만 기억하자.
- 모델을 수정한다 (models.py)
- 이 변경사항에 대해
migrations를 생성하기 위해python3 manage.py makemigrations명령어를 실행한다. - 이 변경사항을 적용하기 위해서
python3 manage.py migrate명령어를 실행한다.
migrations를 만들기 위한 명령어와 적용하기 위한 명령어가 따로 나누어져 있는 이유는 Git과 같은 버전 컨트롤 시스템에 migrations를 commit하고 앱과 함께 같이 출시할 수 있도록 하기 위함이다. 이 구분된 두 명령어는 개발하기를 더 쉽게 만들어줄 뿐만이 아니라 다른 개발자가 프로덕션에서 사용할 수 있게 해준다.
manage.py 에서 이것에 대한 모든 정보를 확인해볼 수 있다.
Playing with the API
이제 대화식 Python 쉘에 뛰어들어 Django API를 자유롭게 가지고 놀아봅시다. Python 쉘을 실행하려면 다음의 명령을 입력합니다
python3 manage.py shell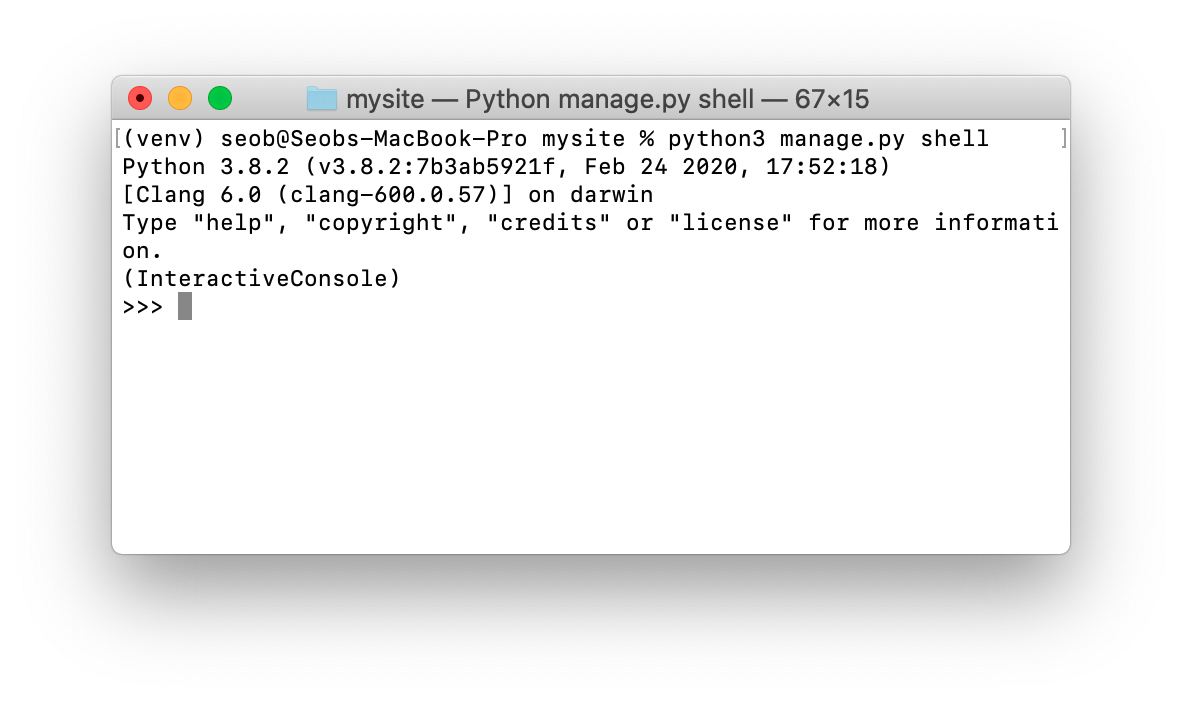
단순히 python 명령어를 입력하는 대신에 위의 명령어를 입력한 이유는 manage.py파일이 DJANGO_SETTINGS_MODULE 환경 변수를 설정하기 때문이다. 그리고 이 파일은 Django에게 mysite/settings.py파일로 임포트 경로를 준다.
일단 쉘에 들어오면, database API를 살펴보자.
>>> from polls.models import Choice, Question  # Import the model classes we just wrote.

# No questions are in the system yet.
>>> Question.objects.all()
<QuerySet []>

# Create a new Question.
# Support for time zones is enabled in the default settings file, so
# Django expects a datetime with tzinfo for pub_date. Use timezone.now()
# instead of datetime.datetime.now() and it will do the right thing.
>>> from django.utils import timezone
>>> q = Question(question_text="What's new?", pub_date=timezone.now())

# Save the object into the database. You have to call save() explicitly.
>>> q.save()

# Now it has an ID.
>>> q.id
1

# Access model field values via Python attributes.
>>> q.question_text
"What's new?"
>>> q.pub_date
datetime.datetime(2012, 2, 26, 13, 0, 0, 775217, tzinfo=<UTC>)

# Change values by changing the attributes, then calling save().
>>> q.question_text = "What's up?"
>>> q.save()

# objects.all() displays all the questions in the database.
>>> Question.objects.all()
<QuerySet [<Question: Question object (1)>]>
여기서 잠깐. <Question: Question object (1)>은 이 객체를 표현하는 데 별로 도움이 되지 않습니다. (polls/models.py 파일의) Question 모델을 수정하여, str() 메소드를 Question과 Choice에 추가해 봅시다.
polls/models.py
from django.db import models
class Question(models.Model):
    # ...
    def __str__(self):
        return self.question_text
class Choice(models.Model):
    # ...
    def __str__(self):
        return self.choice_text
당신의 모델에 str() 메소드를 추가하는것은 객체의 표현을 대화식 프롬프트에서 편하게 보려는 이유 말고도, Django 가 자동으로 생성하는 관리 사이트 에서도 객체의 표현이 사용되기 때문입니다.
이 모델에 커스텀 메소드 또한 추가해봅시다:
polls/models.py
import datetime
from django.db import models
from django.utils import timezone
class Question(models.Model):
    # ...
    def was_published_recently(self):
        return self.pub_date >= timezone.now() - datetime.timedelta(days=1)
import datetime은 Python의 표준 모듈인 datetime 모듈을, from django.utils import timezone은 Django의 시간대 관련 유틸리티인 django.utils.timezone을 참조하기 위해 추가한 것입니다. 만약 Python에서 시간대를 조작하는 방법에 대해 익숙하지 않다면, 시간대 지원 문서에서 더 많은 것을 배울 수 있습니다.
변경된 사항을 저장하고, python manage.py shell를 다시 실행해보세요.
>>> from polls.models import Choice, Question

# Make sure our __str__() addition worked.
>>> Question.objects.all()
<QuerySet [<Question: What's up?>]>

# Django provides a rich database lookup API that's entirely driven by
# keyword arguments.
>>> Question.objects.filter(id=1)
<QuerySet [<Question: What's up?>]>
>>> Question.objects.filter(question_text__startswith='What')
<QuerySet [<Question: What's up?>]>

# Get the question that was published this year.
>>> from django.utils import timezone
>>> current_year = timezone.now().year
>>> Question.objects.get(pub_date__year=current_year)
<Question: What's up?>

# Request an ID that doesn't exist, this will raise an exception.
>>> Question.objects.get(id=2)
Traceback (most recent call last):
    ...
DoesNotExist: Question matching query does not exist.

# Lookup by a primary key is the most common case, so Django provides a
# shortcut for primary-key exact lookups.
# The following is identical to Question.objects.get(id=1).
>>> Question.objects.get(pk=1)
<Question: What's up?>

# Make sure our custom method worked.
>>> q = Question.objects.get(pk=1)
>>> q.was_published_recently()
True

# Give the Question a couple of Choices. The create call constructs a new
# Choice object, does the INSERT statement, adds the choice to the set
# of available choices and returns the new Choice object. Django creates
# a set to hold the "other side" of a ForeignKey relation
# (e.g. a question's choice) which can be accessed via the API.
>>> q = Question.objects.get(pk=1)

# Display any choices from the related object set -- none so far.
>>> q.choice_set.all()
<QuerySet []>

# Create three choices.
>>> q.choice_set.create(choice_text='Not much', votes=0)
<Choice: Not much>
>>> q.choice_set.create(choice_text='The sky', votes=0)
<Choice: The sky>
>>> c = q.choice_set.create(choice_text='Just hacking again', votes=0)

# Choice objects have API access to their related Question objects.
>>> c.question
<Question: What's up?>

# And vice versa: Question objects get access to Choice objects.
>>> q.choice_set.all()
<QuerySet [<Choice: Not much>, <Choice: The sky>, <Choice: Just hacking again>]>
>>> q.choice_set.count()
3

# The API automatically follows relationships as far as you need.
# Use double underscores to separate relationships.
# This works as many levels deep as you want; there's no limit.
# Find all Choices for any question whose pub_date is in this year
# (reusing the 'current_year' variable we created above).
>>> Choice.objects.filter(question__pub_date__year=current_year)
<QuerySet [<Choice: Not much>, <Choice: The sky>, <Choice: Just hacking again>]>

# Let's delete one of the choices. Use delete() for that.
>>> c = q.choice_set.filter(choice_text__startswith='Just hacking')
>>> c.delete()
모델의 관계에 대한 더 많은 정보는 관련 객체에 접근하기를 참조하세요. API에서 이중 밑줄(__) 을 이용해서 어떻게 필드를 조회할 수 있는지는 필드 조회를 읽어보세요.데이터베이스 API에 대한 자세한 내용을 보려면, 데이터베이스 API 레퍼런스를 읽어보세요.
Introducing the Django Admin
철학
직원들이나 고객들이 컨텐츠를 수정하기 위한 관리자 사이트를 만드는 것은 딱히 창의적일 필요없는 지루한 작업입니다. 이런 이유로, Django는 모델에 대한 관리용 인터페이스를 모두 자동으로 생성합니다.
Django는 Lawrence Journal-World 신문사의 프로그래머가 처음 개발하였습니다. 이런 태생적인 이유 때문에, "컨텐츠 게시자" 와 "공개" 사이트의 구분이 명확합니다. 사이트 관리자는 뉴스 기사, 사건, 스포츠 경기 결과 같은 것들을 시스템에 추가합니다. 그렇게 추가된 컨텐츠는 "공개" 사이트에 노출됩니다. Django는 사이트 관리자가 컨텐츠를 편집할 수 있는 통합적인 인터페이스를 생성하는 문제를 해결합니다.
관리자 사이트는 사이트 방문자를 위한 것이 아니라, 사이트 관리자를 위한 것입니다.
관리자 생성하기
관리 사이트에 로그인 할 수 있는 사용자를 생성해 보자. 다음과 같은 명령어를 입력해보자.
python manage.py createsuperuserUsername: admin그런 다음 원하는 이메일 주소를 입력하라는 메시지가 표시된다.
Email address: admin@example.com마지막으로, 암호를 입력하면 된다. 암호를 두번 물어보게 되는데, 두번째 입력하는 암호를 올바로 입력했는지를 확인하기 위한 암호이다.
Password: **********
Password (again): *********
Superuser created successfully.
Start the development server
Django 관리자 사이트는 기본으로 활성화되어 있다. 개발 서버를 켜고, 탐험해 보자.
서버가 동작하고 있지 않다면 다음 명령으로 시작한다.
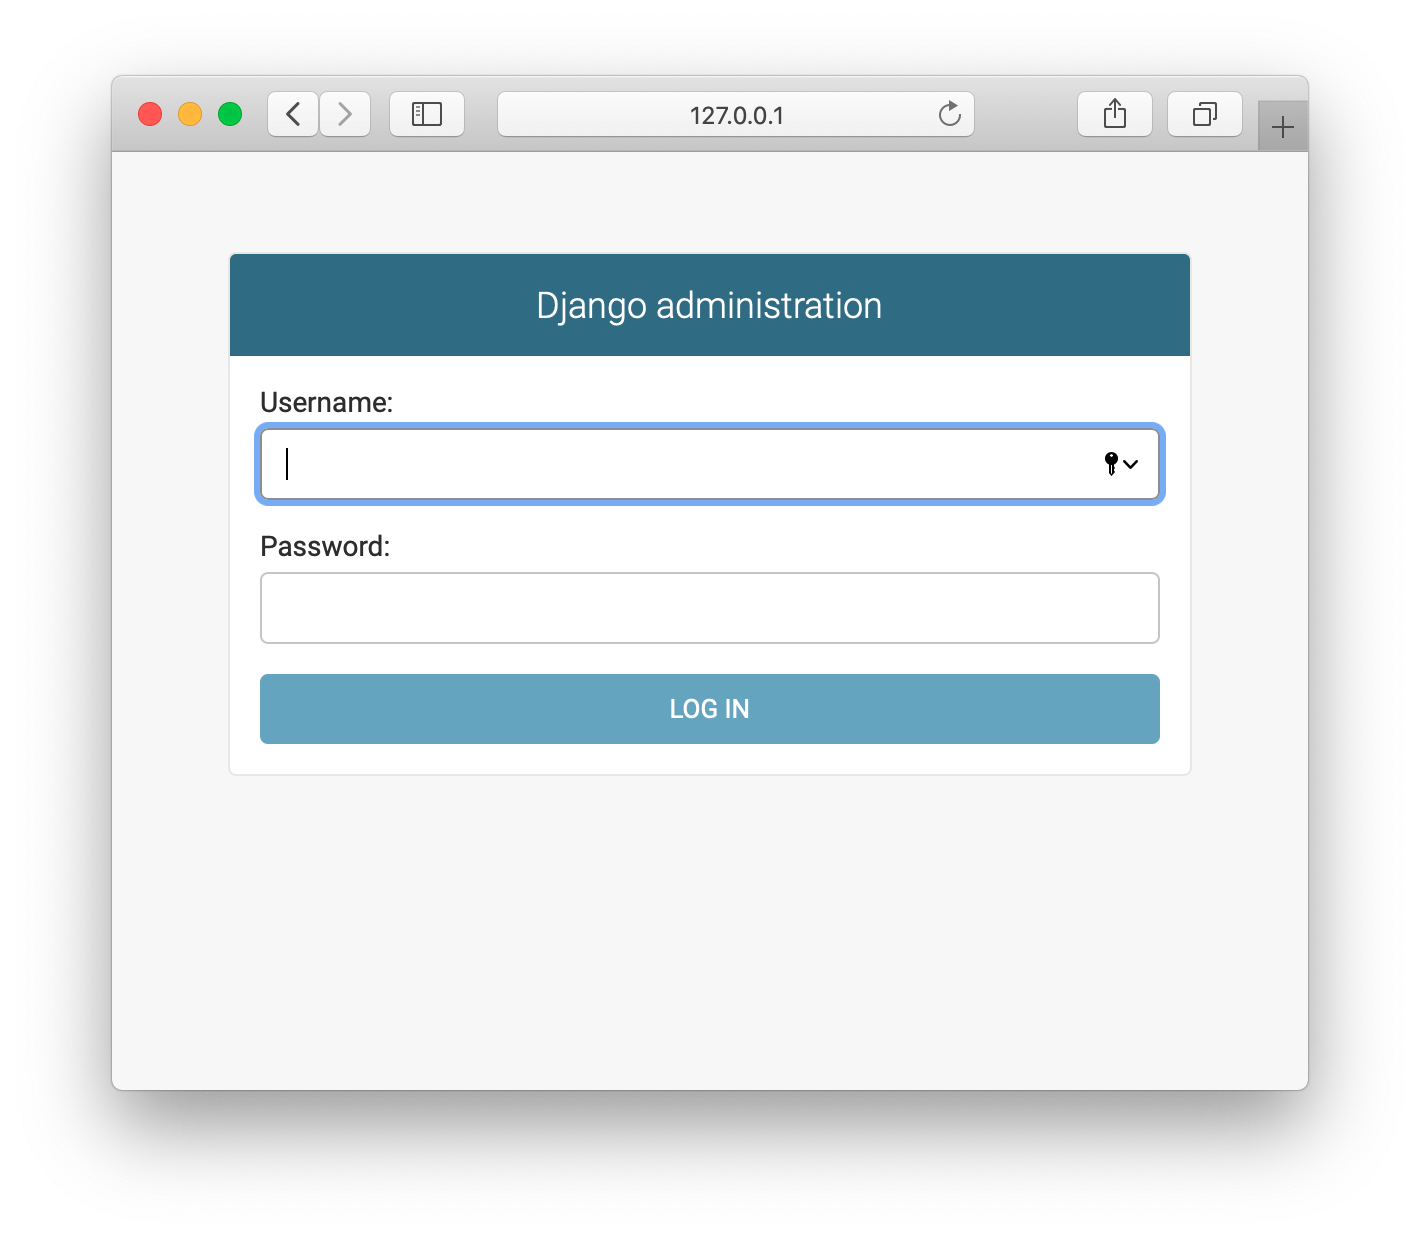
python manage.py runserver이제, 웹 브라우져를 열고 로컬 도메인의 "/admin/"으로 이동한다. 예를 들면, http://127.0.0.1:8000/admin/으로 접근할 수 있다. 그럼 다음과 같이 로그인 화면이 보인다.
Since translation is turned on by default, if you set LANGUAGE_CODE, the login screen will be displayed in the given language (if Django has appropriate translations).
Enter the admin site
앞서 생성한 슈퍼유저(superuser) 계정으로 로그인해봅시다. 다음과 같은 Django 관리 인덱스 페이지가 보일 것입니다.
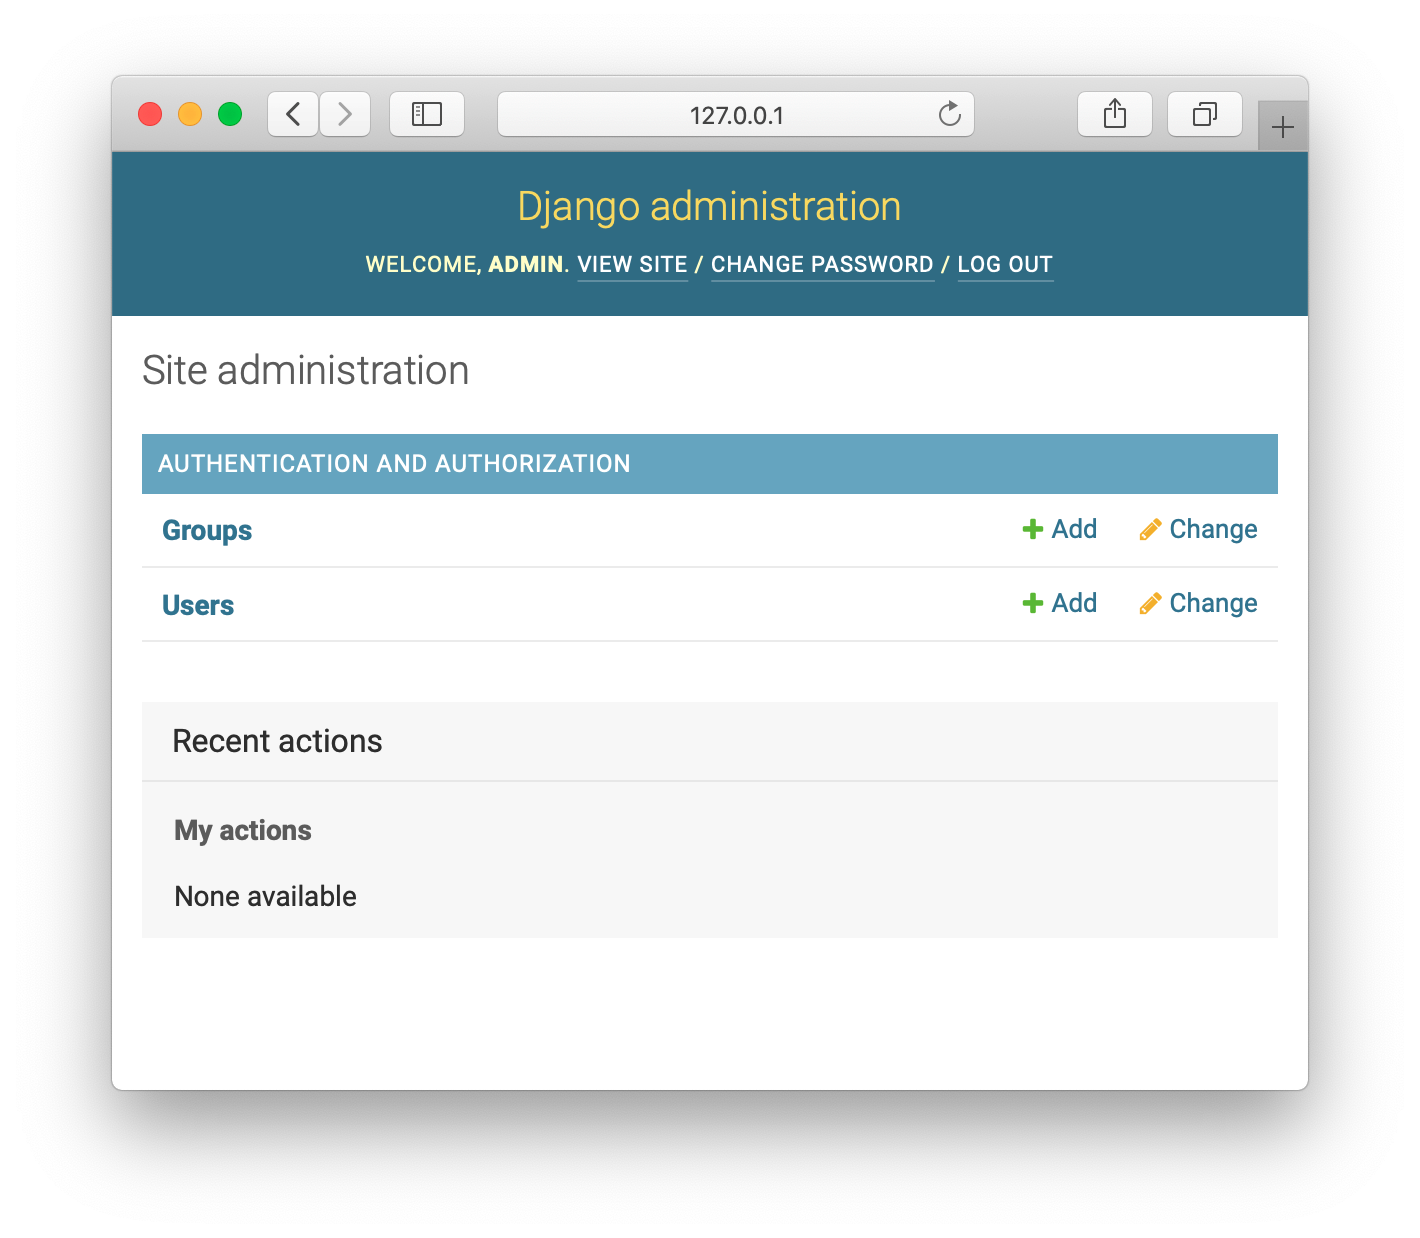
편집 가능한 그룹과 사용자와 같은 몇 종류의 컨텐츠를 볼 수 있습니다. 이것들은 django.contrib.auth 모듈에서 제공되는데, Django 에서 제공되는 인증 프레임워크 입니다.
Make the poll app modifiable in the admin
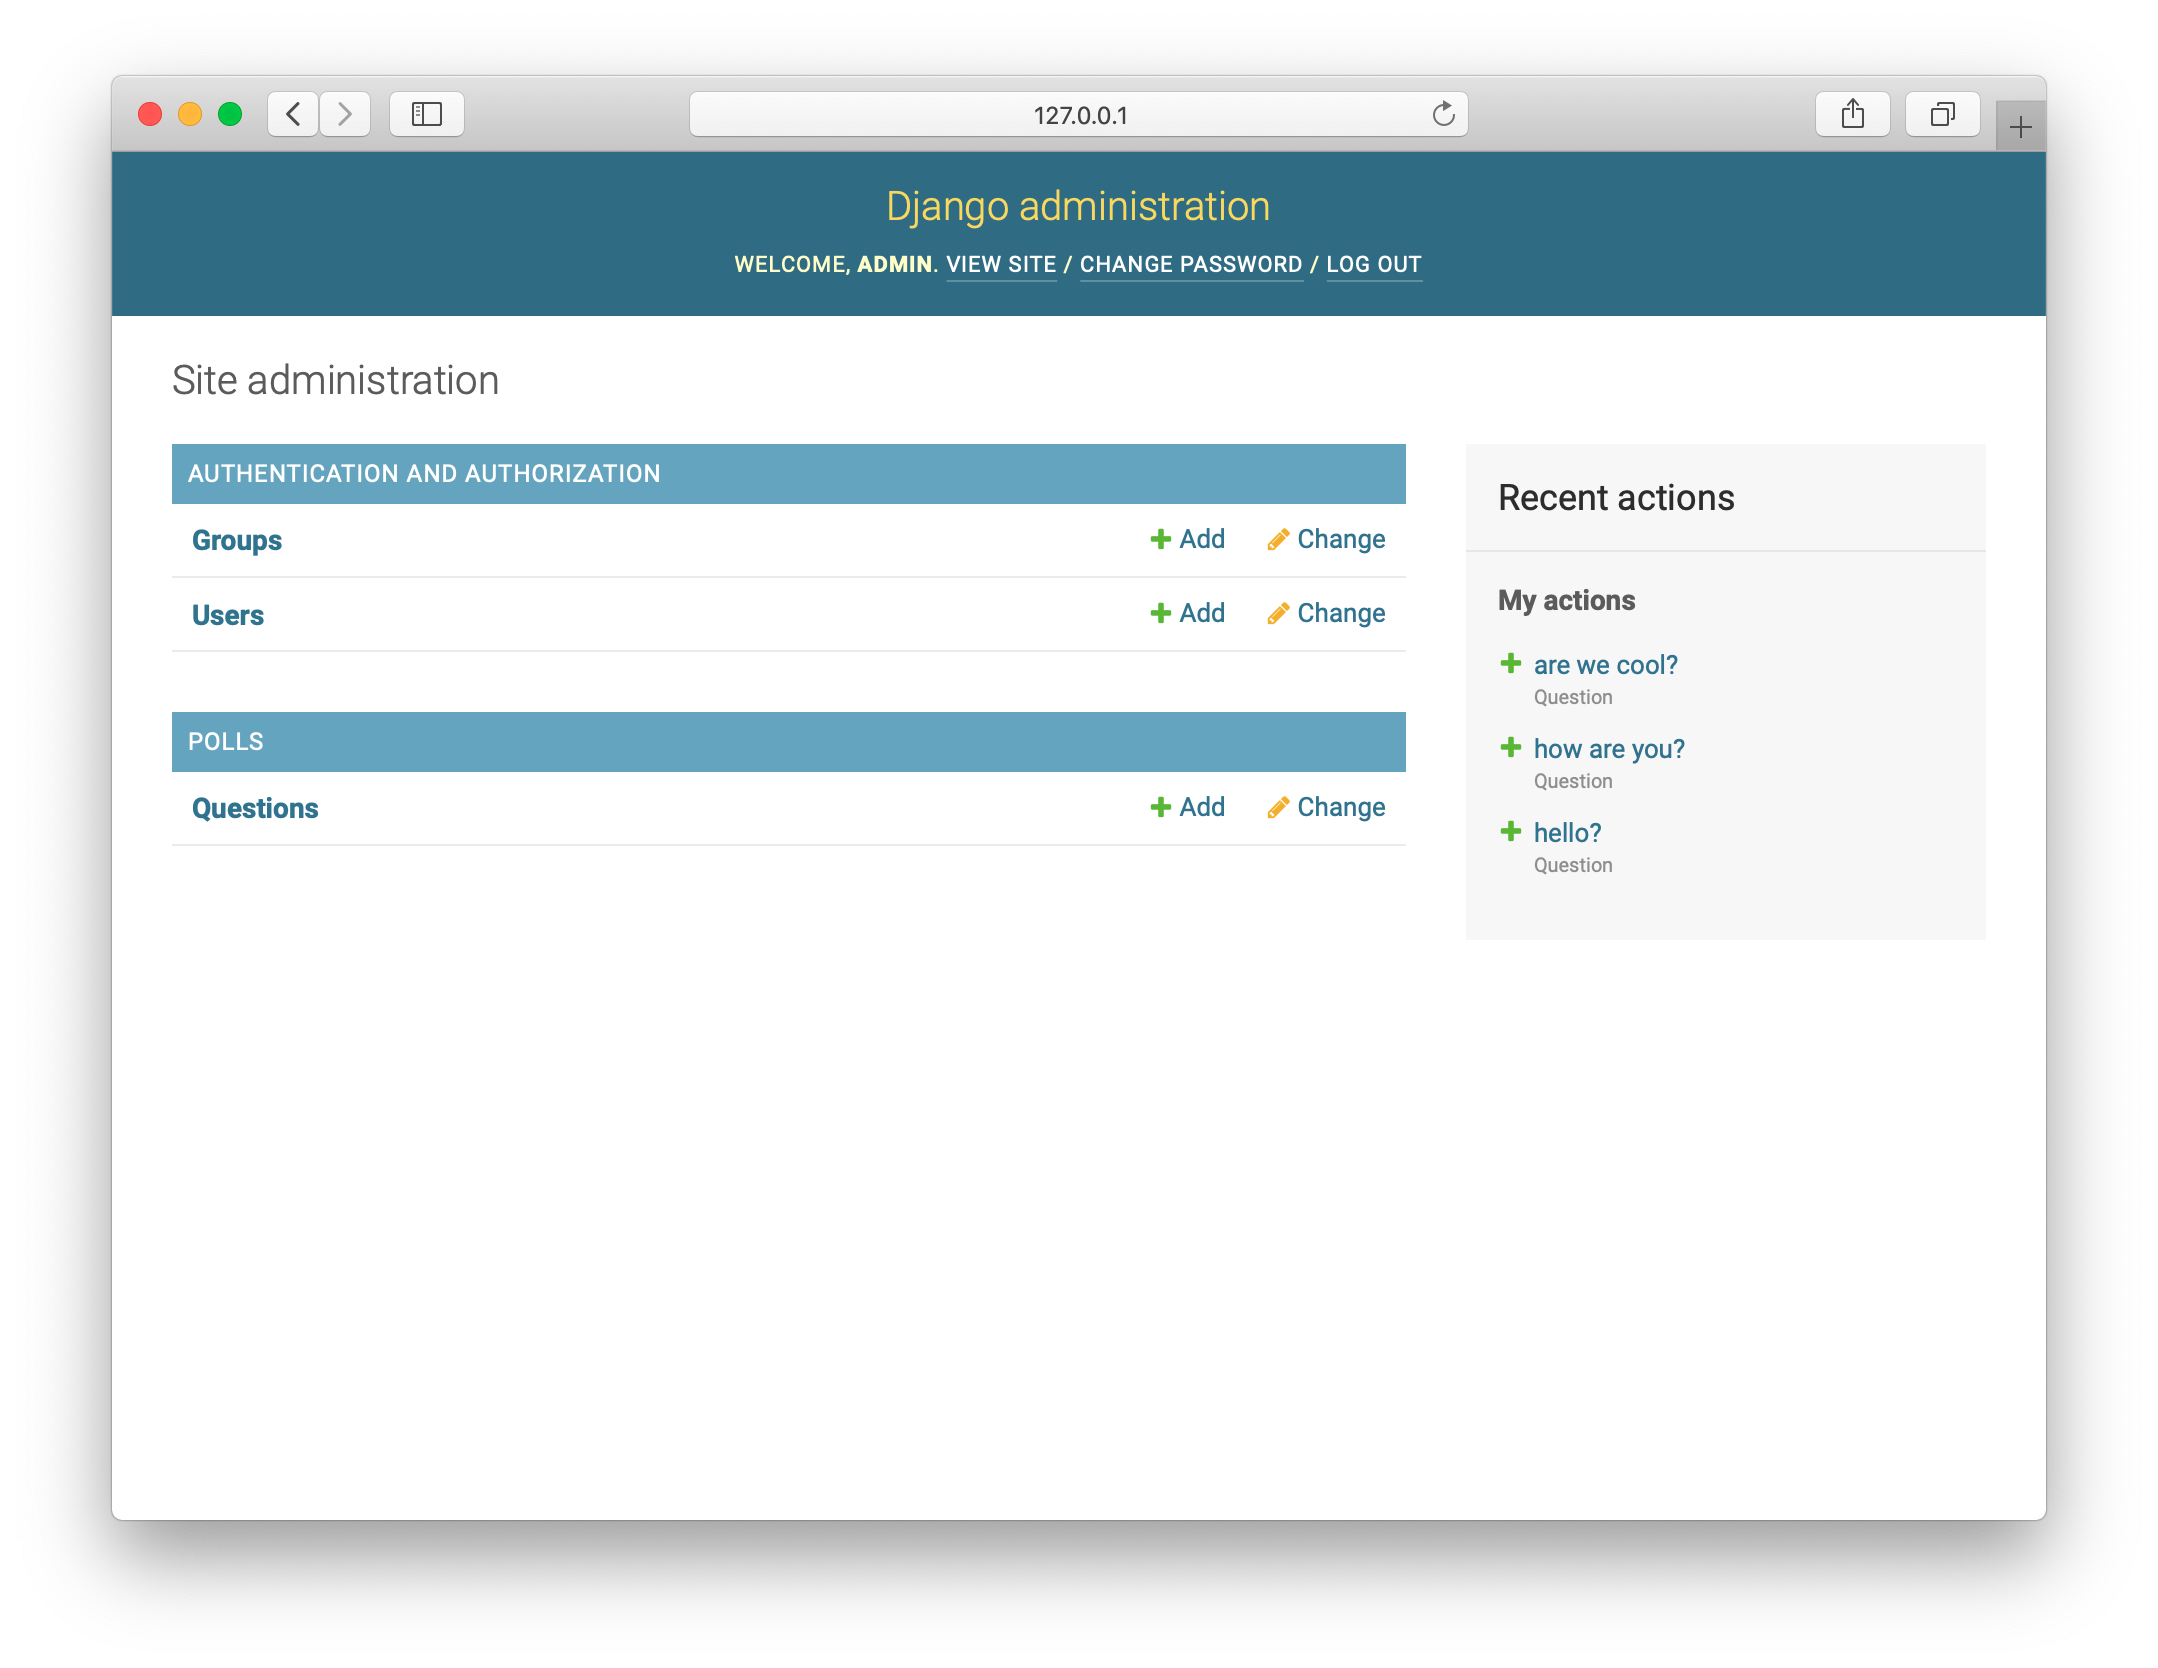
But where’s our poll app? It’s not displayed on the admin index page.
Only one more thing to do: we need to tell the admin that Question objects have an admin interface. To do this, open the polls/admin.py file, and edit it to look like this:
polls/admin.py
from django.contrib import admin
from .models import Question
admin.site.register(Question)
Explore the free admin functionality
Now that we’ve registered Question, Django knows that it should be displayed on the admin index page:
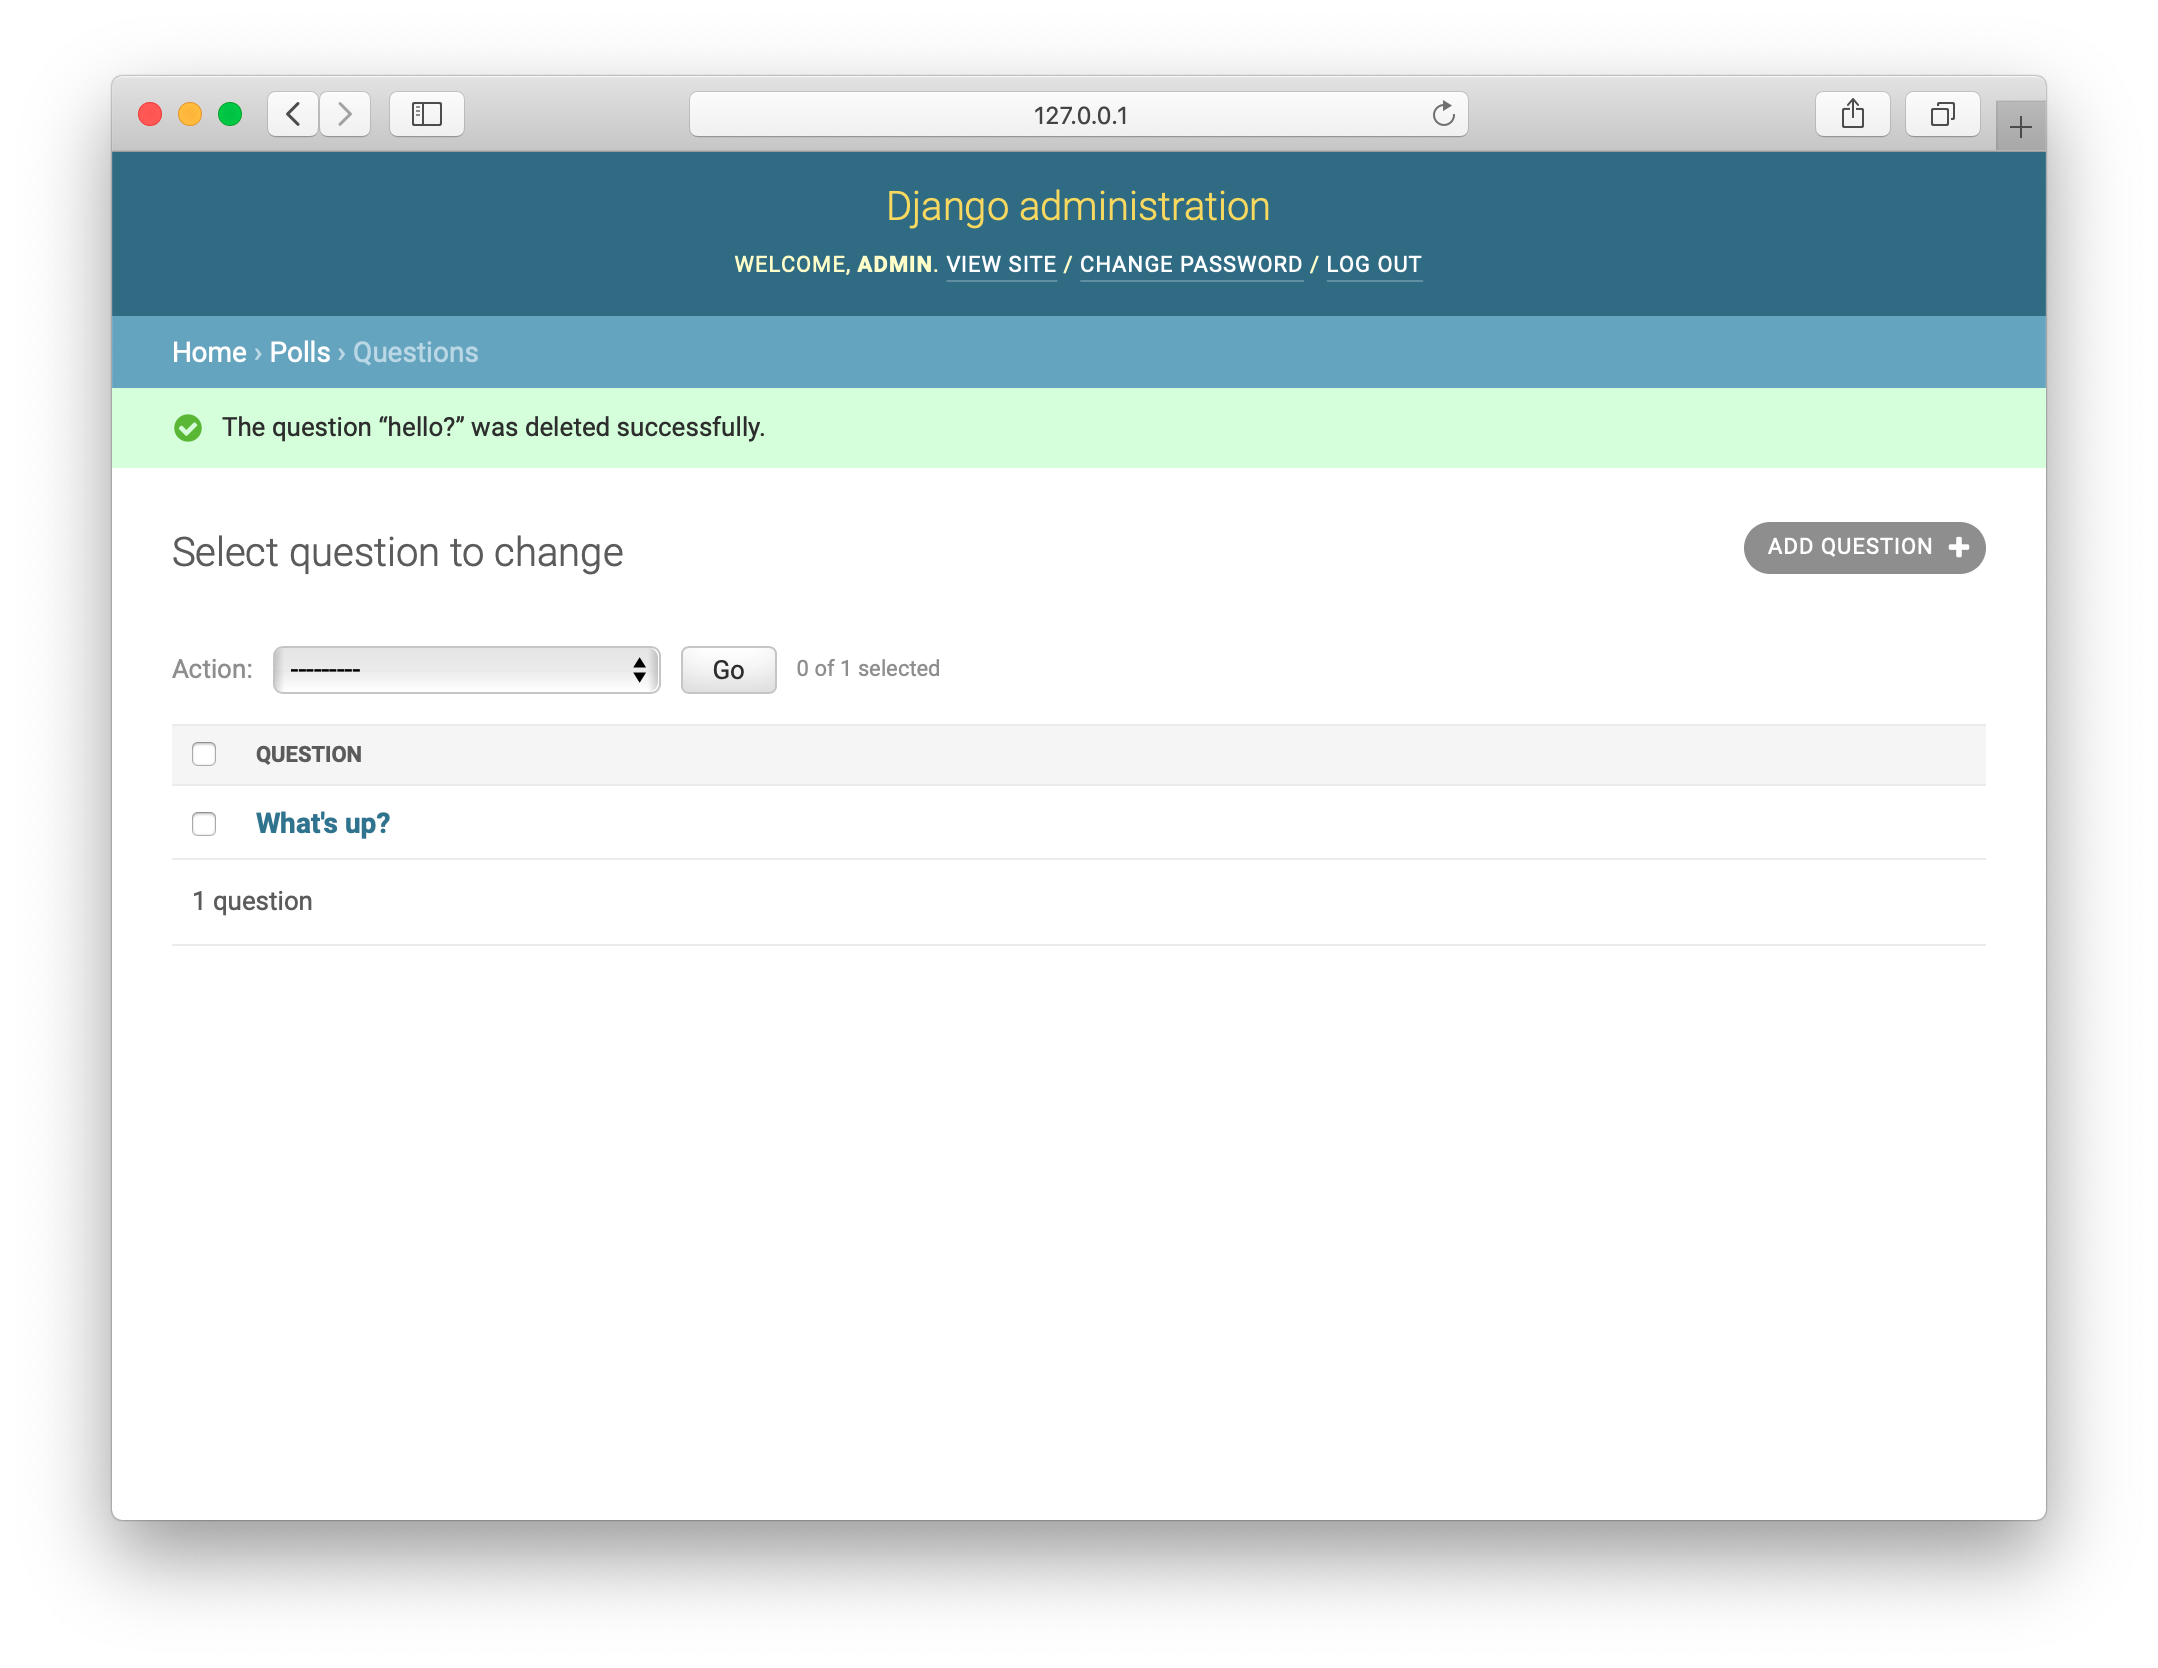
Click “Questions”. Now you’re at the “change list” page for questions. This page displays all the questions in the database and lets you choose one to change it. There’s the “What’s up?” question we created earlier:
Things to note here:
- The form is automatically generated from the Question model.
- The different model field types (DateTimeField, CharField) correspond to the appropriate HTML input widget. Each type of field knows how to display itself in the Django admin.
- Each DateTimeField gets free JavaScript shortcuts. Dates get a “Today” shortcut and calendar popup, and times get a “Now” shortcut and a convenient popup that lists commonly entered times.
The bottom part of the page gives you a couple of options:
- Save – Saves changes and returns to the change-list page for this type of object.
- Save and continue editing – Saves changes and reloads the admin page for this object.
- Save and add another – Saves changes and loads a new, blank form for this type of object.
- Delete – Displays a delete confirmation page.
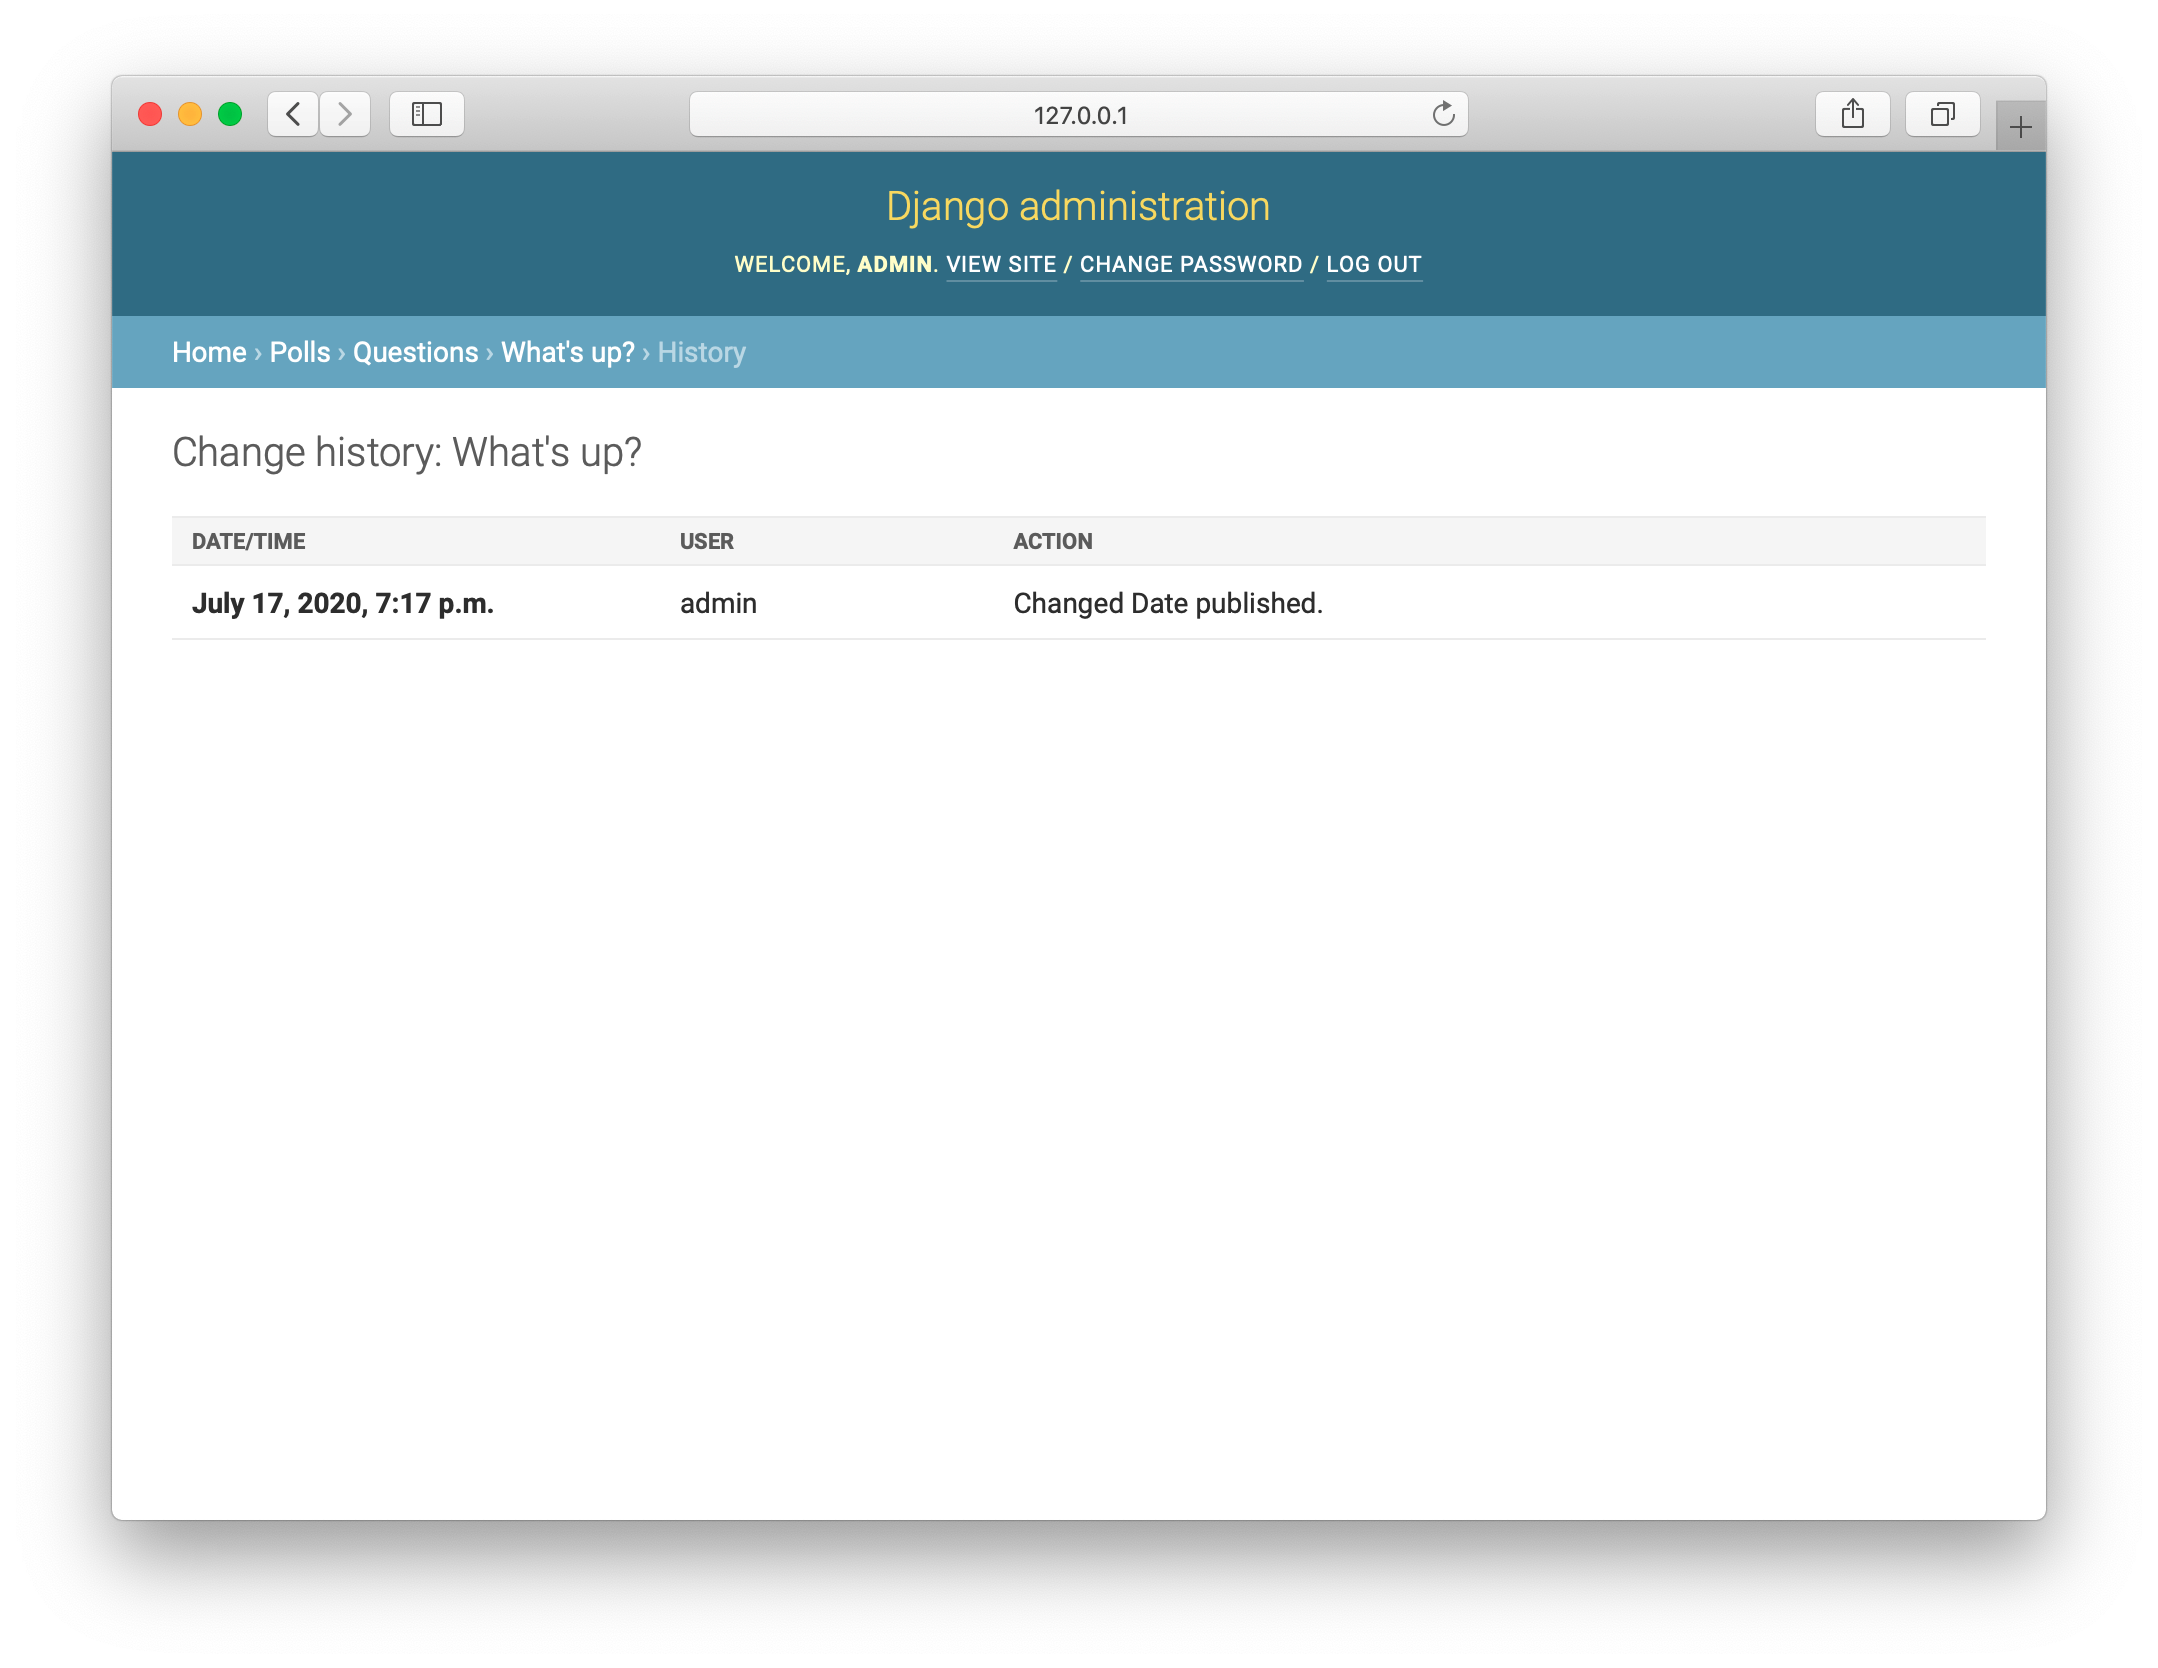
If the value of “Date published” doesn’t match the time when you created the question in Tutorial 1, it probably means you forgot to set the correct value for the TIME_ZONE setting. Change it, reload the page and check that the correct value appears.
Change the “Date published” by clicking the “Today” and “Now” shortcuts. Then click “Save and continue editing.” Then click “History” in the upper right. You’ll see a page listing all changes made to this object via the Django admin, with the timestamp and username of the person who made the change: