View 환경설정
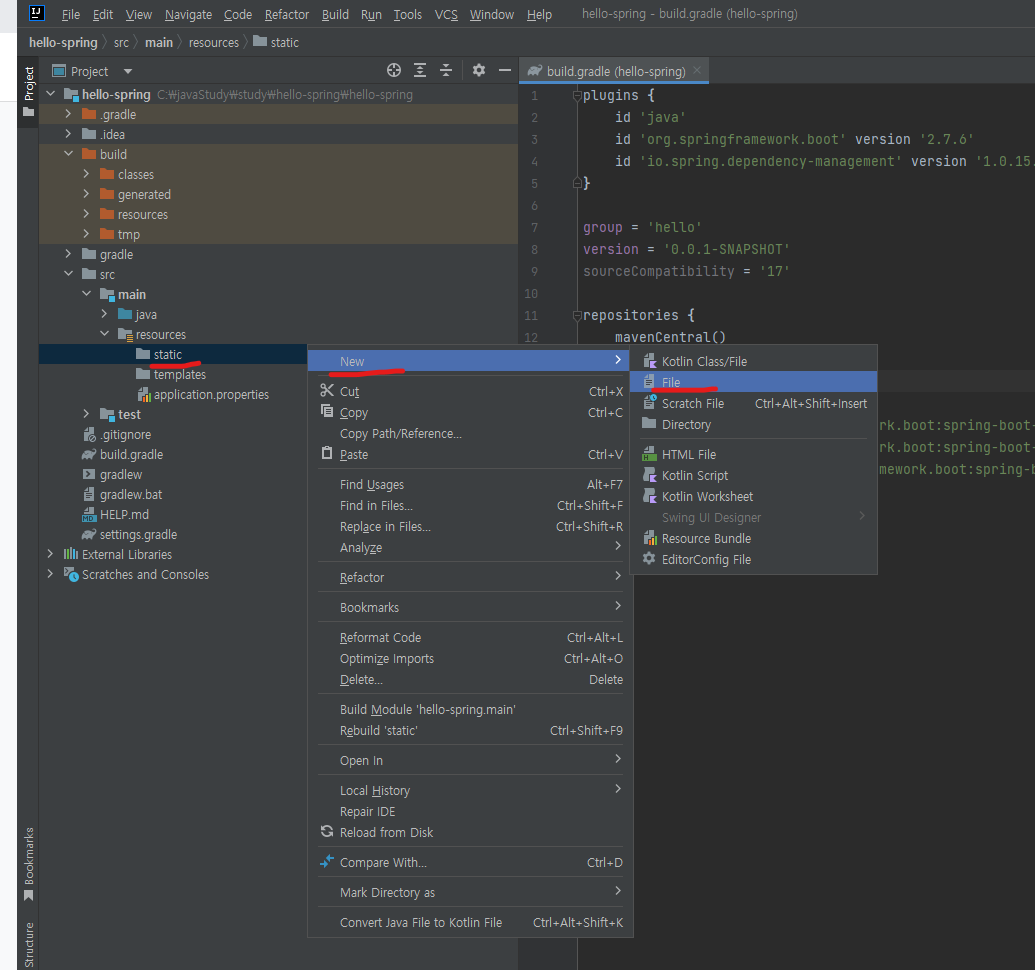
resources -> static -> new -> File -> index.html 만들어 welcome 페이지로 사용
<!DOCTYPE HTML>
<html>
<head>
 <title>Hello</title>
 <meta http-equiv="Content-Type" content="text/html; charset=UTF-8" />
</head>
<body>
Hello
<a href="/hello">hello</a>
</body>
</html>
hello.hellospring 밑에 패키지로 hello.hellospring.controller를 만든다
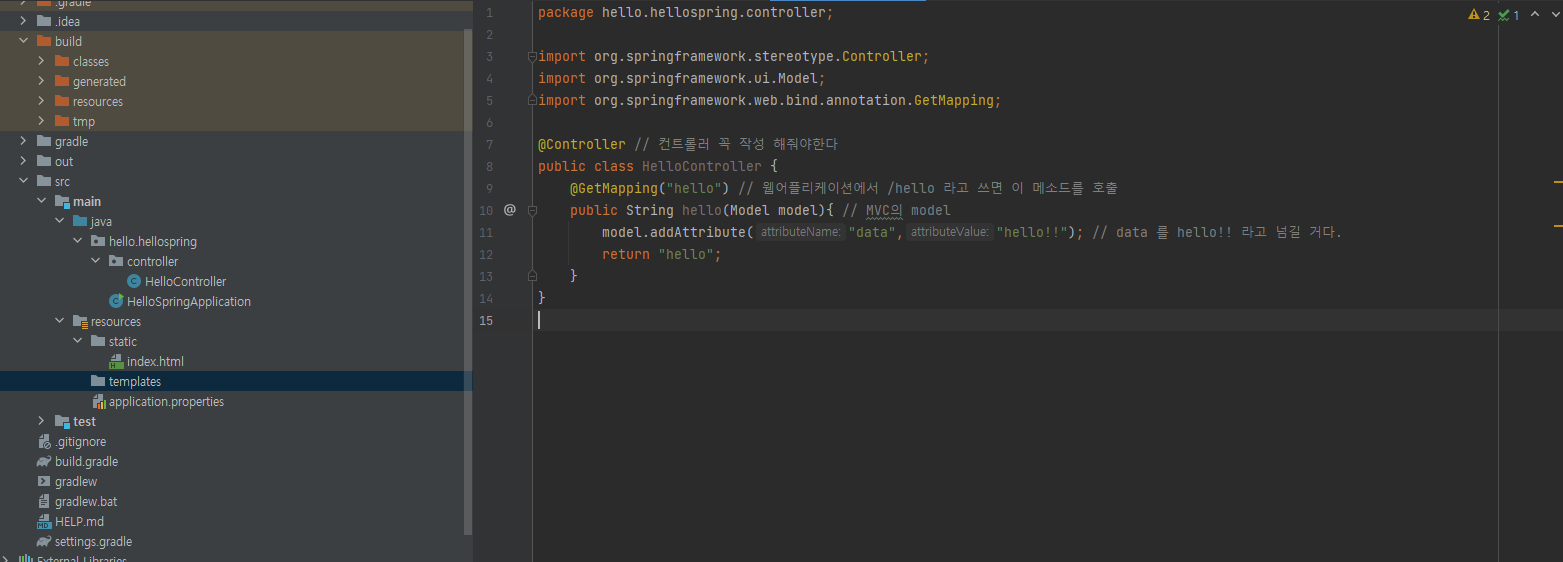
컨트롤러에 HelloController 클래스를 만든다
HelloController 클래스에 위와 같이 작성 해준다.
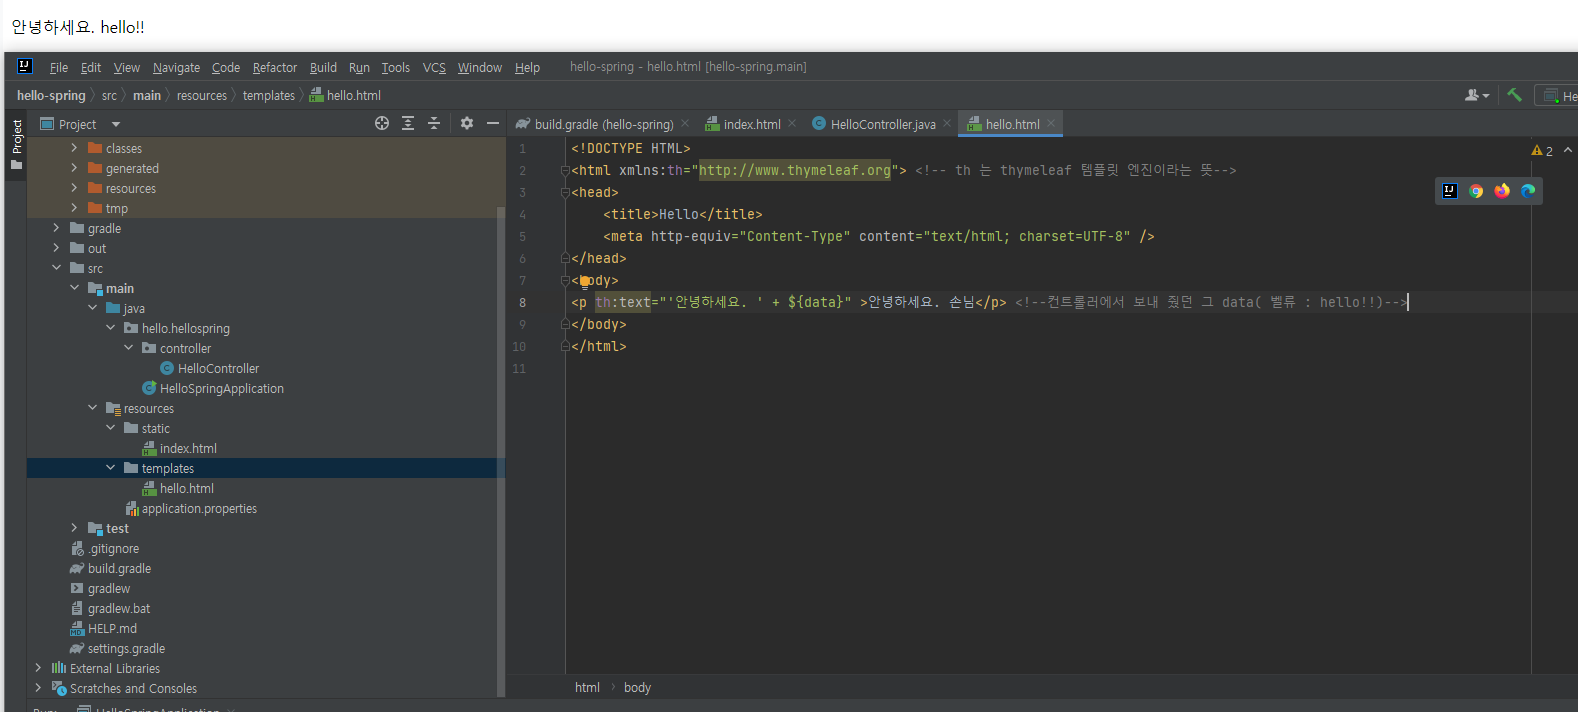
<!DOCTYPE HTML>
<html xmlns:th="http://www.thymeleaf.org">
<head>
 <title>Hello</title>
 <meta http-equiv="Content-Type" content="text/html; charset=UTF-8" />
</head>
<body>
<p th:text="'안녕하세요. ' + ${data}" >안녕하세요. 손님</p>
</body>
</html>
templates에 hello.html 만들고 위와 같이 코드를 작성 후 실행 한다.


동작 방법
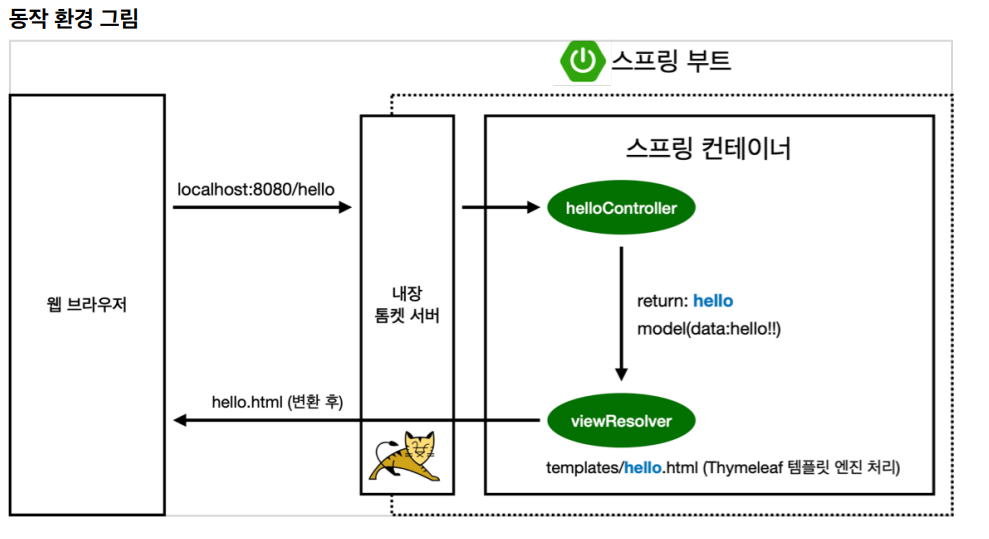
- 스프링 부트는 톰캣 서버를 내장
- @GetMapping("hello") url을 매핑하여 메소드 실행
- 스프링이 Model 을 만들어 넣어줌
- return "hello"; 값과 일치하는 것을 templates 에서 찾아 렌더링함 resources -> templates -> hello.html
- 즉 컨트롤러에서 리턴값으로 문자를 반환하면 viewResolver가 화면을 찾아서 처리
