1. Javascript의 필요성
웹페이지가 사용자와 동적으로 상호작용하기 위해 Javascript를 사용한다
- 웹의 특징: 검색엔진을 통해 검색되면서 사용자와 상호작용 가능
2. <script>
html에서는 자바스크립트를 작성할 때 'script'태그 안에 쓴다
	<body>
      <script>
        document.write() //괄호 안의 값을 문서에 출력함
      </script>
	</body>
3. Event 속성
	<body>
        <input type="button" value="hi" onclick="alert('hi')">
        <input type="text" onchange="alert('chaged')">
        <input type="text" onkeydown="alert('key down!')">
</body>- event 종류
onclick(...): 클릭하면 (...)라는 이벤트
onchange(...): 수정하면 (...)라는 이벤트
onkeydown(...): 키보드를 치면 (...)라는 이벤트
4. Console
크롬에서 F12키를 누르거나 '우클릭>검사'를 누르고 Console 실행
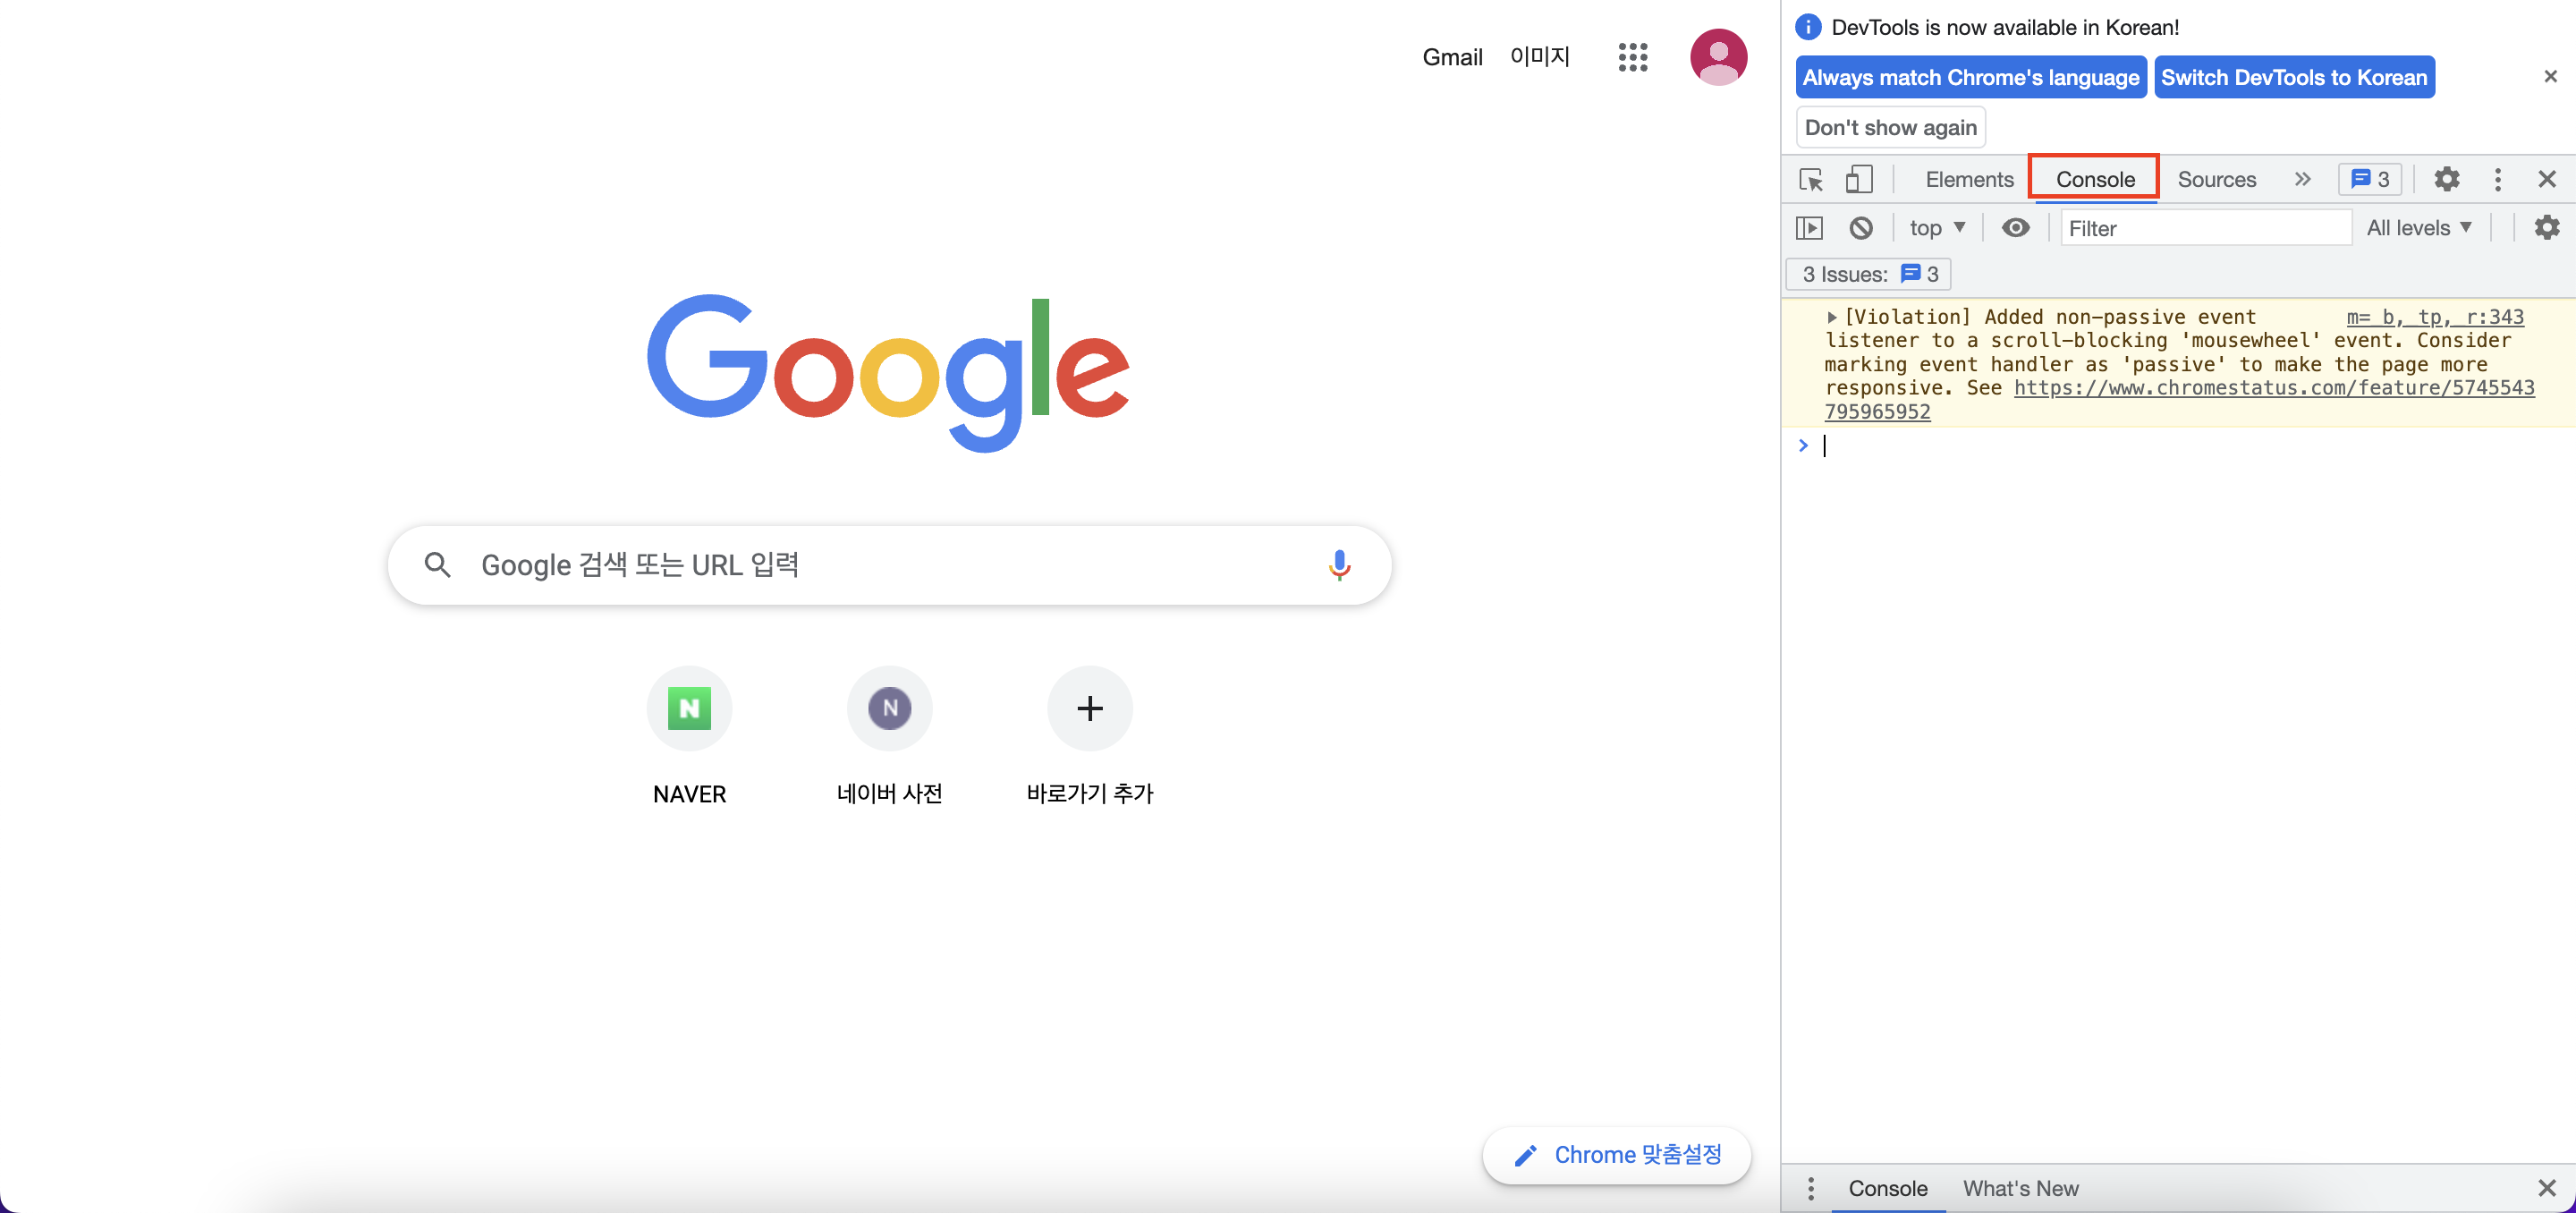
- 입력한 연산을 실행할 때:
Enter - 실행을 유보하고 싶을 때(줄바꿈):
shift + Enter
5. 데이터 타입
- 산술연산자(+, -, *, /, %)
- 경고창: alert('text')
- 글자수: string.length
- 대문자변환: string.prototype.toUpperCase()
- 동일값 찾기: string.prototype.indexOf()
6. 변수, 대입연산자
'x = 1': 변수(x), 대입연산자(=)
- variable: 바뀌는. 변수
- constant: 바뀌지 않는. 상수
7. 다크모드 설정/해제(1)
- dark, bright 버튼을 만드세요
  <body>
	<input type="button" value="dark">
    <input type="button" value="bright">
</body>- 클릭 이벤트를 넣으세요(javascript로 할당할 예정)
  <body>
	<input type="button" value="dark" onclick="">
    <input type="button" value="bright">
</body>- 문서에서 "body"라는 태그를 사용하는
첫 번째 요소를 반환합니다.
  <body>
	<input type="button" value="dark" onclick="
	  document.querySelector('body')
	">
    <input type="button" value="bright">
</body>- 문서에서 "body"라는 태그의 "style"의 "background color"를 "black"으로 할당합니다
  <body>
	<input type="button" value="dark" onclick="
	  document.querySelector('body').style.backgroundColor = 'black';
	">
    <input type="button" value="bright">
</body>- 문서에서 "body"라는 태그의 "style"의 폰트"color"를 "white"로 할당합니다
  <body>
	<input type="button" value="dark" onclick="
	  document.querySelector('body').style.backgroundColor = 'black';
 	  document.querySelector('body').style.color = 'white';
	">
    <input type="button" value="bright">
</body>- Result
  <body>
	<input type="button" value="dark" onclick="
	  document.querySelector('body').style.backgroundColor = 'black';
 	  document.querySelector('body').style.color = 'white';
	">
    <input type="button" value="bright" onclick="
	  document.querySelector('body').style.backgroundColor = 'white';
 	  document.querySelector('body').style.color = 'black';
	">
  </body>
8. 프로그램, 프로그래밍, 프로그래머
- 프로그램: '순서'의 의미가 담겨 있음
- HTML: 웹페이지를 묘사하는 목적의 언어, 시간 순서에 따른 실행과 무관
- JavaScript: 사용자와 상호작용하기 위한 컴퓨터 언어, 시간 순서에 따른 웹브라우저의 여러 기능이 실행되어야 함.(프로그래밍의 형태)
- 조건, 반복, 정리정돈..
9. 비교연산자, Boolean
- 비교연산자:일치(===), 불일치(!==), 작다(<), 크다(>)
- Boolean: true, false
10. 조건문
	<script>
      if(true){
      	document.write("1<br>");	// 1 출력
      }else{
      	document.write("2<br>");
      }
      if(false){
      	document.write("3<br>");
      }else{
      	document.write("4<br>");	// 4 출력
      }
    </script>
12. 다크모드 설정/해제(2)
- "dark"버튼을 누르면 "bright", 다시 누르면 "dark"가 되도록 토글버튼을 생성
  <body>
	<input type="button" value="dark" onclick="
	 if( /*dark*/ ) {
       document.querySelector('body').style.backgroundColor = "black";
 	   document.querySelector('body').style.color = "white";
     }else{
       document.querySelector('body').style.backgroundColor = "white";
  	   document.querySelector('body').style.color = "black";
     }
    ">
  </body>
javascript element get value
👉 'value'라는 property를 쓰면 됨!
- input태그에 id="darkButton"을 할당하고 document.querySelector로 이 id의 "value"를 조건문에 적용하면
  <body>
	<input id="darkButton" type="button" value="dark" onclick="
	 if( document.querySelector('#darkButton').value === 'dark') {
       document.querySelector('body').style.backgroundColor = 'black';
 	   document.querySelector('body').style.color = 'white';
     }else{
       document.querySelector('body').style.backgroundColor = 'white';
  	   document.querySelector('body').style.color = 'black';
     }
    ">
</body>- "dark"모드로 변경 시 버튼 value가 bright가 되도록,
"bright"모드로 변경 시 버튼 value가 dark가 되도록
<body>
<input id="darkButton" type="button" value="dark" onclick="
if( document.querySelector('#darkButton').value === 'dark') {
document.querySelector('body').style.backgroundColor = 'black';
document.querySelector('body').style.color = 'white';
document.querySelector('#darkButton').value = 'bright';
}else{
document.querySelector('body').style.backgroundColor = 'white';
document.querySelector('body').style.color = 'black';
document.querySelector('#darkButton').value = 'dark';
}
">
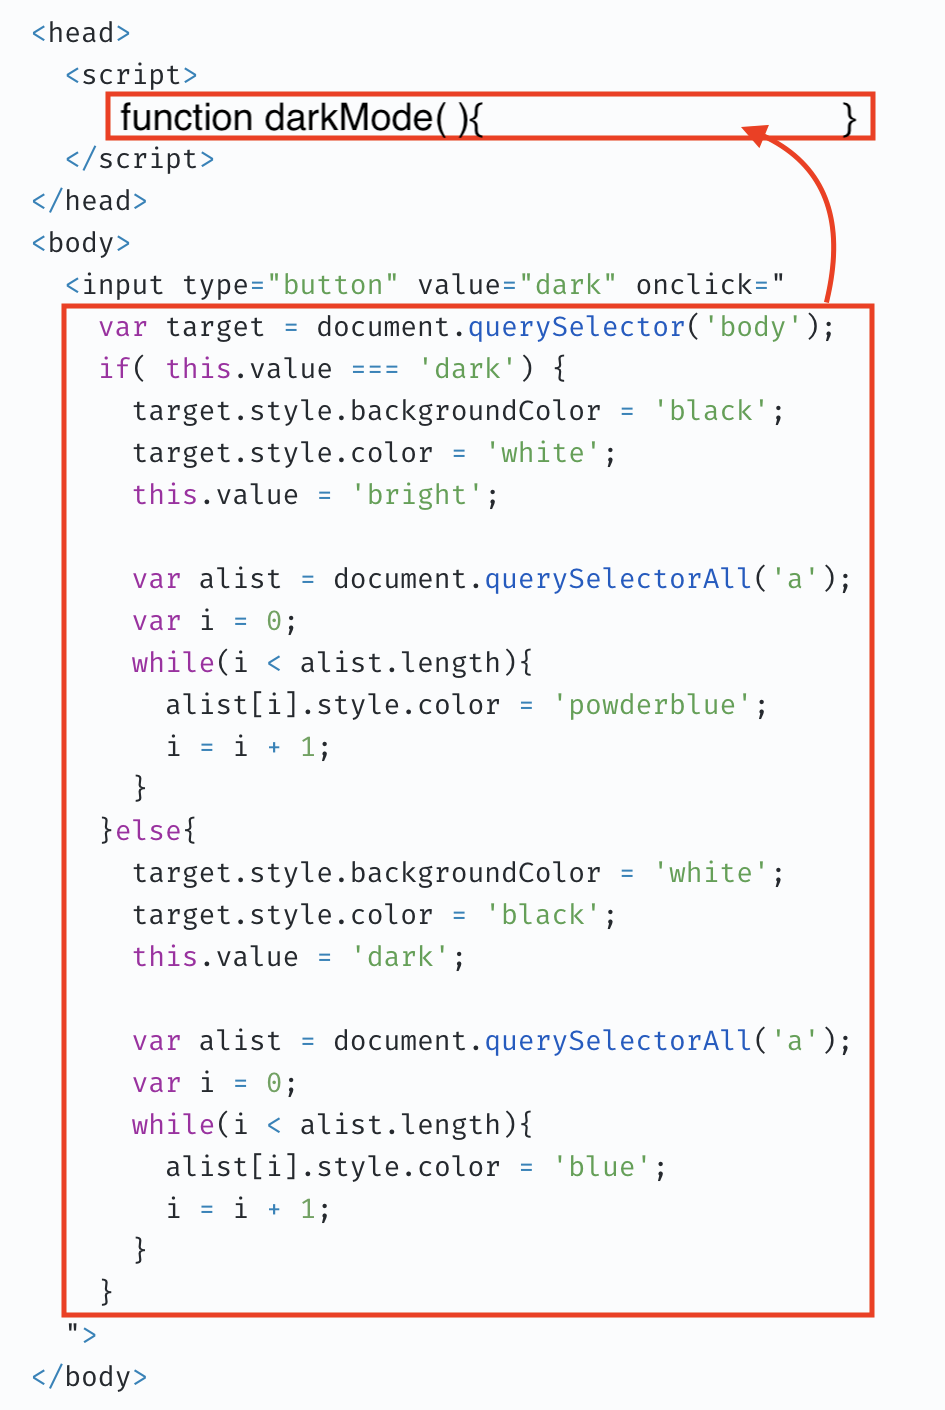
</body>13. 리팩토링 중복의 제거
리팩토링: 코드의 비효율적인 면을 제거하여 동일하게 기능하면서 가독성 향상, 유지보수 편리, 중복 코드 제거 등 개선하는 것
-
현상: 다크모드 버튼을 복사해 2번째 버튼을 만들었다. 그런데 2번째 버튼을 클릭했더니 1번째 버튼의 value가 바뀐다.
👉 id를 다르게 부여하여 구분하는 방법도 있지만 ..버튼 복사가 1억 개라면?
👉 "this"를 사용하면 간단해진다.
코딩을 잘하는 법: 중복을 제거하라!
-
input 태그 안에서 "document.querySelector('#darkButton')"는 자기 자신을 가리키는 것이므로 "this"로 바꿔쓸 수 있다. 그리고 id를 지운다.
  <body>
	<input type="button" value="dark" onclick="
	 if( this.value === 'dark') {
       document.querySelector('body').style.backgroundColor = 'black';
 	   document.querySelector('body').style.color = 'white';
       this.value = 'bright';
     }else{
       document.querySelector('body').style.backgroundColor = 'white';
  	   document.querySelector('body').style.color = 'black';
       this.value = 'dark';
     }
    ">
</body>- 중복된 "document.querySelector('body')"를 변수에 할당해 간결화하기
수정 시, 변수에 할당된 'body' 한 줄만 바꾸면 되므로 방법이 수월해졌음
  <body>
	<input type="button" value="dark" onclick="
	  var target = document.querySelector('body');
	  if( this.value === 'dark') {
       target.style.backgroundColor = 'black';
 	   target.style.color = 'white';
       this.value = 'bright';
     }else{
       target.style.backgroundColor = 'white';
  	   target.style.color = 'black';
       this.value = 'dark';
     }
    ">
  </body>
14. 배열
- 배열 선언 및 값 할당하기, 불러오기, 추가, 개수...
	<script>
	  var fruits = ["apple", "pear", "banana"];
	  // 배열의 각 항목을 element라고 한다
	  document.write(fruits[0]);	// apple
	  document.write(fruits[1]);	// pear
	  document.write(fruits[2]);	// banana
	  //배열의 각 항목은 index라고 하는 순서 번호가 있다
	  fruits.push('peach');	// ["apple", "pear", "banana", "peach"]
	  document.write(fruits.length);	// 4
    </script>
15. 반복문
- while()문
while(true){ // 괄호( ) 안의 조건이 true일 때 중괄호{ } 안을 실행
... // 조건이 true면 계속 반복함
}
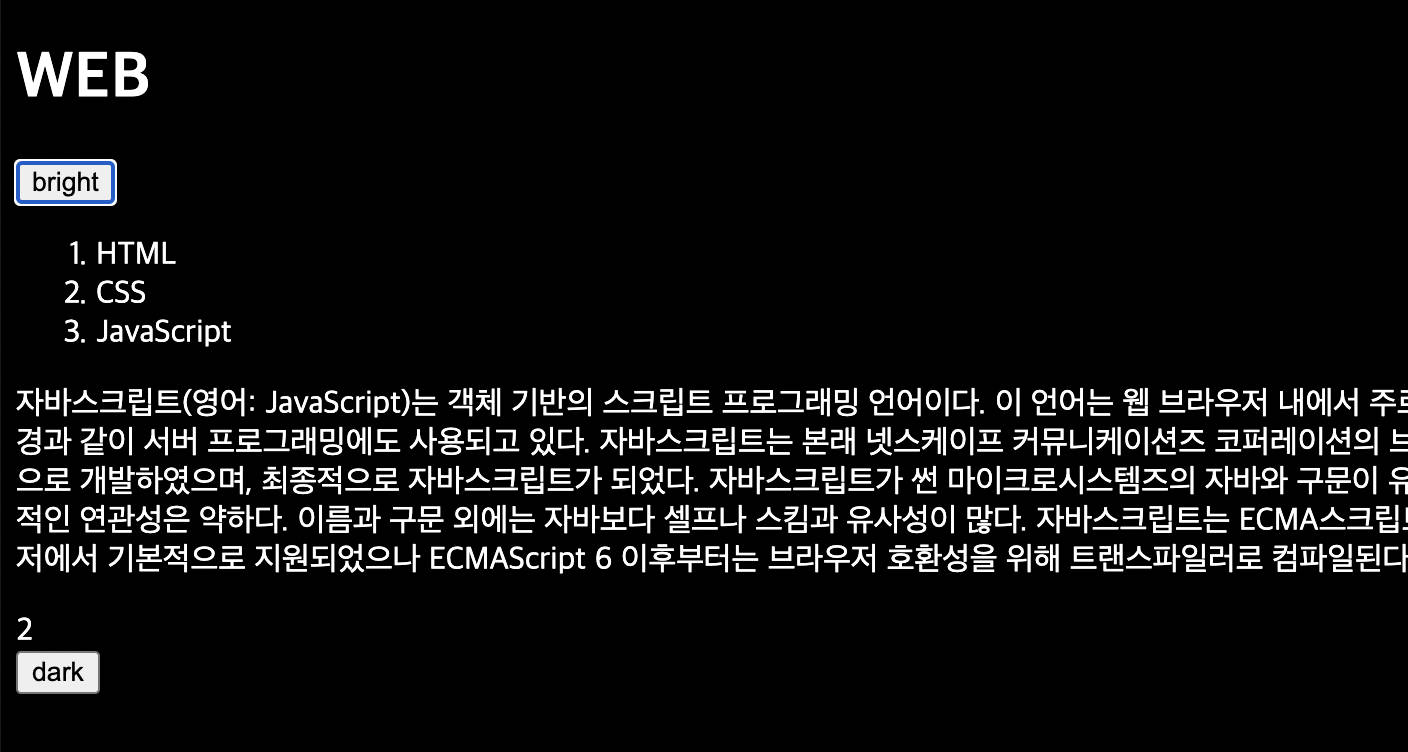
... // 조건이 false면 중괄호{ } 밖을 실행16. 다크모드 설정/해제(3)
dark모드일 때는 텍스트 링크의 색깔을 밝게 하는 코드를 작성해보자
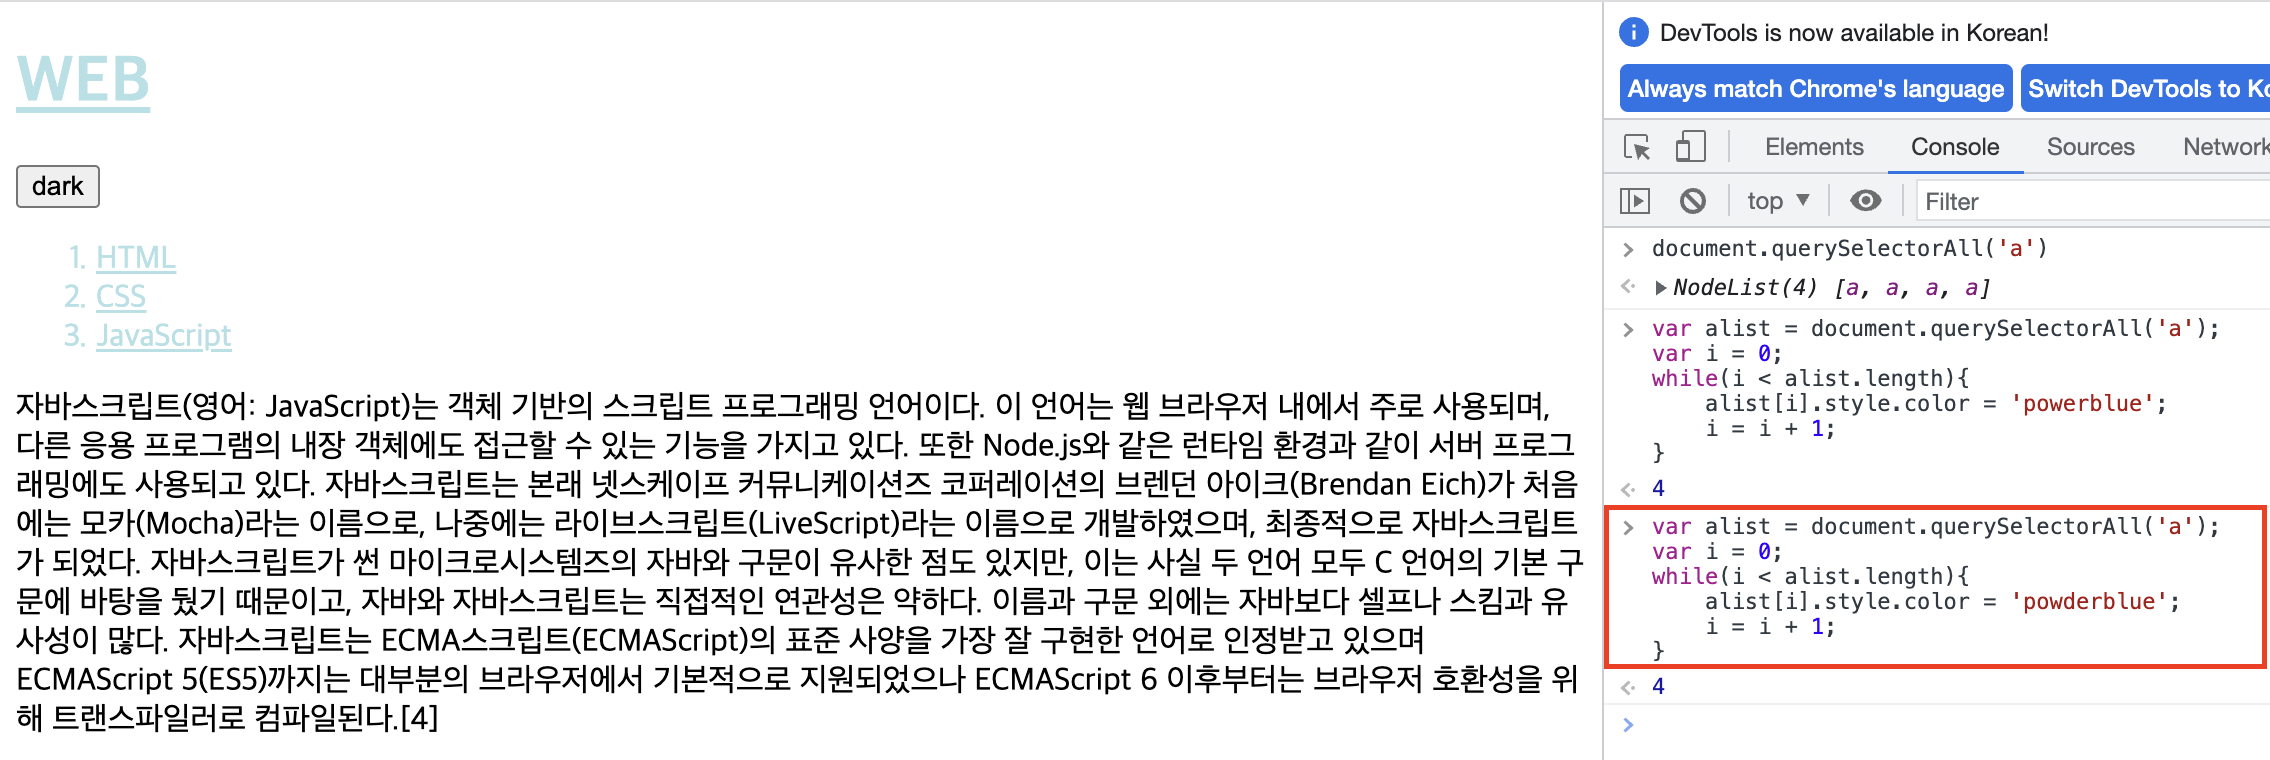
- querySelector()는 괄호 안의 값에 해당하는 1번째를 반환하는 것이므로 모든 'a'태그를 반환하려면 다른 것이 필요하다.
javascript get element by css selector multiple
👉 queryselectorall
	var alist = document.querySelectorAll('a');
	// alist가 노드리스트로 선언되긴 했지만 배열과 비슷하므로
	var i = 0;
	while(i < alist.length){
    	alist[i].style.color = 'powderblue';
    	i = i + 1;
}-
콘솔에서 실행해보고
-
최종적으로 코드에 적용한다
  <body>
	<input type="button" value="dark" onclick="
	  var target = document.querySelector('body');
	  if( this.value === 'dark') {
        target.style.backgroundColor = 'black';
 	    target.style.color = 'white';
        this.value = 'bright';

        var alist = document.querySelectorAll('a');
		var i = 0;
		while(i < alist.length){
    	  alist[i].style.color = 'powderblue';
    	  i = i + 1;
		}
      }else{
        target.style.backgroundColor = 'white';
  	    target.style.color = 'black';
        this.value = 'dark';

        var alist = document.querySelectorAll('a');
		var i = 0;
		while(i < alist.length){
    	  alist[i].style.color = 'blue';
    	  i = i + 1;
		}
      }
    ">
  </body>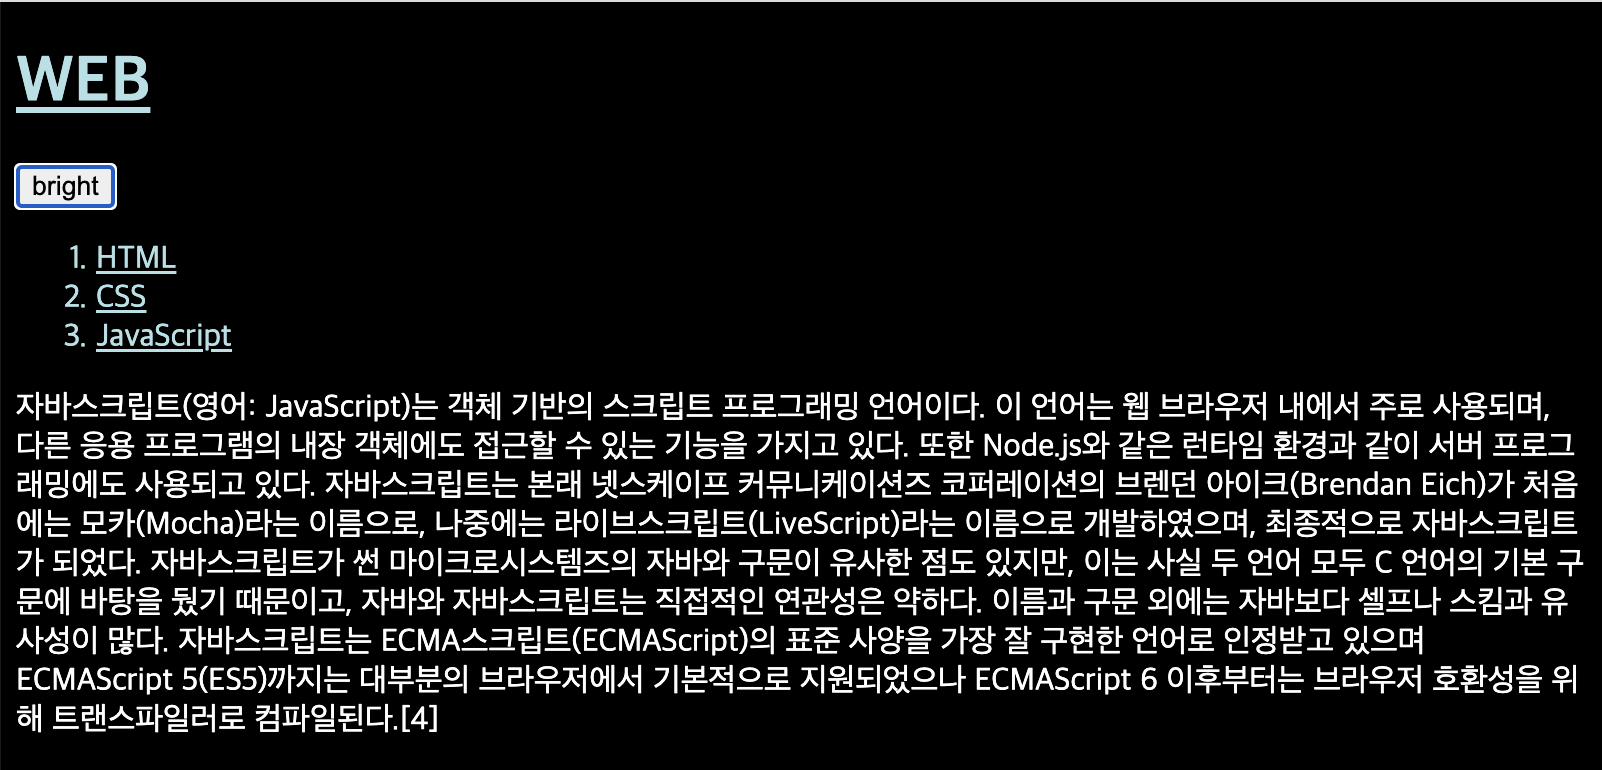
17. 함수
- 함수의 형태
  <script>
	// 함수 선언하기
	function fName(parameter){	// parameter 매개변수
    	return ~;				// : 출력
    }
	// 함수 실행하기
	fName(argument);			// argument 인자: 입력
</script>- 함수의 활용
두 숫자를 입력받아 합을 문서에 출력하는 함수 sum(), 그리고 폰트색:red
- return 없으면
	<script>
      function sumColorRed(l, r){
        document.write('<div style="color:red">'+ (l + r) +'</div>');
      // 괄호() 없으면 write가 '<div>'를 string으로 인식하여 23을 출력
      }
      sumColorRed(2,3)
</script>- return 사용 시:
함수를 다양한 용도로 활용
	<script>
      function sum(l, r){
        return l + r;
      }
      document.write('<div style="color:red">' + sum(2,3) +'</div>');
    </script>
18. 다크모드 설정/해제(4)
- dark모드 버튼의을 함수로 선언해보자
<head>
  <script>
     function darkMode(){
        var target = document.querySelector('body');
        if( this.value === 'dark') {
           target.style.backgroundColor = 'black';
           target.style.color = 'white';
           this.value = 'bright';

           var alist = document.querySelectorAll('a');
           var i = 0;
           while(i < alist.length){
               alist[i].style.color = 'powderblue';
               i = i + 1;
           }
        }else{
           target.style.backgroundColor = 'white';
           target.style.color = 'black';
           this.value = 'dark';

           var alist = document.querySelectorAll('a');
           var i = 0;
           while(i < alist.length){
               alist[i].style.color = 'blue';
               i = i + 1;
           }
        }
     }
  </script>
</head>
<body>
  <input type="button" value="dark" onclick="darkMode()">
</body>
- 3번째 버튼에 적용한 모습
클릭 1번째: 무반응,
클릭 2 ~ n번째: 버튼의 value가 계속 'dark'를 유지함
👉 함수에 별도 선언하면 'this'가 input태그가 아닌전역객체(?)를 가리킴
- 해결: 함수의 argument를
this, parameter를 darkSelf로 줬음
- 버튼의 표현이 간결해짐, 알아보기 쉬움,
- 버튼이 1억개 존재해도 간단히 함수에서 변경하면 모두 동일하게 적용
<head>
  <script>
     function darkMode(darkSelf){
        var target = document.querySelector('body');
        if( darkSelf.value === 'dark') {
           target.style.backgroundColor = 'black';
           target.style.color = 'white';
           darkSelf.value = 'bright';

           var alist = document.querySelectorAll('a');
           var i = 0;
           while(i < alist.length){
               alist[i].style.color = 'powderblue';
               i = i + 1;
           }
        }else{
           target.style.backgroundColor = 'white';
           target.style.color = 'black';
           darkSelf.value = 'dark';

           var alist = document.querySelectorAll('a');
           var i = 0;
           while(i < alist.length){
               alist[i].style.color = 'blue';
               i = i + 1;
           }
        }
     }
  </script>
</head>
<body>
  <input type="button" value="dark" onclick="darkMode(this)">
</body>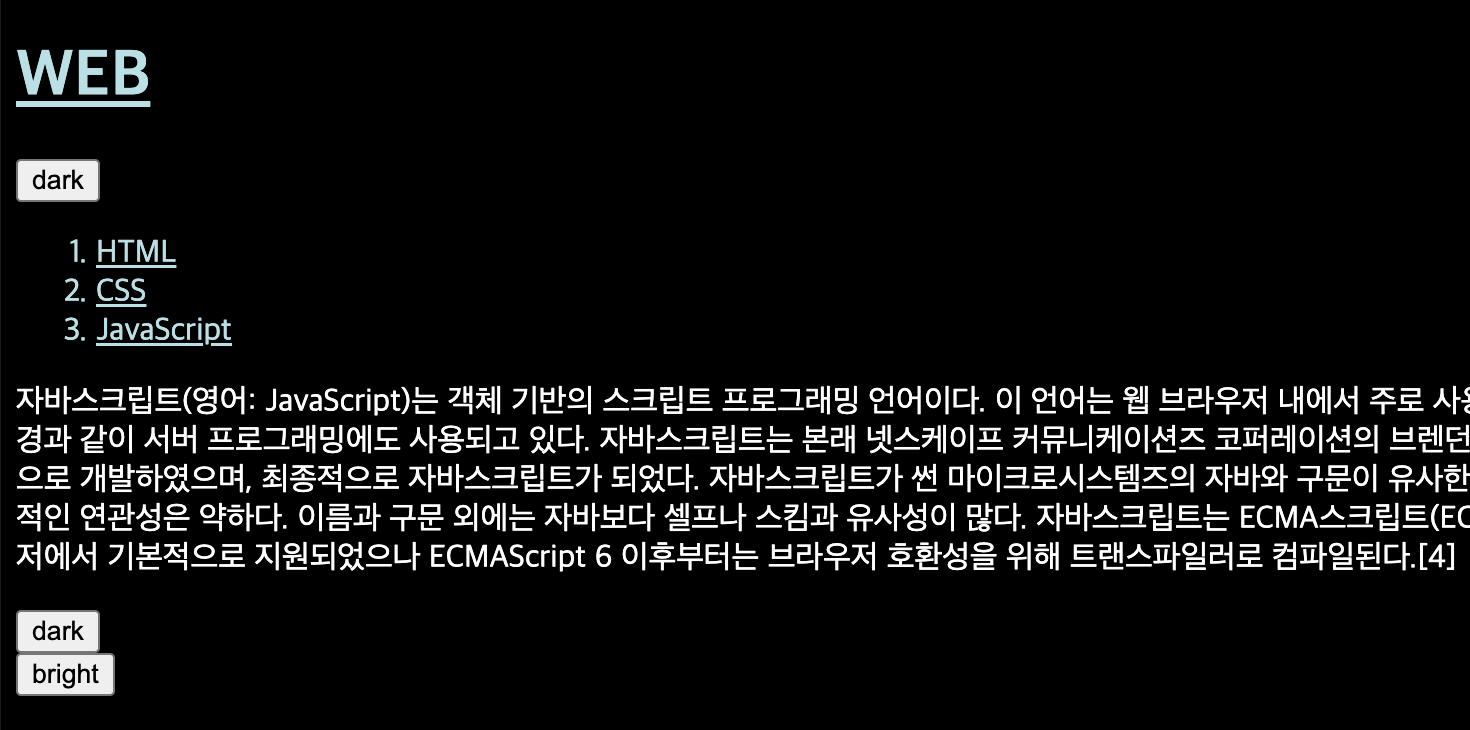
19. 객체
- 함수를 기반으로 존재하는 것; 객체
- 객체에 속한 함수는
메소드라고 부른다 - 배열: 순서에 따라서 많아진 정보를 정리정돈하는 도구
- 배열 선언하기; 대괄호[ ]
var fruits = []; // array literal- 객체 선언하기; 중괄호{ }, 정보 꺼내오기
<script>
  // 선언
  	var fruits = {	//object literal
      "red" : "apple",
      // apple이라는 정보에 red라는 딱지를 붙여 저장
      "yellow" : "banana"
      // banana이라는 정보에 yellow라는 딱지를 붙여 저장
    };
  // 꺼내오기
	document.write("red : " + fruits.red + "<br/>");
	document.write("yellow : " + fruits.yellow + "<br/>");
  // 추가 및 꺼내오기
	fruits.purple = "grape";
	document.write("purple : " + fruits.purple + "<br/>");
  // 띄어쓰기를 포함한 단어 추가 및 꺼내오기
	fruits["striped fruit"] = "water melon";
	document.write("striped fruit : " + fruits["striped fruit"] + "<br/>");
</script>
20. 객체와 반복문
  	var fruits = {
      "red" : "apple",
      "yellow" : "banana",
	  "purple" : "grape",
      "striped fruit" : "water melon"
    };
	for(const key in fruits){
    	document.write(key+' : '+fruits[key]+'<br/>')
    }
  // 변수 fruits가 가리키는 객체에서 key값들을 가져오는 반복문
  // key: 가져오고 싶은 정보value에 도달하는 열쇠
21. 객체 프로퍼티와 메소드
객체의 value에는 문자,숫자,배열,함수 를 담을 수 있다
객체에 소속된 변수: 프로퍼티
객체에 소속된 함수: 메소드
- fruits라는 객체에
  	var fruits = {
      "red" : "apple",
      "yellow" : "banana",
	  "purple" : "grape",
      "striped fruit" : "water melon"
};- showAll 이라는 메소드를 추가하려면
  	var fruits = {
      "red" : "apple",
      "yellow" : "banana",
	  "purple" : "grape",
      "striped fruit" : "water melon"
    };
	fruits.showAll() = function(){

    }
/*	ㄴ 아래와 동일한 표현식이다
	var showAll = function(){
    }
*/- 20.에서 썼던 반복문을 showAll 메소드에 넣고 출력
  	var fruits = {
      "red" : "apple",
      "yellow" : "banana",
	  "purple" : "grape",
      "striped fruit" : "water melon"
    };
  	fruits.showAll = function(){
       for(var key in fruits){
          if(key !== "showAll"){
            // showAll도 fruits에 소속된 데이터이므로 제외하기
             document.write(key+' : '+fruits[key]+'<br/>');
          }
       }
    }
fruits.showAll();- showAll라는 함수 안에서 함수가 소속된 객체 fruit를 가리키는 약속된 기호:
this
  	var fruits = {
      "red" : "apple",
      "yellow" : "banana",
	  "purple" : "grape",
      "striped fruit" : "water melon"
    };
  	fruits.showAll = function(){
       for(var key in this){
          if(key !== "showAll"){
             document.write(key+' : '+this[key]+'<br/>');
          }
       }
    }
    fruits.showAll();
22. 다크모드 설정/해제(5)
- 다음의 중복되는 부분을 함수 LinkSetColor(), BodySetColor(), BodySetBackgroundColor()로 정의한다
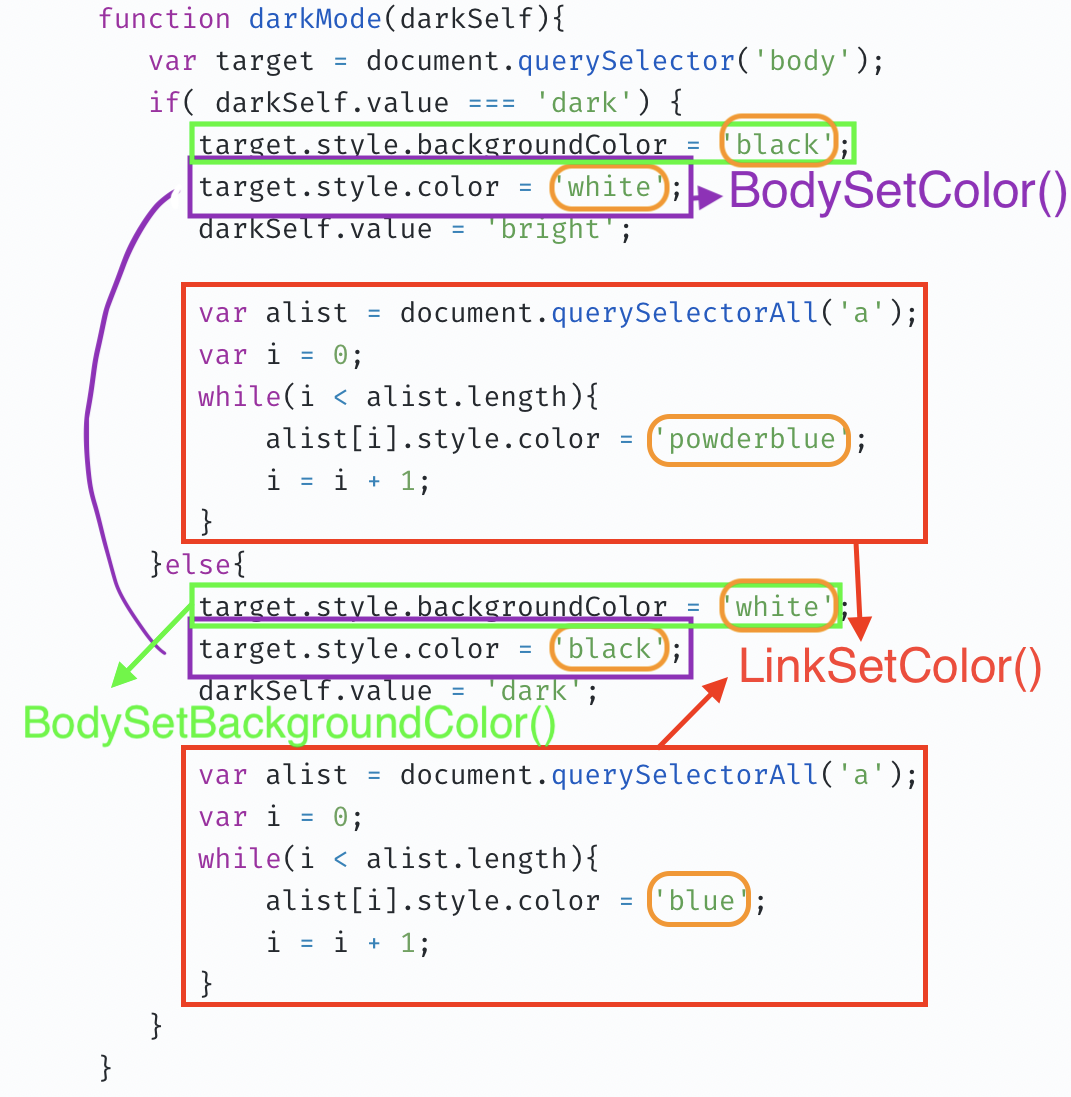
result:
<head>
  <script>
     function LinkSetColor(color){
        var alist = document.querySelectorAll('a');
        var i = 0;
        while(i < alist.length){
           alist[i].style.color = color;
           i = i + 1;
        }
     }
     function BodySetColor(color){
        document.querySelector('body').style.color = color;
     }
     function BodySetBackgroundColor(color){
        document.querySelector('body').style.backgroundColor = color;
     }
     function darkMode(darkSelf){
        //var target = document.querySelector('body');
        //여기서 선언된 target은 다른 함수에서는 적용되지 않음
        if( darkSelf.value === 'dark') {
           BodySetBackgroundColor('black');
           BodySetColor('white');
           darkSelf.value = 'bright';

           LinkSetColor('powderblue');
           }else{
           BodySetBackgroundColor('white');
           BodySetColor('black');
           darkSelf.value = 'dark';

           LinkSetColor('blue');
        }
     }
   </script>
</head>
<body>
  <input type="button" value="dark" onclick="darkMode(this)">
</body>
서로 연관된 함수와 서로 연관된 변수들을 그룹핑해서 정리정돈하기 위한 수납상자
👉 객체
- Body, Link 라는 객체를 만든다
폴더라는 개념으로 이해하면 쉬움!
- LinkSetColor 👉 Link.setColor
- BodySetColor 👉 Body.setColor
- BodySetBackgroundColor 👉 Body.setBackgroundColor
    var Body = {
       				// 1) 객체를 선언하고
    }
var Body = {
setColor: // 2) 프로퍼티를 넣고
} var Body = { // 3) 함수를 넣는다
setColor:function (color){
target.style.color = color;
}, // 4) 여러 개일 땐 콤마(,)로 구분한다
setBackgroundColor:function (color){
target.style.backgroundColor = color;
}
} result:
<head>
  <script>
     var Link = {
        setColor:function(color){
           var alist = document.querySelectorAll('a');
           var i = 0;
           while(i < alist.length){
              alist[i].style.color = color;
              i = i + 1;
           }
        }
     }
     var Body = {
        setColor:function (color){
           document.querySelector('body').style.color = color;
        },
        setBackgroundColor:function (color){
           document.querySelector('body').style.backgroundColor = color;
        }
     }
     function darkMode(darkSelf){
        if( darkSelf.value === 'dark') {
           BodySetBackgroundColor('black');
           BodySetColor('white');
           darkSelf.value = 'bright';

           LinkSetColor('powderblue');
        }else{
           BodySetBackgroundColor('white');
           BodySetColor('black');
           darkSelf.value = 'dark';

           LinkSetColor('blue');
        }
     }
  </script>
</head>
<body>
  <input type="button" value="dark" onclick="darkMode(this)">
</body>
23. 파일로 쪼개서 정리 정돈하기
코드가 많아지면 정리정돈하는 도구가
함수,
함수와 변수가 많아지면 연관된 것들을 그룹핑해서 정리정돈하는 도구가객체
그렇다면객체보다 더 큰 정리정돈 도구는 무엇일까?
- 'colors.js' 파일을 생성
<script></script>내부의 코드를 'colors.js'에 옮기기- 다음과 같이 모든 html파일에 동일하게 적용
<script src="colors.js"></script>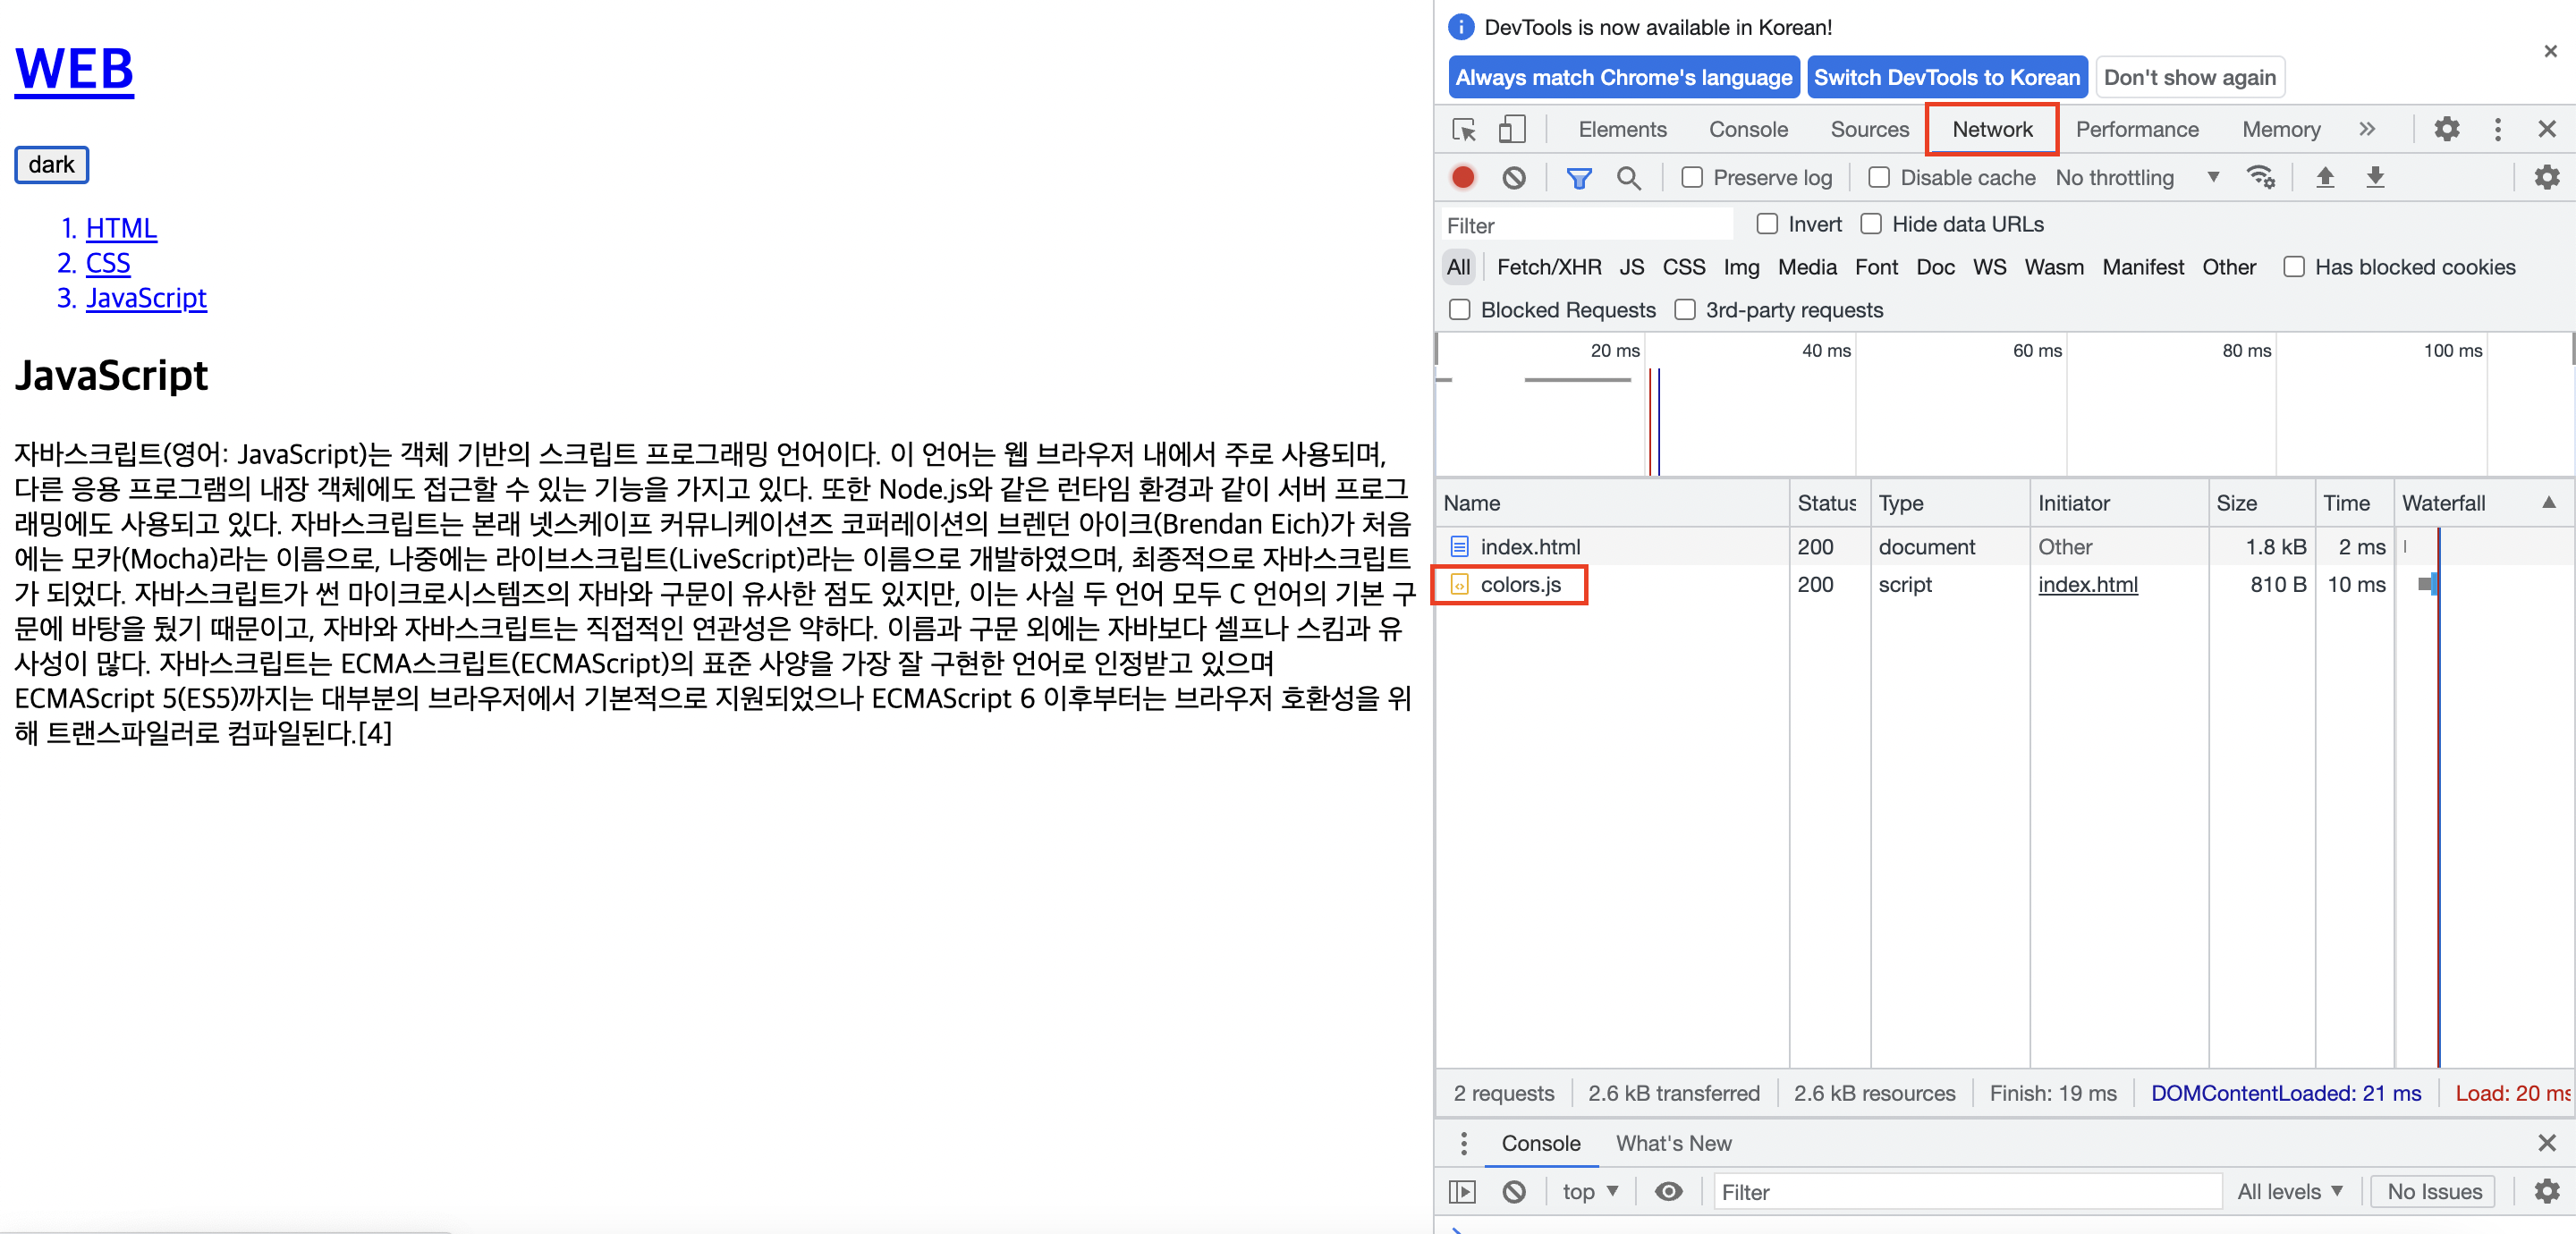
파일을 쪼개는 이유
- Cache 덕분에 한번 다운로드된 .js파일 등은 웹브라우저가 컴퓨터에 저장해두고 다음에 접속할 때 저장된 파일을 읽어서 Network를 통하지 않게 함
- 서버: 비용 절감
사용자: Network traffic 절감, 빠르게 웹페이지를 화면에 표시
24. 라이브러리와 프레임워크
- 다른 사람과 협력하는 모델
- 라이브러리: 만들고자 하는 프로그램에 필요한 부품들이 되는 소프트웨어를 정리정돈하여 재사용이 쉽도록 해놓은 소프트웨어; 부품을 가져오는 것, 땡겨오는 듯
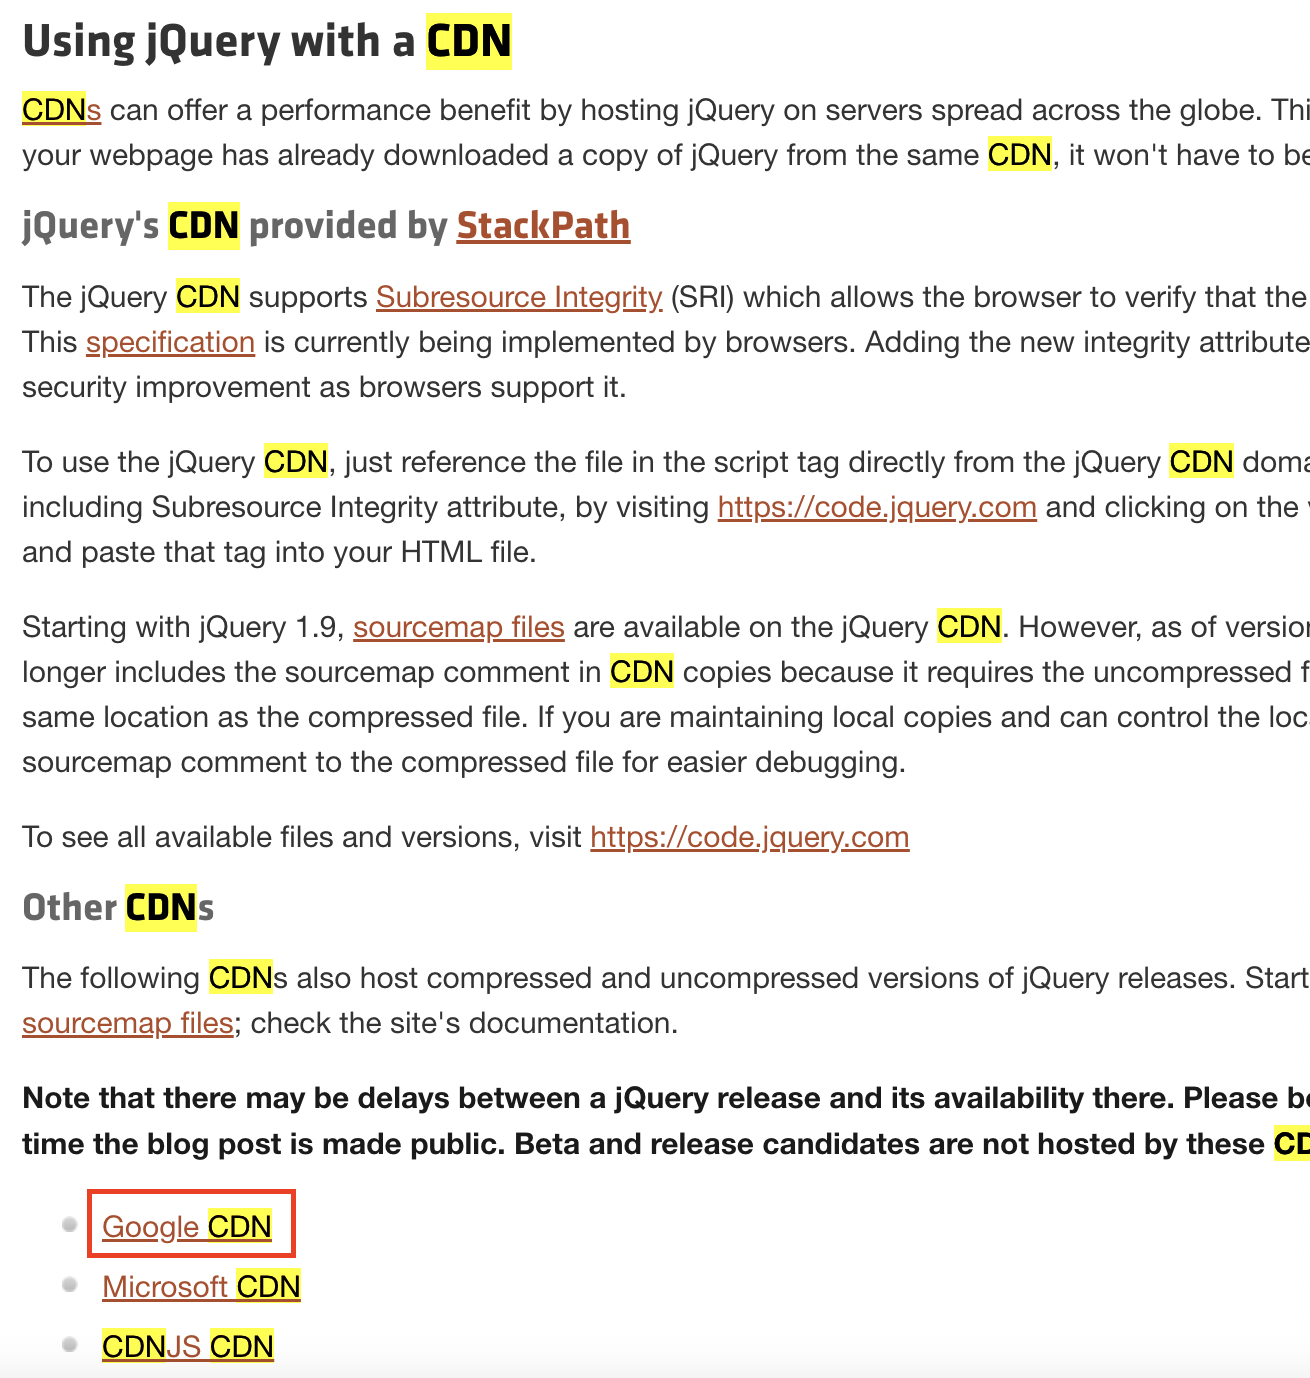
- 라이브러리 예) jQuery
(https://jquery.com/download/) 에서 다운로드 받거나
Ctrl + F: CDN 검색 (Content Delivery Network)
구글CDN 최신버전
colors.js 'jQuery버전'
  var Link = {
    setColor:function(color){
      //var alist = document.querySelectorAll('a');
      //var i = 0;
      //while(i < alist.length){
      //   alist[i].style.color = color;
      //   i = i + 1;
      $('a').css('color', color);
    }
  }

  var Body = {
    setColor:function (color){
      //document.querySelector('body').style.color = color;
      $('body').css('color', color);
    },
    setBackgroundColor:function (color){
      //document.querySelector('body').style.backgroundColor = color;
      $('body').css('backgroundColor', color);
    }
  }
  function darkMode(darkSelf){
    if( darkSelf.value === 'dark') {
      Body.setBackgroundColor('black');
      Body.setColor('white');
      darkSelf.value = 'bright';

      Link.setColor('red');
    }else{
      Body.setBackgroundColor('white');
      Body.setColor('black');
      darkSelf.value = 'dark';

      Link.setColor('blue');
    }
  }
*사용법은 찾아보고 배워야 함
- 프레임워크: 만들고자 하는 프로그램의 기획 의도에 따라 기능을 살짝씩 바꾸면되는 공통적인 부분, 처음부터 끝까지 만들지 않도록 해주는 반제품 같은 것, 들어가서 작업하는 듯


25. UI vs API
- UI : 사용자가 시스템을 제어하기 위해서 사용하는 조작장치,
User Interface- API : 애플리케이션을 만들기 위해 프로그래밍을 할 때 사용하는 조작 장치,
Application Programming Interface
예) 웹브라우저 경고창: 웹브라우저를 만든 사람들이 경고창의 모양 등을 미리 만들어 두었다가 우리가 javascript 문법에 'alert()'함수를 실행하면 경고창을 띄워주겠다고 사용설명서를 통해서 약속해둔 것.
프로젝트를 시작 전에..
- 최소한의 도구만 가지고 하기: 순서대로 프로그래밍
- 그걸로 도저히 구현할 수 없을 때: 조건문, 반복문, 함수, 객체 도입하기
- 그리고 또 한계에 부딪혔을 때: 잠시 멈추고 공부하기
- document 객체의 메소드를 조사
그걸로 어렵다면 DOM(Document Object Model) 객체를 조사 - 윈도우 자체를 제어: window 객체의 프로퍼티, 메소드를 조사
ex) 열려있는 웹페이지의 주소는? 새창 열기? 화면크기를 js를 통해 알려면? - 웹페이지를 리로드하지 않고 정보 변경: ajax (현대적 웹앱 필수 테크닉)
- 웹페이지가 리로드되어도 현재 상태를 유지하려면: cookie
사용자를 위한 개인화된 서비스 제공 - 인터넷이 끊겨도 동작하는 웹페이지 제작: offline web application
- 화상통신 웹앱: webRTC
- 사용자의 음성인식, 음성으로 정보전달: speech로 시작하는 API
- 3차원 그래픽으로 게임 등 제작: webGL
- 가상현실: webVR
- ...
출처
생활코딩, WEB2-Javascript: https://www.youtube.com/playlist?list=PLuHgQVnccGMBB348PWRN0fREzYcYgFybf