
Docker 기반 3-Tier 구성 과정
1. Docker \& Proxy, Maria DB, Redis Server 구축
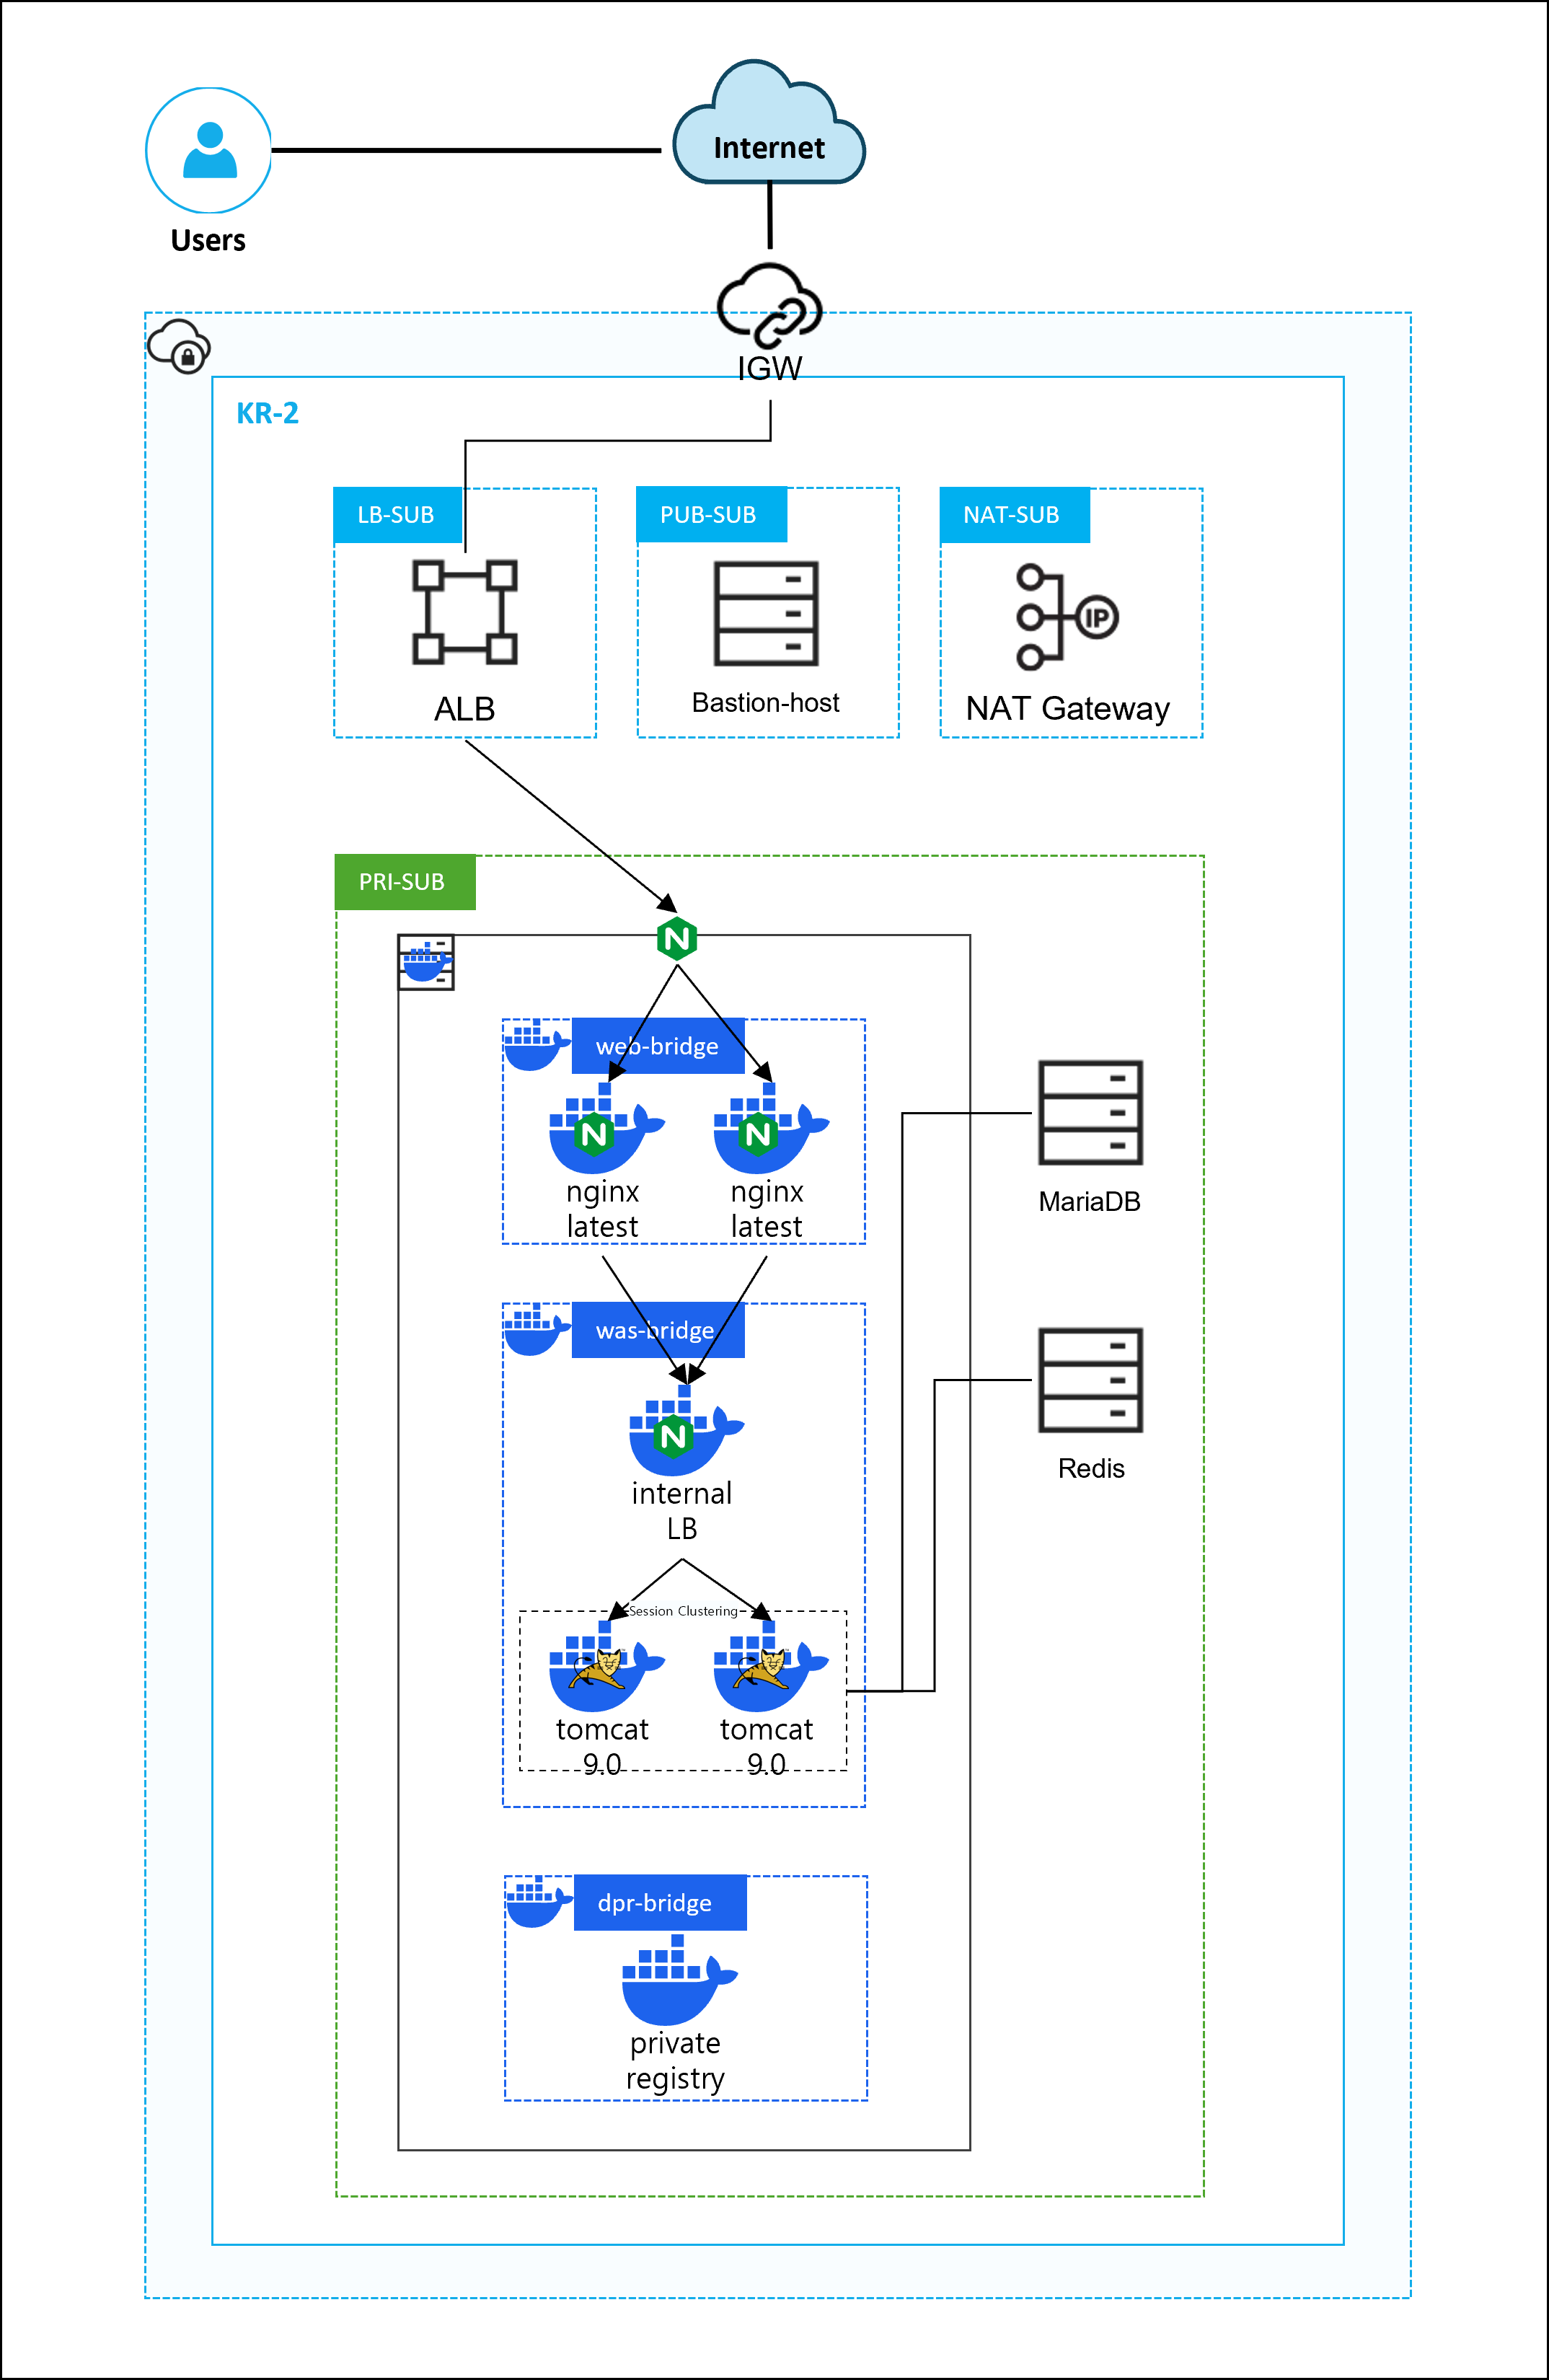
전체 아키텍처 구상
yum remove -y docker \
                    docker-client \
                    docker-client-latest \
                    docker-common \
                    docker-latest \
                    docker-latest-logrotate \
                    docker-logrotate \
                    docker-engine

yum install -y yum-utils
yum-config-manager --add-repo https://download.docker.com/linux/centos/docker-ce.repo

yum install -y docker-ce \
	      docker-ce-cli \
	      containerd.io \
	      docker-buildx-plugin \
	      docker-compose-plugin
systemctl enable --now docker

yum install -y nginx && systemctl enable --now nginx
# docker -> 컨테이너 서비스를 위해서
# nginx -> ncp alb 서비스와 연결할 프록시 설정을 위해서


yum install mariadb mariadb-server && systemctl enable --now mariadb
# 이후 WAS 컨테이너와의 연동을 위한 user, database를 만들어주자
# mysql -u root -p
MariaDB [(none)]>
grant all privileges on *.* to 'test'@'%' identified by '0000';
flush privileges;
create database test;yum install -y redis && systemctl enable --now redis
2. Docker Network Create \& Image Pull
[Docker Server]
*dpr -> docker private registry의 줄임말로 사용
docker network create \
        --driver bridge \
        --subnet 172.18.0.0/16 \
        --gateway 172.18.0.1 \
        web-bridge
docker network create \
        --driver bridge \
        --subnet 172.19.0.0/16 \
        --gateway 172.19.0.1 \
        was-bridge
docker network create \
        --driver bridge \
        --subnet 172.20.0.0/16 \
        --gateway 172.20.0.1 \
        dpr-bridge

docker network ls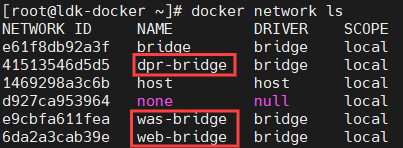
docker pull nginx
docker pull tomcat:9.0
docker pull registry

docker images
3. Container Run
docker run --name web -d -p 81:80 --restart always --network web-bridge --network was-bridge nginx
docker run --name was -d -p 8081:8080 --restart always --network was-bridge tomcat:9.0
docker run --name in-lb -d -p 8080:80 --restart always --network was-bridge nginx
docker run --name registry -d -p 5000:5000 --restart always --network dpr-bridge registry

docker ps
* 참고용
web -> 172.18.0.2
was -> 172.19.0.3
lb -> 172.19.0.3
registry -> 172.20.0.2
4. Container Custom Setting
1) tomcat clustering \& DB connect
[Docker Server]
# docker exec -it was /bin/bash
root@<Container_ID>:/usr/local/tomcat#
cp -r ./webapps.dist/* ./webapps
exit
[root@ldk-docker \~]#
wget https://github.com/ran-jit/tomcat-cluster-redis-session-manager/releases/download/2.0.4/tomcat-cluster-redis-session-manager.zip
unzip tomcat-cluster-redis-session-manager.zip
docker cp ./tomcat-cluster-redis-session-manager/lib/. /usr/local/tomcat/lib/
# vim ./tomcat-cluster-redis-session-manager/conf/redis-data-cache.properties
redis.hosts=10.10.100.8:6379 ## redis endpoint 추가[root@ldk-docker \~]#
docker cp ./tomcat-cluster-redis-session-manager/conf/. /usr/local/tomcat/conf/# vim context.xml
<?xml version="1.0" encoding="UTF-8"?>

<Context>
    <WatchedResource>WEB-INF/web.xml</WatchedResource>
    <WatchedResource>WEB-INF/tomcat-web.xml</WatchedResource>
    <WatchedResource>${catalina.base}/conf/web.xml</WatchedResource>
    <!-- 아래 내용 추가 -->
    <Valve className="tomcat.request.session.redis.SessionHandlerValve" />
    <Manager className="tomcat.request.session.redis.SessionManager" />
</Context>
[root@ldk-docker \~]#
docker cp context.xml was:/usr/local/tomcat/conf/context.xml# vim sessionCheck.jsp
<%@ page language="java" contentType="text/html; charset=UTF-8"
        pageEncoding="UTF-8"%>
<%@ page import="java.text.*"%>
<%@ page import="java.util.*"%>
<%
        String RsessionId = request.getRequestedSessionId();
        String sessionId = session.getId();
        boolean isNew = session.isNew();
        long creationTime = session.getCreationTime();
        long lastAccessedTime = session.getLastAccessedTime();
        int maxInactiveInterval = session.getMaxInactiveInterval();
        Enumeration e = session.getAttributeNames();
%>
<html>
<head>
<meta http-equiv="Content-Type" content="text/html; charset=EUC-KR">
<title>Session Test</title>
</head>
<body>
<h1>WAS</h1>
<table border=1 bordercolor="gray" cellspacing=1 cellpadding=0
        width="100%">
        <tr bgcolor="gray">
                <td colspan=2 align="center"><font color="white"><b>Session
                Info</b></font></td>
        </tr>
        <tr>
                <td>Server HostName</td>
                <td><%=java.net.InetAddress.getLocalHost().getHostName()%></td>
        </tr>
        <tr>
                <td>Server IP</td>
                <td><%=java.net.InetAddress.getLocalHost()
                                                                        .getHostAddress()%></td>
        </tr>
        <tr>
                <td>Request SessionID</td>
                <td><%=RsessionId%></td>
        </tr>
        <tr>
                <td>SessionID</td>
                <td><%=sessionId%></td>
        </tr>
        <tr>
                <td>isNew</td>
                <td><%=isNew%></td>
        </tr>
        <tr>
                <td>Creation Time</td>
                <td><%=new Date(creationTime)%></td>
        </tr>
        <tr>
                <td>Last Accessed Time</td>
                <td><%=new Date(lastAccessedTime)%></td>
        </tr>
        <tr>
                <td>Max Inactive Interval (second)</td>
                <td><%=maxInactiveInterval%></td>
        </tr>
     <tr bgcolor="cyan">
                <td colspan=2 align="center"><b>Session Value List</b></td>
        </tr>
        <tr>
                <td align="center">NAME</td>
                <td align="center">VAULE</td>
        </tr>
        <%
                String name = null;
                while (e.hasMoreElements()) {
                        name = (String) e.nextElement();
        %>
        <tr>
                <td align="left"><%=name%></td>
                <td align="left"><%=session.getAttribute(name)%></td>
        </tr>
        <%
                }
        %>

</table>

        <%
                int count = 0;

                if(session.getAttribute("count") != null)
                        count = (Integer) session.getAttribute("count");

                count += 1;

                session.setAttribute("count", count);

                out.println(session.getId() + "     :     " + count);
        %>
</body>
</html>
[root@ldk-docker ~]#
docker cp sessionCheck.jsp was:/usr/local/tomcat/webapps/ROOT/sessionCheck.jsp
docker restart was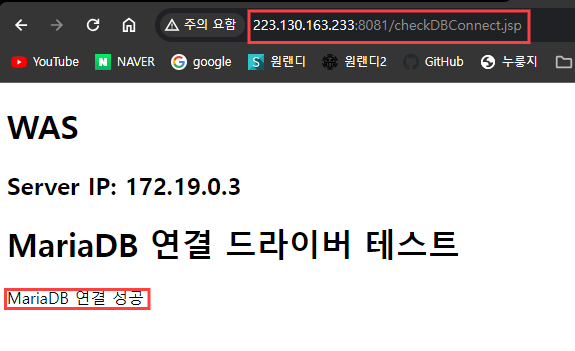
wget https://dlm.mariadb.com/3752064/Connectors/java/connector-java-2.7.12/mariadb-java-client-2.7.12.jar
docker cp mariadb-java-client-2.7.12.jar was:/usr/local/tomcat/lib/
# vim checkDBConnection.jsp
<%@page import="java.sql.DriverManager"%>
<%@page import="java.sql.Connection"%>
<%@ page import="java.text.*"%>
<%@ page import="java.util.*"%>
<%@ page language="java" contentType="text/html; charset=UTF-8" pageEncoding="UTF-8"%>
<!DOCTYPE html>
<html>
<head>
<meta charset="UTF-8">
<title>MariaDB 연결 드라이버 테스트</title>
</head>
<body>
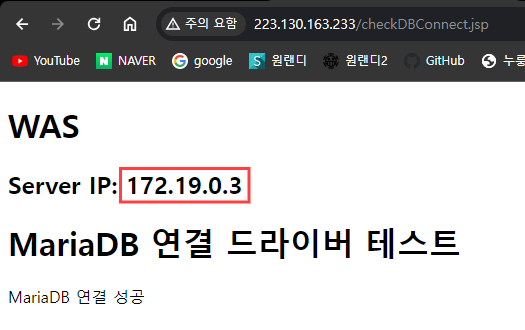
<h1>WAS</h1>
<h2>Server IP: <%=java.net.InetAddress.getLocalHost().getHostAddress()%></h2>
<h1>MariaDB 연결 드라이버 테스트</h1>
<%
String jdbcUrl = "jdbc:mariadb://10.10.100.7:3306/test";
String dbId = "test";
String dbPwd = "0000";
try
{
Class.forName("org.mariadb.jdbc.Driver");
Connection connection = DriverManager.getConnection(jdbcUrl, dbId, dbPwd);
out.println("MariaDB 연결 성공");
}
catch (Exception ex)
{
out.println("연결 오류입니다. 오류 메시지 : " + ex.getMessage());
}
%>
</body>
</html>[root@ldk-docker \~]#
docker cp checkDBConnection.jsp was:/usr/local/tomcat/webapps/ROOT/
docker restart was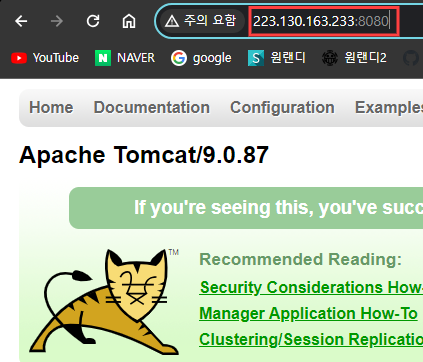
2) Internal-LB Connect
# vim nginx.conf
user  nginx;
worker_processes  auto;

error_log  /var/log/nginx/error.log notice;
pid        /var/run/nginx.pid;


events {
    worker_connections  1024;
}


http {
    include       /etc/nginx/mime.types;
    default_type  application/octet-stream;

    log_format  main  '$remote_addr - $remote_user [$time_local] "$request" '
                      '$status $body_bytes_sent "$http_referer" '
                      '"$http_user_agent" "$http_x_forwarded_for"';

    access_log  /var/log/nginx/access.log  main;

    sendfile        on;
    #tcp_nopush     on;

    keepalive_timeout  65;

    #gzip  on;

    #include /etc/nginx/conf.d/*.conf;
    upstream tomcat {
        server 172.19.0.3:8080;
    }
    server {
        listen 80;
        server_name localhost;
        location / {
            root   /usr/share/nginx/html;
            index  index.html index.htm;
            proxy_pass http://tomcat;
        }
    }
}
[root@ldk-docker ~]#
docker cp nginx.conf in-lb:/etc/nginx/nginx.conf
docker restart in-lb
# internal-lb 포트로 접속 시 tomcat 페이지가 나오는 것을 확인할 수 있다.

3) Web Connect
# vim nginx.conf
user  nginx;
worker_processes  auto;

error_log  /var/log/nginx/error.log notice;
pid        /var/run/nginx.pid;


events {
    worker_connections  1024;
}


http {
    include       /etc/nginx/mime.types;
    default_type  application/octet-stream;

    log_format  main  '$remote_addr - $remote_user [$time_local] "$request" '
                      '$status $body_bytes_sent "$http_referer" '
                      '"$http_user_agent" "$http_x_forwarded_for"';

    access_log  /var/log/nginx/access.log  main;

    sendfile        on;
    #tcp_nopush     on;

    keepalive_timeout  65;

    #gzip  on;

    #include /etc/nginx/conf.d/*.conf;
    upstream inLB {
        server 172.19.0.4:80;
    }
    server {
        listen 80;
        server_name localhost;
        location / {
            root   /usr/share/nginx/html;
            index  index.html index.htm;
            proxy_pass http://inLB;
        }
    }
}
[root@ldk-docker ~]#
docker cp nginx.conf web:/etc/nginx/nginx.conf
docker restart web
#WEB 포트로 접속시 tomcat page가 나오는 것을 확인할 수 있다
4) Server Proxy Connect
# vim /etc/nginx/nginx.conf
user  nginx;
worker_processes  auto;

error_log  /var/log/nginx/error.log notice;
pid        /var/run/nginx.pid;


events {
    worker_connections  1024;
}


http {
    include       /etc/nginx/mime.types;
    default_type  application/octet-stream;

    log_format  main  '$remote_addr - $remote_user [$time_local] "$request" '
                      '$status $body_bytes_sent "$http_referer" '
                      '"$http_user_agent" "$http_x_forwarded_for"';

    access_log  /var/log/nginx/access.log  main;

    sendfile        on;
    #tcp_nopush     on;

    keepalive_timeout  65;

    #gzip  on;

    #include /etc/nginx/conf.d/*.conf;
    upstream web {
        server 172.18.0.2:80;
    }
    server {
        listen 80;
        server_name localhost;
        location / {
            root   /usr/share/nginx/html;
            index  index.html index.htm;
            proxy_pass http://web;
        }
    }
}
[root@ldk-docker ~]#
systemctl restart nginx# default port로 접속시 tomcat page가 나오는 것을 확인 할 수 있다

5. Docker Image Push (Docker Private Registry)
[root@ldk-docker ~]#
docker commit web localhost:5000/custom-web:1.0
docker commit was localhost:5000/custom-was:1.0
docker commit in-lb localhost:5000/custom-lb:1.0

docker push localhost:5000/custom-web:1.0
docker push localhost:5000/custom-was:1.0
docker push localhost:5000/custom-lb:1.0

docker rmi localhost:5000/custom-web:1.0
docker rmi localhost:5000/custom-was:1.0
docker rmi localhost:5000/custom-lb:1.0

docker run --name web2 -d -p 82:80 --restart always --network web-bridge --network was-bridge localhost:5000/custom-web:1.0
docker run --name was2 -d -p 8082:8080 --restart always --network was-bridge localhost:5000/custom-was:1.0
# 이후 nginx.conf 마다 nginx server -> web2\_IP:80, internal LB -> was2\_IP:8080 포트를 upstream 블럭 내에 추가 ( 형식은 web과 was IP 적는 방식과 동일, [4. Container Custom Setting 참고]) # conf 파일이 수정된 서버와 컨테이너 restart

6. Docker-Compose
# Docker compose를 통해 컨테이너를 통합 생성 및 제거가 가능하다
# 이미지 생성 이후 web과 internal LB의 nginx.conf의 수정사항이 있었으므로 이미지 업데이트를 해준다
[root@ldk-docker ~]#
docker commit web2 localhost:5000/custom-web:1.1
docker commit in-lb localhost:5000/custom-lb:1.1

docker push localhost:5000/custom-web:1.1
docker push localhost:5000/custom-lb:1.1

docker rmi localhost:5000/custom-web:1.1
docker rmi localhost:5000/custom-lb:1.1
# vim docker-compose.yml
services:
  web01:
    image: localhost:5000/custom-web:1.1
    restart: always
    networks:
      - web-bridge
      - was-bridge
    container_name: web01
    expose:
      - 80
    depends_on:
      - internal-LB
  web02:
    image: localhost:5000/custom-web:1.1
    restart: always
    networks:
      - web-bridge
      - was-bridge
    container_name: web02
    expose:
      - 80
    depends_on:
      - web01
  internal-LB:
    image: localhost:5000/custom-lb:1.1
    restart: always
    networks:
      - was-bridge
    container_name: in-lb
    expose:
      - 80
    depends_on:
      - was02
  was01:
    image: localhost:5000/custom-was:1.0
    restart: always
    networks:
      - was-bridge
    container_name: was01
    expose:
      - 8080
  was02:
    image: localhost:5000/custom-was:1.0
    restart: always
    networks:
      - was-bridge
    container_name: was02
    expose:
      - 8080
    depends_on:
      - was01
networks:
  web-bridge:
    external: true
  was-bridge:
    external: true
  dpr-bridge:
    external: true
[root@ldk-docker \~]#
docker compose up -d
docker ps
# ( IMAGE 태그는 실습과정에서 생긴 차이이므로 무시하자 )
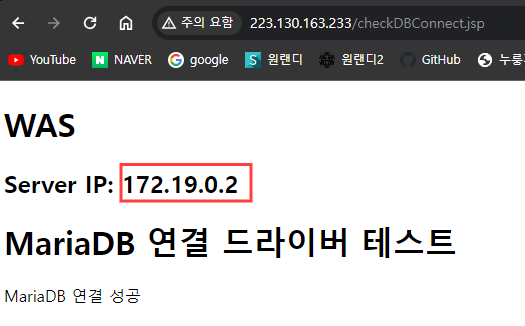
# Load Balancer 테스트


[root@ldk-docker ~]#
docker compose down
docker ps -a
# 컨테이너가 사라진 것을 확인 할 수 있다
