야곰님의 boostcourse 강의를 듣기로 결정하고 오늘 처음 들었다.
그런데, 코드를 하나하나 설명해주시는게 아니라, 그냥 코드만 던져주고 붙여넣기로 해보라는 방식이라서 당황스러웠다.
어쩔 수 없이 코드를 하나하나 보며 모르는 부분을 정리해서 velog에 기록해두려고 한다.
단축키
- 빠르게 열기:
cmd+shift+o

- 단어별 자동완성:
tab - 자동완성:
return - 실행:
cmd+r - 어시스턴트 뷰:
cmd+opt+ctrl+return
// MARK: - 와 // MARK:
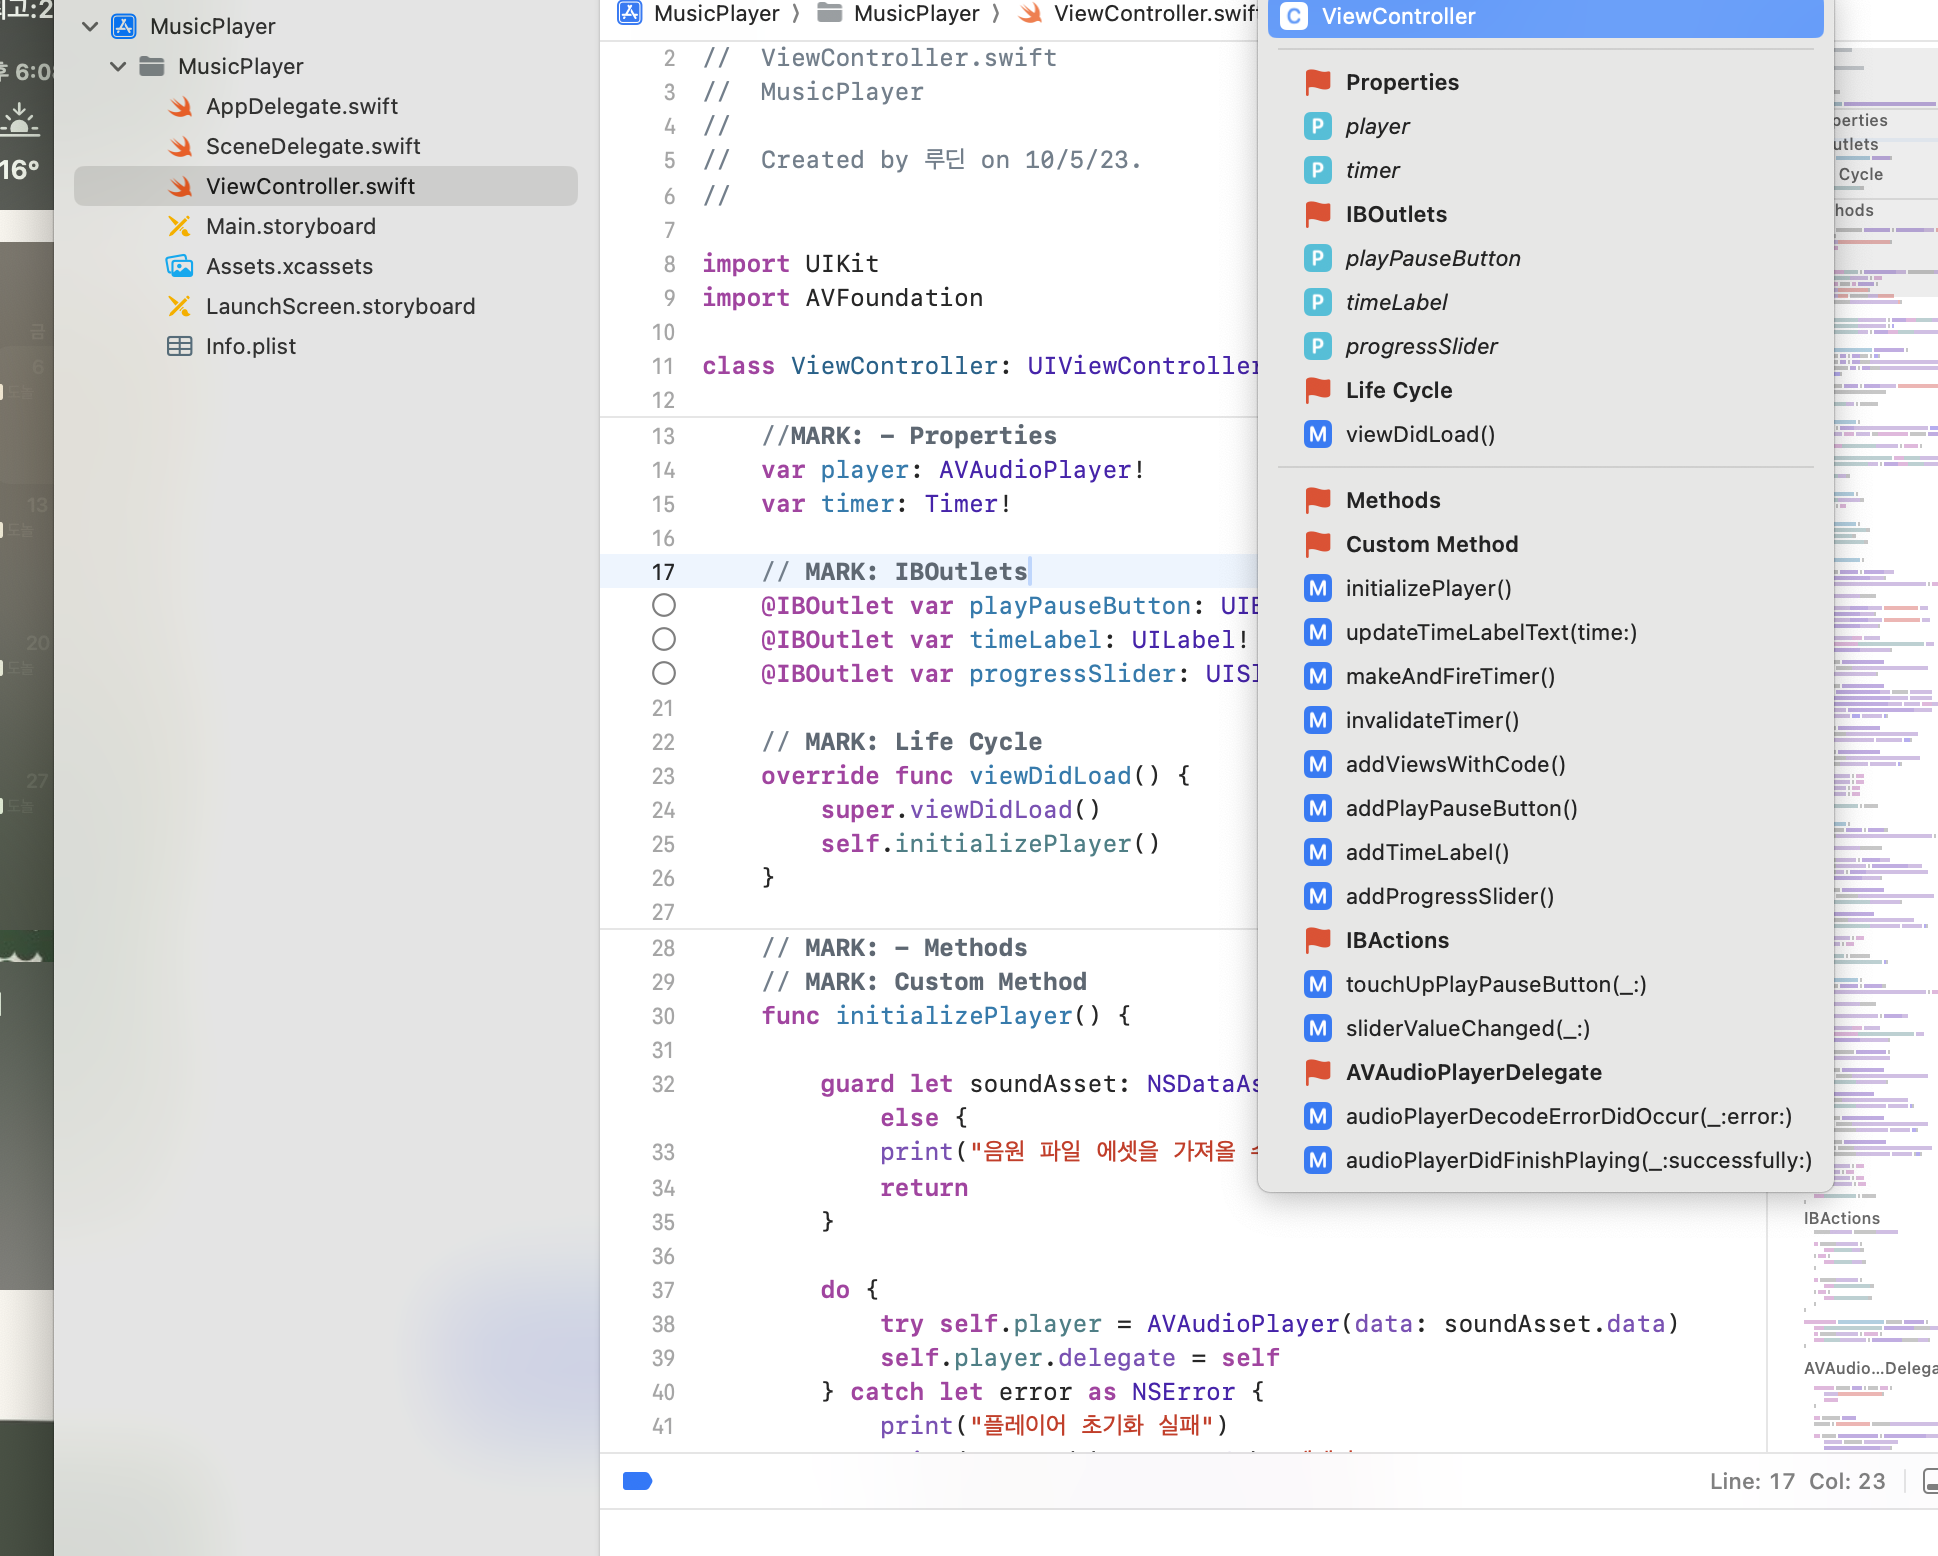
- 주석을 달아두면 위와 같이 뜬다.
//MARK: -를 하면 저렇게 깃발표시와 함께 구분이 된다.
IBOutlet
- storyboard에서 연결할 수 있게 보여진다.
- 변수다
IBAction
- storyboard에서 연결할 수 있게 보여진다.
- 함수다
AVFoundation
- 오디오와 관련된 라이브러리
viewDidLoad
- This method is called after the view controller has loaded its view hierarchy into memory.
코드 리뷰 (모르는것만)
initializePlayer()
func initializePlayer() {

        guard let soundAsset: NSDataAsset = NSDataAsset(name: "sound") else {
            print("음원 파일 에셋을 가져올 수 없습니다")
            return
        }

        do {
            try self.player = AVAudioPlayer(data: soundAsset.data)
            self.player.delegate = self
        } catch let error as NSError {
            print("플레이어 초기화 실패")
            print("코드 : \(error.code), 메세지 : \(error.localizedDescription)")
        }

        self.progressSlider.maximumValue = Float(self.player.duration)
        self.progressSlider.minimumValue = 0
        self.progressSlider.value = Float(self.player.currentTime)
}NSDataAsset: An object from a data set type stored in an asset catalog.
- 여기서의
self는viewController이다.
updateTimeLabel(time: TimeInterval)
    func updateTimeLabelText(time: TimeInterval) {
        let minute: Int = Int(time / 60)
        let second: Int = Int(time.truncatingRemainder(dividingBy: 60))
        let milisecond: Int = Int(time.truncatingRemainder(dividingBy: 1) * 100)

        let timeText: String = String(format: "%02ld:%02ld:%02ld", minute, second, milisecond)

        self.timeLabel.text = timeText
}TimeInterval: typealias TimeInterval = Double
- A TimeInterval value is always specified in seconds; it yields sub-millisecond precision over a range of 10,000 years.
- 초 단위의
Double형 객체
truncatingRemainder(dividingBy:))
- Returns the remainder of this value divided by the given value using truncating division.
Double이나Float형에서 나머지를 구할 때 사용
makeAndFireTimer()
func makeAndFireTimer() {
        self.timer = Timer.scheduledTimer(withTimeInterval: 0.01, repeats: true, block: { [unowned self] (timer: Timer) in

            if self.progressSlider.isTracking { return }

            self.updateTimeLabelText(time: self.player.currentTime)
            self.progressSlider.value = Float(self.player.currentTime)
        })
        self.timer.fire()
    }
class func scheduledTimer(
withTimeInterval interval: TimeInterval,
repeats: Bool,
block: @escaping @Sendable (Timer) -> Void
) -> Timer- Creates a timer and schedules it on the current run loop in the default mode.

[unowned self]: 캡쳐 리스트. 다른 걸로는 [weak self] 가 있다고 한다.
- 캡쳐리스트는 클로저 안에서 한개 이상의 참조 타입(reference type)을 어떤 참조(strong, weak, unowned)로 캡쳐 할지를 정의하는 리스트입니다. 이는 두 개(사용할 참조타입과 클로저)의 인스턴스가 강한 순환 참조가 생기는 것을 방지하기 위해 사용합니다.
강한 순환 참조: 두 클래스가 서로를 참조하고 있을 때 강한 순환 참조라고 한다.
progressSlider.isTracking: 사용자가 progressSlider을 만지고 있는지 Bool로 리턴
timer.fire(): You can use this method to fire a repeating timer without interrupting its regular firing schedule. If the timer is non-repeating, it is automatically invalidated after firing, even if its scheduled fire date has not arrived.
- 그냥 타이머 끝. 이란 소리
addPlayPauseButton()
func addPlayPauseButton() {

        let button: UIButton = UIButton(type: UIButton.ButtonType.custom)
        button.translatesAutoresizingMaskIntoConstraints = false

        self.view.addSubview(button)

        button.setImage(UIImage(named: "button_play"), for: UIControl.State.normal)
        button.setImage(UIImage(named: "button_pause"), for: UIControl.State.selected)

        button.addTarget(self, action: #selector(self.touchUpPlayPauseButton(_:)), for: UIControl.Event.touchUpInside)

        let centerX: NSLayoutConstraint
        centerX = button.centerXAnchor.constraint(equalTo: self.view.centerXAnchor)

        let centerY: NSLayoutConstraint
        centerY = NSLayoutConstraint(item: button, attribute: NSLayoutConstraint.Attribute.centerY, relatedBy: NSLayoutConstraint.Relation.equal, toItem: self.view, attribute: NSLayoutConstraint.Attribute.centerY, multiplier: 0.8, constant: 0)

        let width: NSLayoutConstraint
        width = button.widthAnchor.constraint(equalTo: self.view.widthAnchor, multiplier: 0.5)

        let ratio: NSLayoutConstraint
        ratio = button.heightAnchor.constraint(equalTo: button.widthAnchor, multiplier: 1)

        centerX.isActive = true
        centerY.isActive = true
        width.isActive = true
        ratio.isActive = true

        self.playPauseButton = button
}button.translatesAutoresizingMaskIntoConstraints: A Boolean value that determines whether the view’s autoresizing mask is translated into Auto Layout constraints.
참고
addSubview: 뷰에 새로 보여지도록 추가. 새로운 하위 뷰를 넣는다.
button.addTarget(self, action: #selector(self.touchUpPlayPauseButton(_:)), for: UIControl.Event.touchUpInside)
- addTarget은 event 중 UIControl Actions
action / target pattern을 사용 - 사용자가 control에서 지정한 이벤트를 수행하면 이와 관련된 작업이 등록된 target으로 보낸다
- 여기서 타겟은 self 이고 #selector()에서 지정한 함수가 호출 됩니다.
#selector(): 참고
NSLayoutConstraint는 아예 글을 따로 정리해야겠다. -,.-