// 기본내용은 java 스프링부트 ( spring boot ) / 목록 ( 1 ) 와 동일합니다.
프로젝트 설정
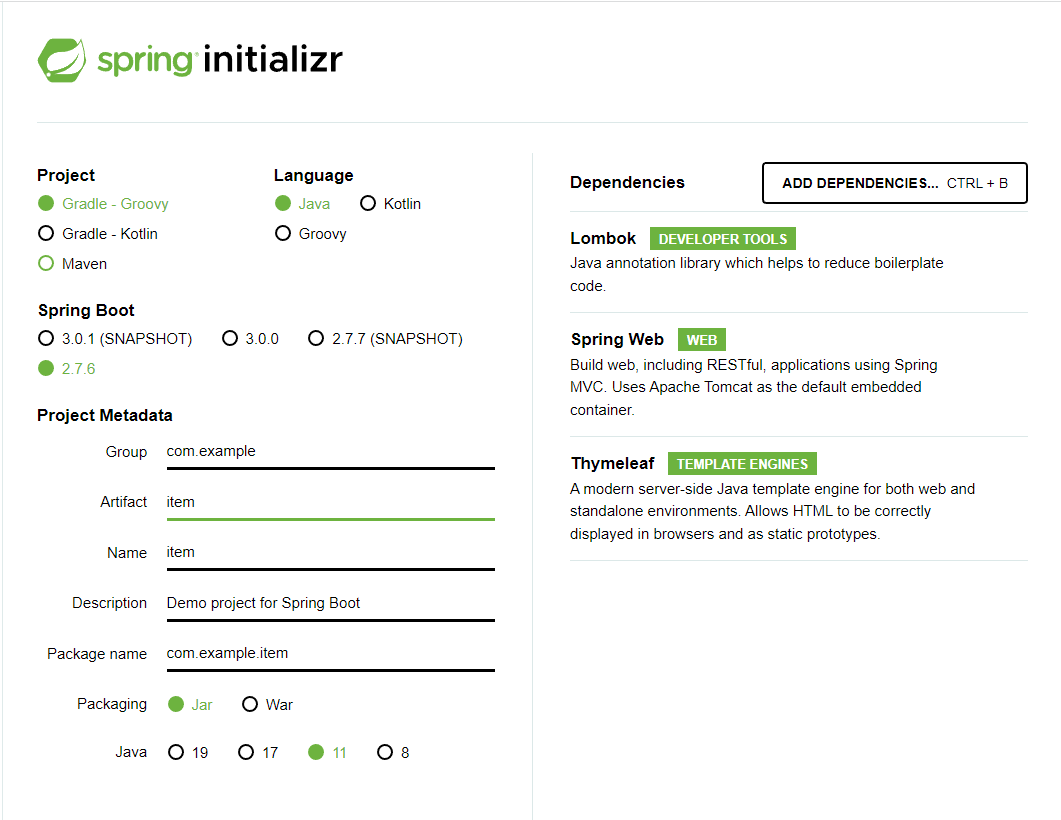
- application.properties
#port
server.port=9090

#thymeleaf cache
spring.thymeleaf.cache=false

#encoding
server.servlet.encoding.charset=UTF-8
server.servlet.encoding.force=true
server.servlet.encoding.enabled=true
시작
상품 등록, 수정 간편화, checkbox, enum, radio, select box
Item.java수정
...
	private Integer quantity;

	private Boolean open; 			// 판매여부
	private List<String> regions;	// 등록 지역
	private ItemType itemType;		// 상품 종류
	private String deliveryCode;	// 배송 방식

	public Item() {}
...
1. 상품 등록, 수정 간편화
1-1. th:object, th:field 사용
이론
th:object="${item}": 선언하면 상품명에서 th:field="${item.itemName}" 사용 가능th:field="${item.itemName}":id="itemName" name="itemName"을 같이 만들어준다.th:field="*{itemName}":th:object소속이라는 뜻의 *을 넣어주면 item도 생략 가능하다.
-> th:field : name, id, value 속성을 자동으로 만들어준다.
ItemController.java수정@GetMapping("/add")추가model객체 추가
...
@GetMapping("/add")
public String addForm(Model model) {
	model.addAttribute("item",new Item());
	return "basic/addForm";
    }
} addForm.html수정- form 태그
th:action: 같은 url에 전송하고, 방법만 달라지는 경우는 url을 쓰지 않아도 된다. th:object="${item}"th:field="${item.itemName}"
- form 태그
	<div class="container">
		<div class="py-5 text-center">
			<h2>상품 등록 폼</h2>
		</div>
		<h4 class="mb-3">상품 입력</h4>
		<form action="item.html" th:object="${item}" th:action method="post">
			<div>
				<label for="itemName">상품명</label>
				<input type="text" th:field="${item.itemName}" class="form-control" placeholder="이름을 입력하세요">
			<div>
				<label for="price">가격</label>
				<input type="text" th:field="*{price}" class="form-control" placeholder="가격을 입력하세요">
			</div>
			<div>
				<label for="quantity">수량</label>
				<input type="text" th:field="*{quantity}" class="form-control" placeholder="수량을 입력하세요">
			</div>
			<hr class="my-4">
			<div class="row">
				<div class="col">
					<button class="w-100 btn btn-primary btn-lg" type="submit">
						상품등록
					</button>
				</div>
				<div class="col">
					<button class="w-100 btn btn-secondary btn-lg" onclick="location.href='items.html'" th:onclick="|location.href='@{/basic/items}'|" type="button">
						취소
					</button>
				</div>
			</div>
		</form>
</div>editForm.html수정
	<div class="container">
		<div class="py-5 text-center">
			<h2>상품 수정 폼</h2>
		</div>
		<form action="item.html" th:object="${item}" th:action method="post">
			<div>
				<label for="id">상품 ID</label>
				<input type="text" th:field="*{id}" class="form-control" value="1" th:value="${item.id}" readonly>
			</div>
			<div>
				<label for="itemName">상품명</label>
				<input type="text" th:field="*{itemName}" class="form-control" value="상품A" th:value="${item.itemName}" >
			</div>
			<div>
				<label for="price">가격</label>
				<input type="text" th:field="*{price}" class="form-control" value="10000" th:value="${item.price}" >
			</div>
			<div>
				<label for="quantity">수량</label>
				<input type="text" th:field="*{quantity}" class="form-control" value="10" th:value="${item.quantity}" >
			</div>
			<hr class="my-4">
         </form>
	</div>
2. check box
- 체크박스 체크여부
open = on & _open=on
-> open에 값이 있는 것을 확인하고, 사용
-> true 결과값을 출력
_open=on 하나만 넘어올경우
-> 체크박스를 체크하지 않으면 Spring이 _open만 있는 것을 확인하고 open 값이 체크되지 않았다고 인식
-> 이 경우 서버에서 null이 아니라 false인 것을 확인 할 수 있다.
addform.html수정 - thymeleaf 미사용
...
			<div>판매여부</div>
			<div>
				<div class="form-check">
					<input type="checkbox" id="open" name="open" class="form-check-input">
					<input type="hidden" name="_open" value="on">
					<label for="open" class="form-check-lable">판매 오픈</label>
				</div>
			</div>
...addform.html수정 - thymeleaf 사용
...
			<div>판매여부</div>
			<div>
				<div class="form-check">
					<input type="checkbox" id="open" th:field="*{open}" class="form-check-input">
<!-- 					<input type="hidden" name="_open" value="on"> 타임리프가 hidden 속성 input 까지 만들어준다. -->
					<label for="open" class="form-check-lable">판매 오픈</label>
				</div>
			</div>
...- 페이지 소스

item.html수정
...
		<div>판매여부</div>
			<div>
				<div class="form-check">
					<input type="checkbox" id="open" th:field="${item.open}" class="form-check-input" disabled>
					<label for="open" class="form-check-lable">판매 오픈</label>
				</div>
			</div>
...addform.html수정
...
			<div>판매여부</div>
			<div>
				<div class="form-check">
					<input type="checkbox" id="open" th:field="*{open}" class="form-check-input">
					<label for="open" class="form-check-lable">판매 오픈</label>
				</div>
			</div>
...ItemRepository.java수정- findItem.setOpen(updateParam.getOpen()); 추가
...
public void update(Long itemId, Item updateParam) {
		...
		findItem.setOpen(updateParam.getOpen());
...
3. multi checkbox
ItemController.java수정- @ModelAttribute : Controller를 호출할때 ( 어떤 메서드가 호출이 되던간에) model에 자동으로 해당 내용이 담기는게 보장된다.
- LinkedHashMap :순서가 보장되는 hashmap
...
	@ModelAttribute("regions")
	public Map<String, String> regions(){

		Map<String, String> regions = new LinkedHashMap<String, String>();
		regions.put("SEOUL", "서울");
		regions.put("BUSAN", "부산");
		regions.put("JEJU", "제주");
		return regions;
	}
...addform.html수정th:for="${#ids.prev('regions')}": label 과 input 을 연결 시켜주는 thymeleaf 속성
			<div>
				<div>등록 지역</div>
				<div th:each="region : ${regions}" class="form-check form-check-inline">
					<input type="checkbox" th:field="*{regions}" th:value="${region.key}" 	class="form-check-input">
					<label th:for="${#ids.prev('regions')}" class="form-check-label" th:text="${region.value }">서울</label>
				</div>
</div>item.html수정
...
			<div>
				<div>등록 지역</div>
				<div th:each="region : ${regions}" class="form-check form-check-inline">
					<input type="checkbox" th:field="${item.regions}" th:value="${region.key}" 	class="form-check-input" disabled>
					<label th:for="${#ids.prev('regions')}" class="form-check-label" th:text="${region.value }">서울</label>
				</div>
			</div>
...editform.html수정
...
			<div>
				<div>등록 지역</div>
				<div th:each="region : ${regions}" class="form-check form-check-inline">
					<input type="checkbox" th:field="*{regions}" th:value="${region.key}" 	class="form-check-input">
					<label th:for="${#ids.prev('regions')}" class="form-check-label" th:text="${region.value }">서울</label>
				</div>
			</div>
...ItemRepository.java수정- findItem.setOpen(updateParam.getOpen()); 추가
...
public void update(Long itemId, Item updateParam) {
		...
		findItem.setRegions(updateParam.getRegions());
...
4. enum
이론
- Enumeration
- 데이터 중에는 요일, 계절 등과 같이 몇 가지 한정된 값을 갖는 경우가 있다.
- 열거 타입에 들어가는 값들을 열거 상수라고 한다.
- 자바 class 대신 enum을 적어준다.
- 열거 상수를 적을 때는 첫 글자를 대문자로 작성.
- 순서에 따라 0부터 index를 가지게 되며, 1씩 증가
- enum 열거형으로 지정할 상수들은 전부 대문자로 선언
- 열거 상수들을 선언한 뒤에는 세미콜론(;)을 작성하지 않고, 상수 ( "문자열") 등 상수와 다른값을 연결하는 경우에는 ; 작성
- 코드가 단순해지며 가독성이 좋아짐
4-1. enum 사용 예시 ( 1 )
enumeration패키지 생성
enumeration 패키지 > week.java ( enum 파일로 생성 )
- 일반 메서드가 정의 될땐 열거 상수 뒤에 ; 붙여야 한다
public enum Week {
	MONDAY, TUESEDAY, WEDNESDAY,THURSDAY, FRIDAY, SATURDAY, SUNDAY;

	public void dayInfo() {
		System.out.println("dayInfo enum");
	}
}
enumeration 패키지 > Main01.java 생성
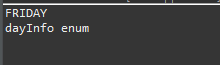
public class Main01 {

	public static void main(String[] args) {
		Week today = Week.FRIDAY;
		System.out.println(today);

		Week.MONDAY.dayInfo();
	}
}- 콘솔창
4-2. enum 사용 예시 ( 2 )
enumeration 패키지 > Season.java ( enum 파일로 생성 )
public enum Season {
	SPRING, SUMMER, FALL, WINTER
}
enumeration 패키지 > Main02.java 생성
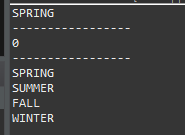
public class Main02 {

	public static void main(String[] args) {
		Season season = Season.SPRING;

		// name() : 열거 객체의 문자열 리턴
		String name = season.name();
		System.out.println(name);
		System.out.println("-----------------");


		// ordinal() : 열거 객체가 몇 번째인지를 리턴
		int ordinal = season.ordinal();
		System.out.println(ordinal);
		System.out.println("-----------------");

		// values() : 열거 타입의 모든 열거 객체들을 배열로 만들어 리턴
		Season[] seasons1 = Season.values();
		for ( Season s : seasons1) {
			System.out.println(s);
		}

	}

}- 콘솔창
4-3. 열거 상수를 다른 값과 연결하기
이론
- 상수 ( " 연결문자 " ) , 상수 ( 값 ) 과 같은 형태로 작성
- 상수들을 열거한 끝에 ; 작성
- 해당 자료형에 맞는 private 생성자 필요
- 연결할 값을 반환해줄 getter 메서드 필요
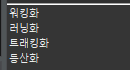
enumeration 패키지 > Type.java ( enum 파일로 생성 )
public enum Type {
	// static final String WALKING = "워킹화"; x4 번의 작업을 아래와 같이 생성

	WALKING("워킹화"),
	RUNNING("러닝화"),
	TRACKING("트래킹화"),
	HIKING("등산화");

	final private String name;

	private Type(String name) { // enum에서 생성자와 같은 개념
		this.name = name;
	}

	public String getName() { // 문자를 받아오는 함수
		return name;
	}

}
enumeration 패키지 > Main02.java 생성
public class Main03 {

	public static void main(String[] args) {

		for( Type type : Type.values()) {
			System.out.println(type.getName());
		}
	}
}- 콘솔창
4-4. 상품 종류에 해당하는 enum 추가
item 패키지 > ItemType.java ( enum 파일로 생성 )
public enum ItemType {

	BOOK("도서"), FOOD("식품"),ETC("기타");

	private final String description;

	private ItemType(String description) {
		this.description = description;
	}

	public String getDescription() {
		return description;
	}
}
5. radio
ItemController.java수정
...
	@ModelAttribute("itemType")
	public ItemType[] itemType() {
		// enum에 있는 값을 배열로 넘겨준다.
		return ItemType.values();
	}
...addform.html수정
...
			<div>
				<div>상품종류</div>
				<div th:each="type : ${itemType}" class="form-check form-check-inline">
					<input type="radio" th:field="*{itemType}" th:value="${type.name()}" class="form-check-input">
					<label class="form-check-label" th:for="${#ids.prev('itemType')}" th:text="${type.description}"></label>
				</div>
			</div>
...item.html수정
...
			<div>
				<div>상품종류</div>
				<div th:each="type : ${itemType}" class="form-check form-check-inline">
					<input type="radio" th:field="${item.itemType}" th:value="${type.name()}" class="form-check-input" disabled>
					<label class="form-check-label" th:for="${#ids.prev('itemType')}" th:text="${type.description}"></label>
				</div>
			</div>
...editform.html수정
...
			<div>
				<div>상품종류</div>
				<div th:each="type : ${itemType}" class="form-check form-check-inline">
					<input type="radio" th:field="*{itemType}" th:value="${type.name()}" class="form-check-input">
					<label class="form-check-label" th:for="${#ids.prev('itemType')}" th:text="${type.description}"></label>
				</div>
			</div>
...ItemRepository.java수정- findItem.setOpen(updateParam.getOpen()); 추가
...
public void update(Long itemId, Item updateParam) {
		...
				findItem.setItemType(updateParam.getItemType());
...
6. select box
item 패키지 >
DeliveryCode.java생성- @AllArgsConstructor : 모든 전역변수에 대해 생성자를 만들어주는 어노테이션
@Data
@AllArgsConstructor
public class DeliveryCode {

	private String code;
	private String displayName;
}
ItemController.java수정
...
	@ModelAttribute("deliveryCodes")
	public List<DeliveryCode> deliveryCodes(){
		List<DeliveryCode> deliveryCodes = new ArrayList<DeliveryCode>();
		deliveryCodes.add( new DeliveryCode("FAST", "빠른배송"));
		deliveryCodes.add( new DeliveryCode("NORMAL", "일반배송"));
		deliveryCodes.add( new DeliveryCode("SLOW", "느린배송"));
		return deliveryCodes;
	}
...addform.html수정
...
			<div>
				<div>배송방식</div>
				<select th:field="*{deliveryCode}" class="form-select">
					<option value="">=== 배송 방식 선택 ===</option>
					<option th:each="deliveryCode : ${deliveryCodes}" th:value="${deliveryCode.code}" th:text="${deliveryCode.displayName}">
					</option>
				</select>
			</div>
...item.html수정
...
			<div>
				<div>배송방식</div>
				<select th:field="${item.deliveryCode}" class="form-select" disabled>
					<option value="">=== 배송 방식 선택 ===</option>
					<option th:each="deliveryCode : ${deliveryCodes}" th:value="${deliveryCode.code}" th:text="${deliveryCode.displayName}">
					</option>
				</select>
			</div>
...editform.html수정
...
			<div>
				<div>배송방식</div>
				<select th:field="*{deliveryCode}" class="form-select">
					<option value="">=== 배송 방식 선택 ===</option>
					<option th:each="deliveryCode : ${deliveryCodes}" th:value="${deliveryCode.code}" th:text="${deliveryCode.displayName}">
					</option>
				</select>
			</div>
...
코딩공부