antd로 화면 만들기-_app.js와 Head, 로그인 폼, 리렌더링 이해하기, 프로필 페이지와 회원가입 페이지 만들기(custom hook)
0
Next.js로 SNS서비스 만들기
목록 보기
2/2

antd와 styled-components
- ant design ( css framework )
- 아이콘을 바로 가져다 쓸 수 있음
- 보통 고객이 있는 서비스에서는 잘 안씀 → why? 개성이 사라짐 (admin 느낌)
- 혼자 개발하는 경우 → 디자이너 없이도 그럴듯하게 디자인 가능
- css 입히기
- styled-components
- emotion
- 명령어 :
npm i antd styled-components @ant-design/icons- icon은 용량을 많이 차지해서 최적화를 위해 다른 라이브러리로 분리해두는 경우가 많음
AppLayout.js
하지만 여기서 antd이 버전 업 됨에 따라 아래와 같이 수정해주어야<Menu mode="horizontal"> <Menu.Item> <Link href="/"><a>노드버드</a></Link> </Menu.Item> <Menu.Item> <Link href="/profile"><a>프로필</a></Link> </Menu.Item> <Menu.Item> <SearchInput enterButton /> </Menu.Item> <Menu.Item> <Link href="/signup"><a>회원가입</a></Link> </Menu.Item> </Menu>warning이 없어진다.const menuItems = [ { label: <Link href="/"><a>노드버드</a></Link>, key: "home", }, { label: <Link href="/profile"><a>프로필</a></Link>, key: "profile", }, { label: <SearchInput enterButton />, key: "search", }, { label: <Link href="/signup"><a>회원가입</a></Link>, key: "signup", }, ] ... <Menu mode="horizontal" items={menuItems}/>
_app.js와 Head
- next는 기본적으로 webpack이 들어있음
_app.js
- 모든 페이지 내에 공통적으로 들어가는 것들에 대해서 처리해줄 수 있음 (import 등)
- 강의에서는 ‘antd/dist/antd.css’를 import해주어야한다고 했는데, 최근 antd버전이 올라가면서 따로 import 해주지 않아도 됨.
error 등장 ❗️TypeError _interopRequireDefault is not a function@babel/runtime을 설치해주면 해결된다
- common components랑 _app.js랑 차이점이 무엇일까?
- 모든 페이지에서 공통 → _app.js
- 특정 컴포넌트가 공통 컴포넌트인 경우 → common compoennts
Head
- head를 조작하고 싶을때(문서의 title을 변경하고 싶을 때 등) Next가 제공하는 Head component를 사용
- 지금은 _app.js에서 진행했지만, 만약 Head도 페이지마다 다르게 하고 싶다면 각 페이지 파일에서 Head 컴포넌트를 선언하면 됨
_app.jsimport Head from 'next/head' const NodeBird = ({ Component }) => { return ( <> <Head> <meta charSet='utf--8' /> <title>koeunseo_nodebird</title> </Head> ... </> ) }
반응형 그리드 사용하기
반응형
-
화면이 늘어남에 따라 컴포넌트 등이 재배치되면서, 모바일 환경 → 태블릿 환경 → 데스크탑 환경으로 바꿀 수 있음
-
원칙
- 가로(row) → 세로(col)
- 모바일 버전 먼저 css 적용 → 데스크탑으로 넓혀가는 것이 훨씬 빠름
- why? 브레이크포인트 설정이 힘들어짐
-
AppLauout.js내 반응형 추가<Row gutter={8}> <Col xs={24} md={6}> 왼쪽 메뉴 </Col> <Col xs={24} md={6}> {children} </Col> <Col xs={24} md={6}> <a href="https://github.com/Koeunseooooo" target="_blank" rel="noreferrer noopener">Made by koeunseo</a> </Col> </Row>💡왜 여기서는 Link 태그를 사용하지 않을까?
→ csr할 링크는 Link, 그 외에는 a태그만 사용한다. 여기서는 외부페이지로 이동하므로 a태그를 사용
💡Link 컴포넌트의 이점은?
→ 페이지 리렌더링 없이 이동시켜주는 SPA 동작을 담당하며, a 태그로 전환되어 SEO에 적합하거나 다음 페이지를 prefetch 하는 등의 장점이 있음
로그인폼 만들기
- comopnent에 props로 넘겨지는 것들은 최적화를 위해 useCallback 사용을 습관화할 것
LoginForm.jsconst LoginForm = () => { const [id, setId] = useState('') const [password, setPassword] = useState('') const onChangeId = useCallback((e) => { setId(e.target.value) },[]) const onChangePassword = useCallback((e) => { setPassword(e.target.value) },[]) return ( <Form> <div> <div> <label htmlFor="user-id">아이디</label> <br/> <Input name="user-id" value={id} onChange={onChangeId} required /> </div> <div> <label htmlFor="user-password">비밀번호</label> <br/> <Input name="user-password" type="password" value={password} onChange={onChangePassword} required /> </div> <div> <Button type="primary" htmlType="submit" loading={false}>로그인</Button> <Link href="/signup"><a><Button>회원가입</Button></a></Link> </div> </div> </Form> ) }- 비슷한 패턴의 코드를 한 번에 처리할 수도 있다 (→ 커스텀 훅 이용)
- onChangeId
- onChangePassword 등
- 비슷한 패턴의 코드를 한 번에 처리할 수도 있다 (→ 커스텀 훅 이용)
리렌더링 이해하기
- style을 inline css로 줄때 아래와 같이 객체를 넣으면 안된다.
why?<div style={{ marginTop:10 }}>{} === {} //false- 객체는 새로 생성될 때마다 서로 다른 것으로 인식하기 때문에 왼쪽의 객체와 오른쪽의 객체는 엄연히 다르다.
- 즉, react에서 virtual dom으로 리렌더링을 할 때 어디가 달라지는 지 찾는 작업을 진행하는데, 이전버전의 객체와 현재버전의 객체가 다르다고 인식해 불필요한 리렌더링이 일어난다.
- 인라인 스타일을 사용하면서 최적화를 진행하고 싶다면 usememo를 활용한다.
- antd을 사용할 때 커스터마이징을 위해 인라인 스타일링을 줄 때, 아래와 같이 사용하면 좋다
import { useMemo } from 'react' //값을 캐싱하는 useMemo

const style = useMemo(()=>({marginTop:10}),[]);

<div style={style}>이런식으로 사용하면 인라인을 사용해도 리렌더링 최적화 가능</div>
- style-component
- inline css 스타일링이 아닌 style-component를 사용할 수도 있다.
AppLayout.jsimport styled from 'styled-components' const ButtonWrapper = styled.div`// div 태그 컴포넌트가 됨 margin-top: 10px; ` (...) <ButtonWrapper> <Button /> <Button /> </ButtonWrapper>import styled from 'styled-components' const SearchInput = styled(Input.Search)` // 컴포넌트 커스텀도 가능 vertical-align: middle ` (...) <SearchInput enterButton />
- 리렌더링의 동작 방식
- 함수형 컴포넌트에서 리렌더링이 될 때는 return 부분이 다시 실행되는 것은 맞음
- 그렇지만 return 부분 안에서도, 바뀌는 부분만 다시 그려줌
- 정리하면,
- return 부분은 virtual dom이다.
- 최초 렌더링 때에는 리액트에서 return 부분을 모두 그려준다
- 리렌더링 되었을 때 이전 virtual dom과 지금 virtual dom를 비교했을 때 달라지는 부분만 다시 그려준다
더미데이터로 로그인하기
- button 태그에 htmlType=”submit”을 추가해야 Form이 submit됨
- sumbit이 되면 onFinish props가 호출됨
크롬 확장 프로그램과 QnA
-
크롬 web store
- 프론트엔드 개발자라면 필수 설치 권장
- react, redux
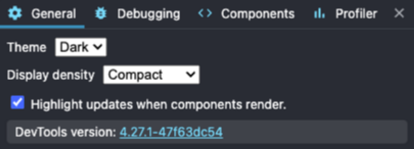
components탭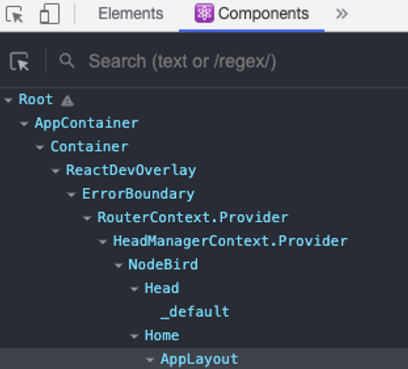
- 컴포넌트가 렌더링될 때마다 하이라이팅 설정도 해줄 수 있음
-
jquery와 react, vue를 같이 쓰면 안되는 궁극적인 이유
- react와 vue는 알아서 화면을 그려줌
- 그러나 jqeury는 직접 화면을 그려줌
- 함께 쓰게 되면 react와 vue의 이점을 상쇄시키는 꼴
프로필페이지 만들기
profile.jsconst Profile = () => { const followerList=[{nickname:"고은서"},{nickname:"고은서부계"},{nickname:"고은서부계2"},] const followingList=[{nickname:"고은서"},{nickname:"고은서부계"},{nickname:"고은서부계2"},] return ( <> ... <AppLayout> <NicknameEditForm /> <FollowList header="팔로잉 목록" data={followingList} /> <FollowList header="팔로워 목록" data={followerList} /> </AppLayout> </> ); }NicknameEditForm, FollowList로 컴포넌트 분리- 이전에는 컴포넌트를 잘게 쪼개면 상위컴포넌트로부터 하위컴포넌트들에게 data를 props로 넘겨주어야하는 부담이 있었다. 만약 컴포넌트가 깊게 형성되어있다면 그만큼 여러 컴포넌트들의 props를 거쳐 데이터를 주어야 하는 부담은 더욱 커졌다
- 하지만 최근에는 hooks로 바로 데이터를 원하는 컴포넌트로 줄 수 있기 때문에 더욱 적극적으로 컴포넌트를 쪼개도 된다 !
- 컴포넌트 공유 기준 🤔 → props 개수로 자신만의 기준을 세울 것. 만약 props가 10개 이상 필요하다면 이는 각각 다른 컴포넌트로 분리해주는 것이 맞다
NicknamEditForm.jsconst NicknameEditForm = () => { const style=useMemo(()=>({ marginBottom:'20px', border: '1px solid #d9d9d9', padding: '20px' }),[]) return ( <Form style={style}> <Input.Search addonBefore="닉네임" enterButton="수정" /> </Form> ) }form제작은 사실 일일이 작성하기에 비효율적이다- 이후 react-form같은 라이브러리 사용 추천
- useMemo를 통해 style 렌더링 최적화 진행
FollowList.jsconst FollowList = ({header, data}) => { return ( <List style={{marginBottom:20}} grid={{gutter:4,xs:2,md:3}} size="small" header={<div>{header}</div>} loadMore={<div style={{ textAlign:'center', margin: '10px 0'}}><Button>더 보기</Button></div>} bordered dataSource={data} renderItem={(item)=>( <List.Item style={{marginTop: 20}}> <Card actions={[<StopOutlined key="stop" />]}> <Card.Meta description={item.nickname} /> </Card> </List.Item> )} /> ) }- antd의 List 컴포넌트 활용
- grid style 적용
- FollowList의 props로 받아온 data 객체 배열을 List의 dataSource props에 저장하면, List의 renderItem props에서 dataSource객체들을 item 인자를 통해 하나씩 꺼내주며 렌더링한다.
📌 굳이 공식문서에 찾아보면 다 나와있는 것들을 아깝게 암기하려 하지 말자!
대신 서버사이드렌더링의 동작방식, 클라이언트 렌더링 동작방식, 코드 spliting, next의 기본 원리 등 흐름을 파악해야 하는 것은 설명할 수 있을 정도로 암기 및 이해해두는 것이 좋다.
회원가입 페이지 만들기(커스텀 훅)
custom hooks
- 동일한 패턴의 코드가 계속해서 발생할 때 (특히 form 관련 코드를 짤 때) 커스텀 훅을 이용해 범용적으로 사용할 수 있게 묶어줄 수 있음
LoginForm.jsconst [id, setId] = useState('') const [password, setPassword] = useState('') const onChangeId = useCallback((e) => { setId(e.target.value) },[]) const onChangePassword = useCallback((e) => { setPassword(e.target.value) },[])signup.jsconst [id, setId] = useState('') const [password, setPassword] = useState('') const [nickname, setNickname] = useState('') const onChangeId = useCallback((e) => { setId(e.target.value) },[]) const onChangePassword = useCallback((e) => { setPassword(e.target.value) },[]) const onChangeNickname = useCallback((e) => { setNickname(e.target.value) },[])- 단, 반복문이나 함수 내에서 사용 불가 (즉, 컴포넌트 안에서 depth가 1일때만 가능❗️)
custom hook 만들기
useinput.js# 커스텀 훅들은 hooks라는 폴더 내에서 따로 관리합니다 📦hooks ┗ 📜useinput.jsimport { useState, useCallback } from 'react' export default (initialValue = null) => { const [value, setValue] = useState(initialValue) const handler = useCallback((e)=>{ setValue(e.target.value) },[]) return [value,handler] }
custom hook 적용하기
-
signup.jsconst [id, onChangeId]=useinput('') const [nickname, onChangeNickname]=useinput('') const [password, onChangePassword]=useinput('')-
그러나 비슷해보이더라도 동일한 패턴이 아닐 경우에는 원래대로 useState를 사용한다
(...)

const [passwordCheck, setPasswordCheck]=useState('')
const [passwordError, setPasswordError]=useState(false)
const onChangePasswordCheck = useCallback((e)=>{
    setPasswordCheck(e.target.value)
    setPasswordError(e.target.value !== password)
},[password])

(...)
-

둔한 붓이 총명함을 이긴다