우선 vue 파일에 axios를 설치해준다.
npm i axios
package.json에 다음과 같이 설치된 것을 확인할 수 있다.

여기까지가 설치 및 사용준비 끝~
이제 데이터를 생성하고 가져오기를 해보자!
우선 우리는 api를 따로 제공받을 수 없기 때문에
폴더 내에 예시 데이터 user.json을 생성해준다.
[
  {
    "name": "aaa",
    "email": "aaa@google.com"
  },
  {
    "name": "bbb",
    "email": "bbb@google.com"
  },
  {
    "name": "ccc",
    "email": "ccc@google.com"
  }
]
이제 이것을 깃허브에 올리면 가져올 준비는 끝났다.
가져올 때는 다음과 같은 링크를 사용한다.
https://raw.githubusercontent.com/{owner}/{repo}/{branch}/{file_path}
- owner: 깃허브 id
- repo: repository 이름
- branch: 브런치 이름 (정하지 않았다면 main이 기본)
- file_path: 파일 경로
그런 다음 버튼에 이벤트를 걸어준다
<template>
  <v-btn color="primary" @click="fetchData">get data</v-btn>
</template>
//axios 라이브러리 import
import axios from "axios";
export default {
methods: {
fetchData: function () {
axios //axios 사용
.get( //가지고 오겠다.
"https://raw.githubusercontent.com/limjaehee/axios-/main/user.json" //링크의 데이터를
)
.then((response) => {
//성공 시
console.log(response)
})
.catch(function (error) {
//실패 시
console.log(error);
});
},
},
};네트워크 설정에 들어가보면 user.json이 성공적으로 받아진 것을 볼 수 있다.

이제 UI에 데이터를 입혀보자~
<template>
  <div>
    <v-btn color="primary" @click="fetchData">get data</v-btn>
    <v-card class="mx-auto" max-width="300" tile>
      <v-list dense>
        <v-subheader>USERS</v-subheader>
        <v-list-item-group color="primary">
          <v-list-item v-for="(item, i) in userList" :key="i">
            <v-list-item-icon>
              <v-icon v-text="i + 1"></v-icon>
            </v-list-item-icon>
            <v-list-item-content>
              <v-list-item-title v-text="item.name"></v-list-item-title>
              <v-list-item-subtitle v-text="item.email"></v-list-item-subtitle>
            </v-list-item-content>
          </v-list-item>
        </v-list-item-group>
      </v-list>
    </v-card>
  </div>
</template><script>
//axios 라이브러리 import
import axios from "axios";
export default {
data() {
return {
userList: null,
};
},
methods: {
fetchData: function () {
axios
.get(
"https://raw.githubusercontent.com/limjaehee/axios-/main/user.json"
)
.then((response) => {
this.userList = response.data;
})
.catch(function (error) {
console.log(error);
});
},
},
};
</script>
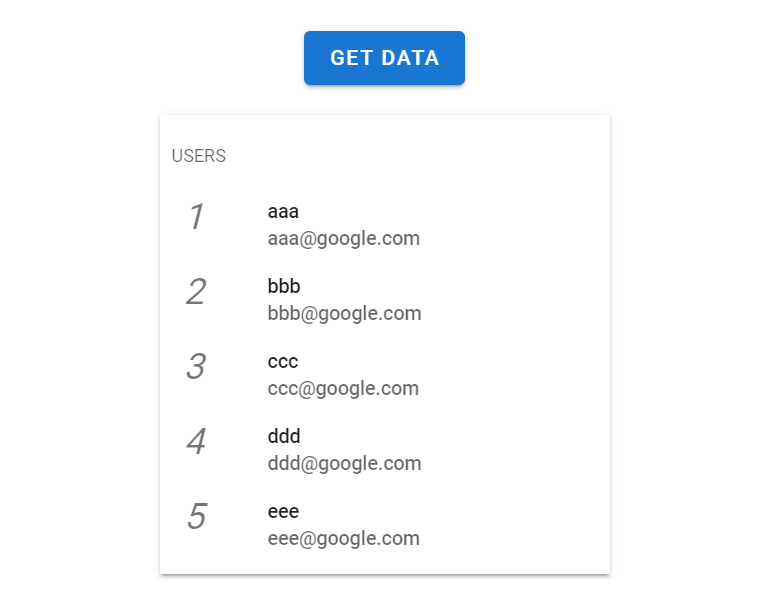
위 코드를 입력한 뒤에 버튼을 누르면 아래와 같이 데이터가 입혀진 모습이 보일 것이다.
여기까지 데이터를 가져오고 입혀보는 연습을 했다.
다음번은 api.js 파일을 생성해서 CRUD를 해보는 연습을 하겠다!

하루하루는 성실하게 인생 전체는 되는대로✏️