참고 링크
https://www.youtube.com/watch?v=9JdP-S3crt8
그리고 stackoverflow
들어가며...
https://stackoverflow.com/questions/68015381/can-i-use-fetch-to-call-the-notion-api
https://github.com/makenotion/notion-sdk-js/issues/96
 노션은 CORS를 지원하지 않는다고 합니다. 웹페이지에서 API 호출하는 것을 권장하지 않는다 써져있는데 Notion API를 사용하고 싶은 나머지 백엔드 서버(Node.js)까지 만들어서 사용하려 합니다.
분명 간단한 Todo 앱을 만드려 DB를 Notion으로 사용하려는건데 일이 왜 커지고 있는지는 모르겠네요....
놀랍게도 이 사실을 알아내기까지 하루도 넘게 걸린 것 같습니다. 저는 아래 방법으로 되지 않아 따로 서버를 뺀 뒤 진행하였는데 혹시 되신다면 댓글로 알려주세요...😥
- 크롬 익스텐션 Allow CORS
- 프론트에서 Axios의 헤더를 변경하여 API 호출
이 글에서 다루게 될 노션은
 https://areumsheep.notion.site/TodoList-e953e9d1fd934a40b82f0bac12967662
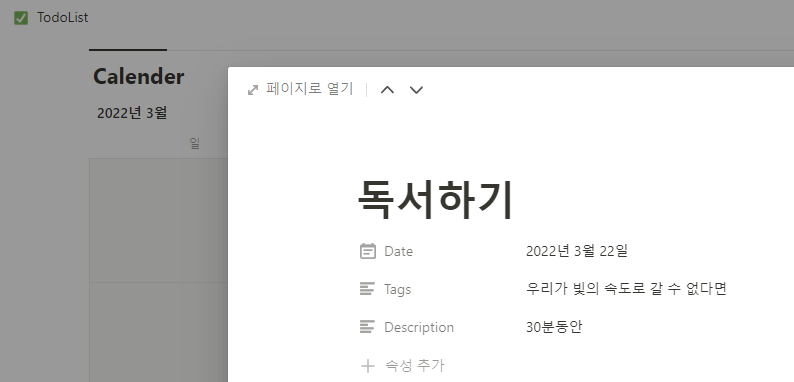
요런 모양의 캘린더를 이용하여 데이터 불러오기 / 페이지 만들기를 해볼 예정입니다.
(추가) 첨부한 이미지의 Property (Date, Tags, Description) 가 모두 존재하여야 아래 코드를 정상적으로 실행하실 수 있습니다 :)
Node.js로 서버 만들기
대부분의 코드는 https://www.youtube.com/watch?v=9JdP-S3crt8 에서 가져왔습니다.
Node.js 서버 세팅하기
1) 원하는 폴더에서 package.json을 생성해줍니다.
npm init -y2) 사용할 프레임워크를 설치해줍니다.
- @notionhq/client: Notion API를 간단하게 사용할 수 있는 프레임워크
- dotenv: 환경변수를
.env파일에 저장한 뒤process.env로 로드할 수 있는 프레임워크 - express: NodeJS를 사용하여 쉽게 서버를 구성할 수 있게 만든 프레임워크
npm i @notionhq/client dotenv express3) node의 서버를 실행할 수 있도록 package.json에 node 실행 start명령어를 추가합니다.
"scripts": {
    "start": "node index",
    "test": "echo \"Error: no test specified\" && exit 1"
},
4) package.json이 있는 곳에 index.js를 만든 뒤 노드가 정상적으로 실행되는지 확인합니다.
//index.js
console.log(123)
터미널에 npm start를 통해 확인할 수 있습니다.
npm start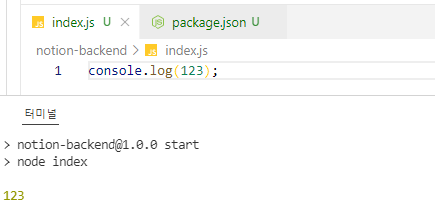
5) index.js가 있는 위치에 .env파일을 생성하여 아래와 같은 형식으로 만들어줍니다.
{{}}안에 들어있는 내용은 기존 포스트를 활용하여 키를 넣어줘야 합니다.
NOTION_TOKEN={{노션의 시크릿 키}}
NOTION_DATABASE_ID={{노션 데이터베이스의 키}}
Node.js로 기존 포스트에 있는 페이지 조회 API 요청 만들기
이제 본격적으로 코드를 작성해보겠습니다.
Notion 데이터베이스의 데이터 리스트 가져오기
아래 코드는 기존 글에서 진행했던 Query a database의 https://api.notion.com/v1/databases/{database_id}/query URL과 동일한 요청입니다.
1) index.js에 express를 이용하여 api 요청을 추가합니다.
로직의 경우 빼는 것이 더 깔끔해보여서 getCalendarList()를 따로 뺄 예정입니다.
const express = require('express')
const getCalendarList = require('./services/notion')
const PORT = process.env.PORT || 5000

const app = express()

/**
 * 노션 캘린더 데이터 가져오기
 */
app.get('/calendars', async(req, res) => {
    const calendars = await getCalendarList()
    res.json(calendars);
})

app.listen(PORT, console.log(`Server started on port ${PORT}`))
2) services폴더를 새롭게 만들어 notion.js를 추가한 뒤 아래와 같이 코드를 작성해줍니다.
사용한 notion.databases.query같은 메소드들의 사용법과 추가적인 메소드들은 https://github.com/makenotion/notion-sdk-js 에서 확인하실 수 있습니다.
// services > notion.js를 추가하여 입력합니다.

const dotenv = require('dotenv').config()
const { Client } = require('@notionhq/client')

//기존 Postman에서 Authorization의 Bearer Token 설정한 것과 동일한 의미입니다.
const notion = new Client({
    auth: process.env.NOTION_TOKEN
})
const database_id = process.env.NOTION_DATABASE_ID

module.exports = async function getCalendarList() {
    const {results} = await notion.databases.query({
        database_id: database_id
    })
    const calendar = results.map((page) => {
        return {
          id: page.id,
          title: page.properties.Name.title[0].text.content,
          date: page.properties.Date.date.start,
          tags: page.properties.Tags.rich_text[0].text.content,
          description: page.properties.Description.rich_text[0].text.content,
        };
    });
    console.log(calendar);
}
다시 서버를 실행(npm start)시켜 Postman으로 http://localhost:5000/calendars에 Get 요청을 보내면 정상적으로 데이터 확인이 가능합니다.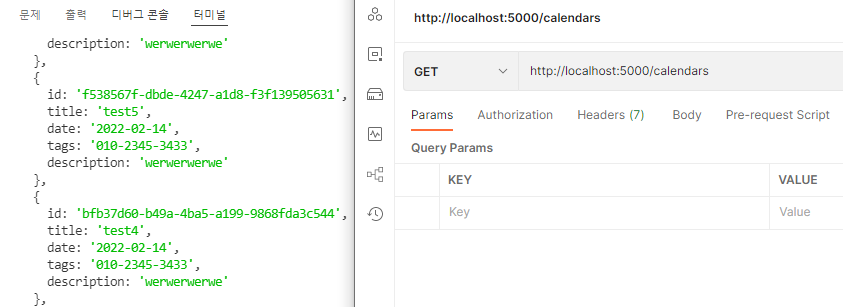
Notion 데이터베이스에 페이지 추가하기
1) index.js에 app.post /calendar요청을 추가합니다.
이번에는 API 요청 시 body에 json형식으로 추가될 데이터를 받을 예정입니다.
const express = require('express')
const { getCalendarList, createPage } = require('./services/notion');

//body를 이용하여 데이터를 가져오므로 아래 두 줄도 추가로 작성해줍니다.
const bodyParser = require('body-parser');
const jsonParser = bodyParser.json();

const PORT = process.env.PORT || 5000

const app = express()

// 기존과 동일하여 코드 첨부를 하지 않았습니다.

/**
 * 노션 캘린더 데이터 추가
 */
app.post('/calendar', jsonParser, async (req, res) => {
  console.log(req.body);
  const { name, startDate, endDate, tags, description } = req.body;

  try {
    const posting = await createPage(name, startDate, endDate, tags, description);
    res.json(posting);
  } catch (err) {
    console.log(err);
  }
});

app.listen(PORT, console.log(`Server started on port ${PORT}`))
2) 이번에는 notion.pages.create요청을 이용하여 page를 만들어줍니다.
여기에 들어가는 properties는 노션 API Property Values를 참고하여 작성하였습니다.
const dotenv = require('dotenv').config()
const { Client } = require('@notionhq/client')

//기존 Postman에서 Authorization의 Bearer Token 설정한 것과 동일한 의미입니다.
const notion = new Client({
    auth: process.env.NOTION_TOKEN
})
const database_id = process.env.NOTION_DATABASE_ID

// 기존과 동일하여 코드 첨부를 하지 않았습니다.

//노션 캘린더 데이터 추가
module.exports.createPage = async function createPage(
  name,
  startDate,
  endDate,
  tags,
  description
) {
  const response = await notion.pages.create({
    parent: { database_id: database_id },
    properties: {
      Name: {
        title: [
          {
            text: {
              content: name,
            },
          },
        ],
      },
      Date: {
        date: {
          start: startDate,
          end: endDate,
        },
      },
      Tags: {
        rich_text: [
          {
            text: {
              content: tags,
            },
          },
        ],
      },
      Description: {
        rich_text: [
          {
            text: {
              content: description,
            },
          },
        ],
      },
    },
  });
  return response;
};
다시 서버를 실행(npm start)시켜 Postman으로 http://localhost:5000/calendar에 Post 요청으로 수정한 뒤 Body > raw > JSON으로 추가할 데이터들을 작성하여 보내줍니다.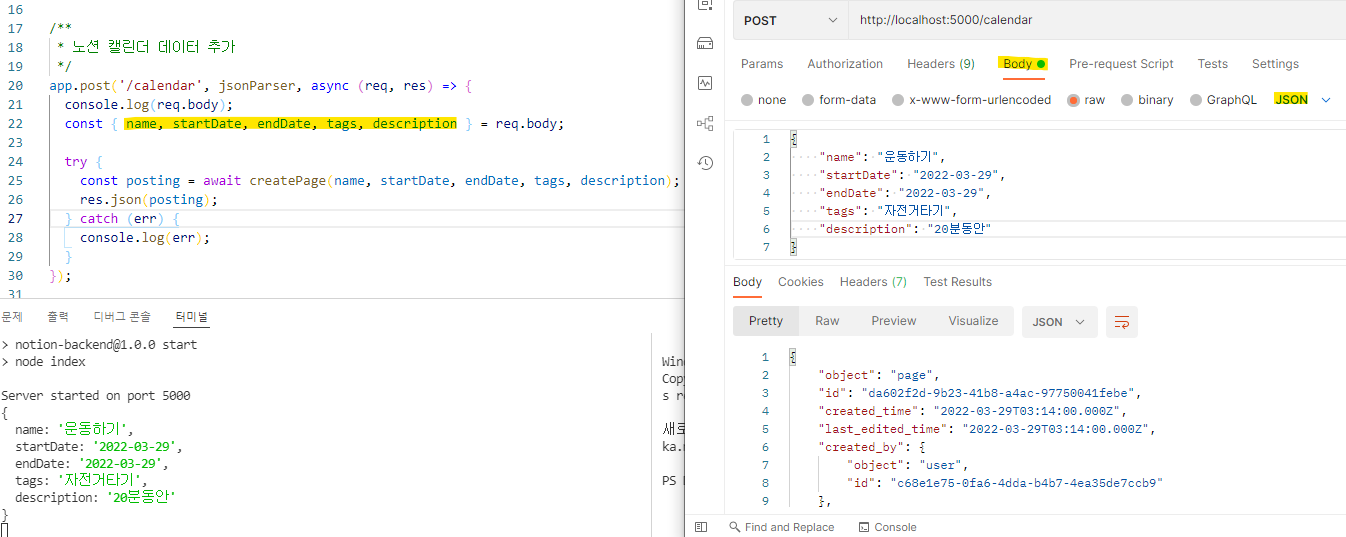
끝!
 최종적으로 노션에 페이지가 추가되었습니다. 클릭하여 속성 확인 시 Post요청으로 Body에 작성한 내용이 출력됩니다.
현재는 데이터가 넘어오지 않을 경우 (=undefined/null) 체크가 되지 않으므로 추후 진행할 예정입니다.

안녕하세요! postman으로 get 확인할 때 typeerror cannot read properties of undefined (reading '0')과 같이 calendar의 title 이후를 못 가져옵니다. id만 get 할 수 있는데 해결 방법이 있을까요?