
뷰 클래스
뷰 클래스의 계층 구조
액티비티 화면을 구성할 떄 사용하는 클래스는 모두 View의 하위 클래스이다.
객체의 계층 구조에서 중요한 역할을 하는 레이아웃 클래스.
<LinearLayout xmlns:android="http://schemas.android.com/apk/res/android"
    xmlns:app="http://schemas.android.com/apk/res-auto"
    xmlns:tools="http://schemas.android.com/tools"
    android:layout_width="match_parent"
    android:layout_height="match_parent"
    tools:context=".MainActivity"
    android:orientation="vertical"
    >
</LinearLayout>
레이아웃 xml 파일을 액티비티 화면에 출력하면 아무것도 나오지 않는다. ViewGroup 클래스의 하위인 레이아웃 클래스는 화면이 아닌 다른 뷰 객체들을 담아 제어할 목적으로 사용하는 그릇 역할을 한다.
<LinearLayout xmlns:android="http://schemas.android.com/apk/res/android"
    xmlns:app="http://schemas.android.com/apk/res-auto"
    xmlns:tools="http://schemas.android.com/tools"
    android:layout_width="match_parent"
    android:layout_height="match_parent"
    tools:context=".MainActivity"
    android:orientation="vertical"
    >
    <Button
        android:layout_width="wrap_content"
        android:layout_height="wrap_content"
        android:text="BUTTON1"
        />
    <Button
        android:layout_width="wrap_content"
        android:layout_height="wrap_content"
        android:text="BUTTON2"
        />
</LinearLayout>- 실행 결과
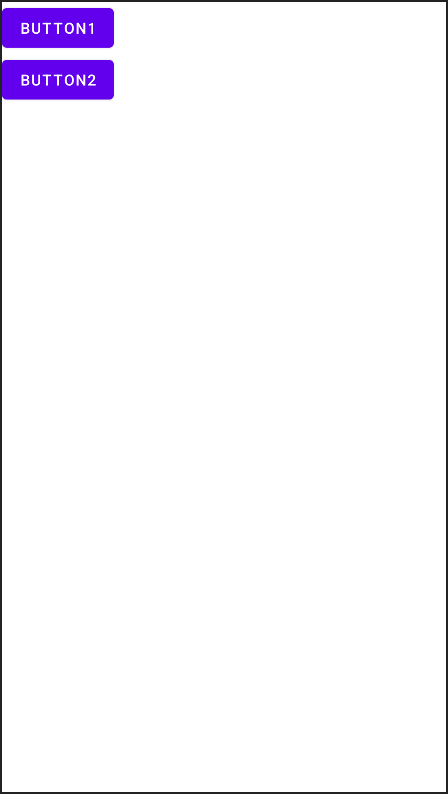
레이아웃을 이용하여 뷰 객체를 계층으로 묶으면 한꺼번에 출력하거나 정렬하는 등 편리하게 사용 가능하다.
레이아웃 중첩
뷰의 계층 구조는 레이아웃 객체를 중첩해서 복잡하게 구성할 수 있다.

이처럼 객체를 계층 구조로 만들어 사용하는 패턴을 컴포지트 패턴(Composite pattern) 또는 문서 객체 모델(Document Object Model)이라고 한다.
레이아웃 XML의 뷰를 코드에서 사용하기
화면 구성을 레이아웃 XML 파일에 작성하고 액티비티에서 setContentView() 함수로 XML파일을 지정하면 화면을 출력한다.
- xml에 구현한 텍스트 뷰 객체
<TextView
        android:layout_width="wrap_content"
        android:layout_height="wrap_content"
        android:text="hello"
        />
이렇게 XML에 선언한 객체를 코드에서 사용해야 할 때는?
id 속성을 부여해준다.
- id 속성 부여
<TextView
        android:id="@+id/text1"
        android:layout_width="wrap_content"
        android:layout_height="wrap_content"
        android:text="hello"
        />
XML 속성값이 @로 시작하면 R.java 파일을 의미한다. 따라서 R.java 파일에 text1이라는 상수 변수를 추가하라는 의미이다.
findViewById() 코드에서 R.java 파일의 상수 변수로 객체를 얻을 수 있다. (이 방법보단 뷰바인딩을 사용하는 것이 좋다.)
// XML 화면 출력
setContentView(R.layout.acitivity_main)
// id값으로 뷰 객체 획득
val textView1 : TextView = findViewById(R.id.text1)
뷰 객체를 제네릭으로 명시해도 된다.
val textView1 = findViewById<TextView>(R.id.text1)뷰의 크기를 지정하는 방법
- 필수 속성인 크기
<TextView
        android:id="@+id/text1"
        android:layout_width="wrap_content"
        android:layout_height="wrap_content"
        android:text="hello"
        />
- 크기 지정의 예
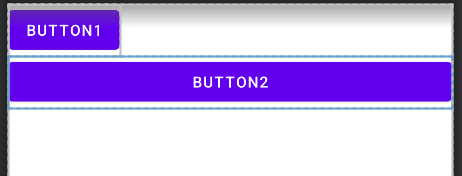
<LinearLayout xmlns:android="http://schemas.android.com/apk/res/android"
    xmlns:app="http://schemas.android.com/apk/res-auto"
    xmlns:tools="http://schemas.android.com/tools"
    android:layout_width="match_parent"
    android:layout_height="match_parent"
    tools:context=".MainActivity"
    android:orientation="vertical"

    <Button
        android:layout_width="wrap_content"
        android:layout_height="wrap_content"
        android:text="BUTTON1"
        />
    <Button
        android:layout_width="match_parent"
        android:layout_height="wrap_content"
        android:text="BUTTON2"
        />
</LinearLayout>
- 실행 결과
크기를 나타내는 속성값
- 수치 (단위 : px, dp 등)
- match_parent : 부모의 크기 전체, 자신보다 상위 계층의 크기
- wrap_content : 콘텐츠를 화면에 출력할 수 있는 적절한 크기
뷰의 간격 설정
- margin : 뷰와 뷰 사이의 간격
- padding : 뷰의 콘텐츠와 테두리 사이의 간격
- 뷰의 간격 설정
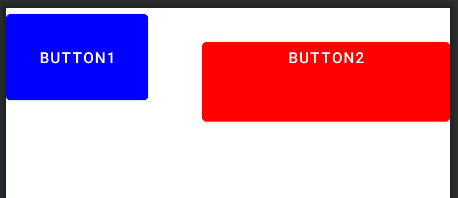
<LinearLayout xmlns:android="http://schemas.android.com/apk/res/android"
    xmlns:app="http://schemas.android.com/apk/res-auto"
    xmlns:tools="http://schemas.android.com/tools"
    android:layout_width="match_parent"
    android:layout_height="match_parent"
    tools:context=".MainActivity"
    android:orientation="horizontal"

    <Button
        android:layout_width="wrap_content"
        android:layout_height="wrap_content"
        android:text="BUTTON1"
        android:backgroundTint="#0000ff"
        android:padding="30dp"
        />
    <Button
        android:layout_width="match_parent"
        android:layout_height="wrap_content"
        android:text="BUTTON2"
        android:backgroundTint="#ff0000"
        android:paddingBottom="50dp"
        android:layout_marginLeft="50dp"
        />
</LinearLayout>
- 실행 결과
뷰의 표시 여부 설정
visibility : 뷰가 화면에 출력되어야 하는지 설정
- visible : 뷰가 화면에 출력
- invisible : 뷰가 화면에 안 보임, 자리 차지함
- gone : 뷰가 화면에 안 보임, 자리 차지하지 않음
- 뷰의 간격 설정
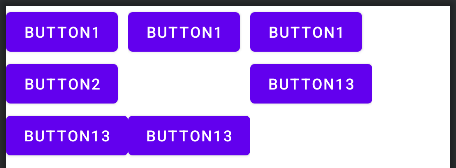
<LinearLayout xmlns:android="http://schemas.android.com/apk/res/android"
    xmlns:app="http://schemas.android.com/apk/res-auto"
    xmlns:tools="http://schemas.android.com/tools"
    android:layout_width="match_parent"
    android:layout_height="match_parent"
    tools:context=".MainActivity"
    android:orientation="horizontal"

    <LinearLayout
        android:layout_width="wrap_content"
        android:layout_height="wrap_content"
        android:orientation="vertical"

        <Button
            android:layout_width="wrap_content"
            android:layout_height="wrap_content"
            android:text="BUTTON1"
            />
        <Button
            android:layout_width="wrap_content"
            android:layout_height="wrap_content"
            android:text="BUTTON2"
            android:visibility="visible"
            />
        <Button
            android:layout_width="wrap_content"
            android:layout_height="wrap_content"
            android:text="BUTTON13"
            />
    </LinearLayout>
    <LinearLayout
        android:layout_width="wrap_content"
        android:layout_height="wrap_content"
        android:orientation="vertical"

        <Button
            android:layout_width="wrap_content"
            android:layout_height="wrap_content"
            android:text="BUTTON1"
            />
        <Button
            android:layout_width="wrap_content"
            android:layout_height="wrap_content"
            android:text="BUTTON2"
            android:visibility="invisible"
            />
        <Button
            android:layout_width="wrap_content"
            android:layout_height="wrap_content"
            android:text="BUTTON13"
            />
    </LinearLayout>
    <LinearLayout
        android:layout_width="wrap_content"
        android:layout_height="wrap_content"
        android:orientation="vertical"

        <Button
            android:layout_width="wrap_content"
            android:layout_height="wrap_content"
            android:text="BUTTON1"
            />
        <Button
            android:layout_width="wrap_content"
            android:layout_height="wrap_content"
            android:text="BUTTON2"
            android:visibility="gone"
            />
        <Button
            android:layout_width="wrap_content"
            android:layout_height="wrap_content"
            android:text="BUTTON13"
            />
    </LinearLayout>
</LinearLayout>
- 코드에서 visibility 속성값 변경
visibleBtn.setOnClickListener {
	targetView.visibility = View.VISIBLE
}
invisibleBtn.setOnClickListener {
	targetView.visibility = View.INVISIBLE
}

SOOP