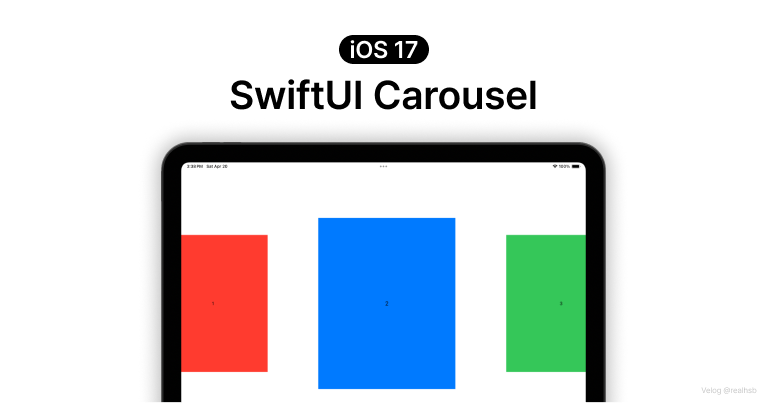
Carousel(캐러셀)이란?
영단어 뜻은, 회전목마. 프론트엔드에서는 대형 이미지 슬라이더라고한다.
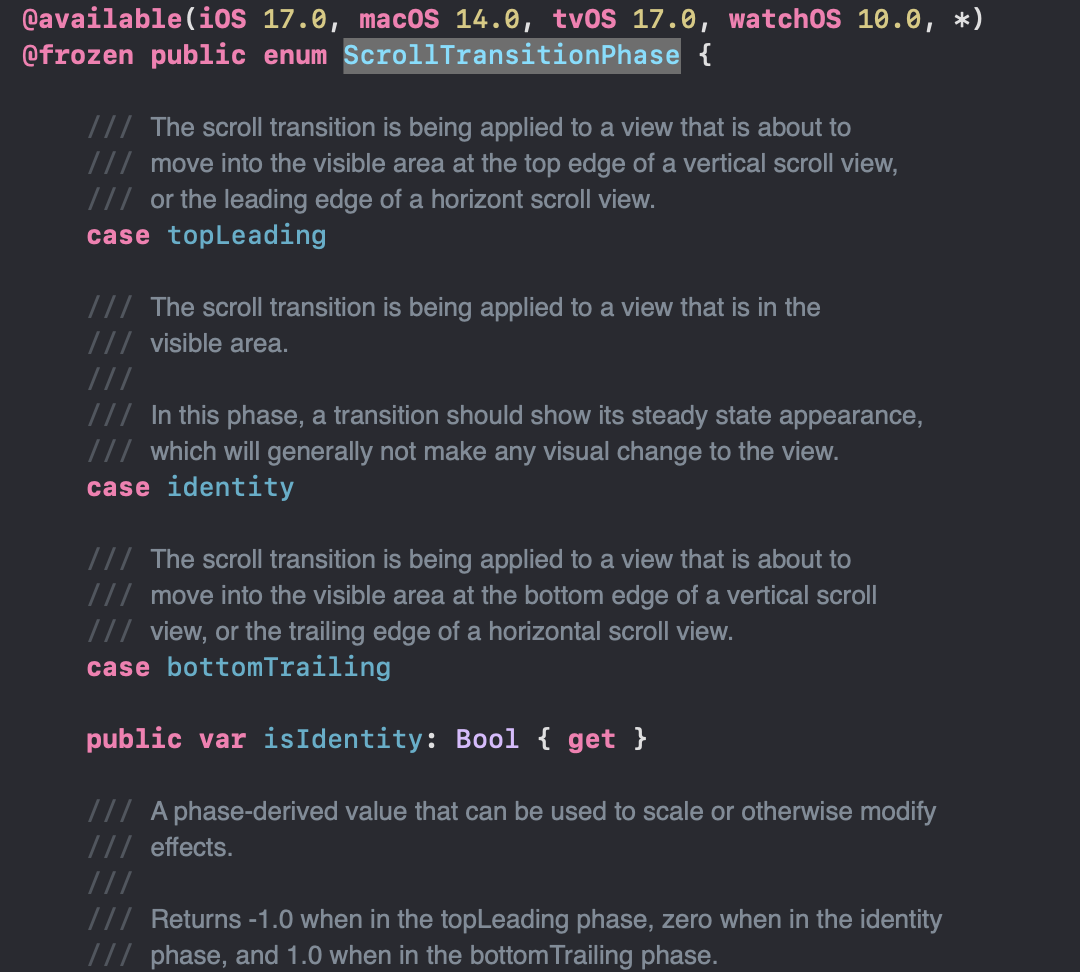
이 효과를 구현할 때 사용할 수 있는 ScrollTransitionPhase 가 iOS17 SwiftUI에 업데이트 되었다!
The phases that a view transitions between when it scrolls among other views.
( 출처 : Apple Developer - ScrollTransitionPhase )
ScrollTransitionPhase 값 살펴보기
case identity
// The scroll transition is being applied to a view that is in the visible area.

case topLeading
// The scroll transition is being applied to a view that is about to move into the visible area at the top edge of a vertical scroll view, or the leading edge of a horizont scroll view.

case bottomTrailing
// The scroll transition is being applied to a view that is about to move into the visible area at the bottom edge of a vertical scroll view, or the trailing edge of a horizontal scroll view.(iOS17 SwiftUI) ScrollView 에서 한 View에서 다른 View로 Transition 될 때 각 뷰의 상태값을 Enum으로 지정한 것 같다...
identity : visible area(화면상 보이는 구역)에 존재하는 뷰
topTrailing, bottomTrailing : visible area(화면상 보이는 구역)으로 이동하려는 뷰 / identity 를 기준으로 양옆, 위아래
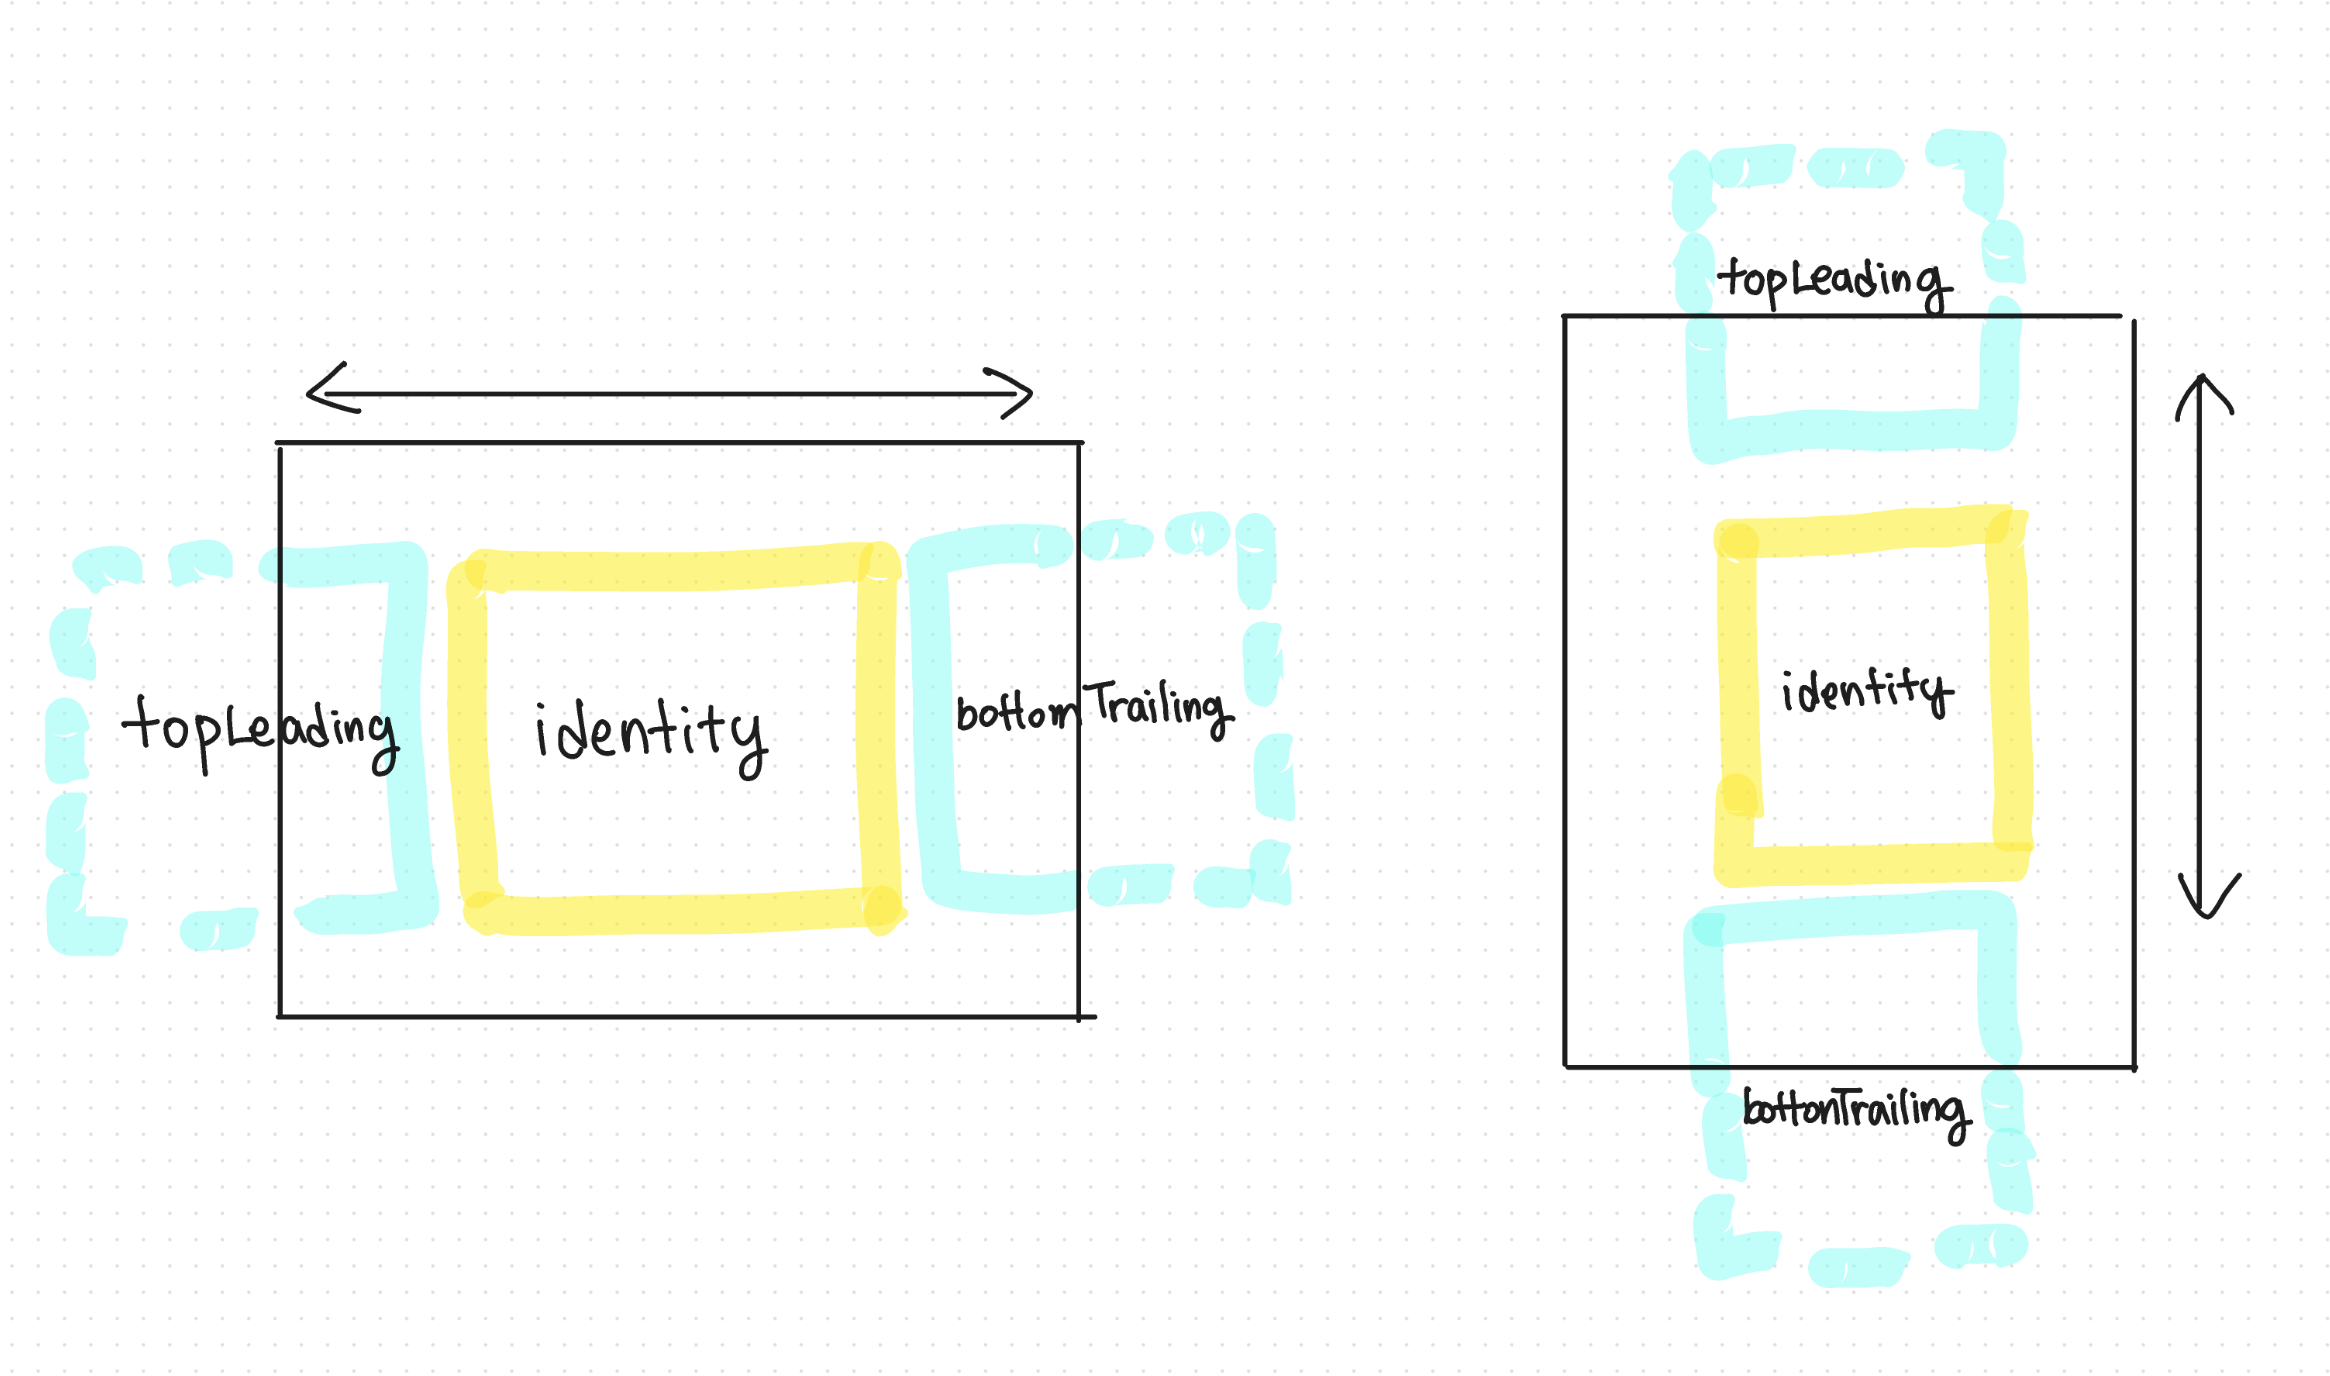
참고로 >> 화면에 보이는 << 기준이기 때문에

이렇게 한 화면에 여러 뷰가 들어온다면 identity는 여러 개가 될 수 있다.
한 번 코드로 보면 이해될 듯
정말정말 간단하다
(졸업작품 화면 구성에 저런 카드 전환 효과가 필요해서 구글링을 열심히 해봤는데,
17 업데이트 이전까지는 카드 뷰들의 총 width + 화면에 보여지는 부분의 크기 + 인덱스 ... 등등 계산해서 구현해야 했다;; 이런 점을 보면 스유가 트렌디한 기술을 많이 제공해주는 것 같다)
구현 방법
STEP 1 : 아이템 정의
자신이 원하는 카드뷰 정의하기
struct ListItem: Identifiable {
    let id = UUID()
    let title: String
    let color: Color

    static let preview: [ListItem] = [
        .init(title: "1", color: .red),
        .init(title: "2", color: .blue),
        .init(title: "3", color: .green),
        .init(title: "4", color: .yellow),
        .init(title: "5", color: .gray),
    ]
}
STEP 2 : ScrollView 사용하기
바로 스크롤뷰 말아주기
뷰에 .scrollTransition 함수를 적용했다. effect는 뷰에 적용되는 효과이고, phase는 앞서 말한 뷰의 상태를 정의한 ScrollTransitionPhase 이다. identity 인지 확인하는 Bool 변수 isIdentity를 사용하여 identity일 때와 아닐 때로 나눠서 효과를 적용할 수 있다.
effect에는 뷰가 스크롤될 때 원하는 효과를 지정하면 된다.
struct ContentView: View {
    var body: some View {
        ScrollView(.horizontal) {
            HStack {
                ForEach(ListItem.preview) { item in
                    item.color
                        .frame(width: 400, height: 500)
                        .overlay {
                            Text(item.title)
                        }
                        .scrollTransition(.interactive, axis: .horizontal) { effect, phase in
                            effect
                                .scaleEffec
                        }
                    }
                }
            }
            .scrollIndicators(.hidden)
    }
}
이정도만 해도 단조롭지 않은 스크롤뷰를 만들 수 있다.
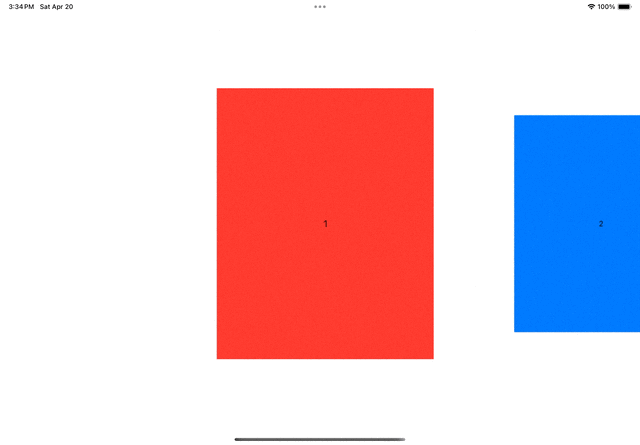
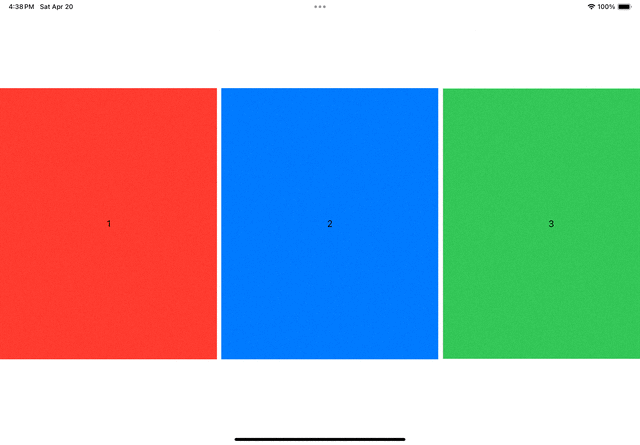
하지만 아이패드 사이즈다보니 화면에 들어갈 수 있는 뷰가 많아 즉, identity 수가 많아서 효과가 극적으로 보이지 않는다. 그래서 GeometryReader를 사용하여 아이패드 화면 값을 구한 다음, 카드뷰가 차지하는 영역을 늘리기로 했다.
STEP 3: GeometryReader를 사용하여 카드뷰의 영역 넓히기
struct ContentView: View {
var body: some View {
GeometryReader { proxy in // 추가된 부분!
ScrollView(.horizontal) {
HStack {
ForEach(ListItem.preview) { item in
item.color
.frame(width: 400, height: 500) // 실제 카드뷰 크기
.overlay {
Text(item.title)
}
.frame(width: proxy.size.width, height: proxy.size.height) // 추가로 넓힌 카드뷰 영역
.scrollTransition(.interactive, axis: .horizontal) { effect, phase in
effect
.scaleEffect(phase.isIdentity ? 1 : 0.8)
}
}
}
.scrollTargetLayout()
}
.scrollTargetBehavior(.viewAligned)
.scrollIndicators(.hidden)
}
}
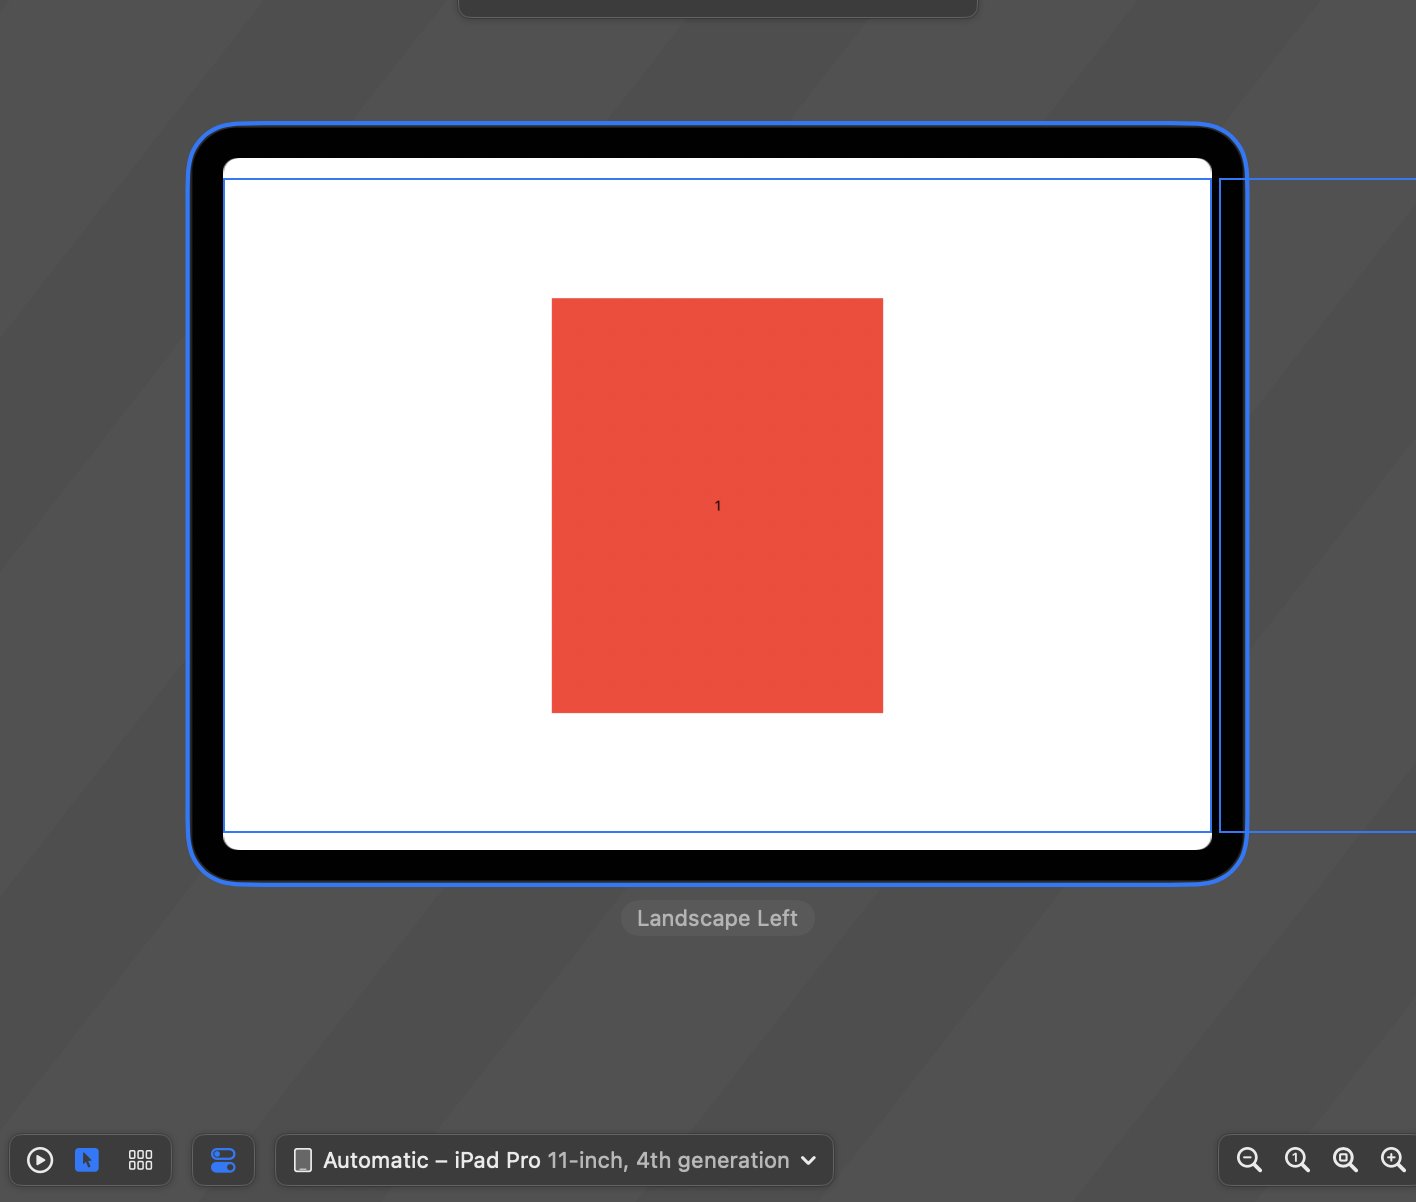
}카드뷰 자체 크기는 유지하면서, 화면에 차지하는 영역만 넓혀주었다.
적용 전

적용 후
STEP 4 : Switch문으로 분기처리하여 각 Enum case별로 효과 지정하기
phase를 입력 받아, switch문으로 각 case마다 효과 주고 싶은 수치를 입력한다.
func offset(for phase: ScrollTransitionPhase) -> Double {
    switch phase {
    case .topLeading:
        700
    case .identity:
        0
    case .bottomTrailing:
        -700
    }
}
상단의 effect에 .offset 효과를 주어서, topLeading과 bottomTrailing 뷰가 visible area에 살짝 걸치게끔 설정했다.
.offset(x: offset(for: phase))왜 Switch문으로 분기처리를 해야 하는가?
그냥 애플이 isIdentity만 변수로 제공해준다더라 ... isTopLeading, isBottomTrailing 이런 건 없다 ㅋㅅㅋ
완성본

간단한데 정말 삽질 많이 했다 ㅠ ㅠ ... 왜냐하면 일반 변수로 선언한 뷰 배열은 바로 적용이 되는데 @StateObject 끼는 순간 자꾸 에러나고 ... 아직 공부할 게 많다 ㅠㅠ
전체코드
//
//  ContentView.swift
//  CarouselCardList
//
//  Created by Subeen on 4/19/24.
//

import SwiftUI

struct ListItem: Identifiable {
    let id = UUID()
    let title: String
    let color: Color

    static let preview: [ListItem] = [
        .init(title: "1", color: .red),
        .init(title: "2", color: .blue),
        .init(title: "3", color: .green),
        .init(title: "4", color: .yellow),
        .init(title: "5", color: .gray),
        .init(title: "5", color: .gray),
        .init(title: "5", color: .gray),
        .init(title: "5", color: .gray),
        .init(title: "5", color: .gray),
    ]
}

struct ContentView: View {
    var body: some View {
        GeometryReader { proxy in
            ScrollView(.horizontal) {
                HStack {
                    ForEach(ListItem.preview) { item in
                        item.color

                            .frame(width: 400, height: 500)
                            .overlay {
                                Text(item.title)
                            }
                            .frame(width: proxy.size.width, height: proxy.size.height)
                            .scrollTransition(.interactive, axis: .horizontal) { effect, phase in
                                effect
                                    .scaleEffect(phase.isIdentity ? 1 : 0.8)
                                    .offset(x: offset(for: phase))
                                    .blur(radius: 0.5)

                            }
                    }
                }
                .scrollTargetLayout()
            }
            .scrollTargetBehavior(.viewAligned)
            .scrollIndicators(.hidden)
        }

    }

    func offset(for phase: ScrollTransitionPhase) -> Double {
        switch phase {
        case .topLeading:
            700
        case .identity:
            0
        case .bottomTrailing:
            -700
        }
    }
}

#Preview {
    ContentView()
}
참고자료

이걸 자동으로 해준다니..!
iOS 17.0이 미니멈이 되는 세상은 언제쯤 오려나요 ㅠㅠ