프로젝트 생성
-
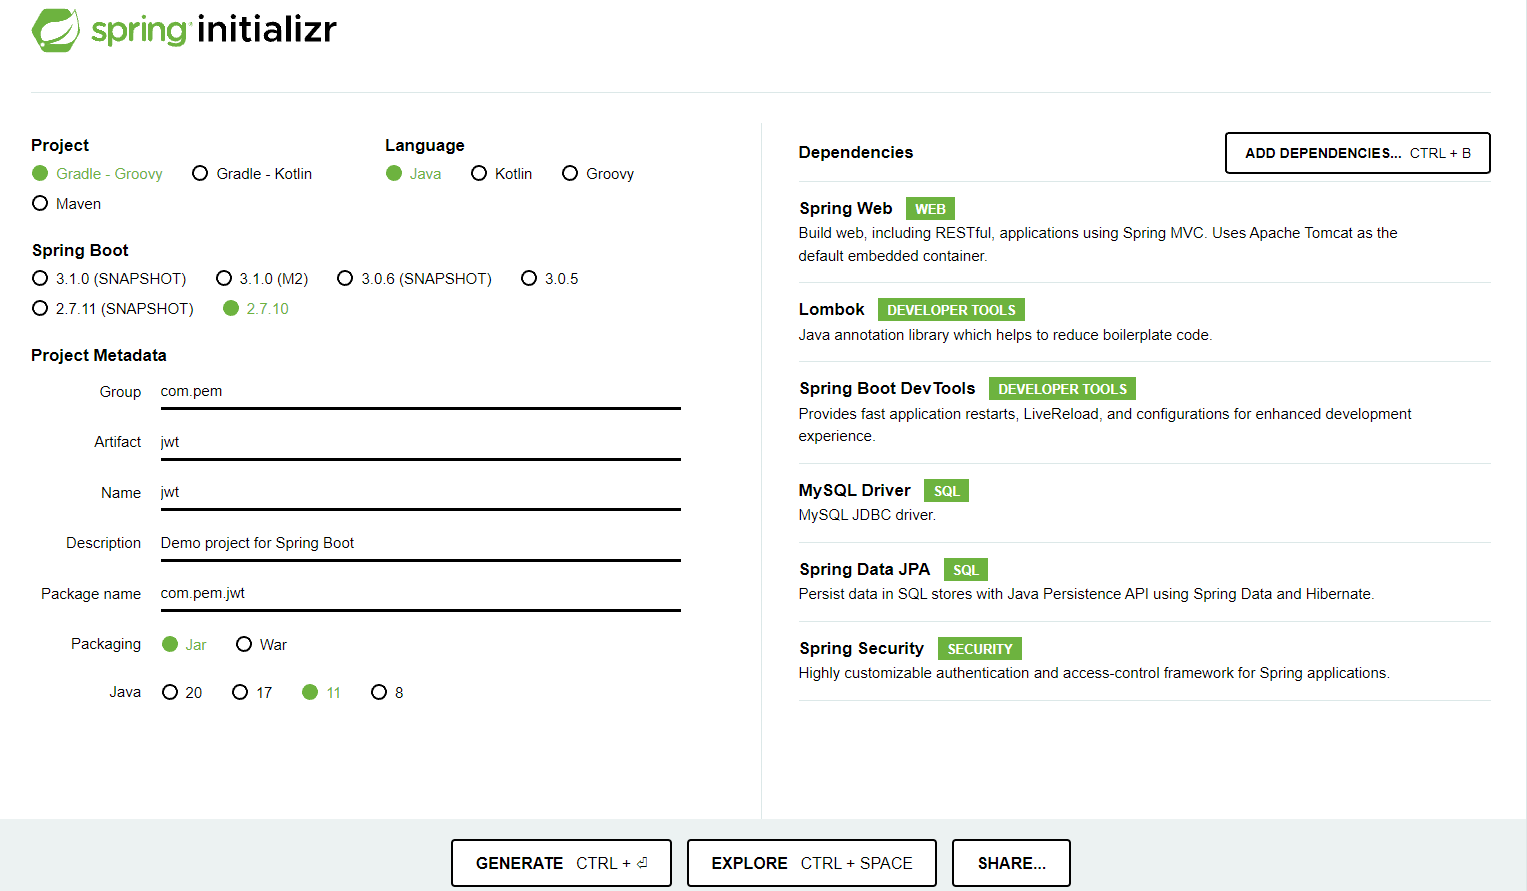
start.spring.io에서 아래와 같이 프로젝트를 하나 생성하자
-
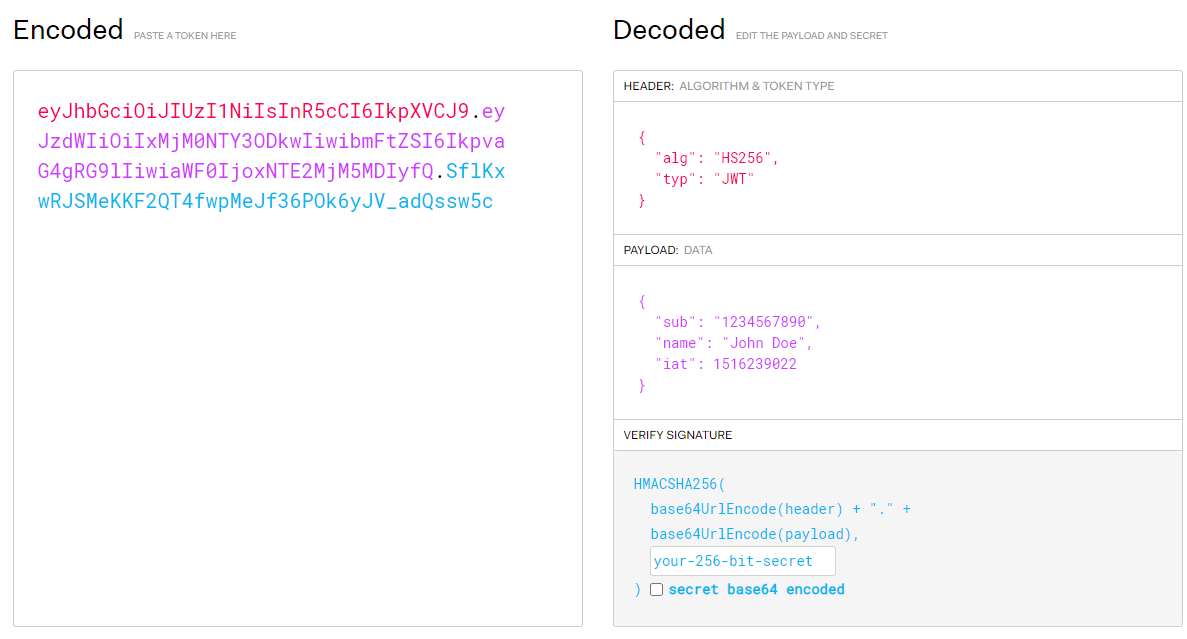
jwt의 형태는 아래와 같다.
헤더와 페이로드를 base64로 인코딩하고, 헤더+페이로드+비밀키로 시그니처를 생성하고 다시 base64로 인코딩한다.
-
이걸 직접 만들어 볼 것이다!!
jwt 라이브러리 추가
- maven repository에서 java jwt를 검색하여 하나를 선택하고 gradle을 복사하자
- 여기서는 3.10.2버전을 사용하였다. - build.gradle dependencies에 아래 코드를 추가해주자
// https://mvnrepository.com/artifact/com.auth0/java-jwt
implementation group: 'com.auth0', name: 'java-jwt', version: '3.10.2'
application.properties 수정
- 강의에서는 yml로 진행하였지만 나는 properties로 하였다.
server.port=8080
server.servlet.context-path=/
server.servlet.encoding.charset=UTF-8
server.servlet.encoding.enabled=true
server.servlet.encoding.force=true

spring.datasource.url=
spring.datasource.driver-class-name=com.mysql.cj.jdbc.Driver
spring.datasource.username=
spring.datasource.password=

spring.h2.console.enabled=true

spring.jpa.hibernate.ddl-auto=create
spring.jpa.hibernate.naming.physical-strategy=org.hibernate.boot.model.naming.PhysicalNamingStrategyStandardImpl
spring.jpa.show-sql=true- db url, username, password는 각 db에 맞게 입력해주면 된다.
RestController.java 생성
- controller 패키지를 만들고 그 아래 RestController를 생성해주자
@RestController
public class RestApiController {

    @GetMapping("home")
    public String home() {
        return "<h1>home<h1>";
    }
}
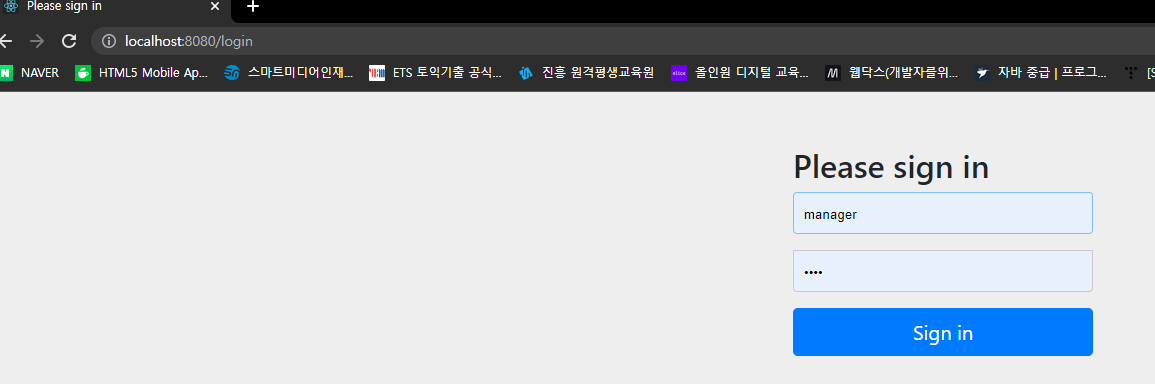
- 프로젝트를 실행하고 home으로 접속했을 때 아래의 화면이 뜨면 설정이 완료된 것이다.
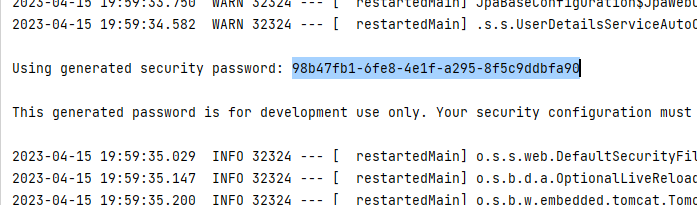
- 이 때 사용되는 암호는 콘솔에 뜨는 password를 입력하면 된다

꾸준히 하자!