현재 진행중인 프로젝트에서 api를 활용해 젤리 영양성분 정보를 받아오거나 수정, 관리등을 하는 기능을 구현하는 와중에 사용자의 권한에 따라 접근할 수 있는 메소드가 달라야 할 필요성이 생겼다. 그래서 spring security를 조금 알아보기로 하였다!
Spring Security란?
엔터프라이즈 애플리케이션을 위한 인증, 권한 부여 및 기타 보안 기능을 제공하는 Java/Java EE 프레임워크입니다.
환경설정
1. MySQL 스키마 생성
create user 'cos'@'%' identified by 'cos1234';
GRANT ALL PRIVILEGES ON *.* TO 'cos'@'%';
create database security;
use security;
2. 프로젝트 생성
- Maven
- Java 11
- 영상은 1.8버전이지만 스프링 부트 버전에 맞춰 11로 함 - 버전은 2.대로
- 3.대부터는 자바 버전 17이상부터 지원함 - 메타데이터 설정
- 의존성 주입
- spring web
- MySQL Driver
- Spring Boot DevTools
- Lombok
- Mustache
- 이건 뷰 탬플릿(Thymeleaf 같은)
- Spring Data JPA
- Spring Security
3. Application.yml
server:
  port: 8080
  servlet:
    context-path: /
    encoding:
      charset: UTF-8
      enabled: true
      force: true

spring:
  datasource:
    driver-class-name: com.mysql.cj.jdbc.Driver
    url: jdbc:mysql://localhost:3306/security?serverTimezone=Asia/Seoul
    username: cos
    password: cos1234

  jpa:
    hibernate:
      ddl-auto: update #create update none
      naming:
        physical-strategy: org.hibernate.boot.model.naming.PhysicalNamingStrategyStandardImpl
show-sql: true- 그런데 나는 Application.properties로 설정을 하였는데 아래의 코드로 하면 된다
server.port=8080
server.servlet.context-path=/
server.servlet.encoding.charset=UTF-8
server.servlet.encoding.enabled=true
server.servlet.encoding.force=true

spring.datasource.url=jdbc:mysql://localhost:3306/security?serverTimezone=Asia/Seoul
spring.datasource.driver-class-name=com.mysql.cj.jdbc.Driver
spring.datasource.username=cos
spring.datasource.password=cos1234

spring.h2.console.enabled=true

spring.jpa.hibernate.ddl-auto=create
spring.jpa.hibernate.naming.physical-strategy=org.hibernate.boot.model.naming.PhysicalNamingStrategyStandardImpl

# 추가
spring.jpa.defer-datasource-initialization=true
IndexController 생성
@Controller
public class IndexController {

    @GetMapping({"", "/"})
    public String index() {
        // 머스테치 기본폴더 src/main/resources
        // 뷰리졸버 설정 : templates (prefix), .mustache (suffix) 생략가능!!
        return "index"; // src/main/resources/tamplates/index.mustache
    }
}
index.html 생성
<!DOCTYPE html>
<html lang="en">
<head>
    <meta charset="UTF-8">
    <title>인덱스 페이지</title>
</head>
<body>
    <h1>인덱스 페이지입니다.</h1>
</body>
</html>- 컨트롤러에서 메서드가 실행되면 뷰 리졸버는 경로에서 index.mustache파일을 찾을 것인데,
우리는 index.html 파일을 생성하였으므로 suffix 설정을 해줘야한다.
WebMvcConfig 생성
@Configuration
public class WebMvcConfig implements WebMvcConfigurer {

    @Override
    public void configureViewResolvers(ViewResolverRegistry registry) {
        MustacheViewResolver resolver = new MustacheViewResolver();
        resolver.setCharset("UTF-8");
        resolver.setContentType("text/html; charset=UTF-8");
        // prefix 설정
        resolver.setPrefix("classpath:/templates/");
        // suffix 설정
        resolver.setSuffix(".html");

        registry.viewResolver(resolver);
    }
}- config에서 직접 뷰 리졸버를 생성하여 등록해준다.
- 이때 configureViewResolvers는 WebMvcConfigurer의 메서드를 오버라이드 한다.
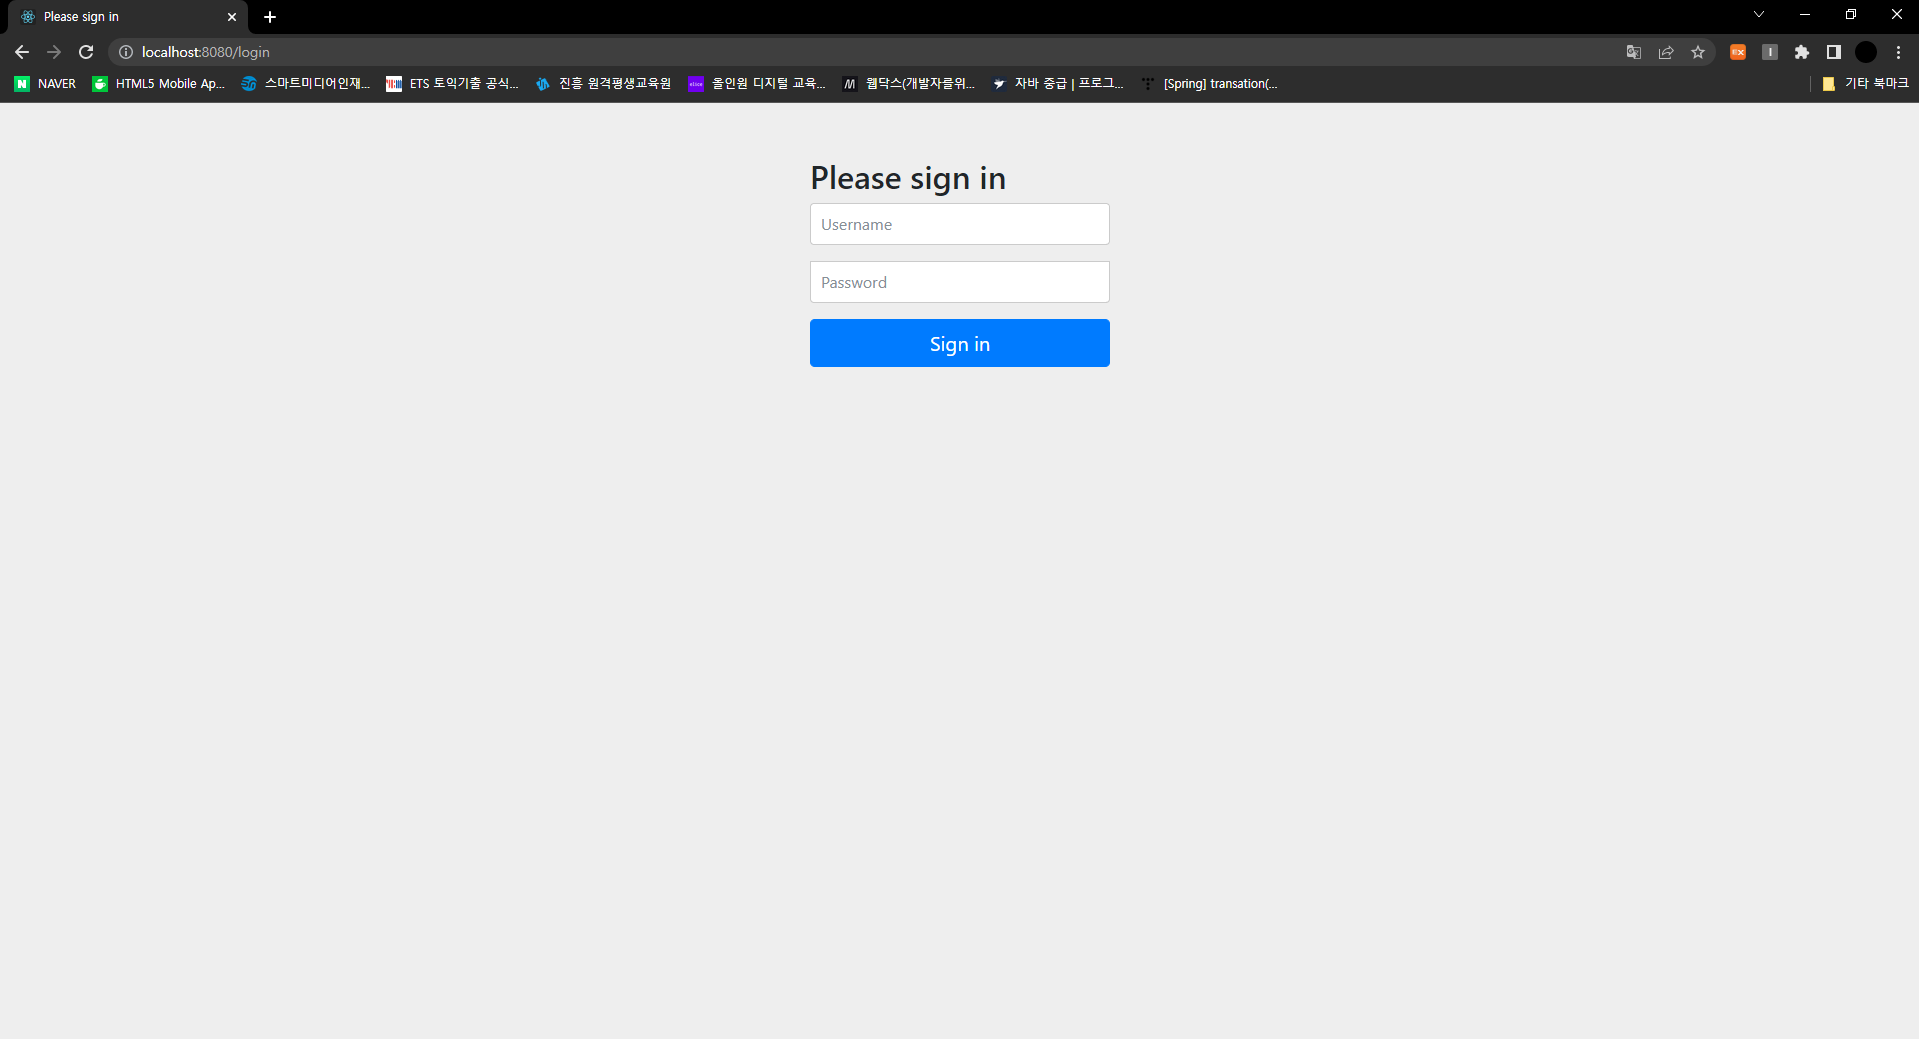
localhost 접속
- 이제 localhost로 접속을 하면 아래의 화면으로 이동하는데
spring security의존성을 추가하였기 때문에 다른 리소스로 접근을 시도하여도 login으로 자동으로 이동하게 된다
- 프로젝트를 구동해보면 중간에 아래 같이 password가 로그로 찍히는데
username : user
password : 아래처럼 로그에 찍힌 암호를 입력하면

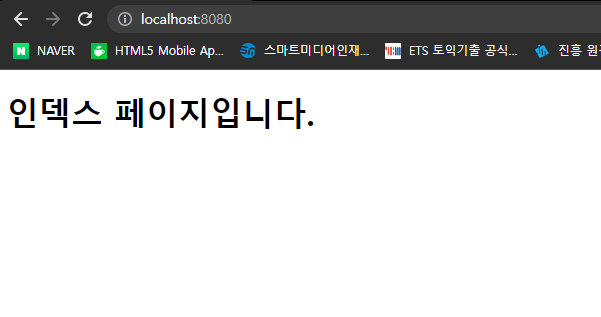
인덱스 페이지로 이동한다!!

꾸준히 하자!