
이번에 개인 공부용으로 맥북을 사게 되면서 자바를 설치할 예정이다.
기존에는 윈도우를 썼으나, 맥북을 사게 되면서 MacOS에서 설치하는 방법이 달라 Velog를 작성하게 되었다.
💻 Homebrew
Homebrew는 Max Howell이 만든 MacOS용 대표 패키지 관리 애플리케이션이다. RedHat 계열의 yum 또는 데비안 계열의 apt-get과 같이 의존성문제에 신경쓰지 않고 Command Line에서 쉽게 패키지를 설치하기 위한 도구이다.
Homebrew는 MacOS용 패키지 관리 애플리케이션이지만, 리눅스나 윈도우의 WSL(Windows Subsystem for Linux) 또한 지원하고 있고, 캐스크(cask) 확장을 통해 GUI 애플리케이션 설치에도 이용할 수 있다.
아래는 Homebrew 사이트이다.
Homebrew 홈페이지 이동
아래는 설치 방법이다.
> /bin/bash -c "$(curl -fsSL https://raw.githubusercontent.com/Homebrew/install/HEAD/install.sh)"홈페이지 또는 위의 명령어를 복사해 터미널에 입력할 경우 Homebrew설치가 시작되고 비밀번호를 입력하게 되면 자동으로 설치가 되게 된다.
Homebrew가 잘 설치가 되었는지 확인하기 위해 brew --version명령어를 통해 확인해보도록 하겠다.
> idowon@idowon-ui-MacBookPro ~ % brew --version
Homebrew 3.4.11
Homebrew/homebrew-core (git revision bb48bd138f9; last commit 2022-05-18)
이렇게 명령어를 입력 시 버전이 출력이 된다면 잘 설치가 됬으니 다음 과정으로 넘어가도록 하겠다.
☕️ JAVA
다음으로는 중요한 JAVA를 설치해 보도록 하겠다.
위에서 설치한 Homebrew를 통해 설치를 할 예정이다. OpenJDK16버전을 설치 했으며 명령어로는 이렇다.
> idowon@idowon-ui-MacBookPro ~ % brew install --cask adoptopenjdk16만약 다른버전을 설치하고 싶을 때에는 찾기 명령어를 통해 검색 후 원하는 버전을 골라 명령어에 입력해주면 편리하게 설기가 완료된다. 찾기 명령어로는 아래와 같다.
idowon@idowon-ui-MacBookPro ~ % brew search jdk설치가 완료후 JAVA가 잘 설치가 되었는지 확인하기 위해 java --version 명령어를 통해 확인해보도록 하겠다.
idowon@idowon-ui-MacBookPro ~ % java --version
openjdk 16.0.1 2021-04-20
OpenJDK Runtime Environment AdoptOpenJDK-16.0.1+9 (build 16.0.1+9)
OpenJDK 64-Bit Server VM AdoptOpenJDK-16.0.1+9 (build 16.0.1+9, mixed mode, sharing)
이렇게 명령어를 입력 시 버전이 출력이 된다면 잘 설치가 됬으니 다음 과정으로 넘어가도록 하겠다.
🪩 전자정부프레임워크
다음으로는 여러가지 개발자 개발환경이 갖추어진 전자정부프레임워크를 설지하도록 하겠다.
우선 전자정부프레임워크의 사이트이다.
https://www.egovframe.go.kr/home/sub.do?menuNo=94
필자는 4.0.0 버전으로 설치 했으며, 필요한 버전에 따라 dmg파일을 다운로드 받으면 된다.
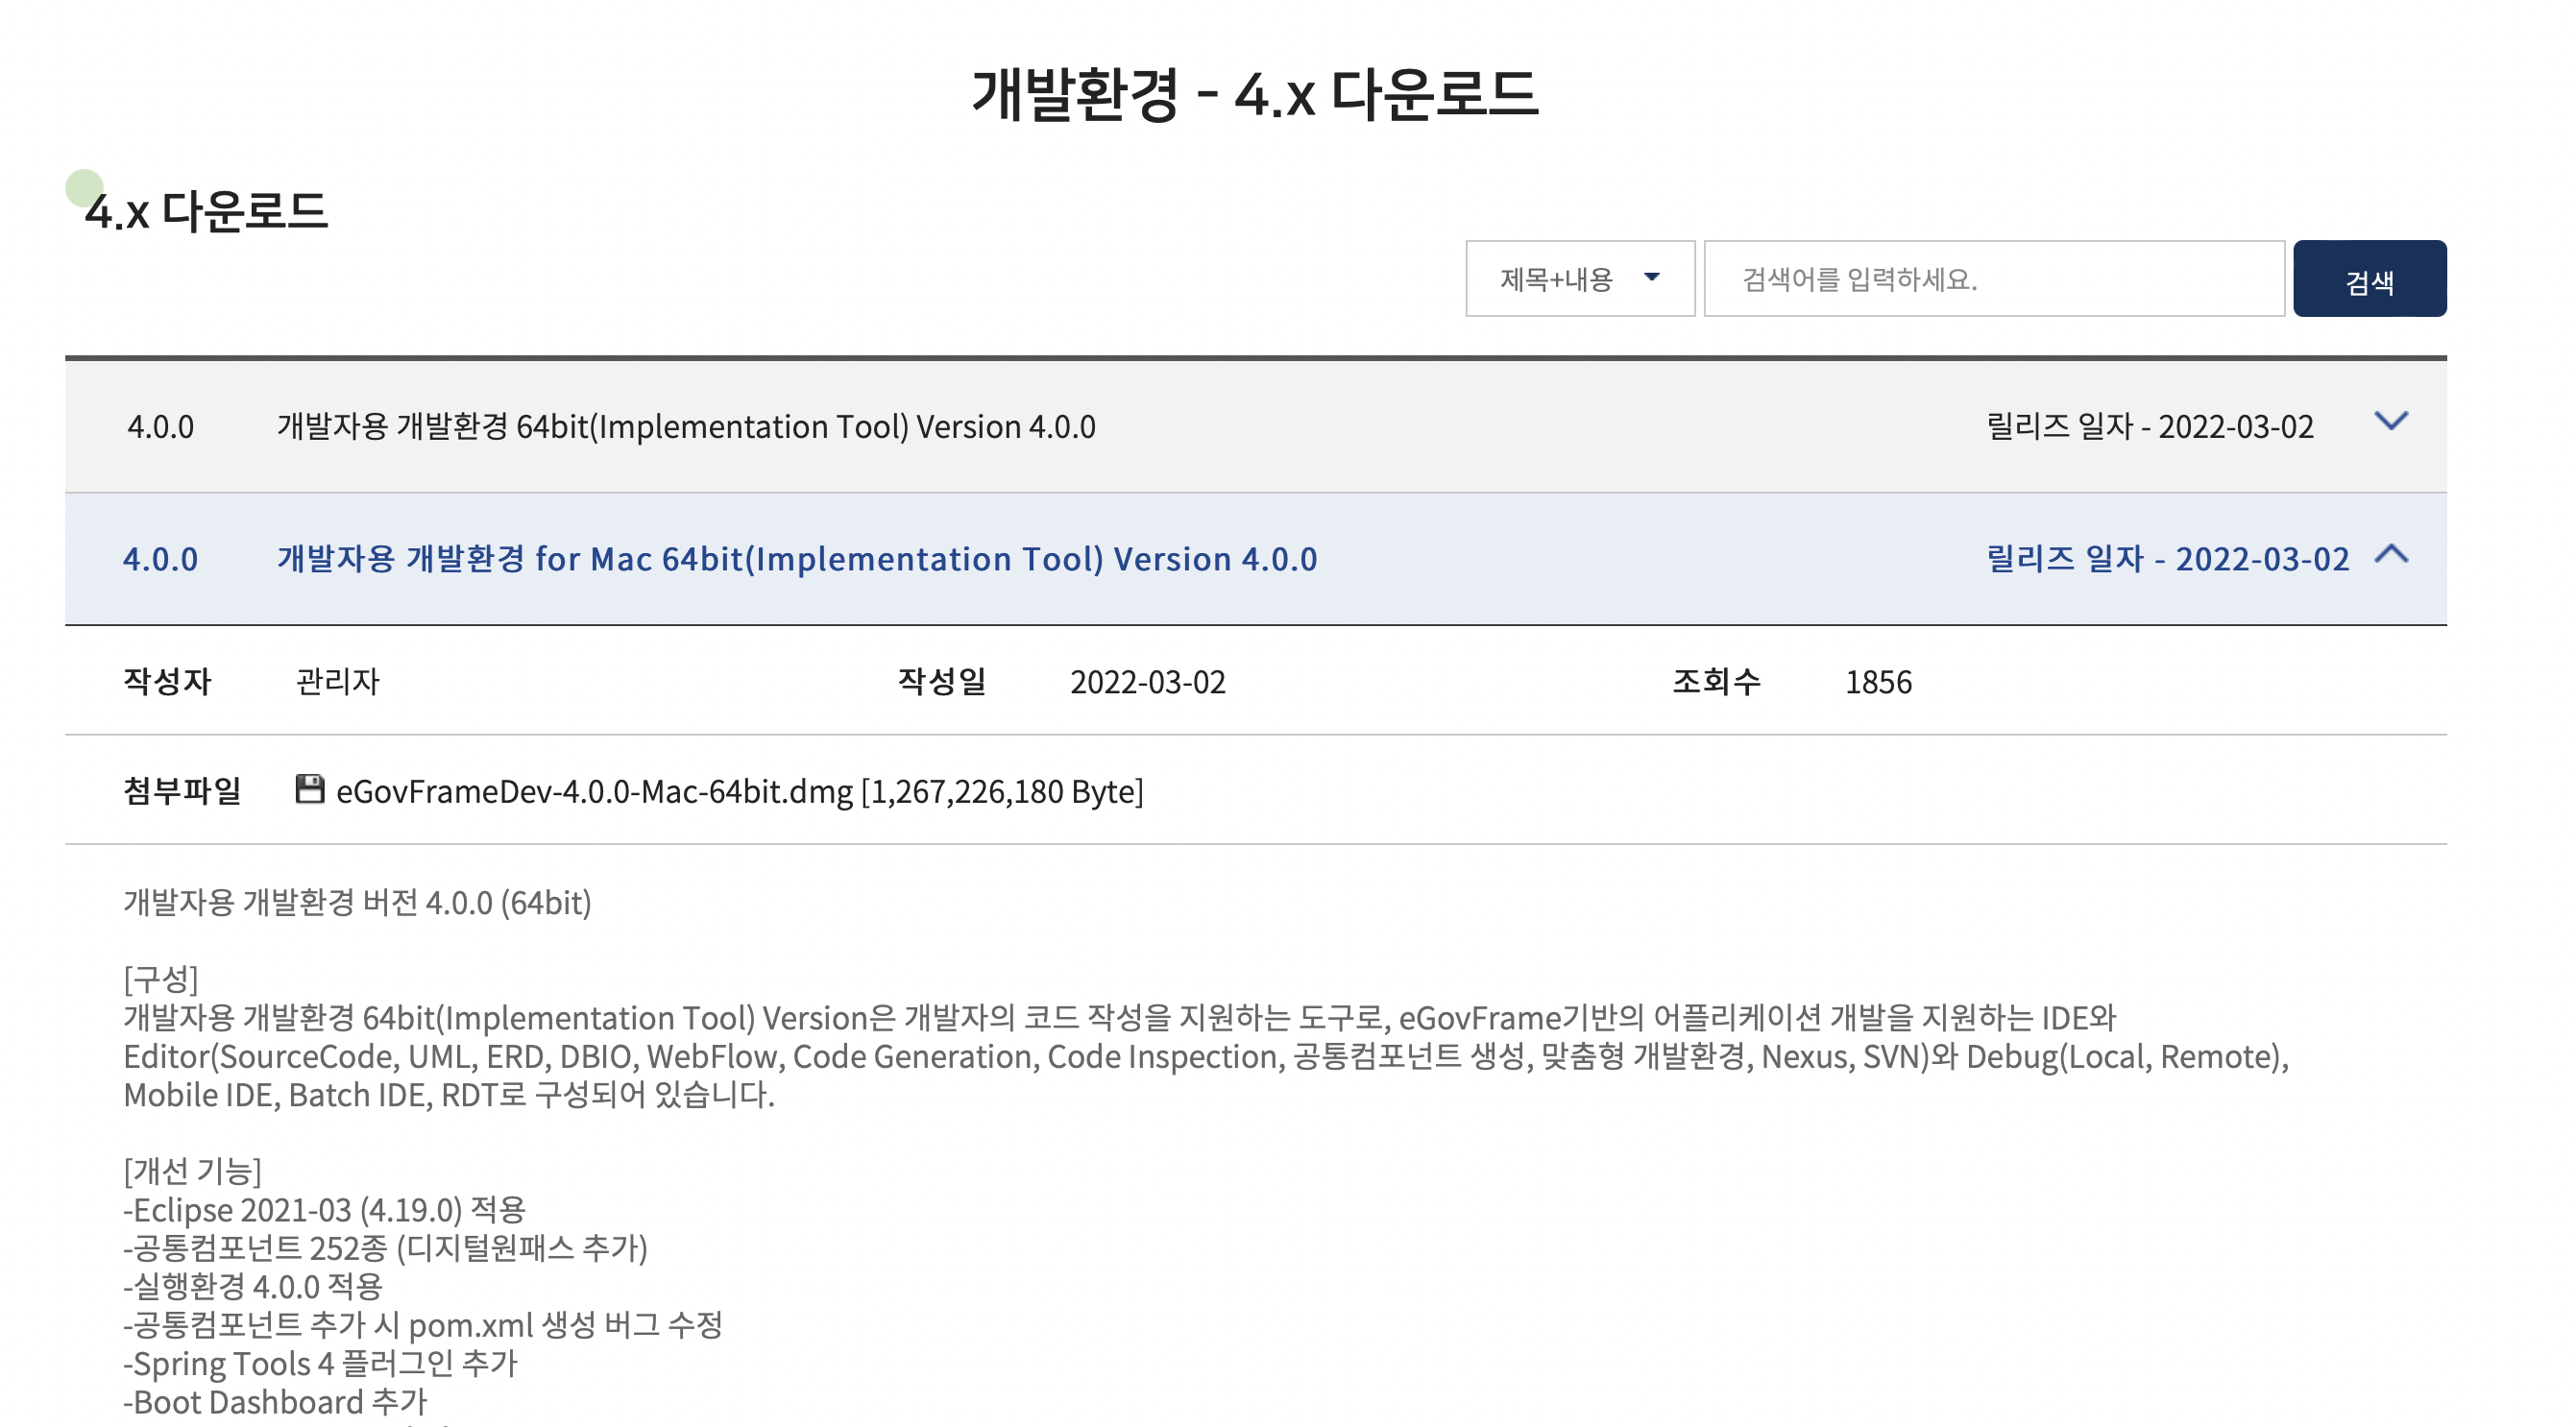
우선 첫번째 개발자용 개발환경 for Mac으로 들어가 약관에 동의후 다운로드 받는다.
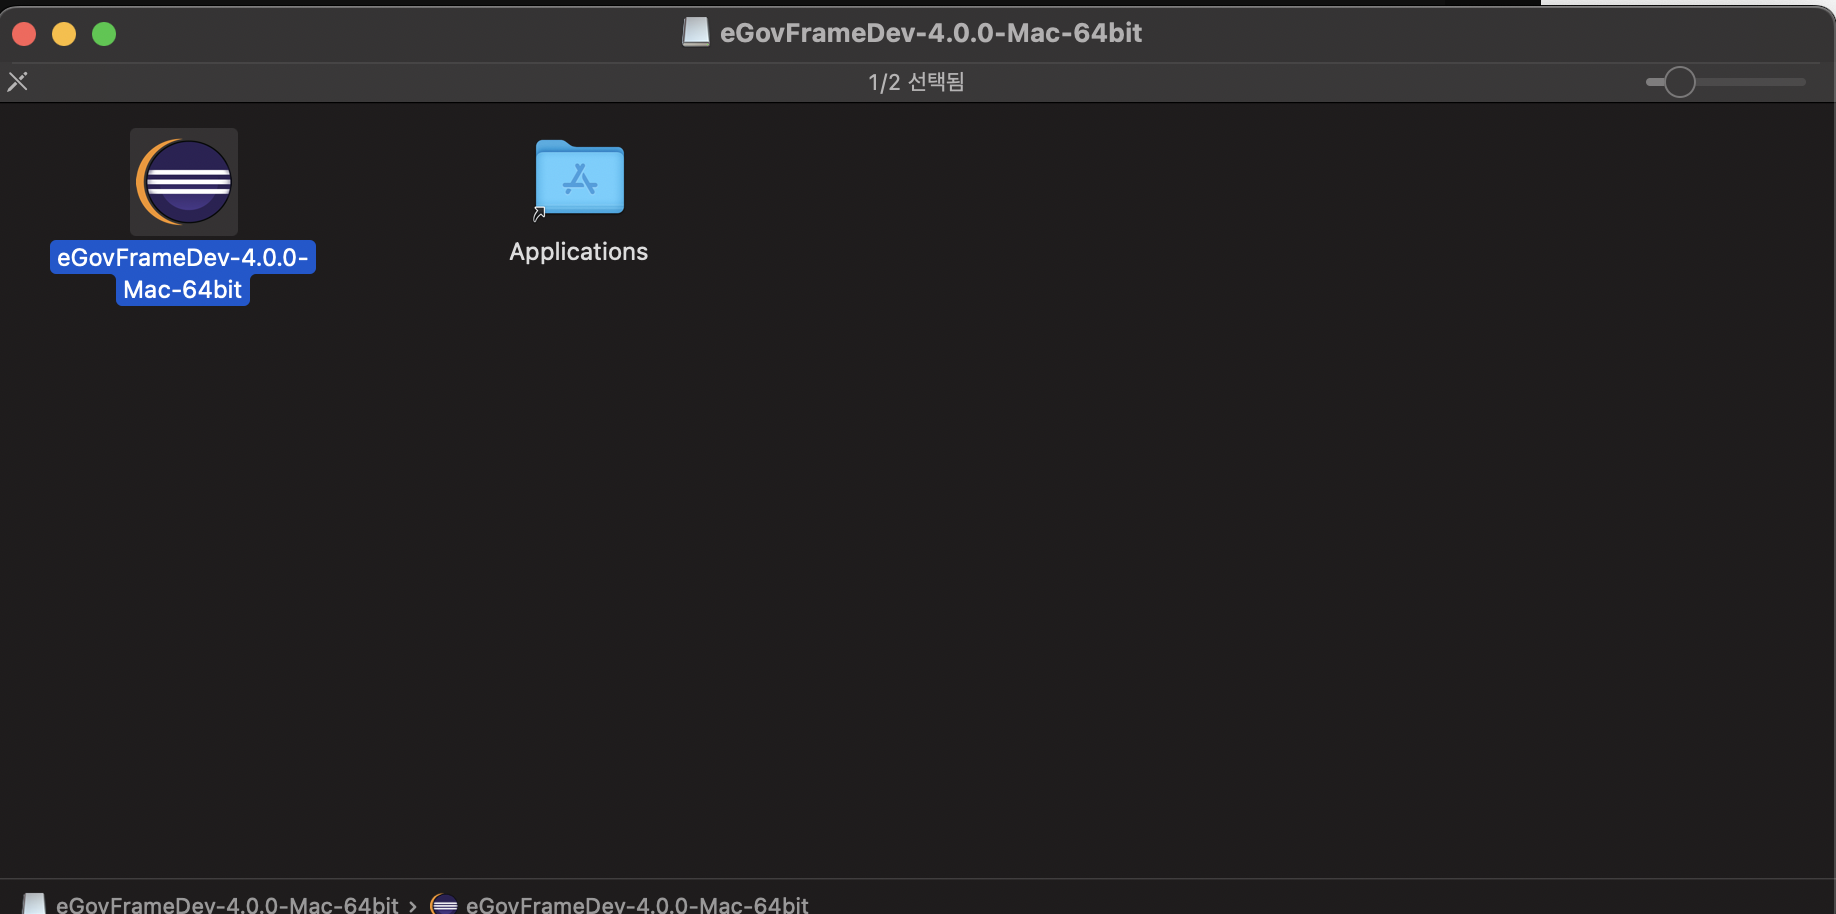
다운로드가 완료되어 dmg파일을 실행하면 다음과 같은 화면이 나오게 된다.
이때 eGovFrameDev-4.0.0-Mac-64bit를 Applications에 드래그 드롭 하게 되면 설치는 완료되게 된다.
전자정부프레임워크는 다음과 같이 설치가 간단하게 끝난다.
🐈 Tomcat
다음으로는 웹서버를 구동하기 위해 Tomcat을 설치한다. 필자의 버전은 8.5.82버전으로 사용했다.
아래는 톰캣사이트이다.
https://tomcat.apache.org/download-80.cgi
아래의 화면은 원하는 버전을 선택했을테 페이지 화면이고 좌측 메뉴에서 원하는 버전을 선택할 수 있다.
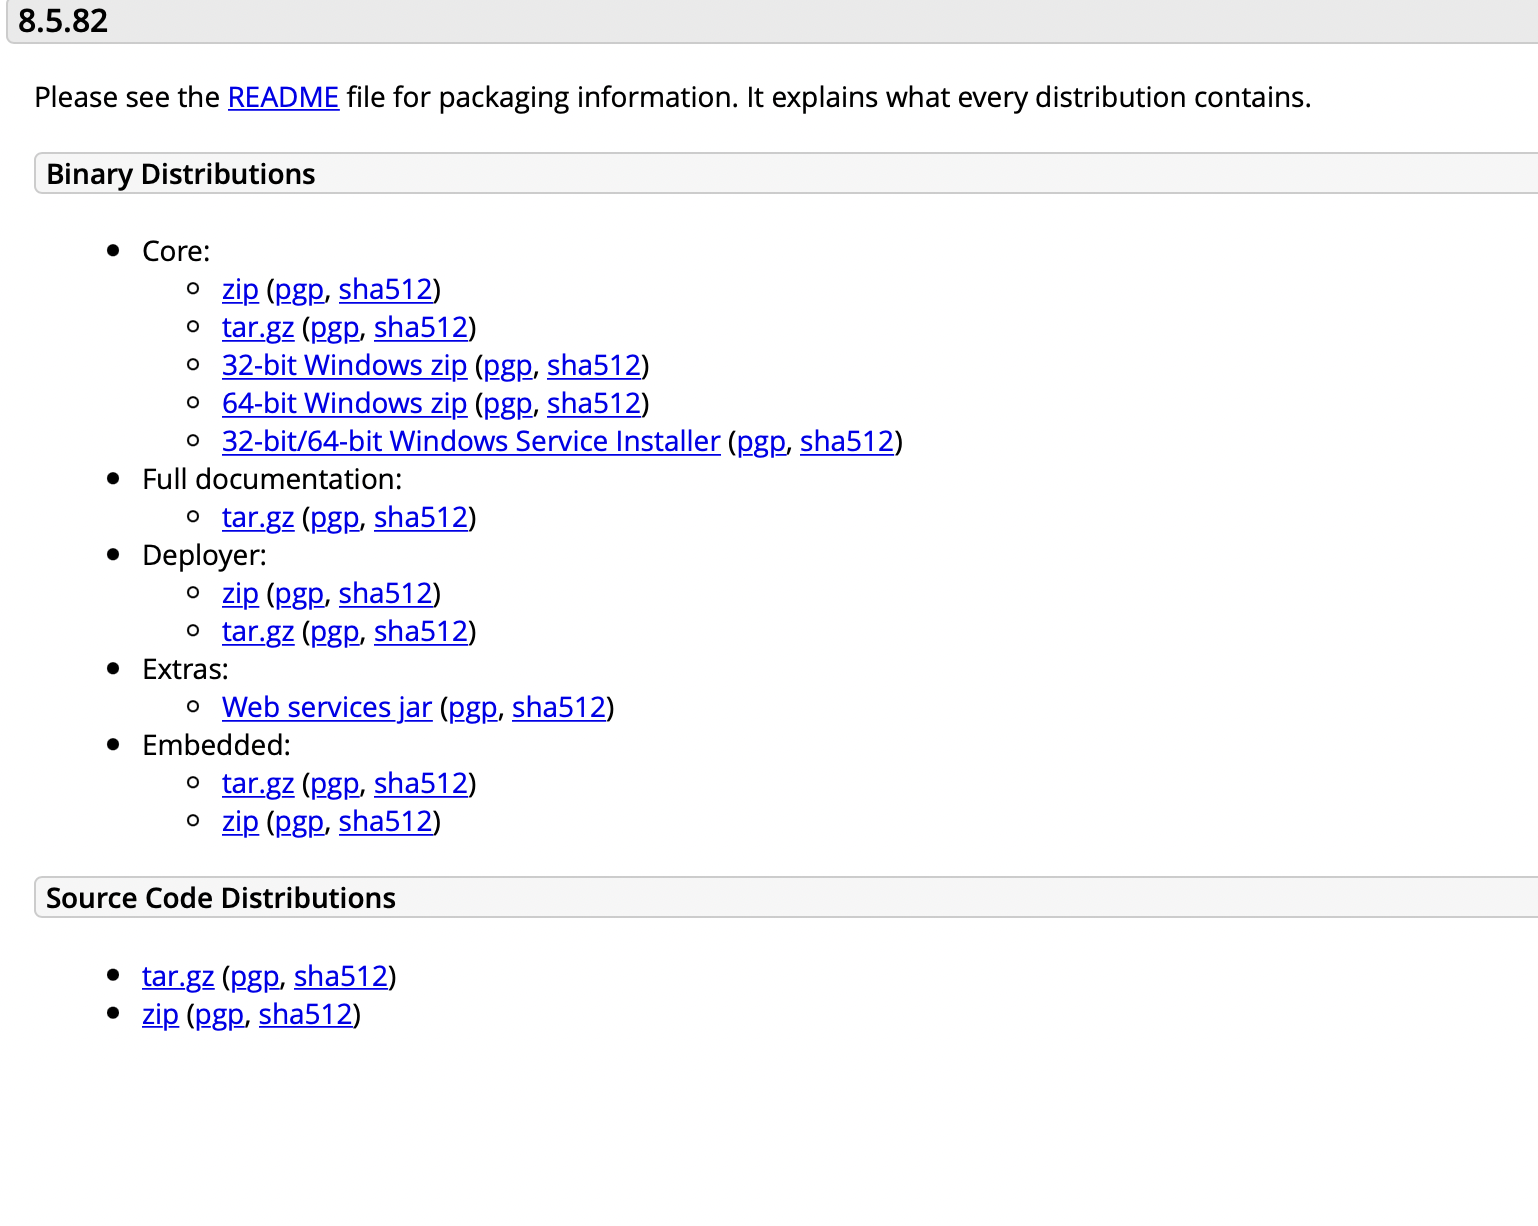
위의 화면에서 tar.gz를 클릭해 다운로드 받고 원하는 위치에 압축을 푼다.
그 후 위에서 설치한 전자정부프레임워크를 실행해 Tomcat을 구동하기 위해 설정을 진행하도록 하겠다.
Tomcat Eclipse 설정
- Eclipse가 실행 된후 상단바에서 Eclipse > Preferences.. 를 클릭합니다.
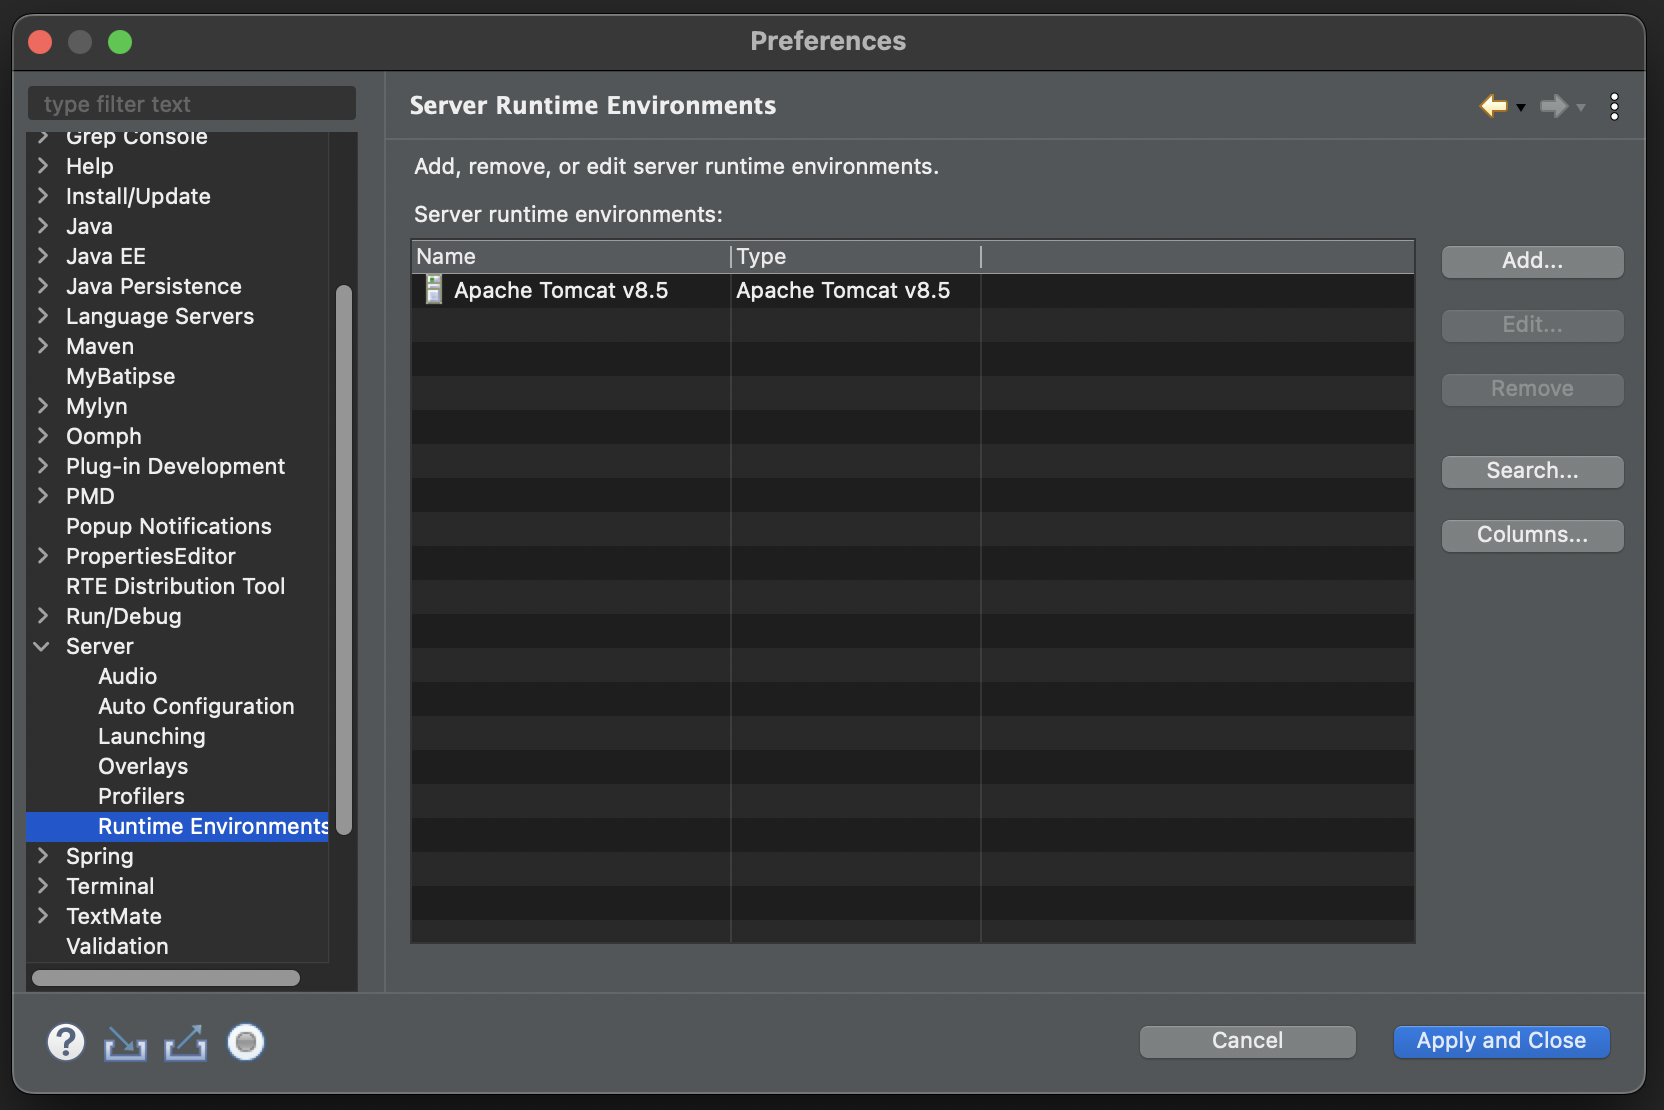
- Perferences에서 Server > Runtime Environments를 클릭해 경로를 설정해주는 창으로 이동합니다.
- Add 버튼을 클릭해 경로 추가를 시작합니다.
- Add 버튼을 클릭할 시 새로운 윈도우가 나오게 되는데 Apache를 클릭 후 다운로드 받은 버전과 같은 Tomcat을 선택합니다.
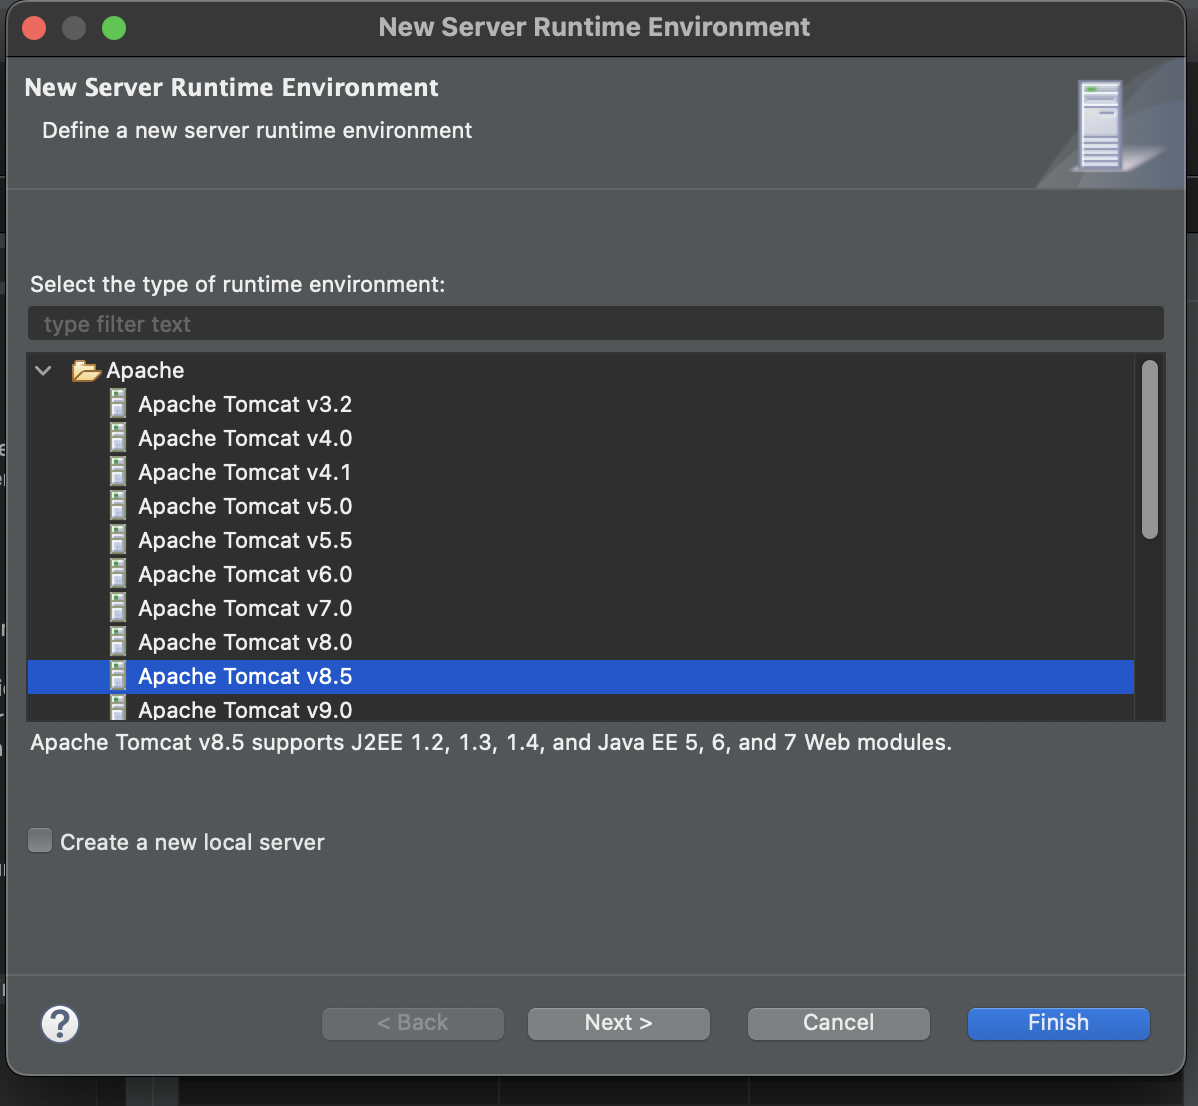
- 버전을 선택후 Next > 버튼을 클릭 시 Browse버튼이 있는 윈도우가 표출되고 Browse..버튼을 클릭해 Tomcat이 있는 폴더를 지정해줍니다.
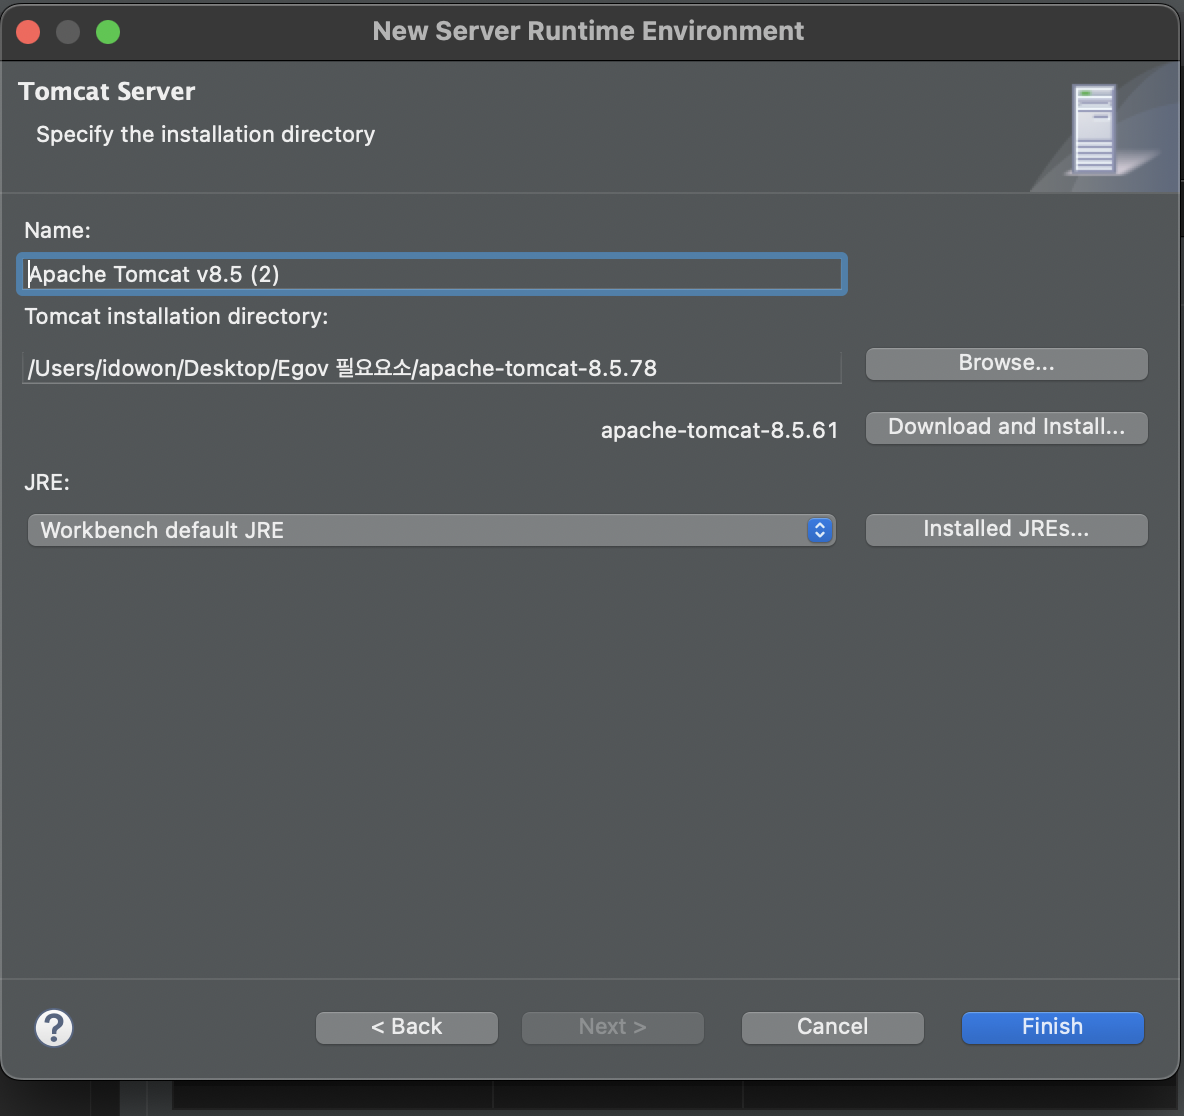
- 폴더를 입력 후 Finish를 클릭할 시 설정창에 Tomcat Server가 추가된다. (완료)
이로써 모든 개발환경 세팅은 끝나게 되었고, 맥북을 처음 구매하게 되어 설치법을 모르거나 처음 개발환경을 세팅하는 분들에게 도움이 됬으면 한다. 앞으로 차근차근 공부한 내용을 올리도록 하겠다.

5개의 댓글

Employees or other members of the Hyvee Huddle Login Company can utilise the internet portal Hy-Vee Connect.
Employees or other members of the Hyvee Huddle Login Company can utilise the internet portal Hy-Vee Connect.

Your health care expenses will be effectively controlled once you sign up for a MyBenefitWallet.com account. By doing this, you will be able to build up your tax-advantaged health savings account wealth.
Users may easily manage and customize a highly portable and scalable solution using www.MyBenefitWallet.com. Additionally, this platform easily meets the members' total health demands, including health funding, healthcare savings, and healthcare payments.

Employees of Northside Hospital can access their benefits and personal data online through the protected myNorthsideHR Employee Portal. Maintaining personnel data, viewing payroll information, creating new hire packs for recently hired staff, and more will all be within the HR department's capabilities.
Employees will also be able to see personal records like vacation, sick leave, and personal timekeeping using the MyNorthsideHR interface. Workers can also examine information regarding health insurance benefits, such as payroll deductions, 401(k) plans, and other perks related to their employment at Northside Hospital.
Thanks for that Iraq Dinar Recaps