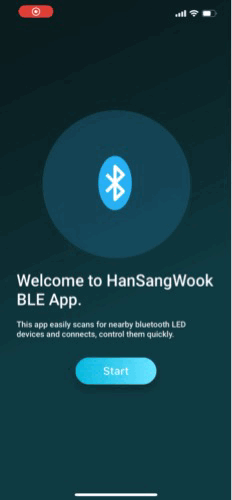
들어가며
지난번에서는 디바이스의 블루투스 기능활성화여부에 따른 라우팅까지 했었습니다. 이제는 본격적으로 블루투스 기기 검색과 ESP32와 Arduino IDE를 이용하여 Advertising할 수 있도록 하는 방법을 알아보겠습니다.
startScan & scanResults
Start버튼을 클릭하면 제가 ESP32로 만든 BLE 장치를 검색해야 합니다. 제가 만든 BLE 장치의 코드를 잠깐 보겠습니다.
#include <BLEDevice.h>
#include <BLEUtils.h>
#include <BLEServer.h>

#define SERVICE_UUID        "4fafc201-1fb5-459e-8fcc-c5c9c331914b" //Service uuid
#define CHARACTERISTIC_UUID "beb5483e-36e1-4688-b7f5-ea07361b26a8" //Characteristic uuid


BLECharacteristic *pCharacteristic;
BLEServer *pServer;

void setup() {
  Serial.begin(115200);
  Serial.println("Starting BLE work!"); //실행되면 출력하는 메시지

  BLEDevice::init("LED BLE MESH SERVER"); //BLE장치의 이름
  pServer = BLEDevice::createServer();
  BLEService *pService = pServer->createService(SERVICE_UUID);
  pCharacteristic = pService->createCharacteristic(
    CHARACTERISTIC_UUID,
    BLECharacteristic::PROPERTY_READ |
    BLECharacteristic::PROPERTY_WRITE |
    BLECharacteristic::PROPERTY_NOTIFY
  );
  pCharacteristic->setValue("0");
  pService->start();

  BLEAdvertising *pAdvertising = BLEDevice::getAdvertising();
  pAdvertising->addServiceUUID(SERVICE_UUID);
  pAdvertising->setScanResponse(true);
  pAdvertising->setMinPreferred(0x06);
  pAdvertising->setMinPreferred(0x12);

  BLEDevice::startAdvertising(); //Advertising 시작 !
  Serial.println("Characteristic defined! Now you can read it on your phone!");
}

void loop() {

}
해당 코드는 Arduino IDE를 이용하여 제작하였습니다. 이렇게 실행시키면 ESP32는 BLE장치처럼 Advertising을 할 수 있습니다. 이제 앱에서 해당 기기를 찾아야 합니다. 저는 우선, 장치의 이름을 이용해서 필터링을 해주도록 하겠습니다.
flutterBlue.startScan(timeout: const Duration(seconds: 5));flutterBlue는 FlutterBluePlus.instance로 선언한 상수입니다. 그 안에는 startScan함수가 내재되어있습니다. 이 함수를 이용하면 BLE 장치를 스캔할 수 있습니다. 함수안에 timeout 프로퍼티로 스캔하는 시간도 지정할 수 있고, 만약 지정하지 않으면 계속해서 스캔하게 됩니다. 결과는 어떻게 가져올 수 있을까요?
flutterBlue.scanResults; //Stream<List<ScanResult>> 반환검색함수와 비슷하게 scanResults를 내재하고 있습니다. 이는 스캔함수로 검색된 장치결과를 의미하는 ScanResult타입의 객체를 Stream 타입의 배열로 반환해줍니다. 이제 본격적으로 검색하고 결과를 가져오는 프로세스를 만들어보겠습니다.
검색결과 모델
검색결과를 하나의 모델로 받아올겁니다. 이러한 스캔의 결과로 생성할 수 있는 모델을 만들어주겠습니다.
class DeviceModel {
  BluetoothDevice? device;
  late String name;
  late DeviceIdentifier id;
  late bool isConnected;

  DeviceModel(
      {required this.device,
      required this.name,
      required this.id,
      required this.isConnected});

  factory DeviceModel.fromScan(ScanResult result) {
    return DeviceModel(
      device: result.device,
      name: result.device.name,
      id: result.device.id,
      isConnected: false,
    );
  }
}
ScanResult타입의 객체는 device, name, id 속성을 갖고 각각 장치, 장치의 이름, 장치의 Mac주소를 의미합니다. 그리고 이 장치가 연결되었는지를 알기 위한 isConnected 변수는 따로 만들어주겠습니다.
검색 함수 서비스 클래스
직접 컨트롤러에 코딩을 할 수 있지만, 아무래도 주요 기능은 따로 클래스를 만들어서 모듈화시키는 것이 좋을 것 같습니다. 따라서 BluetoothDiscovery 클래스를 만들고 그 안에 검색함수를 만들어주겠습니다.
class BluetoothDiscovery {
  // static을 통해 함수를 클래스에 귀속
  static Stream<List<DeviceModel>> getDevices() {
    flutterBlue.startScan(timeout: const Duration(seconds: 5));
    return flutterBlue.scanResults.map((results) {
      List<DeviceModel> devices = [];
      for (var result in results) {
        if (result.device.name == 'LED BLE MESH SERVER') {
          final device = DeviceModel.fromScan(result);
          devices.add(device);
        }
      }
      return devices;
    });
  }
}
해당 함수는 검색을 수행하고, 검색결과를 map함수와 for반복문을 이용하여 접근하면서 이름이 LED BLE MESH SERVER와 같다면 DeviceModel의 생성자를 이용하여 생성하고 결과를 반환하기 위해 생성한 List에 담은 후 결과로 반환해줍니다. 따라서 검색 후 나타난 결과를 반환하는 함수입니다.
Repository 클래스
class BluetoothRepository {
  static Stream<List<DeviceModel>> getDevices() =>
      BluetoothDiscovery.getDevices();
}
해당 클래스는 서비스와 컨트롤러를 이어주는 Repository 클래스입니다. 원래는 이렇게 직접 함수를 호출하지 않고, 데이터의 가공을 위해 존재하는 클래스입니다. 하지만 가공할 필요가 없으니 직접 호출하였습니다.
검색 함수 동작
Start 버튼을 눌렀을 때, 메인화면의 BluetoothController를 바인딩해줍니다. 그렇기 때문에 해당 컨트롤러가 초기화될 때, 스캔을 하면 됩니다.
class BluetoothController extends GetxController {
final _result = Rx<List<DeviceModel>>([]); //검색결과를 담는 변수
List<DeviceModel> get result => _result.value; //검색결과 getter
void onInit() { //컨트롤러가 초기화될 경우 실행
super.onInit();
startScan();
}
void startScan() { //장치를 검색하는 함수
_result.bindStream(BluetoothRepository.getDevices());
}컨트롤러가 초기화되면서 bindStream을 통해 해당함수의 결과를 _result에게 갱신시킬 수 있습니다.
검색결과 UI 구성
검색결과를 ListView를 이용하여 화면에 나타낼 수 있습니다. 물론, 해당 ListView는 Obx로 감싸야 하며, GetView를 이용해야 합니다. 해당 코드는 본인의 스타일대로 직접 작성해보시기 바랍니다.
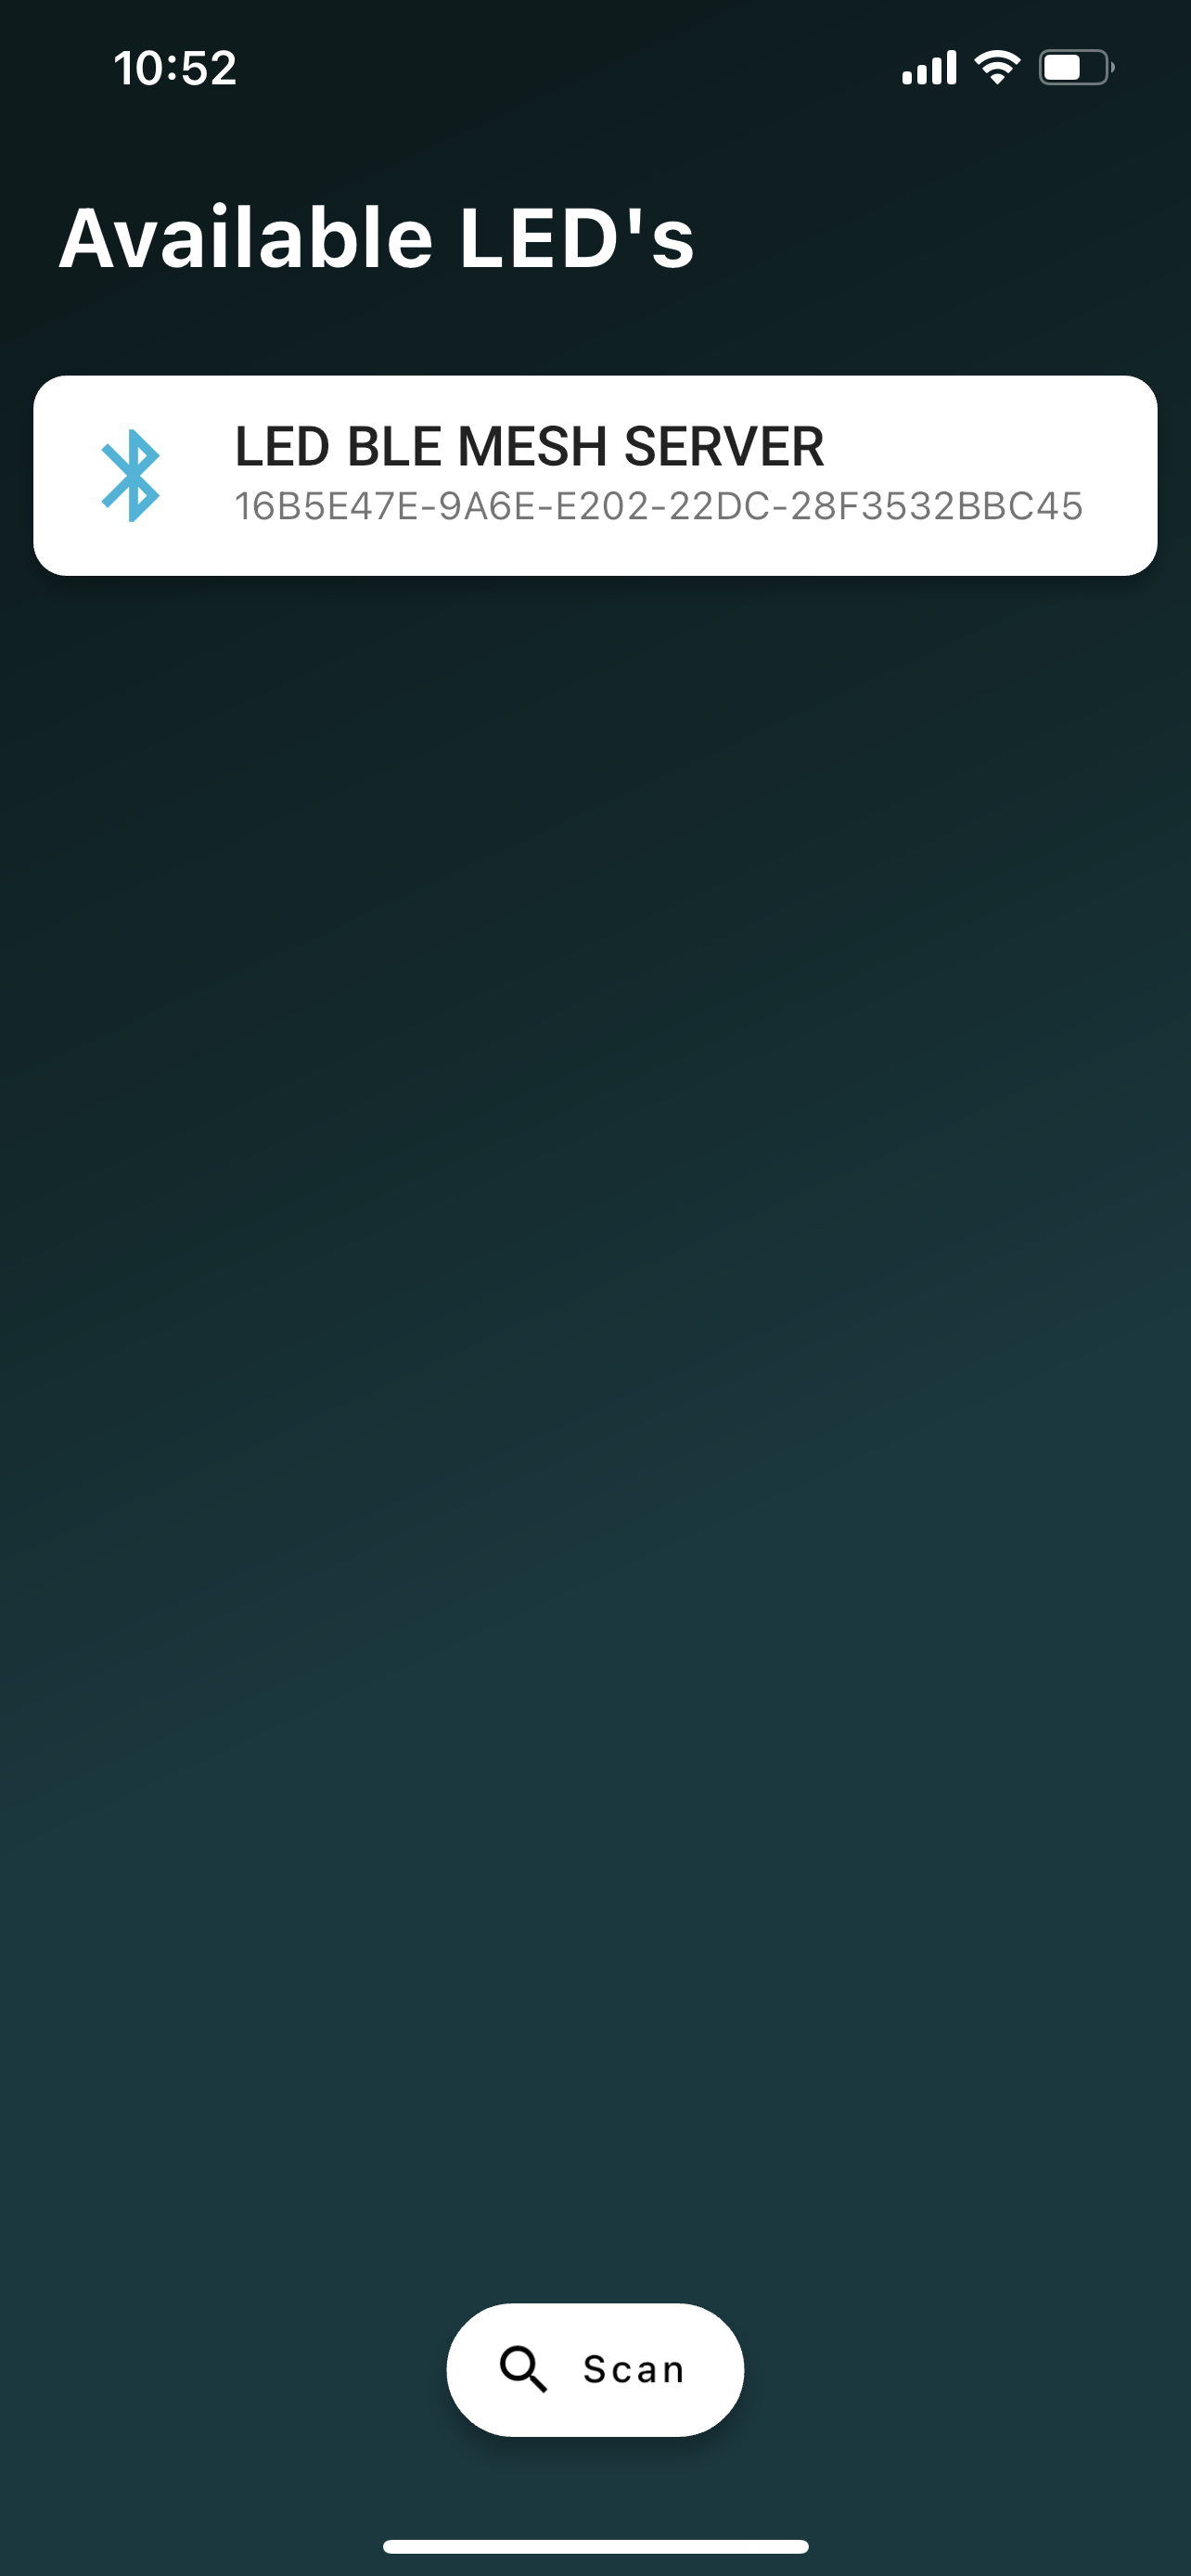
결과가 잘 출력되는 것을 알 수 있습니다 !
실행모습