회사에서 스크롤할때 따라다니는 메뉴를 구현했다.
구글링을 했었지만 자료가 부족하여 이번 블로그를 통해 개발했던 내용을 정리하고자 한다.
vuetify v-scroll
맨처음에 이벤트리스너를 사용하여 스크롤 이벤트를 감지하도록 했었지만 vuetify에서 제공하는 Scroll API가 있었다.
vuetify 설치하고 사용하면 아래와 같이 사용하면됨
<template>
	<div v-scroll='onScroll'>
		...
	</div>
</template>
<script>
	methods:{
		onScroll(){
			...
		}
	}
</script>
Scroll 관련 내장함수들
해당기능을 구현하기 위해 필요한 내장함수들을 알아보자
getBoundingClientRect().top
- 현재 화면 기준으로 해당 엘리멘트의 좌표값을 반환
- 스크롤에 따라 값이 변함, 실시간 동적으로 움직이는 좌표를 구할때 사용
js 방식 : dom에 직접 접근하여 제어
<div id='tagId'>
document.getElementById('tagId').getBoundingClientRect().top

vue 방식 : js방식과 비슷하지만 좀더 vue스럽다
<div ref='tagId'>
this.$refs.tagId.$el.getBoundingClientRect().top
window.pageYOffset
- 현재 스크롤이 얼마나 됐는지 px 단위로 반환하는 속성
내가 사용한 로직
- 처음 렌더링시 초기 위치
topPos를 정함 window.pageXOffset을 통해 스크롤 값이topPos보다 커지면 애니메이션이 시작된다.- opacity가 1로 돼어 메뉴바가 보임
currentPos - this.topPos통해topPos값을 조정함 $nextTick() 설정으로 UI가 갱신될때 오류를 방지
- 예시: topPos가 200 currentPos가 201이면 201-200=1이므로 이때부터 스크롤에 따라 엘리먼트가 움직인다.
- 다시
currentPos가topPos보다 작아지면 opacity가 0이돼어 메뉴바가 사라짐
data(){
return{
topPos: 0,
accountInfoStyle: {
top: 0,
position: 'relative',
transition: 'ease-in-out 1.5s',
opacity: 0,
},
}
},
mounted(){
this.topPos = this.$refs.portfolio.$el.getBoundingClientRect().top
},
methods(){
onScroll() {
let currentPos = window.pageYOffset
if (currentPos > this.topPos) {
this.accountInfoStyle.opacity = 1
this.$nextTick(() => {
this.accountInfoStyle.top = currentPos - this.topPos + 'px'
})
}
else {
this.accountInfoStyle.opacity = 0
}
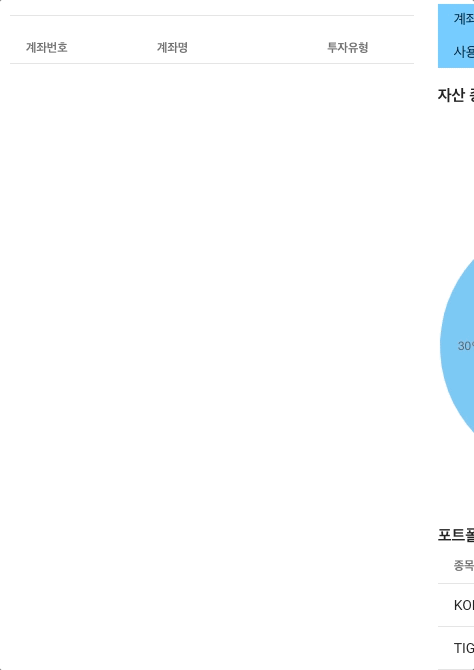
}결과
느낀점
스크롤 이벤트를 제어하는데 힘들었지만 완성해서 뿌듯했다.
좀더 vue스럽게 작성할 필요가 있겠다.