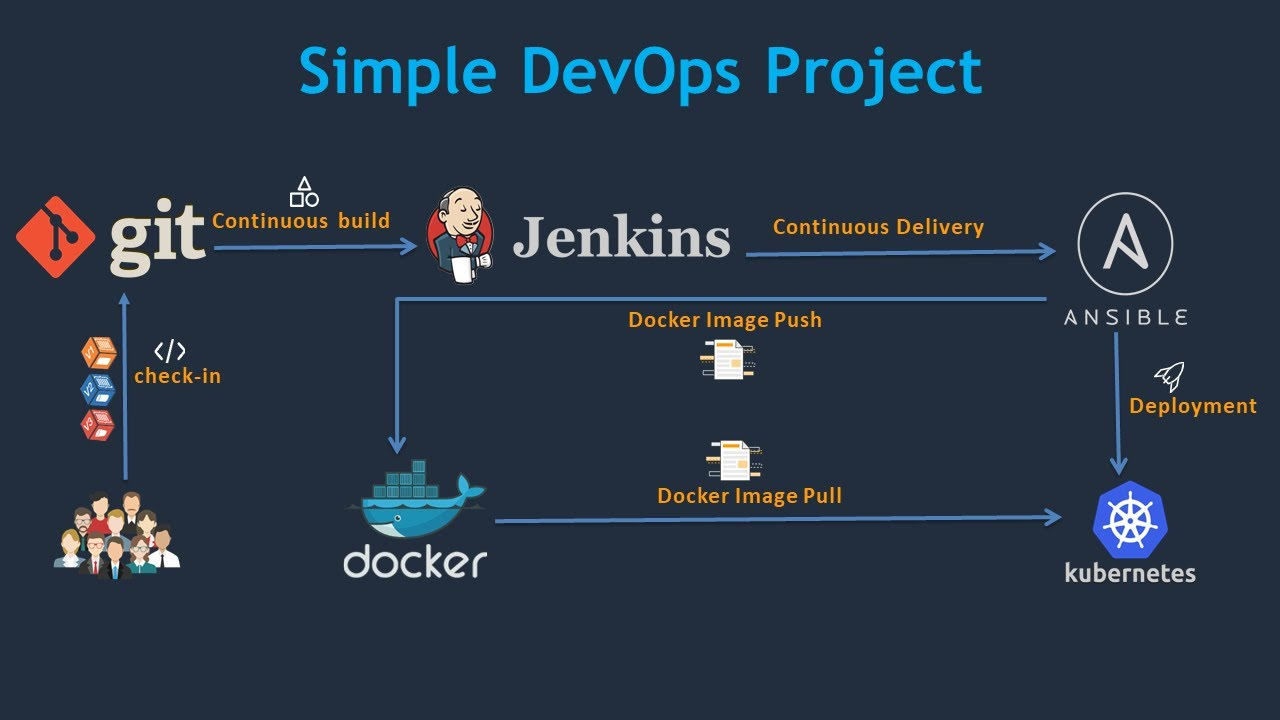
이미지 출처: https://www.youtube.com/watch?v=i8klL6FujLc
노드 준비
master
worker1
gitlab 192.168.1.199
- gitlab ip 주소 설정
root@gitlab:~# vi /etc/netplan/01-network-manager-all.yaml # Let NetworkManager manage all devices on this system
network:
version: 2
ethernets:
ens32:
addresses: [192.168.8.200/24]
gateway4: 192.168.8.2
nameservers:
addresses: [8.8.8.8, 168.126.63.1]
version: 2 root@gitlab:~# netplan apply root@gitlab:~# ifconfig ens32
ens32: flags=4163<UP,BROADCAST,RUNNING,MULTICAST> mtu 1500
inet 192.168.8.199 netmask 255.255.255.0 broadcast 192.168.8.255
inet6 fe80::250:56ff:fe39:d25c prefixlen 64 scopeid 0x20<link>
ether 00:50:56:39:d2:5c txqueuelen 1000 (Ethernet)
RX packets 9340 bytes 6796039 (6.7 MB)
RX errors 0 dropped 0 overruns 0 frame 0
TX packets 3843 bytes 310886 (310.8 KB)
TX errors 0 dropped 0 overruns 0 carrier 0 collisions 0- gitlab 설정 (이미 설치되어있으나 ip 주소 변경해야 함)
root@gitlab:~# vi /etc/gitlab/gitlab.rb 32 external_url 'http://192.168.8.199'root@gitlab:~# gitlab-ctl reconfigure- gitlab에 gitlab-runner, absible 설치
- docker, docker-compose 설치 확인
root@gitlab:~# docker --version
Docker version 20.10.18, build b40c2f6
root@gitlab:~# docker-compose --version
docker-compose version 1.24.1, build 4667896b
curl -L https://packages.gitlab.com/install/repositories/runner/gitlab-runner/script.deb.sh | sudo bashapt-get install -y gitlab-runner
apt-add-repository ppa:ansible/ansible
apt-get install -y ansible
apt-get update- 1차 권한 조정
일반 사용자처럼 동작하는 에이전트인 gitlab-runner는 내부적으로 도커를 이용하여 이미지를 만들고 이를 push, pull할 수 있어야 한다.
따라서 아래의 설정이 필요하다.
4.1 /var/run/docker.sock 퍼미션 조정 -> chmod 666 /var/run/docker.sock
root@gitlab:~# ls -al /var/run/docker.sock
srw-rw---- 1 root docker 0 10월 31 09:40 /var/run/docker.sock
root@gitlab:~# chmod 666 /var/run/docker.sock
root@gitlab:~# ls -al /var/run/docker.sock
srw-rw-rw- 1 root docker 0 10월 31 09:40 /var/run/docker.sock
4.2 /etc/docker/daemon.json
root@gitlab:~# vi /etc/docker/daemon.json {
"insecure-registries": ["192.168.8.100:5000"]
}- ansible 설정
- ansible 설치 확인
root@gitlab:~# ansible --version
ansible [core 2.12.10]
  config file = /etc/ansible/ansible.cfg
  configured module search path = ['/root/.ansible/plugins/modules', '/usr/share/ansible/plugins/modules']
  ansible python module location = /usr/lib/python3/dist-packages/ansible
  ansible collection location = /root/.ansible/collections:/usr/share/ansible/collections
  executable location = /usr/bin/ansible
  python version = 3.8.10 (default, Jun 22 2022, 20:18:18) [GCC 9.4.0]
  jinja version = 2.10.1
libyaml = True- ansible hosts 등록
root@gitlab:~# vi /etc/ansible/hosts [master]
192.168.8.100
[worker]
192.168.8.101- ssh-keygen을 통해 ~/.ssh 디렉토리 생성
root@gitlab:~# ssh-keygen -q -N ""
Enter file in which to save the key (/root/.ssh/id_rsa):
root@worker1:~# ssh-keygen -q -N ""
Enter file in which to save the key (/root/.ssh/id_rsa): root@master:~# ssh-keygen -q -N ""
Enter file in which to save the key (/root/.ssh/id_rsa):master, worker에서 만든 id_rsa, id_rsa.pub는 사용하지 않는다.
- gitlab의 키페어 복사
root@gitlab:~# cat ~/.ssh/id_rsa.pub
ssh-rsa AAAAB3NzaC1yc2EAAAADAQABAAABgQCnAKKyHXcn9H9bGiXwYYs/+LqAyOWxxAzlbiv/Cg2WVVDB7og5FE4EfQljG+EZCqnXXlXvwDqI9KcOl4BARC4GMmFMUMroBhzZ8Bp5y+OnAJI/XcMNAJ1XnibqN9oFRE8rKXZ6RLFEc6s41NvDdqrJQuBkdUhcvA9JRib6zCykrojUdBX3qLVp8OZfCIeZYlyiaV6AZlWO5sQIwf5kR7T49HTh+FaYGWN8jHYgCrDPXZ44jBqDBlNF5e20xwOmDWhUd31We3hoPRYZbun6qitcUvhYBxP2osup3otK84arytkSrw+tm/gGxJfqhT8vKzU041YLqBQ7Z3Ex4PZ31i3eink8rxErI2rJlMa8YP6z44hVHHRisctkxrh7WsxeOkzFFPu80ka4o7bClud/6+p5or2CQyxvDGk/Y6rhgMDTh+bhOdv6D2K0XNQWiEbHrvLLQ24aVMyLixrXQfZgodLmJOjvF56sa0FyJ1S8SedKKOenZjk+Vu/YJ0/I2FBfFd0= root@gitlab- 해당 키페어 master와 worker의 authorized_keys에 붙여넣기 후 퍼미션 600으로 변경
root@master:~# echo "ssh-rsa AAAAB3NzaC1yc2EAAAADAQABAAABgQCnAKKyHXcn9H9bGiXwYYs/+LqAyOWxxAzlbiv/Cg2WVVDB7og5FE4EfQljG+EZCqnXXlXvwDqI9KcOl4BARC4GMmFMUMroBhzZ8Bp5y+OnAJI/XcMNAJ1XnibqN9oFRE8rKXZ6RLFEc6s41NvDdqrJQuBkdUhcvA9JRib6zCykrojUdBX3qLVp8OZfCIeZYlyiaV6AZlWO5sQIwf5kR7T49HTh+FaYGWN8jHYgCrDPXZ44jBqDBlNF5e20xwOmDWhUd31We3hoPRYZbun6qitcUvhYBxP2osup3otK84arytkSrw+tm/gGxJfqhT8vKzU041YLqBQ7Z3Ex4PZ31i3eink8rxErI2rJlMa8YP6z44hVHHRisctkxrh7WsxeOkzFFPu80ka4o7bClud/6+p5or2CQyxvDGk/Y6rhgMDTh+bhOdv6D2K0XNQWiEbHrvLLQ24aVMyLixrXQfZgodLmJOjvF56sa0FyJ1S8SedKKOenZjk+Vu/YJ0/I2FBfFd0= root@gitlab" >> ~/.ssh/authorized_keys

root@master:~# chmod 600 ~/.ssh/authorized_keys
root@worker1:~# echo "ssh-rsa AAAAB3NzaC1yc2EAAAADAQABAAABgQCnAKKyHXcn9H9bGiXwYYs/+LqAyOWxxAzlbiv/Cg2WVVDB7og5FE4EfQljG+EZCqnXXlXvwDqI9KcOl4BARC4GMmFMUMroBhzZ8Bp5y+OnAJI/XcMNAJ1XnibqN9oFRE8rKXZ6RLFEc6s41NvDdqrJQuBkdUhcvA9JRib6zCykrojUdBX3qLVp8OZfCIeZYlyiaV6AZlWO5sQIwf5kR7T49HTh+FaYGWN8jHYgCrDPXZ44jBqDBlNF5e20xwOmDWhUd31We3hoPRYZbun6qitcUvhYBxP2osup3otK84arytkSrw+tm/gGxJfqhT8vKzU041YLqBQ7Z3Ex4PZ31i3eink8rxErI2rJlMa8YP6z44hVHHRisctkxrh7WsxeOkzFFPu80ka4o7bClud/6+p5or2CQyxvDGk/Y6rhgMDTh+bhOdv6D2K0XNQWiEbHrvLLQ24aVMyLixrXQfZgodLmJOjvF56sa0FyJ1S8SedKKOenZjk+Vu/YJ0/I2FBfFd0= root@gitlab" >> ~/.ssh/authorized_keys
root@worker1:~# chmod 600 ~/.ssh/authorized_keys - sshd_config 수정
root@master:~# vi /etc/ssh/sshd_config 39 PubkeyAuthentication yesroot@worker1:~# vi /etc/ssh/sshd_config 39 PubkeyAuthentication yes- restart ssh
root@master:~# systemctl restart sshroot@worker1:~# systemctl restart ssh- gitlab-runner 퍼미션 조정
gitlab-runner가 실행하는 명령은 향후 ansible 등에게 전달할 때 사용해야 한다.
그런데 쉘을 실행할 때 만약 password를 요구한다면 CI 도중 사용자에게 패스워드를 요구하면서 멈출 것이다. 이를 위해 gitlab-runner 사용자의 명령은 패스워드 요구 없이 root 권한 호출하여 사용 가능하도록 해주어야 한다.
root@gitlab:~# vi /etc/sudoers 27 gitlab-runner ALL=NOPASSWD:ALL - 위에서 생성한 키페어는 사실 gitlab-runner 계정에서 만들었어야 했음. root에서 생성했던 개인키를 gitlab-runner에게 보내자.
root@gitlab:~# ls -al /home/gitlab-runner/
total 8
drwxr-xr-x 2 gitlab-runner gitlab-runner 4096 10월 31 09:45 .
drwxr-xr-x 4 root          root          4096 10월 31 09:45 ..

root@gitlab:~# mkdir /home/gitlab-runner/.ssh
root@gitlab:~# cp ~/.ssh/id_rsa /home/gitlab-runner/.ssh/id_rsa

root@gitlab:~# chmod 700 /home/gitlab-runner/.ssh/
root@gitlab:~# chmod 600 /home/gitlab-runner/.ssh/id_rsa
root@gitlab:~# chown gitlab-runner.gitlab-runner /home/gitlab-runner/.ssh -R - 권한 확인
root@gitlab:~# ls -al /home/gitlab-runner/
total 12
drwxr-xr-x 3 gitlab-runner gitlab-runner 4096 10월 31 10:29 .
drwxr-xr-x 4 root          root          4096 10월 31 09:45 ..
drwx------ 2 gitlab-runner gitlab-runner 4096 10월 31 10:29 .ssh
root@gitlab:~# ls -al /home/gitlab-runner/.ssh/
total 12
drwx------ 2 gitlab-runner gitlab-runner 4096 10월 31 10:29 .
drwxr-xr-x 3 gitlab-runner gitlab-runner 4096 10월 31 10:29 ..
-rw------- 1 gitlab-runner gitlab-runner 2590 10월 31 10:29 id_rsa- ssh_config
root@gitlab:~# vi /etc/ssh/ssh_configHost 192.168.8.*
IdentityFile /home/gitlab-runner/.ssh/id_rsa- known_hosts 등록
root@gitlab:~# su gitlab-runner
gitlab-runner@gitlab:/root$ cd

gitlab-runner@gitlab:~$ ssh-keyscan 192.168.8.100 >> ~/.ssh/known_hosts
# 192.168.8.100:22 SSH-2.0-OpenSSH_8.2p1 Ubuntu-4ubuntu0.5
# 192.168.8.100:22 SSH-2.0-OpenSSH_8.2p1 Ubuntu-4ubuntu0.5
# 192.168.8.100:22 SSH-2.0-OpenSSH_8.2p1 Ubuntu-4ubuntu0.5
# 192.168.8.100:22 SSH-2.0-OpenSSH_8.2p1 Ubuntu-4ubuntu0.5
# 192.168.8.100:22 SSH-2.0-OpenSSH_8.2p1 Ubuntu-4ubuntu0.5

gitlab-runner@gitlab:~$ ssh-keyscan 192.168.8.101 >> ~/.ssh/known_hosts
# 192.168.8.101:22 SSH-2.0-OpenSSH_8.2p1 Ubuntu-4ubuntu0.5
# 192.168.8.101:22 SSH-2.0-OpenSSH_8.2p1 Ubuntu-4ubuntu0.5
# 192.168.8.101:22 SSH-2.0-OpenSSH_8.2p1 Ubuntu-4ubuntu0.5
# 192.168.8.101:22 SSH-2.0-OpenSSH_8.2p1 Ubuntu-4ubuntu0.5
# 192.168.8.101:22 SSH-2.0-OpenSSH_8.2p1 Ubuntu-4ubuntu0.5- ansible 테스트
gitlab-runner@gitlab:~$ ansible all -m ping -u root
192.168.8.100 | SUCCESS => {
    "ansible_facts": {
        "discovered_interpreter_python": "/usr/bin/python3"
    },
    "changed": false,
    "ping": "pong"
}
192.168.8.101 | SUCCESS => {
    "ansible_facts": {
        "discovered_interpreter_python": "/usr/bin/python3"
    },
    "changed": false,
    "ping": "pong"
}gitlab-runner@gitlab:~$ ansible master -m ping -u root
192.168.8.100 | SUCCESS => {
"ansible_facts": {
"discovered_interpreter_python": "/usr/bin/python3"
},
"changed": false,
"ping": "pong"
}
gitlab-runner@gitlab:~$ ansible worker -m ping -u root
192.168.8.101 | SUCCESS => {
"ansible_facts": {
"discovered_interpreter_python": "/usr/bin/python3"
},
"changed": false,
"ping": "pong"
}gitlab-runner@gitlab:~$ ansible worker -m command -a 'hostname' -u root
192.168.8.101 | CHANGED | rc=0 >>
worker1
gitlab-runner@gitlab:~$ ansible master -m command -a 'kubectl get node' -u root
192.168.8.100 | CHANGED | rc=0 >>
NAME STATUS ROLES AGE VERSION
master Ready control-plane,master 4d v1.21.1
worker1 Ready <none> 4d v1.21.1
worker2 NotReady <none> 4d v1.21.1
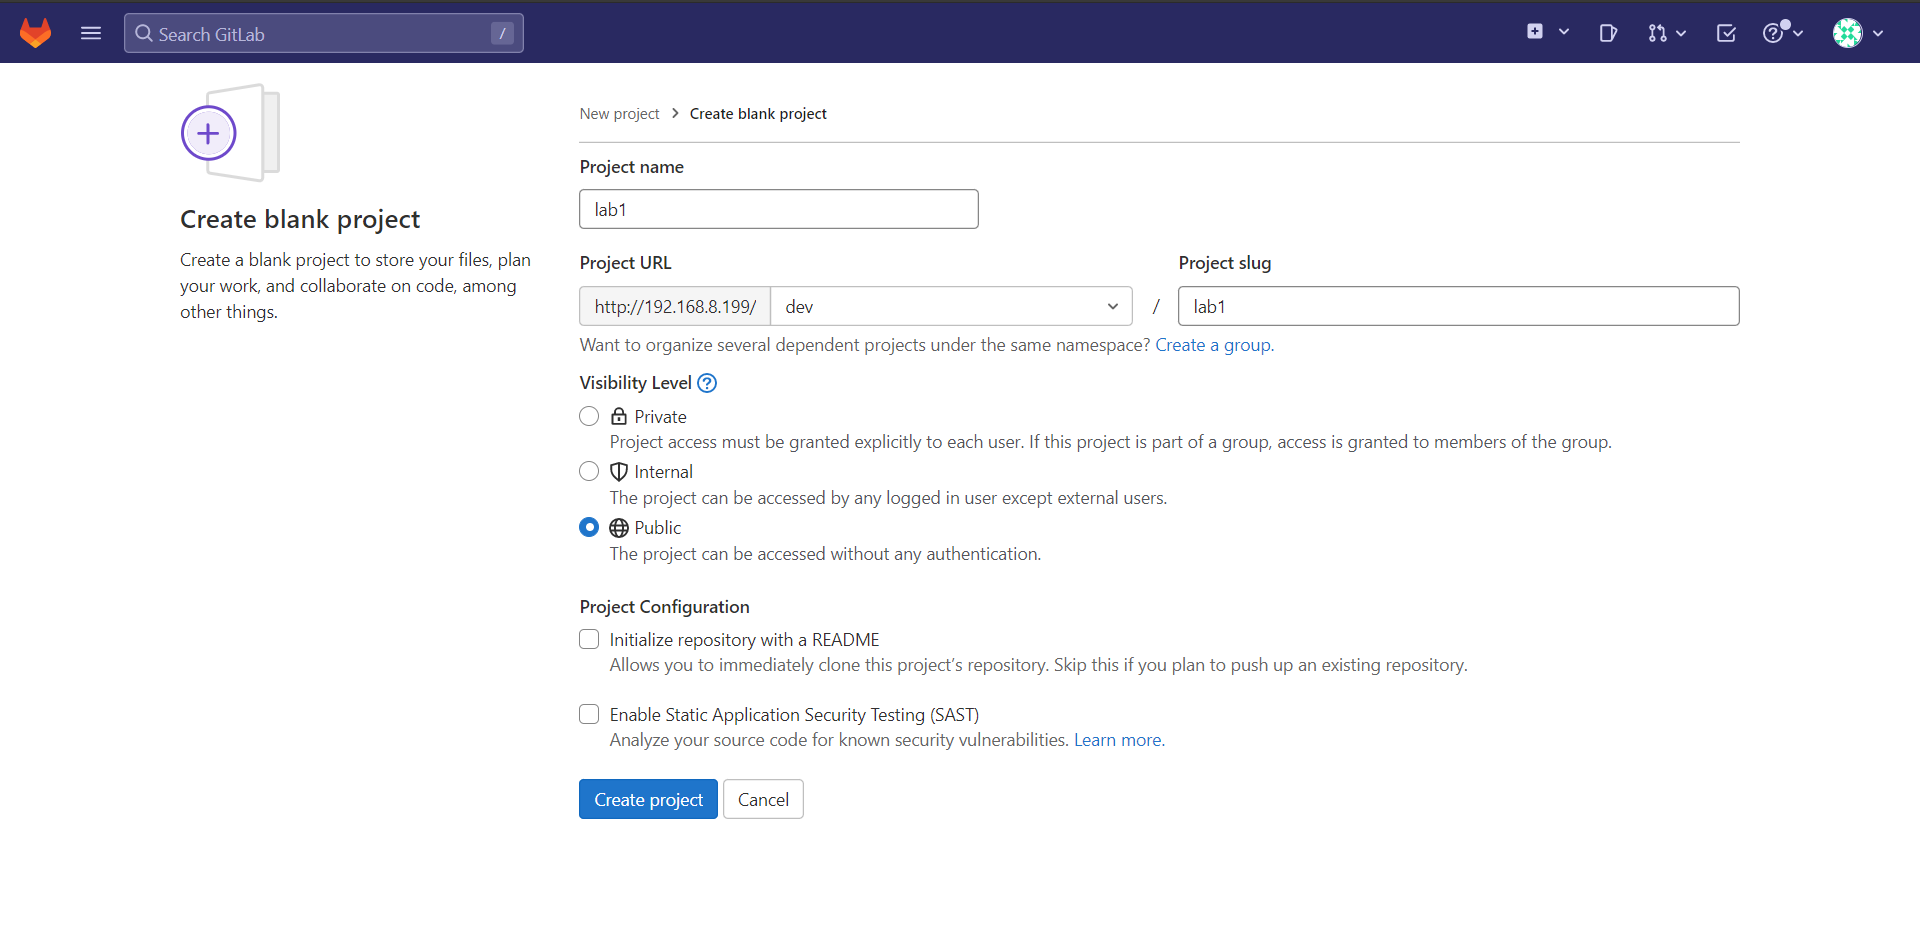
worker3 NotReady <none> 4d v1.21.1- create blank project
- gitlab-runner register
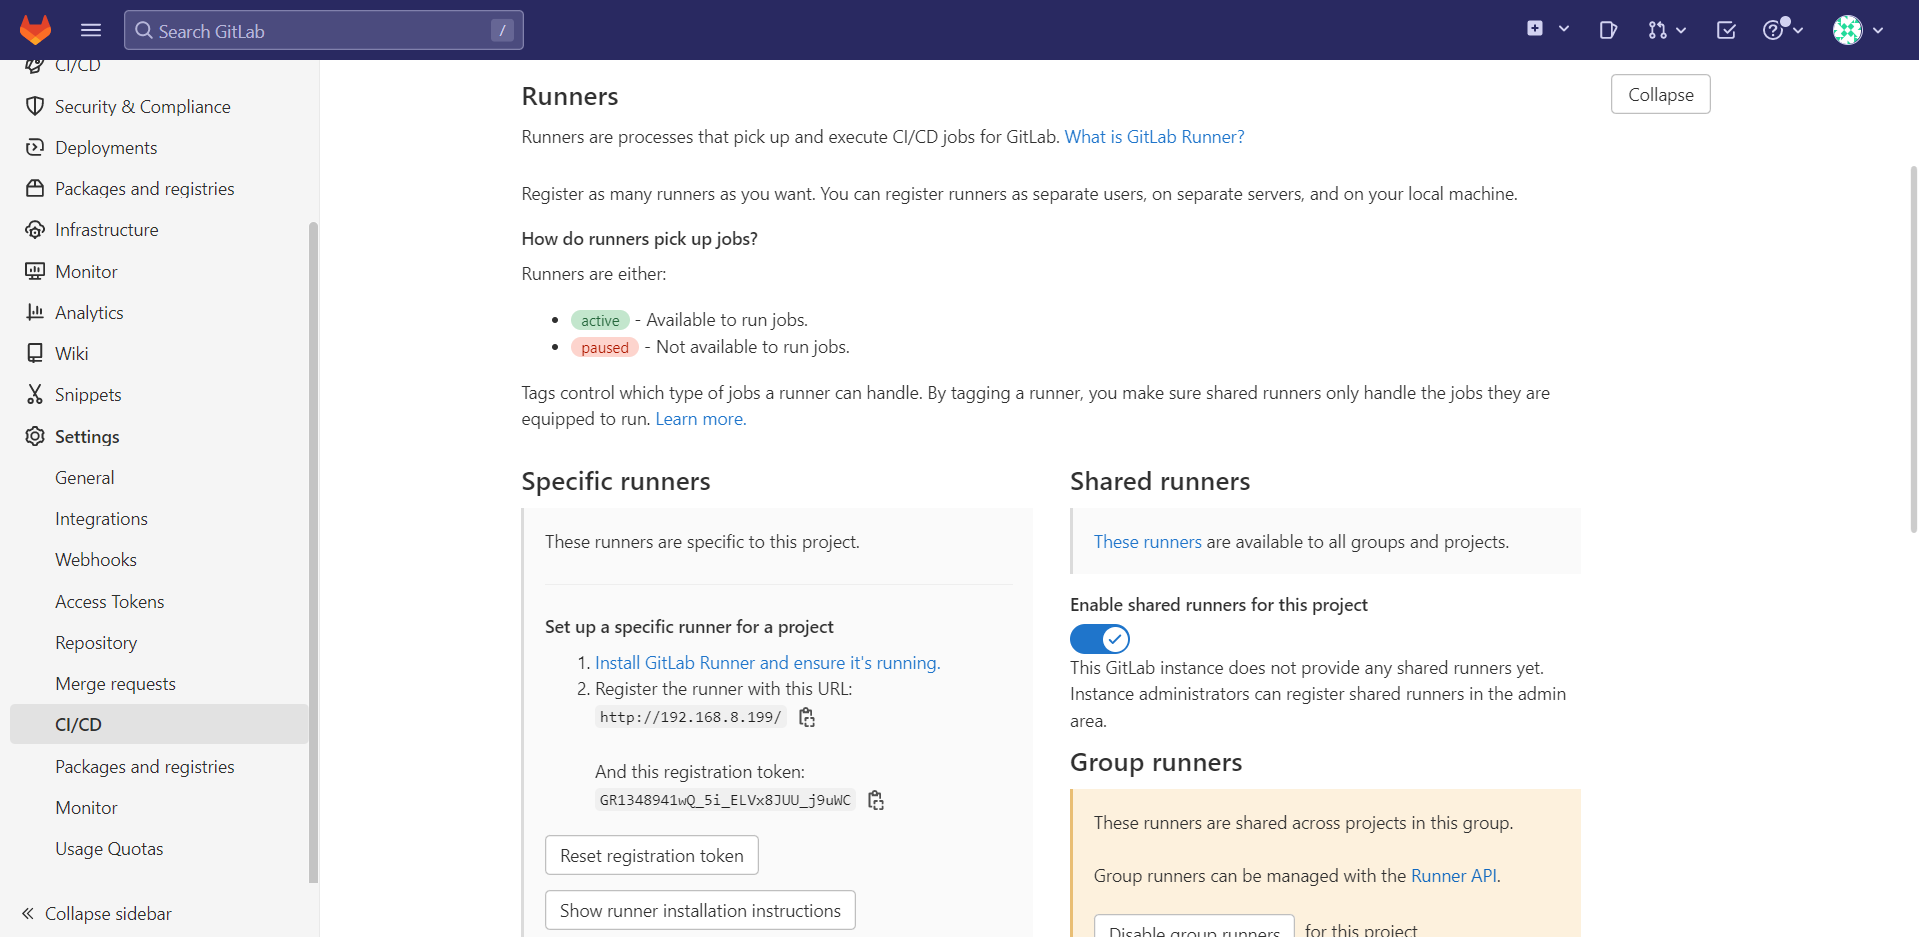
토큰 복사
gitlab-runner@gitlab:~$ su root
Password:
root@gitlab:/home/gitlab-runner# cd
root@gitlab:~# gitlab-runner register
Runtime platform arch=amd64 os=linux pid=14695 revision=0d4137b8 version=15.5.0
Running in system-mode.
Enter the GitLab instance URL (for example, https://gitlab.com/):
http://192.168.8.199
Enter the registration token:
GR1348941wQ_5i_ELVx8JUU_j9uWC
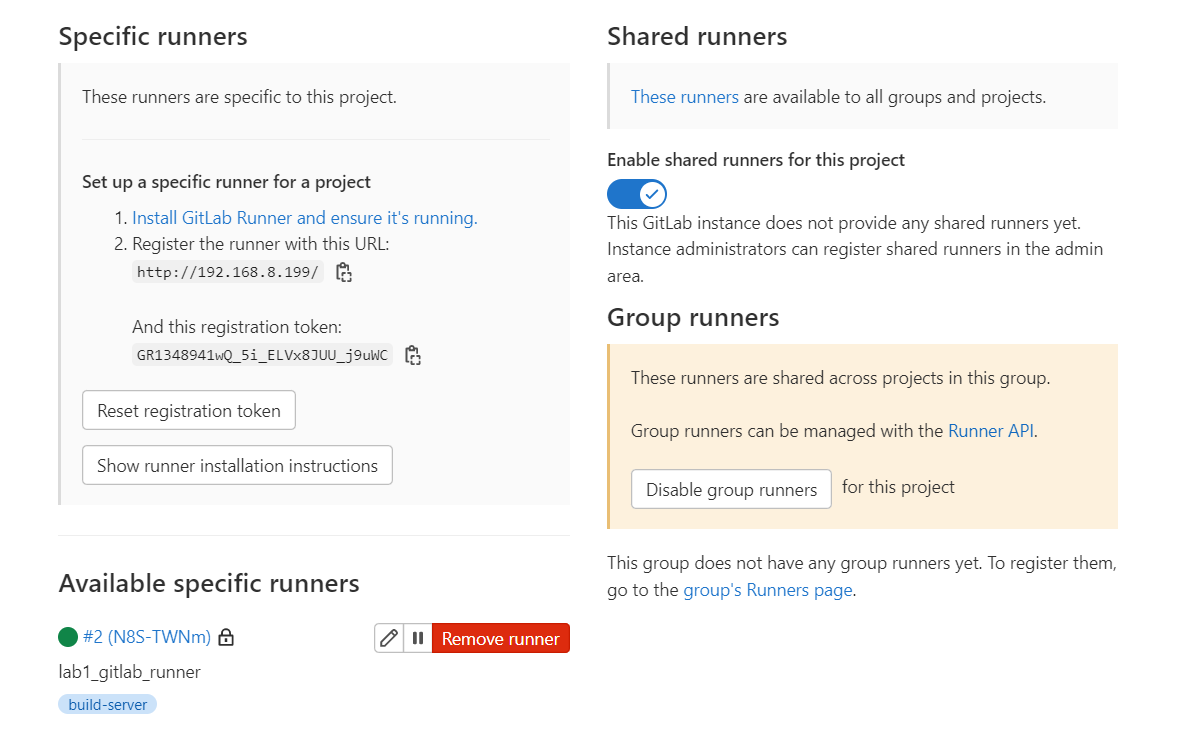
Enter a description for the runner:
[gitlab]: lab1_gitlab_runner
Enter tags for the runner (comma-separated):
build-server
Enter optional maintenance note for the runner:
Registering runner... succeeded runner=GR1348941wQ_5i_EL
Enter an executor: shell, ssh, docker+machine, docker-ssh+machine, kubernetes, custom, docker, docker-ssh, parallels, virtualbox, instance:
shell
Runner registered successfully. Feel free to start it, but if it's running already the config should be automatically reloaded!
Configuration (with the authentication token) was saved in "/etc/gitlab-runner/config.toml" root에서 생성해야 함!
- runner 등록 확인
실습
시나리오
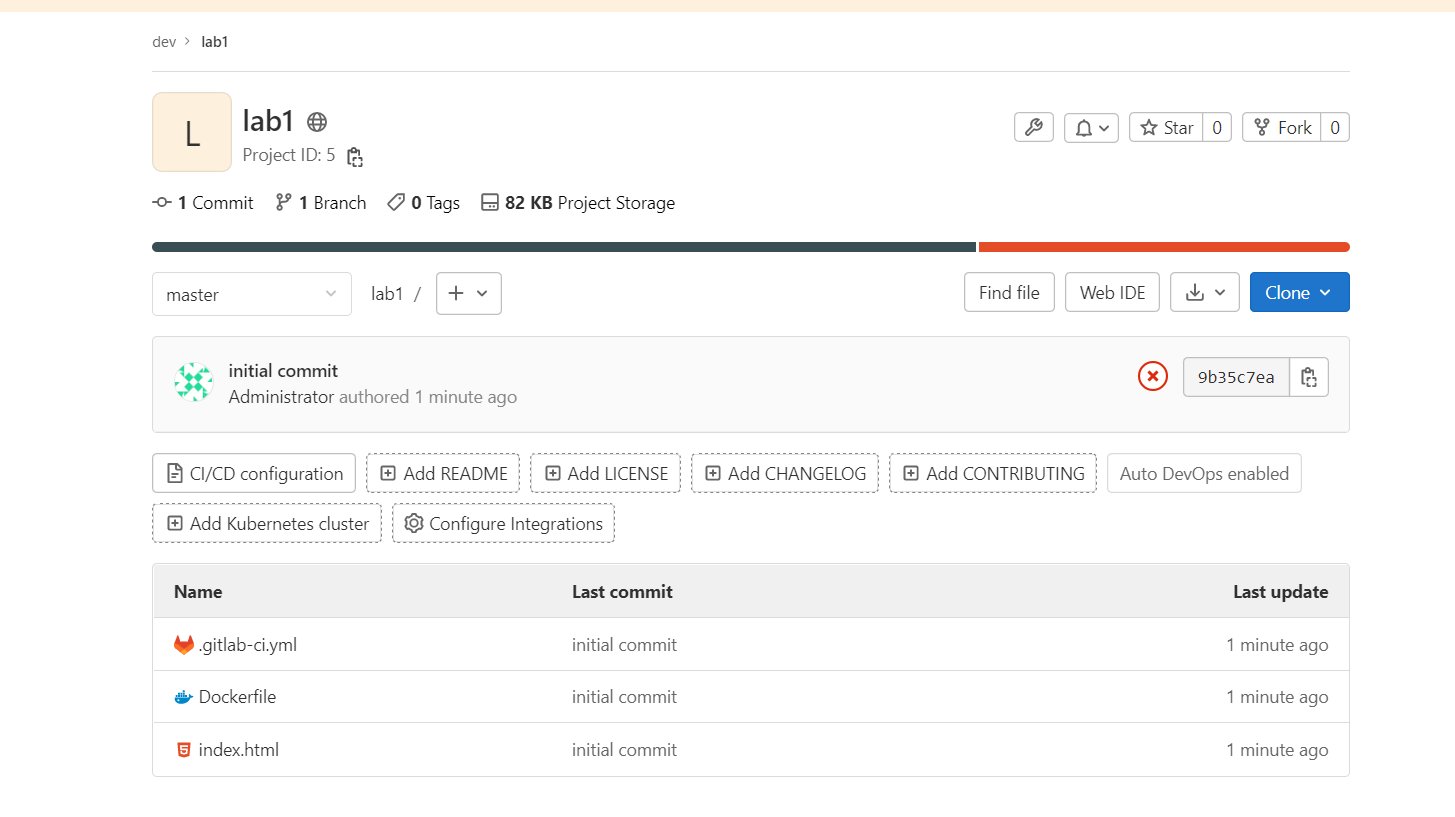
1. 개발자는 Dockerfile, index.html, 그리고 Jenkinsfile과 같은 역할을 수행하는 .gitlab-ci.yml 파일을 작성하여 http://192.168.8.199/dev/lab1.git에 push한다.
-
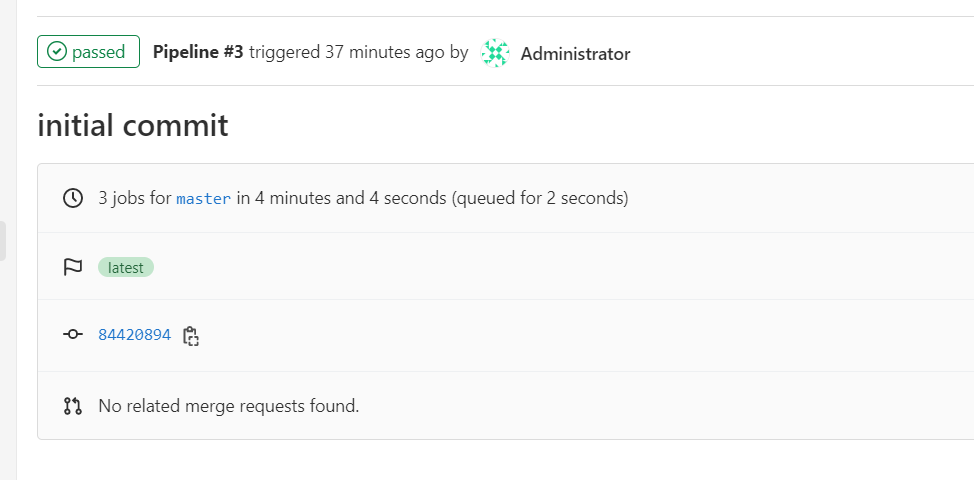
해당 프로젝트에 새로운 파일이 등록된 것을 확인한 gitlab-runner는 작업 지시서 역할을 하는 .gitlab-ci.yml 파일을 읽고 ci/cd를 진행한다.
-
Dockerfile을 이용하여 이미지를 사설 저장소에 등록
ansible 이용하여 worker 노드들이 사설 저장소에서 이미지를 pull하도록 설정
위의 과정에서 중단은 없다. 코드를 push하면 CI->CD 까지 무중단으로 진행된다.
when: manual
- 바탕화면에 디렉토리 생성
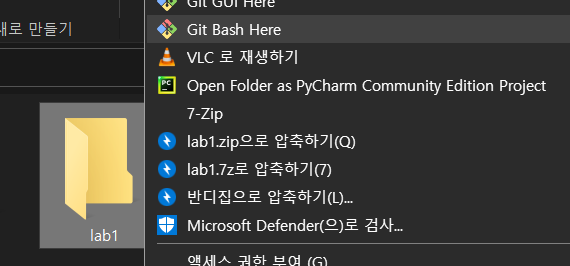
- 파일 생성
user@LAPTOP-CISI8I61 MINGW64 ~/Desktop/lab1
$ touch Dockerfile index.html .gitlab-ci.yml- index.html
user@LAPTOP-CISI8I61 MINGW64 ~/Desktop/lab1
$ echo "<h2>GITLAB CI/CD TEST</h2>" > index.html- Dockerfile
user@LAPTOP-CISI8I61 MINGW64 ~/Desktop/lab1
$ vi Dockerfile
FROM nginx
ADD index.html /usr/share/nginx/html/index.html- .gitlab-ci.yml
user@LAPTOP-CISI8I61 MINGW64 ~/Desktop/lab1
$ vi .gitlab-ci.ymllab1-job:
only:
- master
tages:
- build-server
# when: manual # 버튼을 눌러야 빌드 진행
script:
- docker build -t 192.168.8.100:5000/lab1:1.0 . # 이미지 생성
- docker push 192.168.8.100:5000/lab1:1.0 # 이미지 등록
- ansible worker -u root -m command -a 'docker pull 192.168.8.100:5000/lab1:1.0' # 이미지 pull
- echo 'job completed successfully' - git
user@LAPTOP-CISI8I61 MINGW64 ~/Desktop/lab1
$ git init
Initialized empty Git repository in C:/Users/user/Desktop/lab1/.git/
user@LAPTOP-CISI8I61 MINGW64 ~/Desktop/lab1 (master)
$ git remote add origin http://192.168.8.199/dev/lab1.git

user@LAPTOP-CISI8I61 MINGW64 ~/Desktop/lab1 (master)
$ git add .
warning: LF will be replaced by CRLF in .gitlab-ci.yml.
The file will have its original line endings in your working directory
warning: LF will be replaced by CRLF in Dockerfile.
The file will have its original line endings in your working directory
warning: LF will be replaced by CRLF in index.html.
The file will have its original line endings in your working directory

user@LAPTOP-CISI8I61 MINGW64 ~/Desktop/lab1 (master)
$ git commit -m "initial commit"
[master (root-commit) 9b35c7e] initial commit
 3 files changed, 15 insertions(+)
 create mode 100644 .gitlab-ci.yml
 create mode 100644 Dockerfile
 create mode 100644 index.html
user@LAPTOP-CISI8I61 MINGW64 ~/Desktop/lab1 (master)
$ git push origin master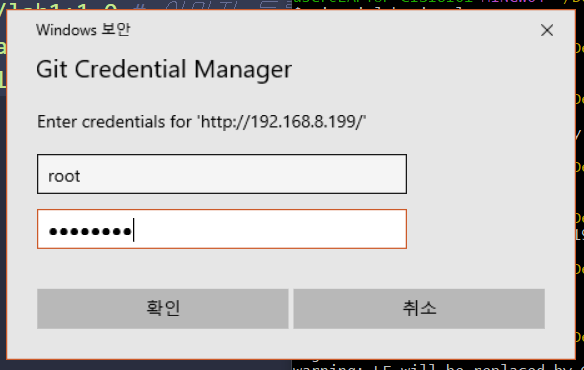
user@LAPTOP-CISI8I61 MINGW64 ~/Desktop/lab1 (master)
$ git push origin master
Enumerating objects: 5, done.
Counting objects: 100% (5/5), done.
Delta compression using up to 8 threads
Compressing objects: 100% (4/4), done.
Writing objects: 100% (5/5), 635 bytes | 635.00 KiB/s, done.
Total 5 (delta 0), reused 0 (delta 0), pack-reused 0
To http://192.168.8.199/dev/lab1.git
* [new branch] master -> master- 파일 업로드 확인
- 빌드 확인
- 레지스트리 업로드 확인
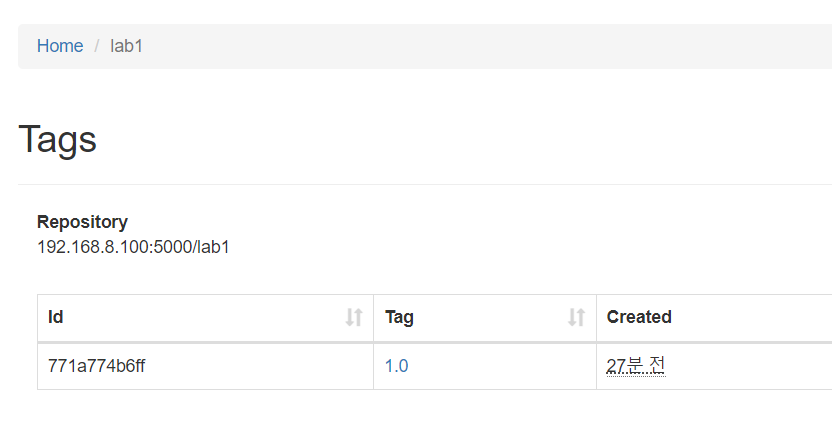
- index.html 수정
user@LAPTOP-CISI8I61 MINGW64 ~/Desktop/lab1 (master)
$ vi index.html<h2>GITLAB CI/CD TEST - 2</h2>- .gitlab-ci.yaml 수정
user@LAPTOP-CISI8I61 MINGW64 ~/Desktop/lab1 (master)
$ vi .gitlab-ci.ymllab1-job:
only:
- master
tags:
- build-server
when: manual # 버튼을 눌러야 빌드 진행
script:
- docker build -t 192.168.8.100:5000/lab1:2.0 . # 이미지 생성
- docker push 192.168.8.100:5000/lab1:2.0 # 이미지 등록
- ansible worker -u root -m command -a 'docker pull 192.168.8.100:5000/lab1:2.0' # 이미지 pull
- echo 'job completed successfully'when: manual 추가 => 깃랩에서 수동으로 빌드해야 함
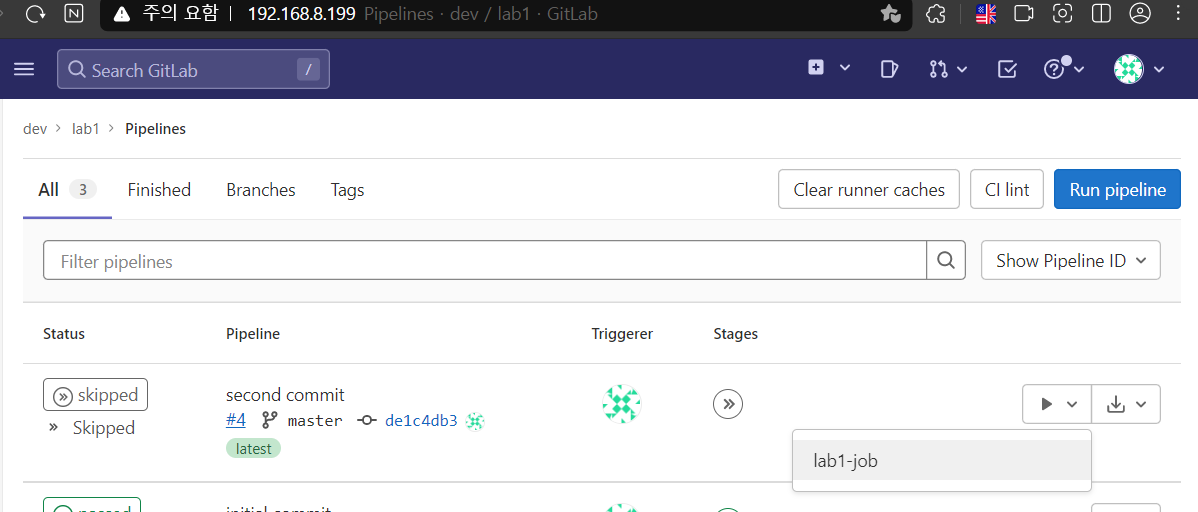
- 파이프라인 확인

- 빌드 실행 버튼 누르기
- 빌드 확인

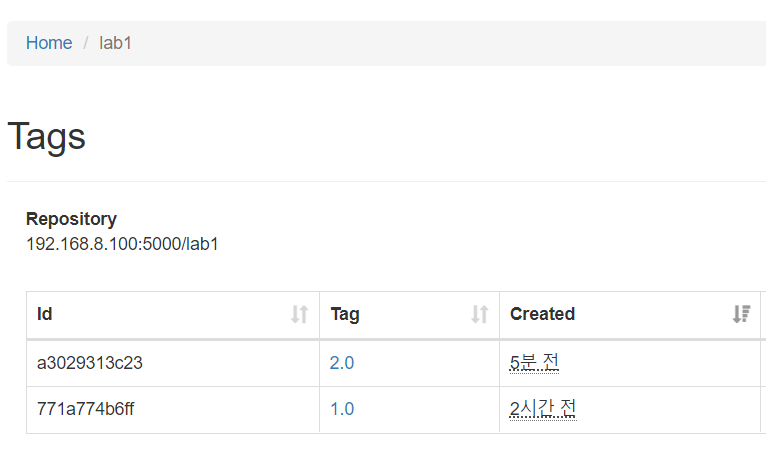
- 레지스트리에 lab1:2.0 업로드 확인
실습
rpm --import https://www.elrepo.org/RPM-GPG-KEY-elrepo.org
rpm -Uvh http://www.elrepo.org/elrepo-release-7.0-2.el7.elrepo.noarch.rpm
yum --disablerepo="*" --enablerepo="elrepo-kernel" list available
yum -y --enablerepo=elrepo-kernel install kernel-ml
reboot
yum -y install epel-release
yum -y install java-11-openjdk[root@jenkins ~]# alternatives --config java
There are 2 programs which provide 'java'.
Selection Command
-----------------------------------------------
*+ 1 java-1.8.0-openjdk.x86_64 (/usr/lib/jvm/java-1.8.0-openjdk-1.8.0.262.b10-1.el7.x86_64/jre/bin/java)
2 java-11-openjdk.x86_64 (/usr/lib/jvm/java-11-openjdk-11.0.17.0.8-2.el7_9.x86_64/bin/java)
Enter to keep the current selection[+], or type selection number: 2[root@jenkins ~]# java --version
openjdk 11.0.17 2022-10-18 LTS
OpenJDK Runtime Environment (Red_Hat-11.0.17.0.8-2.el7_9) (build 11.0.17+8-LTS)
OpenJDK 64-Bit Server VM (Red_Hat-11.0.17.0.8-2.el7_9) (build 11.0.17+8-LTS, mixed mode, sharing)rpm --import https://pkg.jenkins.io/redhat-stable/jenkins.io.key
yum -y install wget
wget -O /etc/yum.repos.d/jenkins.repo \
https://pkg.jenkins.io/redhat-stable/jenkins.repo --no-check-certificate
yum -y install jenkins
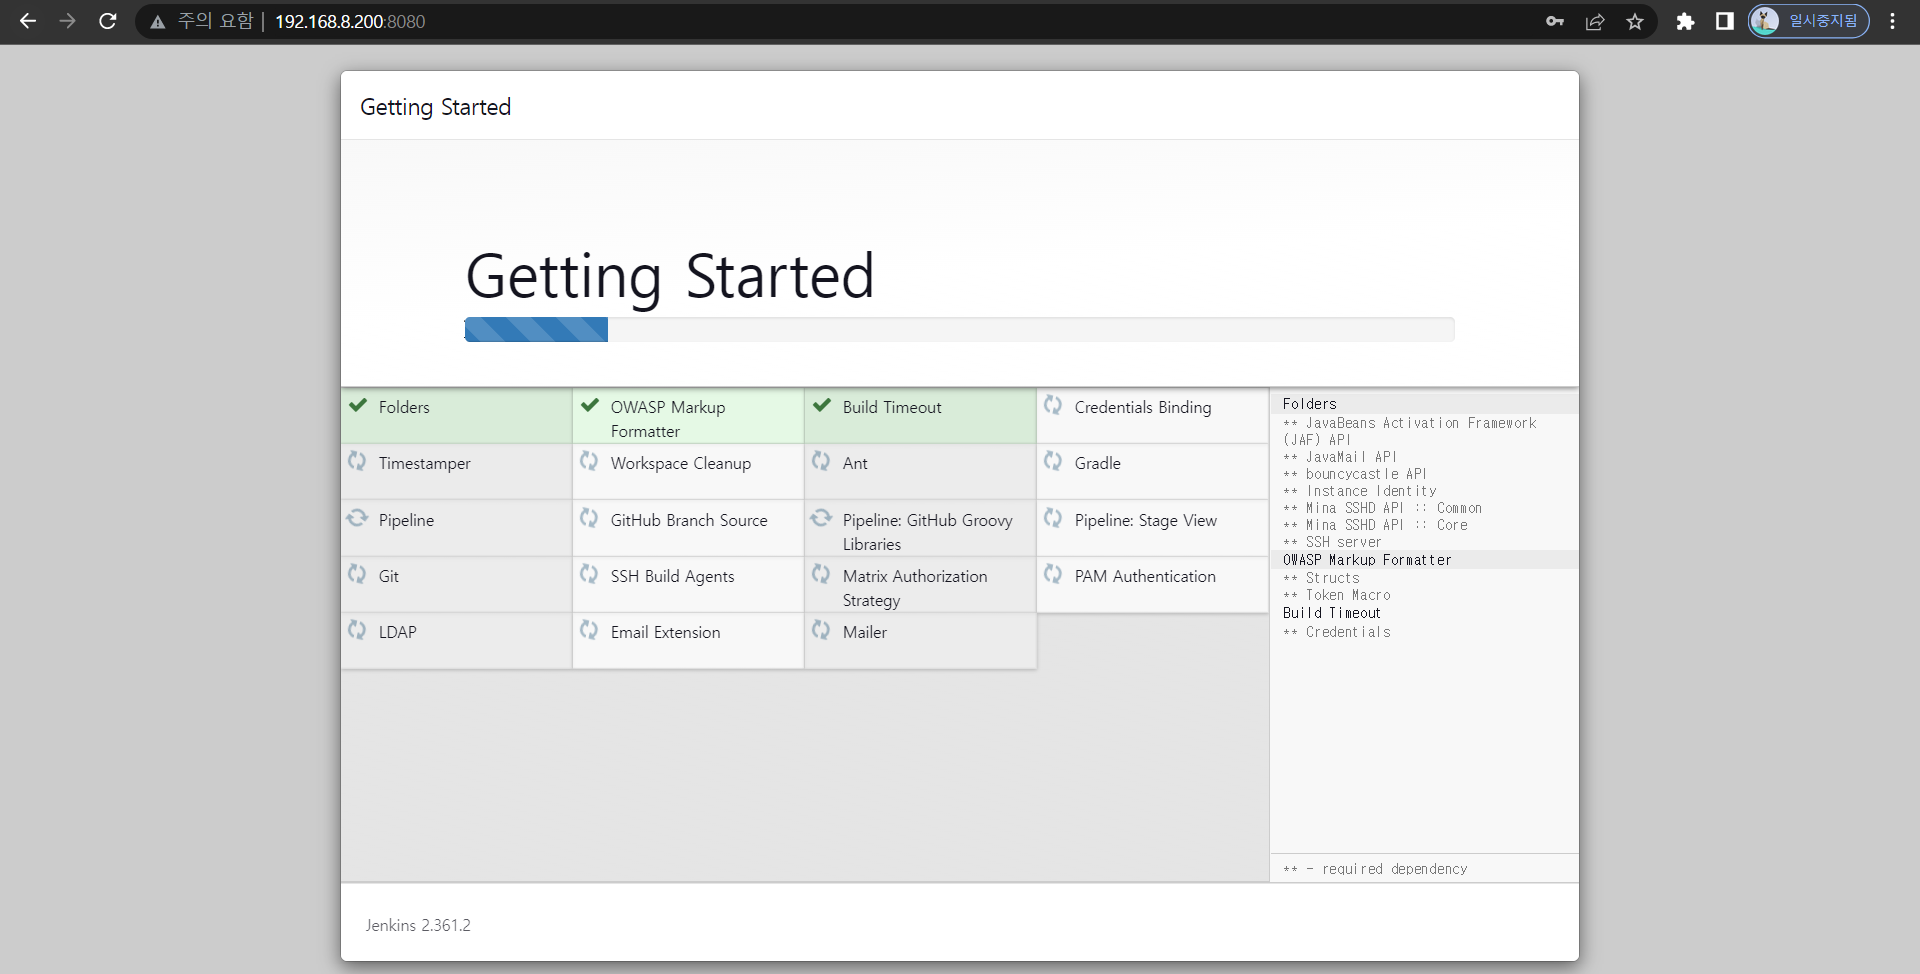
systemctl start jenkins- 192.168.8.200:8080 접속
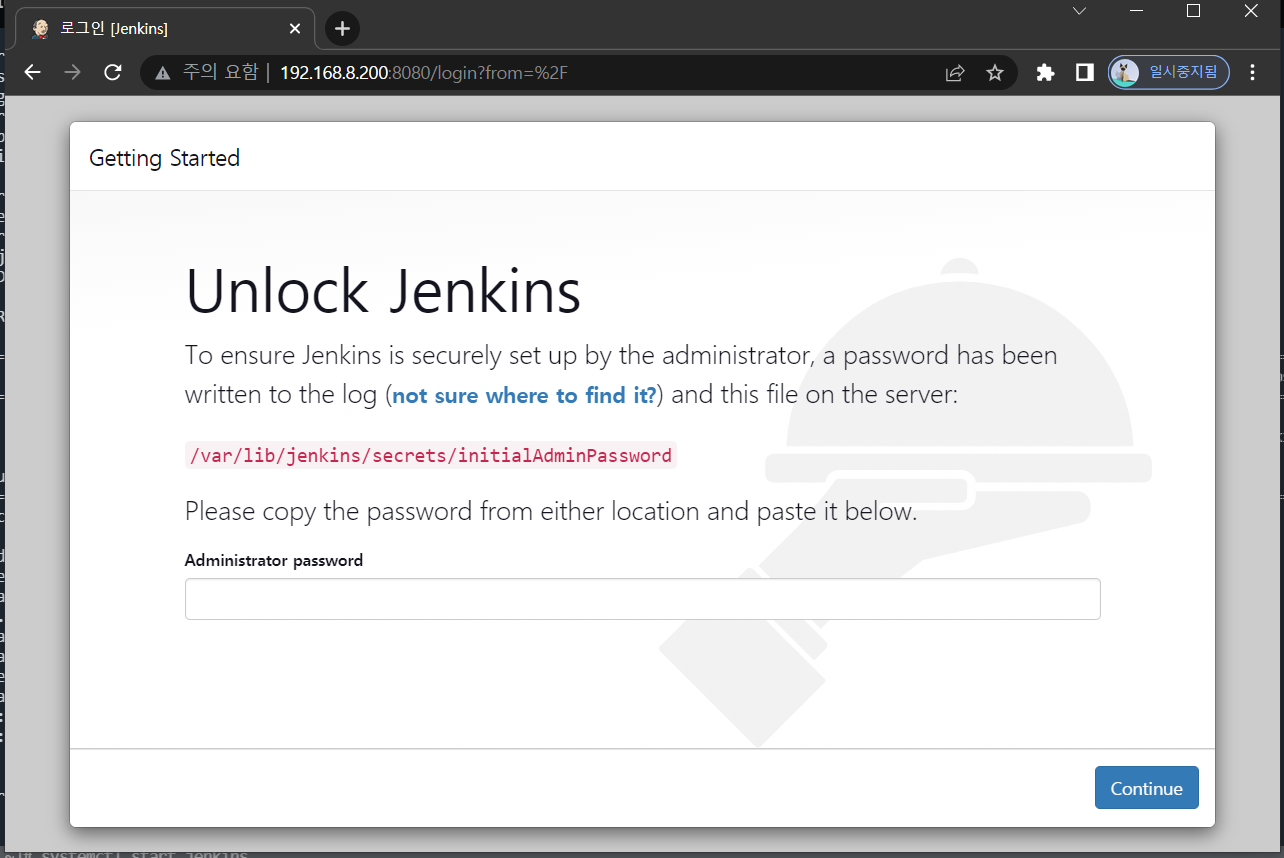
[root@jenkins ~]# cat /var/lib/jenkins/secrets/initialAdminPassword
abb80583ba5d4edbbb0656a03269423f- 플러그인 설치
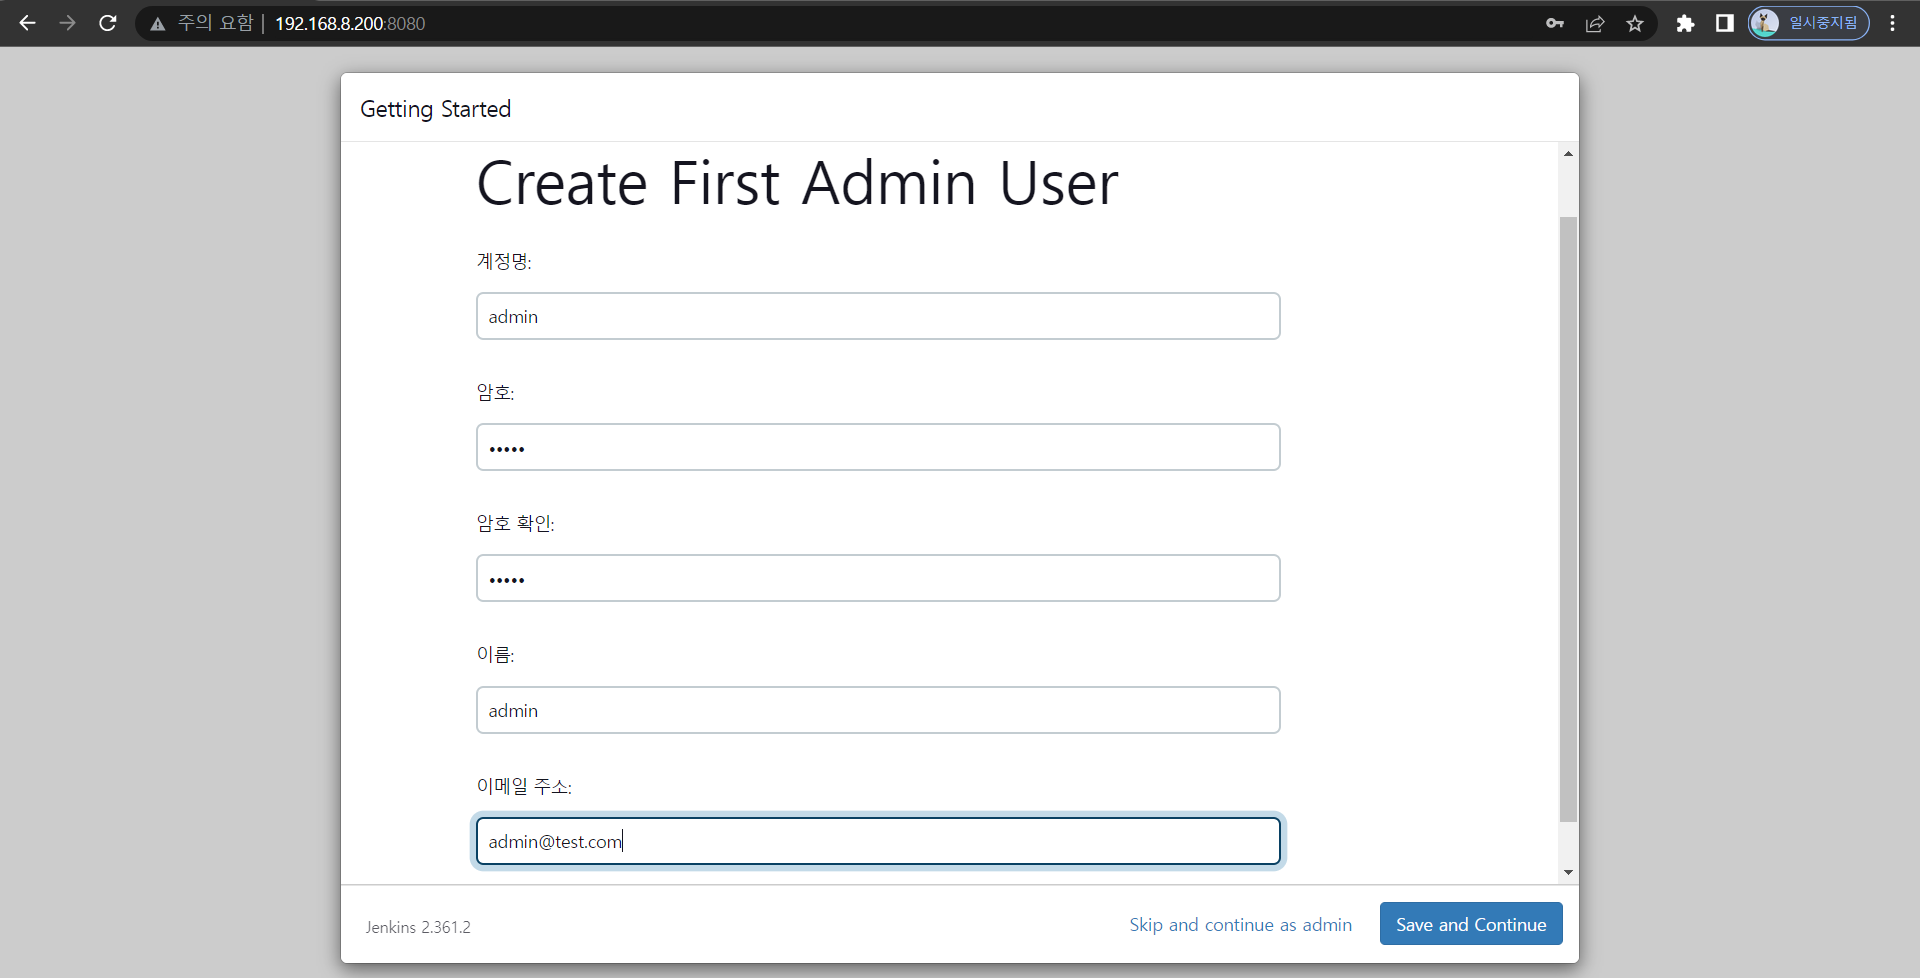
- 계정 생성
- gitlab access token 생성
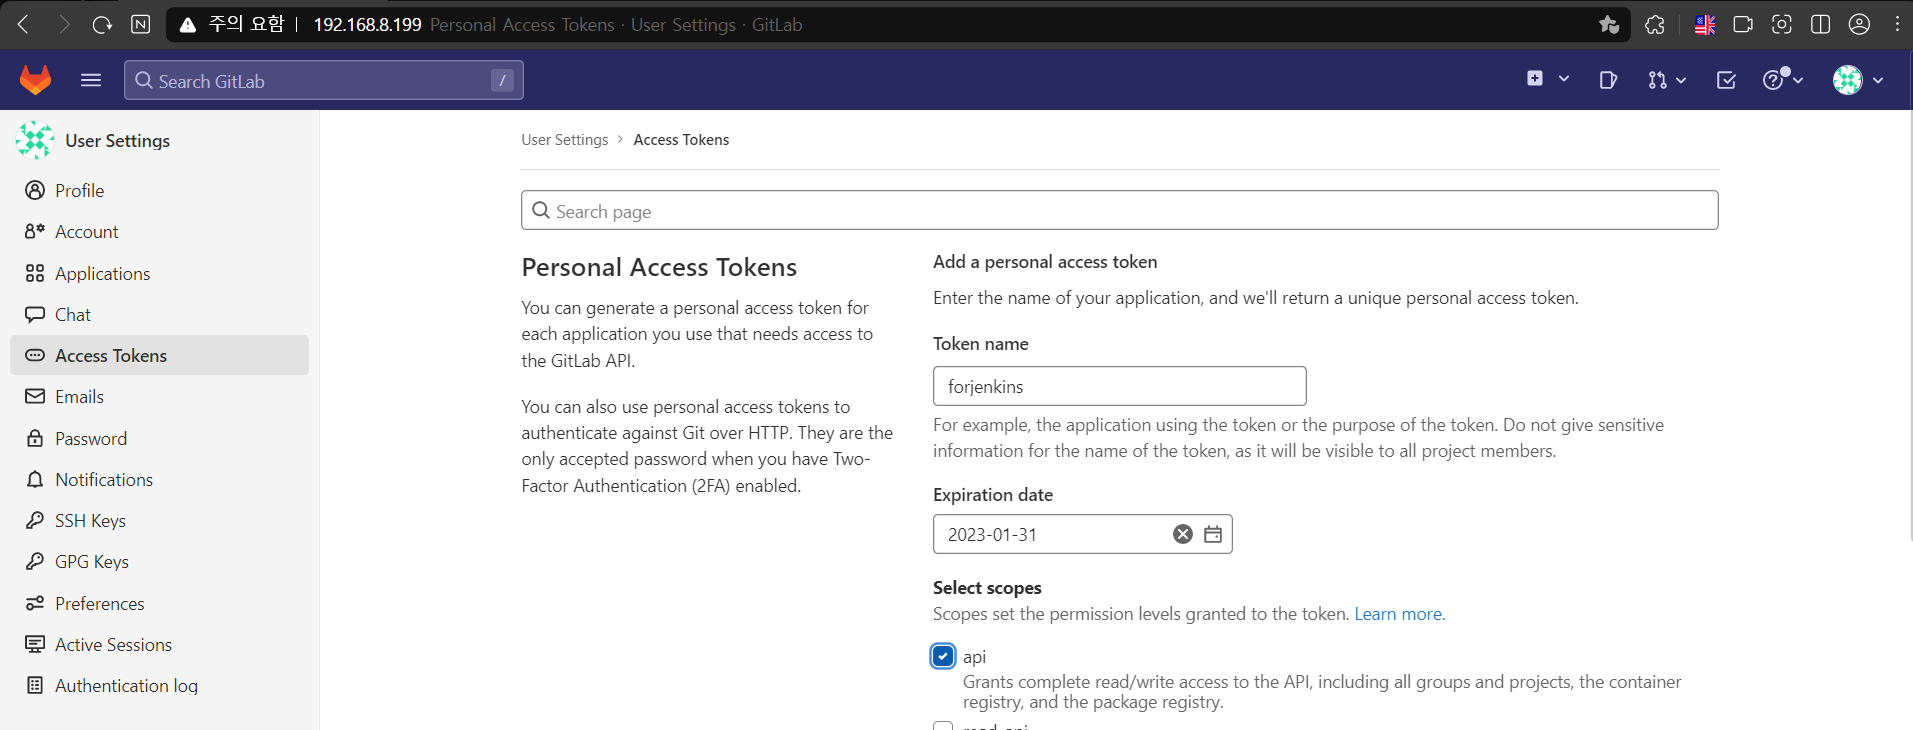
- 토큰 발행 확인

glpat-eA26gocvyxo-VEfh1KBh
- jenkins에 깃랩 api token 등록
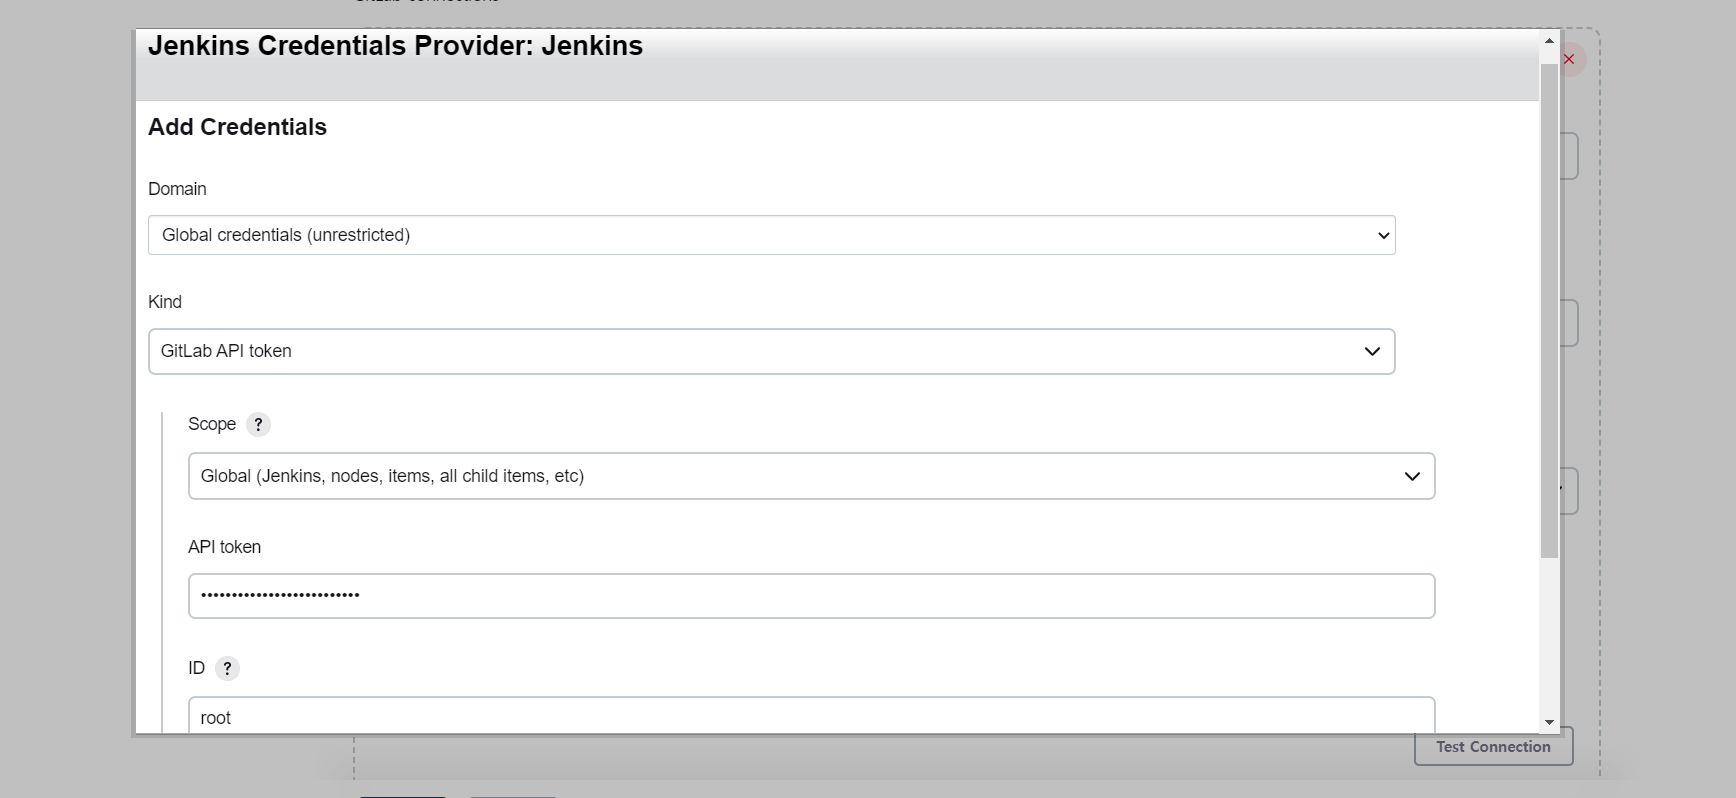
- test connection
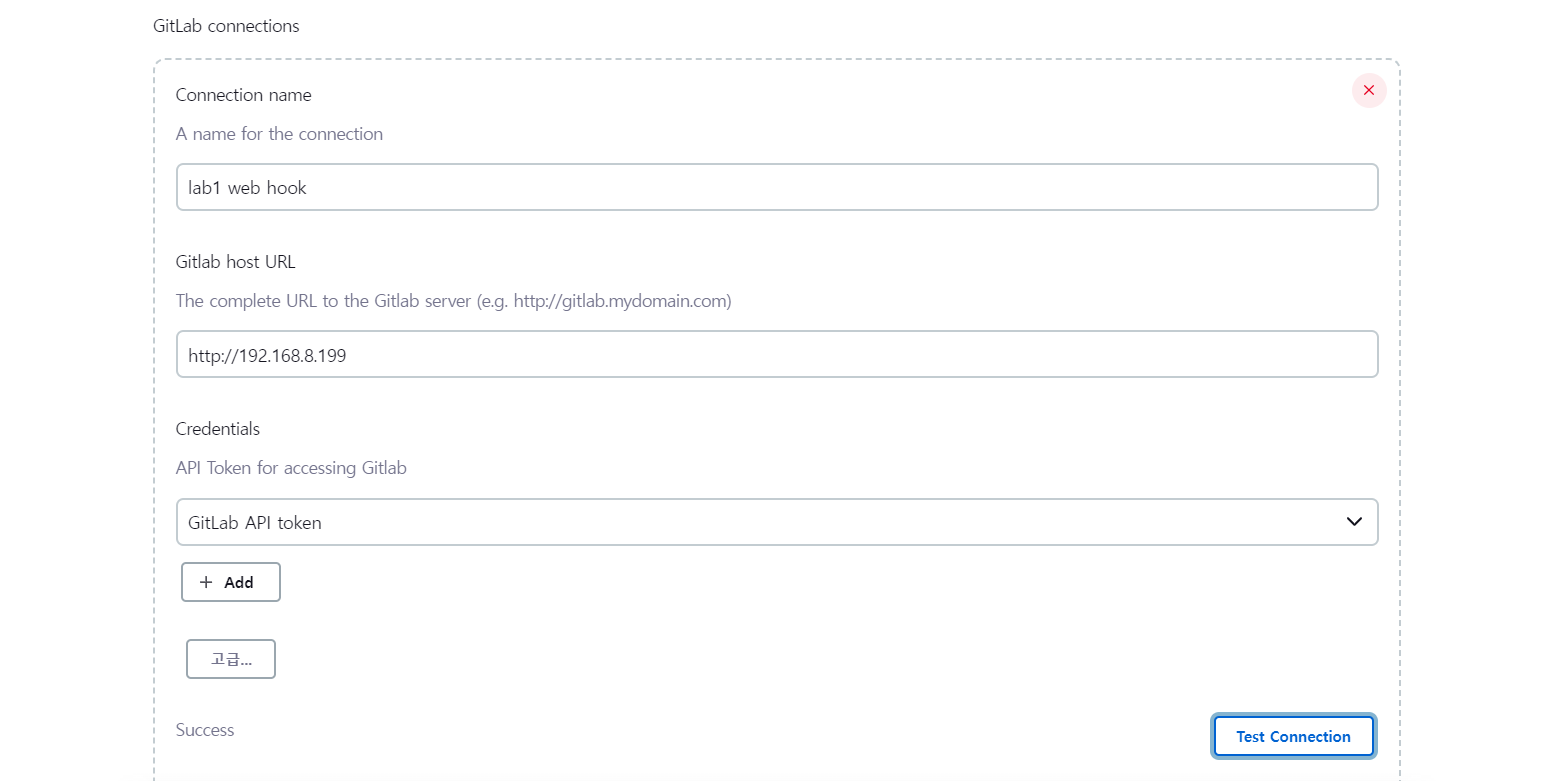
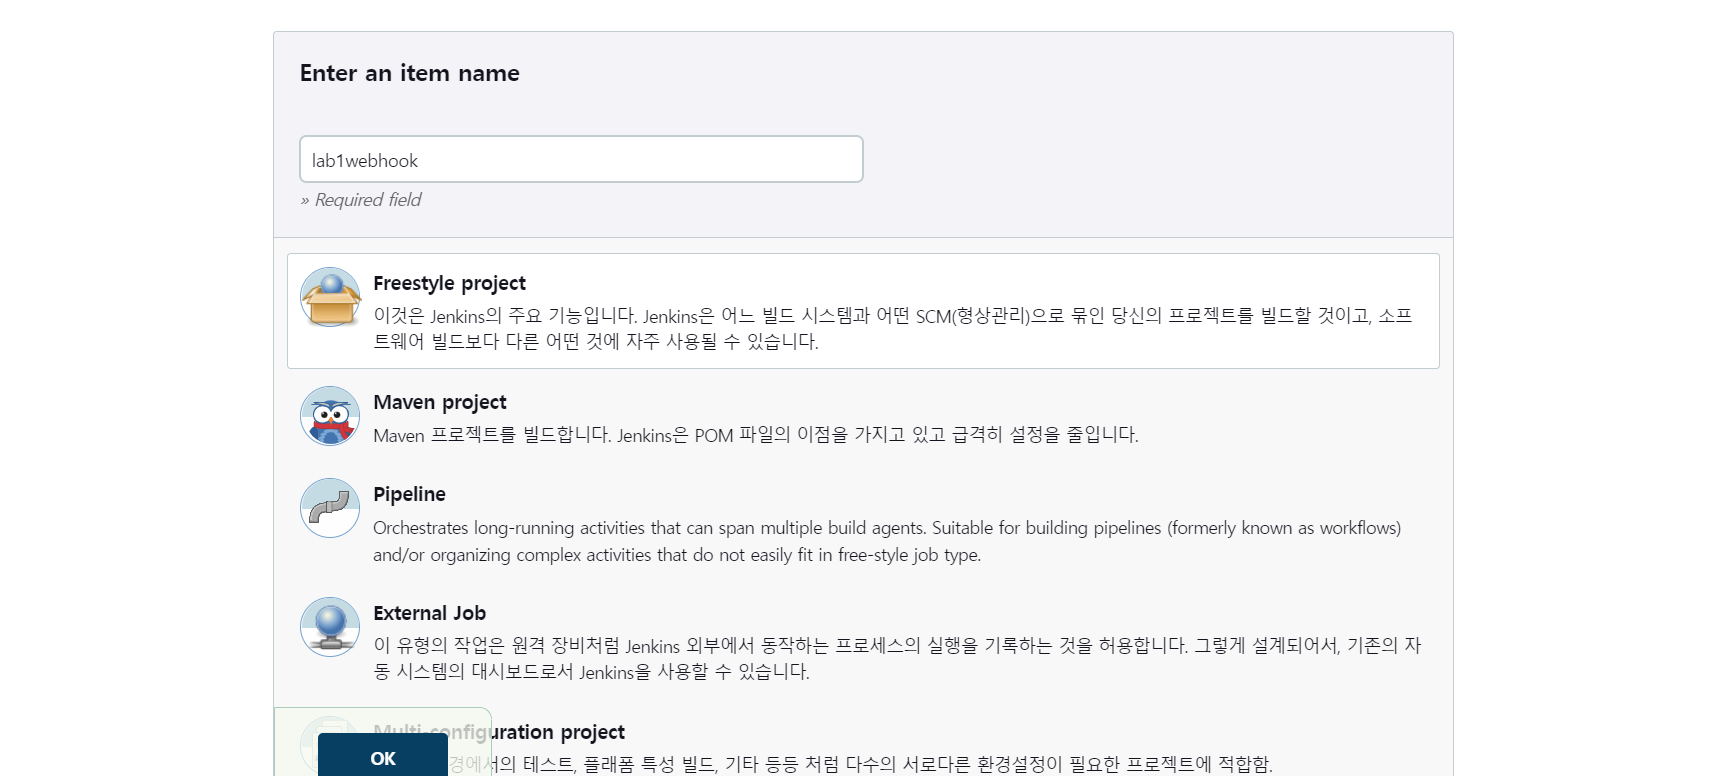
- item 생성
- jenkins에서 토큰 발행
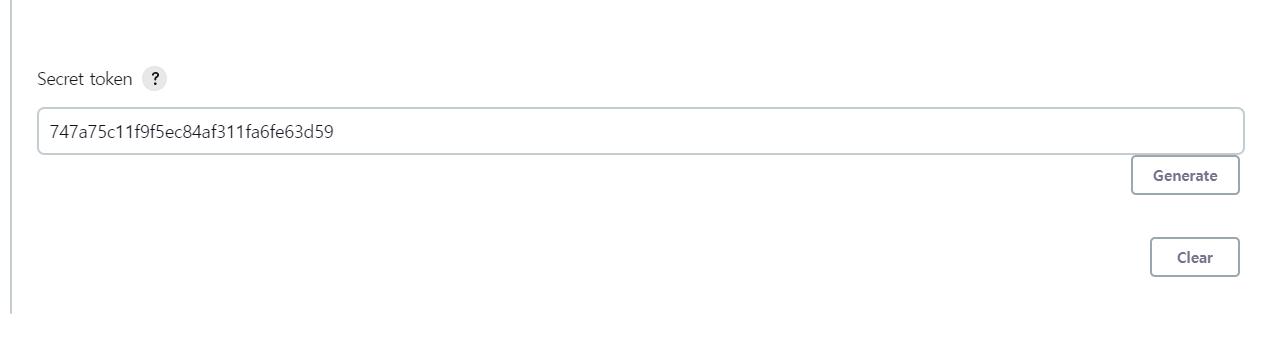
747a75c11f9f5ec84af311fa6fe63d59
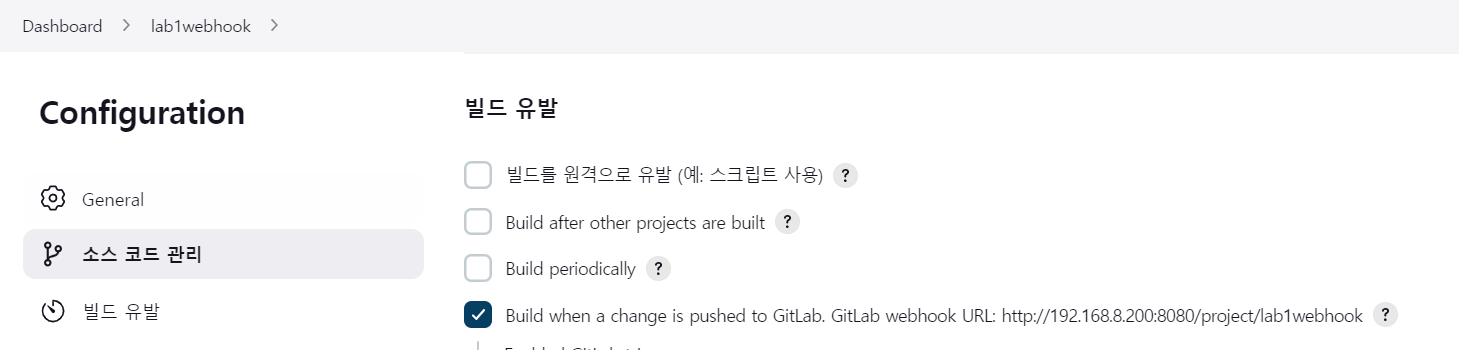
- webhook 추가
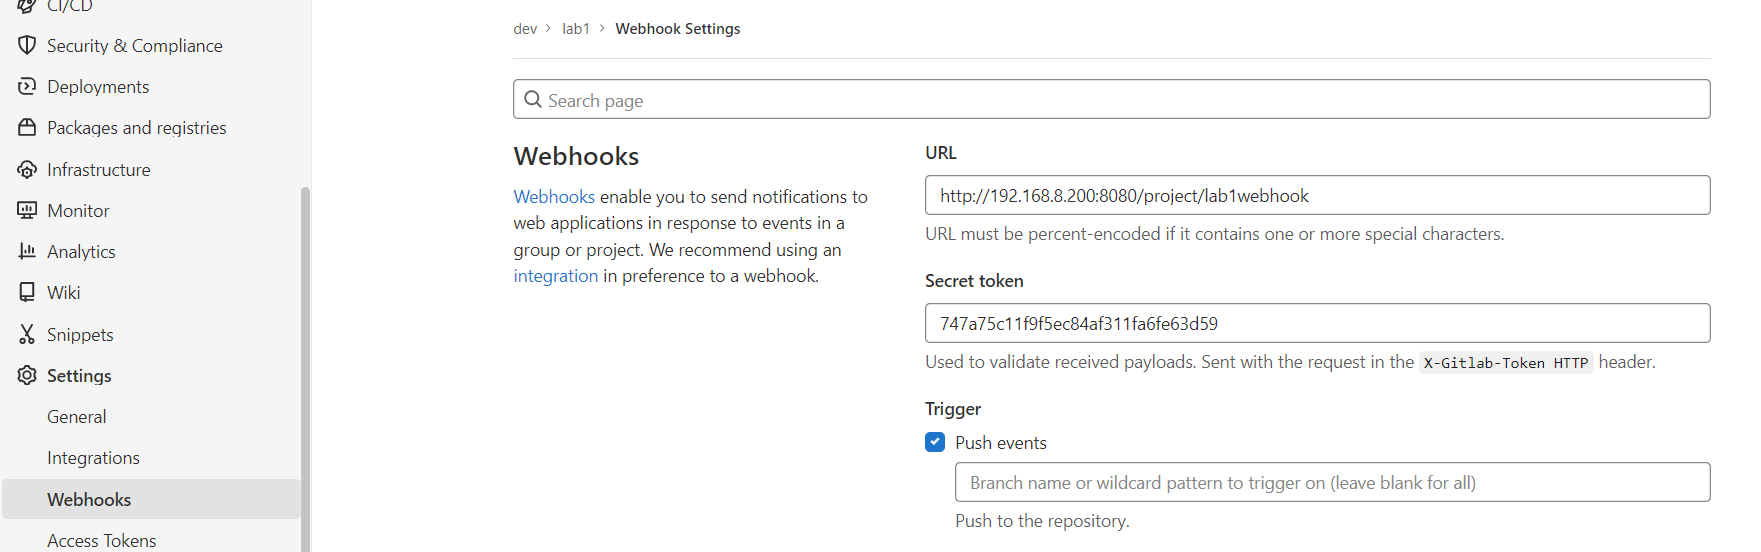
- Build steps 설정

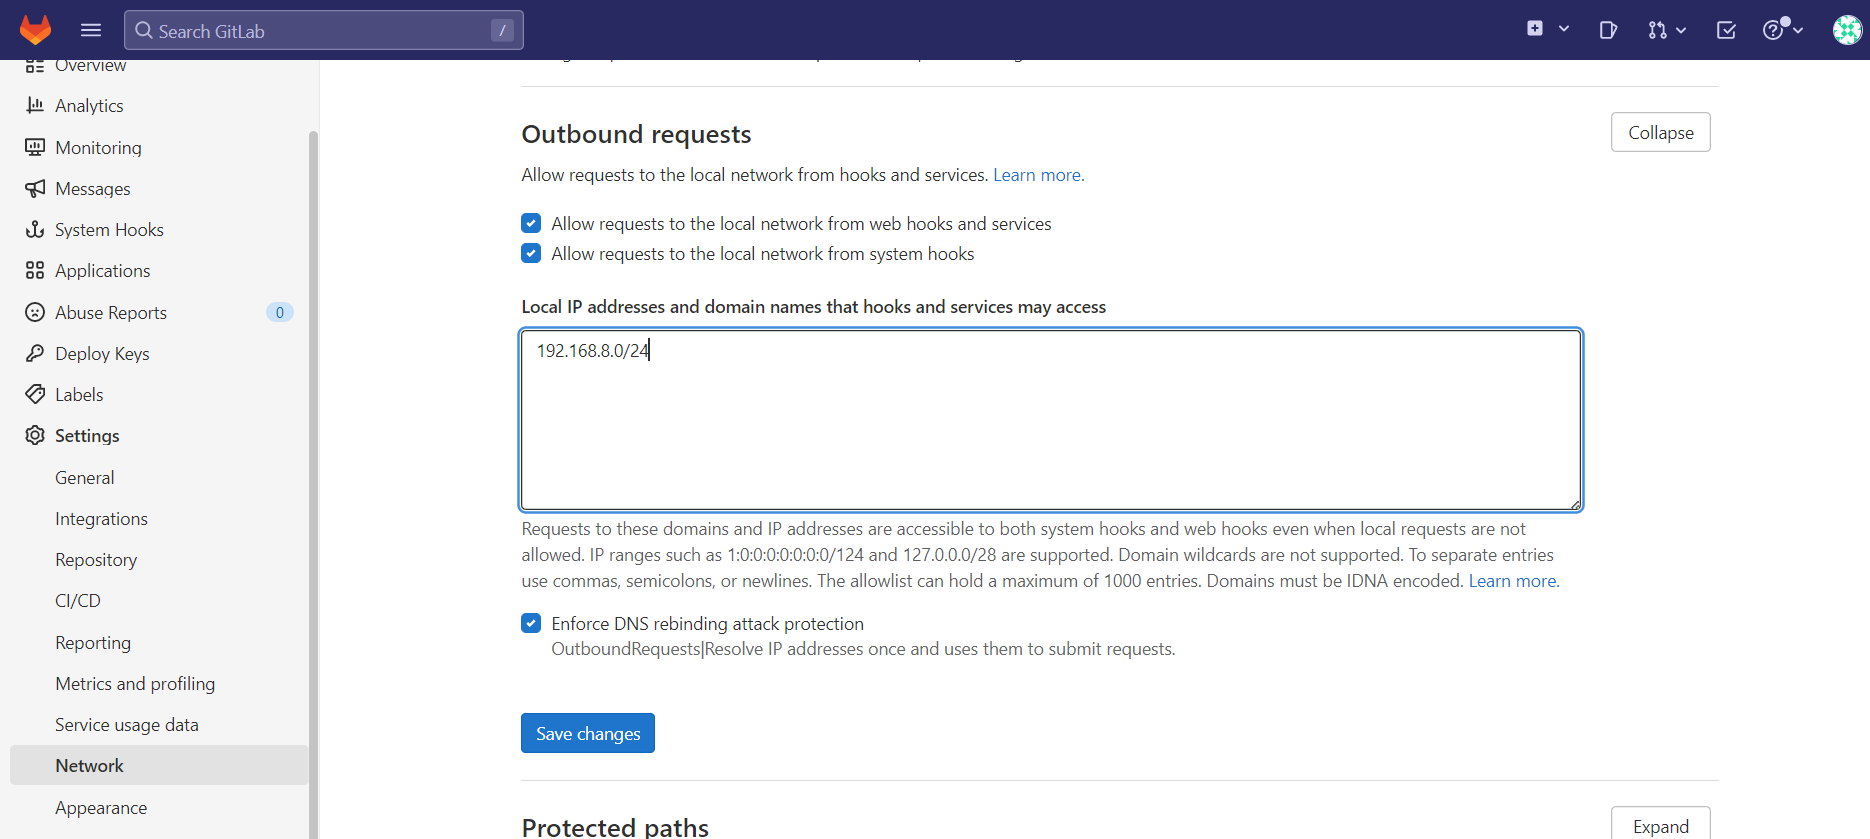
- 네트워크 설정
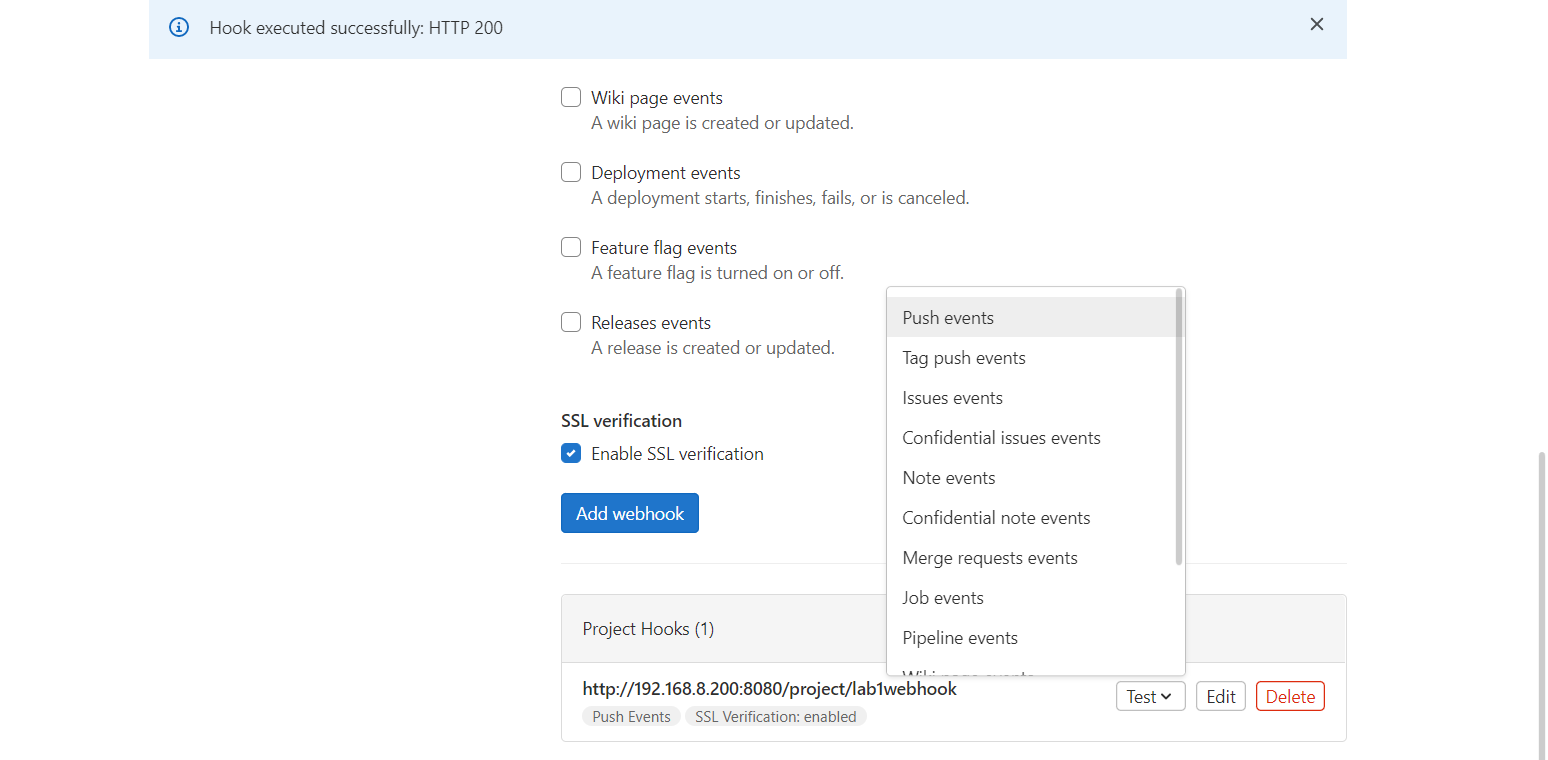
- webhooko 등록
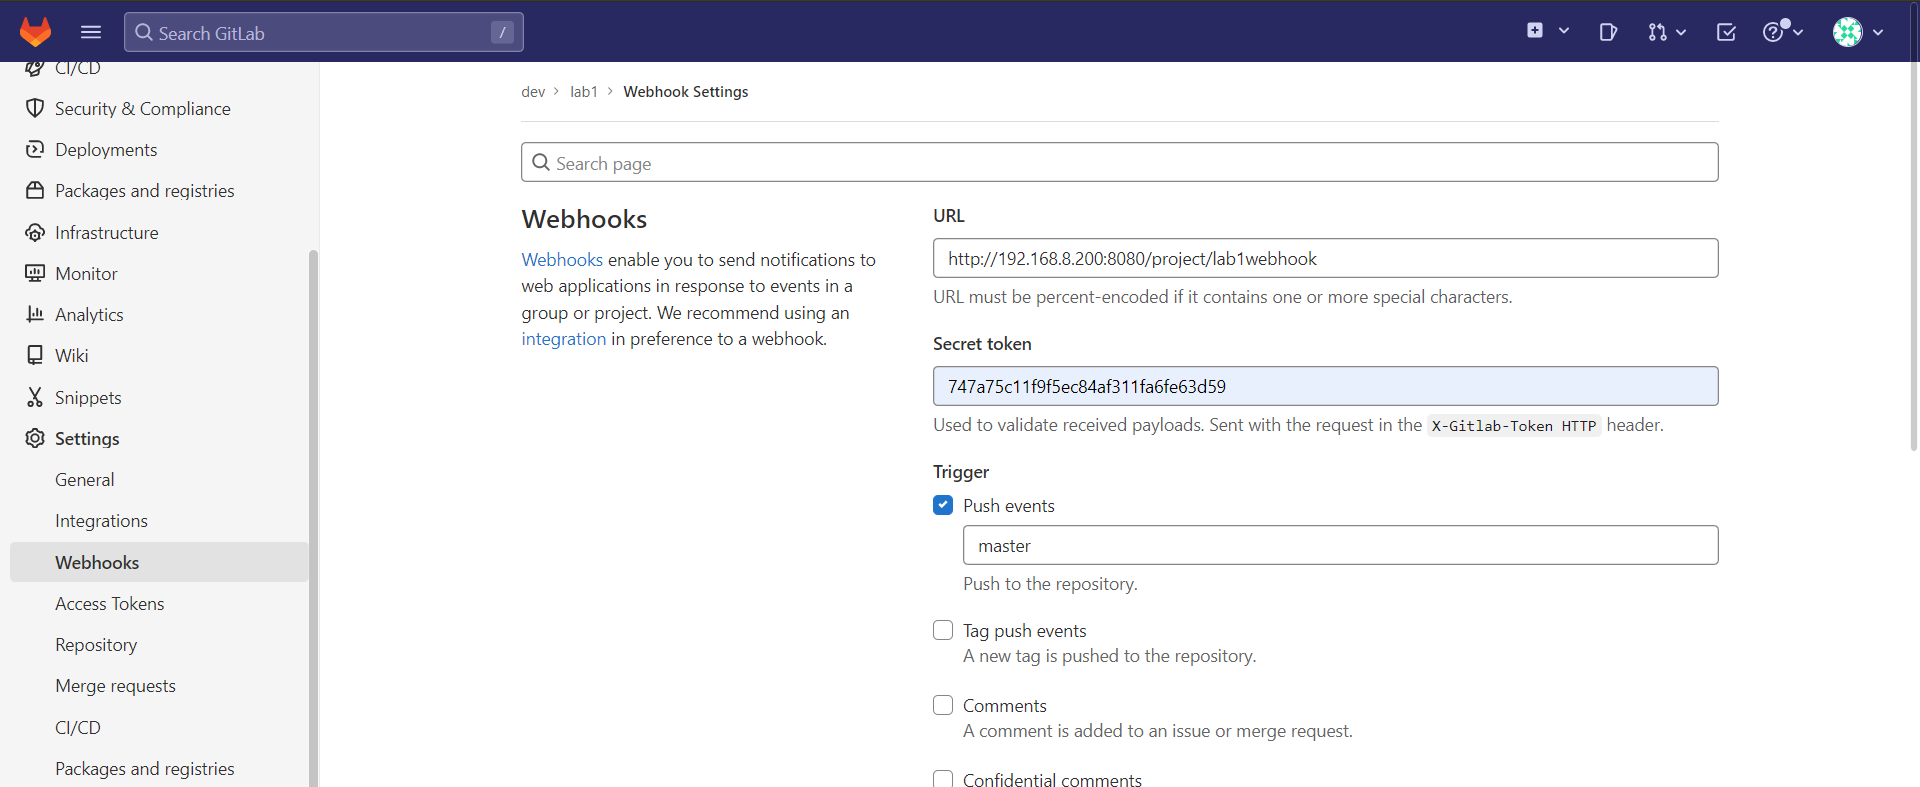
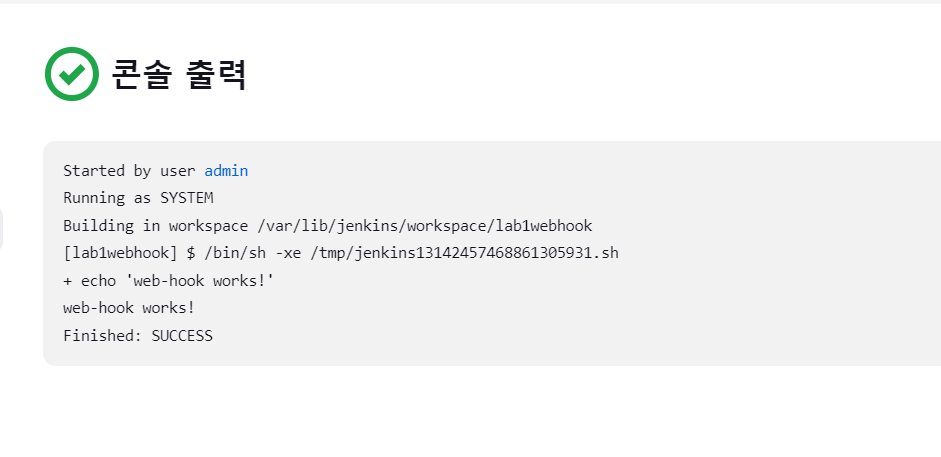
- 푸쉬 테스트
- 파일 업로드
user@LAPTOP-CISI8I61 MINGW64 ~/Desktop/lab1 (master)
$ vi index.html<h2>GITLAB CI/CD TEST webhook</h2>user@LAPTOP-CISI8I61 MINGW64 ~/Desktop/lab1 (master)
$ git add .
warning: LF will be replaced by CRLF in index.html.
The file will have its original line endings in your working directory
user@LAPTOP-CISI8I61 MINGW64 ~/Desktop/lab1 (master)
$ git commit -m "test webhook"
[master e5a08ae] test webhook
1 file changed, 1 insertion(+), 1 deletion(-)
user@LAPTOP-CISI8I61 MINGW64 ~/Desktop/lab1 (master)
$ git push origin master
Enumerating objects: 5, done.
Counting objects: 100% (5/5), done.
Delta compression using up to 8 threads
Compressing objects: 100% (2/2), done.
Writing objects: 100% (3/3), 283 bytes | 283.00 KiB/s, done.
Total 3 (delta 1), reused 0 (delta 0), pack-reused 0
To http://192.168.8.199/dev/lab1.git
de1c4db..e5a08ae master -> master- 빌드하기

- 빌드 확인
쉘을 수정하기 Dockerfile로 이미지 생성하고 생성된 이미지는 private registry로 등록.
192.168.8.100:5000/lab1:3.0으로 등록하고 ansible worker들에게 전달하여 해당 이미지를 로컬 저장소에 pull하도록 해보기