WSL2 환경에서 nodejs를 이용한 웹 개발을 공부해보려 한다. 특히 리눅스 환경에서는 n이라는 도구를 통해서 쉽게 nodejs 버전을 관리할 수 있다.
이번 포스트에서는 WSL 환경에서 nodejs, npm, n을 설치하는 방법을 알아보겠다.
Node.js 설치
아래 사이트에서 자신이 설치하고 싶은 node를 설치하자.
NodeSource - Node.js Binary Distributions
해당 사이트에는 이렇게 나와있다.
Installation instructionsNode.js v16.x:
# Using Ubuntu
curl -fsSL https://deb.nodesource.com/setup_16.x | sudo -E bash -
sudo apt-get install -y nodejs

# Using Debian, as root
curl -fsSL https://deb.nodesource.com/setup_16.x | bash -
apt-get install -y nodejs
(중략)Node.js LTS (v14.x):
# Using Ubuntu
curl -fsSL https://deb.nodesource.com/setup_lts.x | sudo -E bash -
sudo apt-get install -y nodejs

# Using Debian, as root
curl -fsSL https://deb.nodesource.com/setup_lts.x | bash -
apt-get install -y nodejs
Node.js Current (v16.x):
# Using Ubuntu
curl -fsSL https://deb.nodesource.com/setup_current.x | sudo -E bash -
sudo apt-get install -y nodejs

# Using Debian, as root
curl -fsSL https://deb.nodesource.com/setup_current.x | bash -
apt-get install -y nodejs
나는 가장 최신 버전인 16번대 버전을 설치하고 싶어서 맨 아래 명령어로 설치를 했다.
curl -fsSL https://deb.nodesource.com/setup_current.x | sudo -E bash -
sudo apt-get install -y nodejs
npm 설치 with Aptitude
npm은 Aptitude라는 패키지 관리자를 이용해서 설치하도록 하겠다.
Aptitude는 APT같은 패키지관리자이다. 사용법은 아래 링크를 참고
Ubuntu 패키지 관리 사용법 - apt, dpkg, aptitude
Aptitude를 설치하고 이것으로 npm을 설치하면 된다.
sudo apt install aptitude
sudo aptitude install npm
n 설치
깃허브 링크
n - Interactively Manage Your Node.js Versions
npm install -g n만약 설치가 안된다면 명령어 앞에 sudo를 붙이거나 위 깃허브 링크의 Installation을 참고하자.
# make cache folder (if missing) and take ownership
sudo mkdir -p /usr/local/n
sudo chown -R $(whoami) /usr/local/n
# make sure the required folders exist (safe to execute even if they already exist)
sudo mkdir -p /usr/local/bin /usr/local/lib /usr/local/include /usr/local/share
# take ownership of Node.js install destination folders
sudo chown -R $(whoami) /usr/local/bin /usr/local/lib /usr/local/include /usr/local/share
그냥 간단하게 sudo npm install -g n으로 하는걸 추천한다.
n 사용해보기
처음에 명령창에 n을 치면 설치된 node.js를 인식하지 못했다.
그래서 이번엔 lts 버전을 n을 통해 설치해보려 한다.
n lts
현재버전은?
n current # 또는 n lastest
물론 직접 버전을 입력해서 설치하는 것도 가능하다.
이후 콘솔창에 n을 입력하면 다음과 같이 버전을 선택할 수 있는 창이 나온다.

위 아래 방향키로 원하는 버전 위에 하늘색 원을 놓고 Enter로 선택한다.
node.js의 설치, 제거, 버전 변경이 매우 편해졌다.
이것이 n을 설치해야 하는 이유다.
npm notice
npm을 이용해 위의 n을 설치하는데, 새로운 버전이 출시되었다고 알려주었다.
이런 것들을 그냥 지나치는 사람들이 많은데, 메시지를 잘 읽고 확인하면 유용하다.
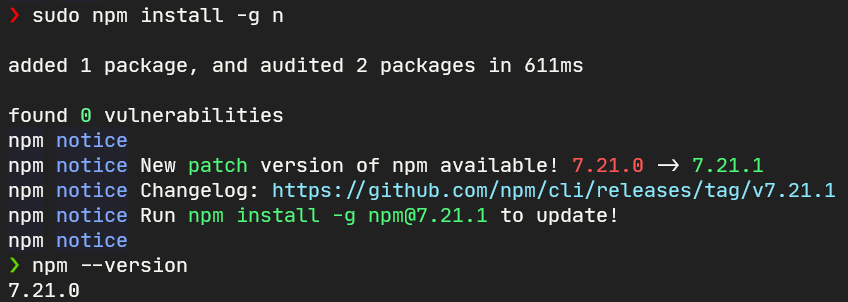
npm --version으로 버전을 확인해보니 7.21.0 이 역시 위의 메시지에서 확인 가능하다.
New patch version of npm available! 7.21.0 -> 7.21.1
npm notice Run npm install -g npm@7.21.1 to update!
그렇다. 해당 버전으로 업그레이드를 하려면 다음과 같이 입력하면 된다.
npm install -g npm@7.21.1만약 에러가 뜬다면 sudo를 붙여서 명령을 실행하자.
sudo npm install -g npm@7.21.1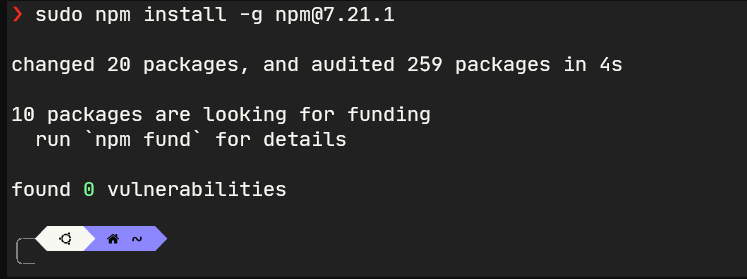
정리
node.js설치
curl -fsSL https://deb.nodesource.com/setup_current.x | sudo -E bash -
sudo apt-get install -y nodejsnpm설치
sudo apt install aptitude
sudo aptitude install npmn설치
sudo npm install -g nn에서node버전 설치 및 고르기
n lts            # LTS 버전 설치
n current        # 또는 n lastest - 최신버전 설치
n                # 버전 관리