
[fastcampus] 30개의 프로젝트로 배우는 프론트엔드 with React (6-2)
(6) React로 구현하는 Image Gallery (Drag & Drop)
3) 이미지 갤러리 로직 구현
useRef로 엘리먼트 접근
- ImageBox 컴포넌트는 재활용이 가능하고, 매개변수를 받아 이미지 경로를 props으로 내려받음
- 이미지를 추가할 수 있도록
<input type="file" />을 통해 이미지가 첨부되는 것을 확인할 수 있음 - 실제로는 plus--box 버튼을 클릭 시 이미지가 계속 추가되는 로직이므로 클릭했을 때 input을 클릭한 것처럼 구현
- input을 사용하기 위해 useRef hook을 활용
- 초기값이 null이고 타입이 지정된 inputRef를 만들고 ref props로 태그로 지정하면 엘리먼트에 접근 가능
<input ref={inputRef} />- plus--box 버튼에 onClick으로 inputRef.current?.click 넣으면 버튼 누를 때 함수가 실행되면서 동일하게 작동 (input 태그는 display:none으로 숨김 처리)
import React, { useRef, useState } from 'react';
import './App.css';
import ImageBox from './components/ImageBox';

function App() {
  const inputRef = useRef<HTMLInputElement>(null);

  return (
  	<div className="container">
    	<div className="initial--box">
        	<input type="file" ref={inputRef} />
            <div
                className="plus--box"
                onClick={()=>{
                inputRef.current?.click()
              }}
            >
              +
            </div>
        </div>

        {/* <ImageBox src="hello" />
        <ImageBox src="hello" />
        <ImageBox src="hello" />
        <ImageBox src="hello" /> */}

    </div>
  );
}

export default App;
참고
imageList 추가
- input 클릭하여 이미지를 추가할 때 들어오는 value를 콘솔로 체크
function App() {
  const inputRef = useRef<HTMLInputElement>(null);

  return (
    <div className="container">
        <div className="initial--box">
          <input type="file" ref={inputRef}
            onChange={(event)=>{
              console.log("hello")
              console.log(event.currentTarget.value)
            }}
          />
        </div>
    </div>
  );
}
- event.currentTarget.value를 통해 첨부한 이미지의 경로를 받아오는 것을 확인할 수 있는데, 그 경로를 ImageBox 컴포넌트로 넘겨서 렌더링할 수 있도록 구현
- 이미지가 추가될 때 state에 접근하는 변수 imageList와 setImageList는 추가된 이미지들의 자료형을 strings로 받음. useState를 통해 setImageList 함수로 imageList에 새로운 이미지들을 넣을 수 있음
- 이미지가 여러 개이므로 array
- setImageList에서 이전값(prev)를 가져오고, 추가되는 새로운 value를 v에 담아서 넣어줌.
- value가 존재할 때만 실행하도록 조건문 추가
function App() {
  const inputRef = useRef<HTMLInputElement>(null);

  const [imageList, setImageList] = useState<string[]>([]);

  console.log(imageList)

  return (
    <div className="container">
        <div className="initial--box">

          <input type="file" ref={inputRef}
            onChange={(event)=>{
              // console.log("hello")
              // console.log(event.currentTarget.value)

              if(event.currentTarget.value){
                const v = event.currentTarget.value;

                setImageList(prev => [...prev, v])
              }
            }}
          />
          <div
              className="plus--box"
              onClick={()=>{
              inputRef.current?.click()
            }}
          >
            +
          </div>
        </div>
    </div>
  );
}- 이미지가 추가되면 이미지가 없는 case 화면은 보이지 않도록 변경
- 방법 1 : 삼항연산자 활용 (imageList의 길이(length) 조건으로 케이스 렌더링)
function App() {
  const inputRef = useRef<HTMLInputElement>(null);

  const [imageList, setImageList] = useState<string[]>([]);

  console.log(imageList)

  return (
    <div className="container">
        <div className="initial--box">
          <div className={imageList.length === 0 ? '' : 'text--center'}>
            이미지가 없습니다.<br />이미지를 추가해주세요.
          </div>

          <input type="file" ref={inputRef}
            onChange={(event)=>{
              if(event.currentTarget.value){
                const v = event.currentTarget.value;

                setImageList(prev => [...prev, v])
              }
            }}
          />
          <div
              className="plus--box"
              onClick={()=>{
              inputRef.current?.click()
            }}
          >
            +
          </div>
        </div>
    </div>
  );
}- 방법 2 : 논리연산자(&&) 활용 (&&은 전부 참이어야 반환하는 속성을 통해 케이스 렌더링)
function App() {
  const inputRef = useRef<HTMLInputElement>(null);

  const [imageList, setImageList] = useState<string[]>([]);

  console.log(imageList)

  return (
    <div className="container">
        <div className="initial--box">
          { imageList.length === 0 &&
            <div className="text--center">
              이미지가 없습니다.<br />이미지를 추가해주세요.
            </div>
          }

          <input type="file" ref={inputRef}
            onChange={(event)=>{
              if(event.currentTarget.value){
                const v = event.currentTarget.value;

                setImageList(prev => [...prev, v])
              }
            }}
          />
          <div
              className="plus--box"
              onClick={()=>{
              inputRef.current?.click()
            }}
          >
            +
          </div>
        </div>
    </div>
  );
}
참고
ImageBox 렌더링
- 이미지가 추가된 경우의 렌더링 구현
- imageList의 length가 4라면 ImageBox 컴포넌트는 4개가 됨
- imageList에 들어온 el(element)는 string array이고, 이것을 ImageBox 컴포넌트로 변환(conversion)하기
- key는 컴포넌트를 반복생성할 때 동일한 요소가 맞는지 판단
- key값에 같은 파일을 올릴 경우도 있으므로 idx(index)를 추가
        {
          imageList.map((el, idx)=>
            <div key={el + idx} className="gallery--list">
              <ImageBox src={el} alt="" />
            </div>
          )
}- 첨부되는 파일을 고유한 image URL로 바꿔주어야 함
- input files array의 file.name을 콘솔에서 출력
- 첨부된 파일을 생성할 때 들어온 DataURL을 string으로 받음
- onloadend 이벤트 : 읽기 동작이 끝났을 때마다 발생
- .readAsDataURL() : 바이너리 파일을 Base64 Encode 문자열로 반환
          <input type="file" ref={inputRef}
            onChange={(event)=>{

              if(event.currentTarget.files?.[0]){
                const file = event.currentTarget.files[0];
                console.log(file.name)

                const reader = new FileReader();
                reader.readAsDataURL(file)
                reader.onloadend = (event) => {
                  setImageList(prev => [...prev, event.target?.result as string])
                }
              }
            }}
          />
참고
중간 결과
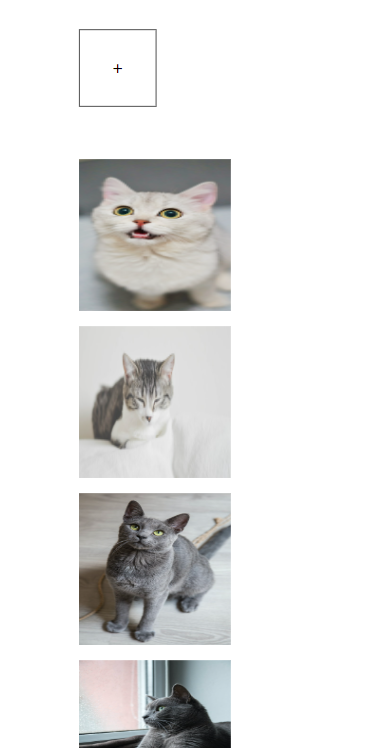
일단 첨부는 잘 되는데, 그냥 기능만 붙일 걸...
(가이드를 바꿔서 row가 아닌 column 형태로 추가하는 커스텀은 다음 시간에... css 노가다…^^ > me)

필요한 내용을 공부하고 저장합니다.