
[fastcampus] 30개의 프로젝트로 배우는 프론트엔드 with VanillaJS (3-1)
(3) 바닐라 자바스크립트로 만드는 date picker
jQuery 라이브러리를 사용하지 않고 만드는 date picker
개요
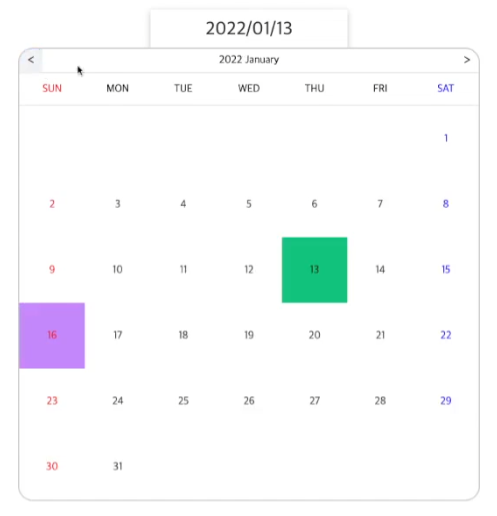
- 날짜 input을 누를 때 캘린더 표시
- 이전/다음달
- 선택한 날짜, 현재 날짜 표시
- SASS 레이아웃 구성
- Snowpack을 통한 개발
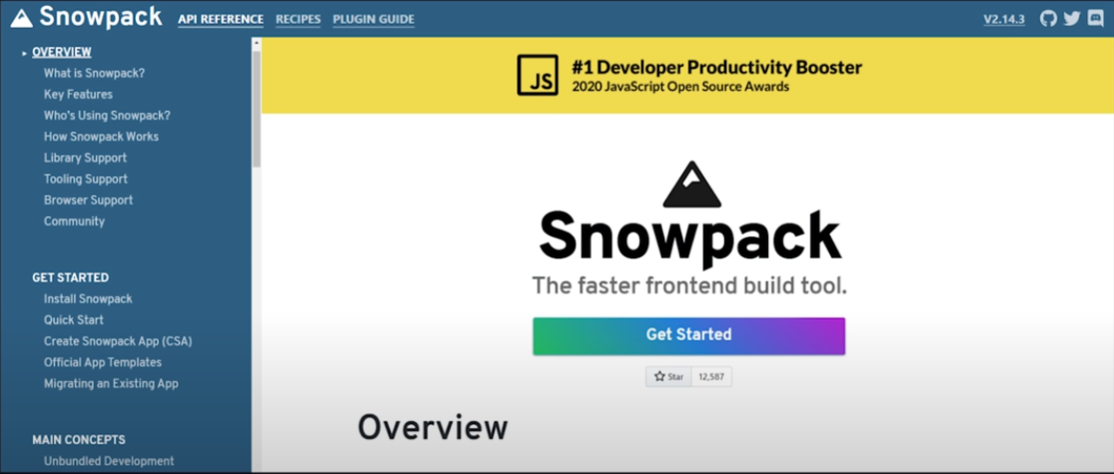
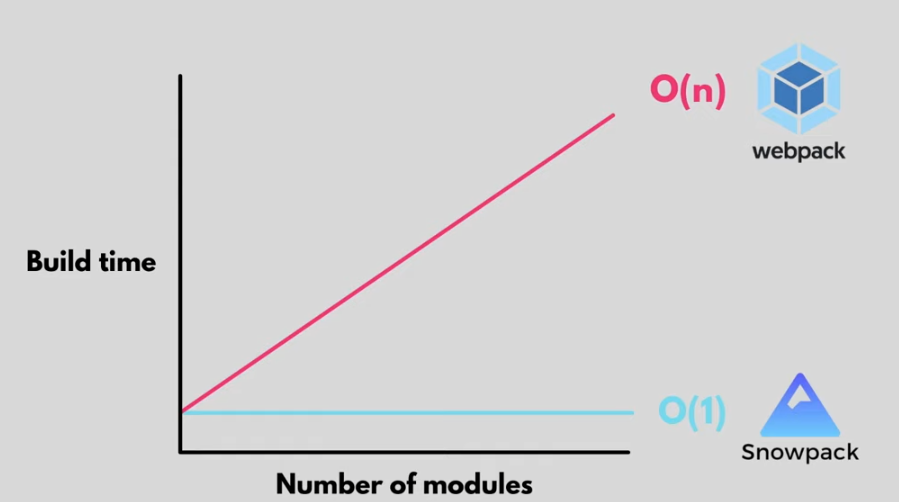
Snowpack
Snowpack
Create Snowpack App (CSA)
참고자료
- 더 빠른 웹 개발을 위한 최신의 프론트엔드 빌드 도구
- 웹 빌드 시스템에 대한 새로운 접근 방식을 제공
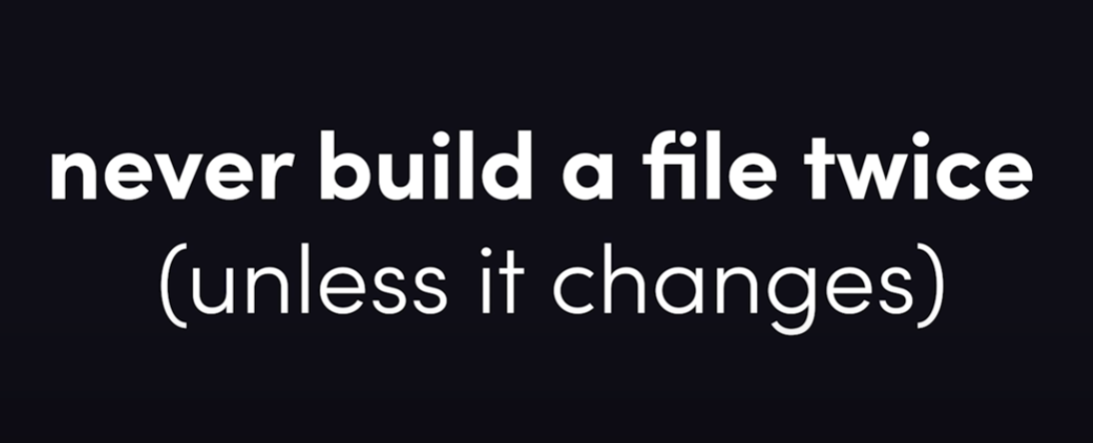
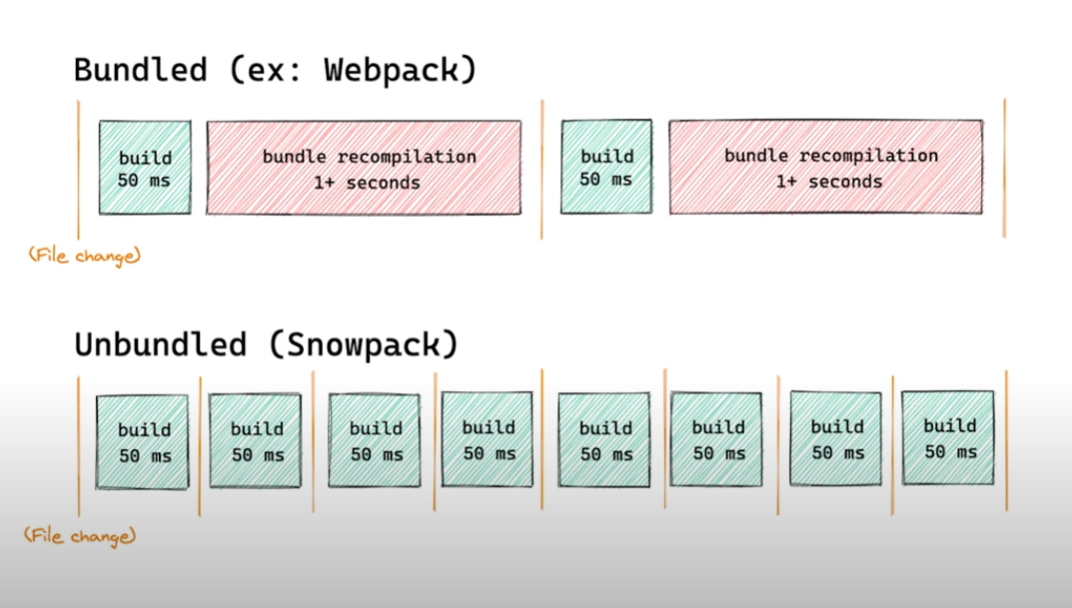
- JavaScript의 ESM(ES Modules)을 활용하여 동일 파일을 다시 빌드하지 않는 최초의 빌드 시스템을 생성해 변경사항을 브라우저에 즉시 적용할 수 있음
- 번들없는 개발 : 파일에 변경사항이 없으면 파일을 다시 빌드하지 않고 브라우저에서 다시 다운로드하지 않음
출처 - Snowpack, 더 빠른 웹 개발을 위한 새로운 방식의 프론트엔드 빌드 도구
출처 - Snowpack으로 시작하기
개발환경 설정
-
package.json : npm itit -y
-
npm i -D snowpack
-
CSS 컴파일 플러그인(SASS) : npm i -D @snowpack/plugin-sass
-
생성
/public/index.html
/public/favicon.ico
/src/js/index.js
/src/scss/style.scss -
snowpack.config.js 생성/설정
module.exports = {
  mount: {
    public: {url: '/', static: true},
    src: {url: '/dist'}
  },
  optimize: {
    minify: true
  },
  plugins: [
    '@snowpack/plugin-sass'
  ]
}- package.json
{
  "name": "03_date-picker",
  "version": "1.0.0",
  "description": "[fastcampus] 30개 프로젝트로 배우는 프론트엔드 with React",
  "main": "index.js",
  "scripts": {
    "start": "snowpack dev",
    "build": "snowpack build"
  },
  "keywords": [],
  "author": "",
  "license": "ISC",
  "devDependencies": {
    "@snowpack/plugin-sass": "^1.4.0",
    "eslint": "^8.23.0",
    "snowpack": "^3.8.8"
  },
  "dependencies": {
    "prettier": "2.7.1"
  }
}
- ESLint & Prettier 설정
npm i -D eslint
npm i --save-exact prettier
.eslintrc.json
.eslintignore
.prettierrc.json
.prettierignore
HTML과 SASS
HTML
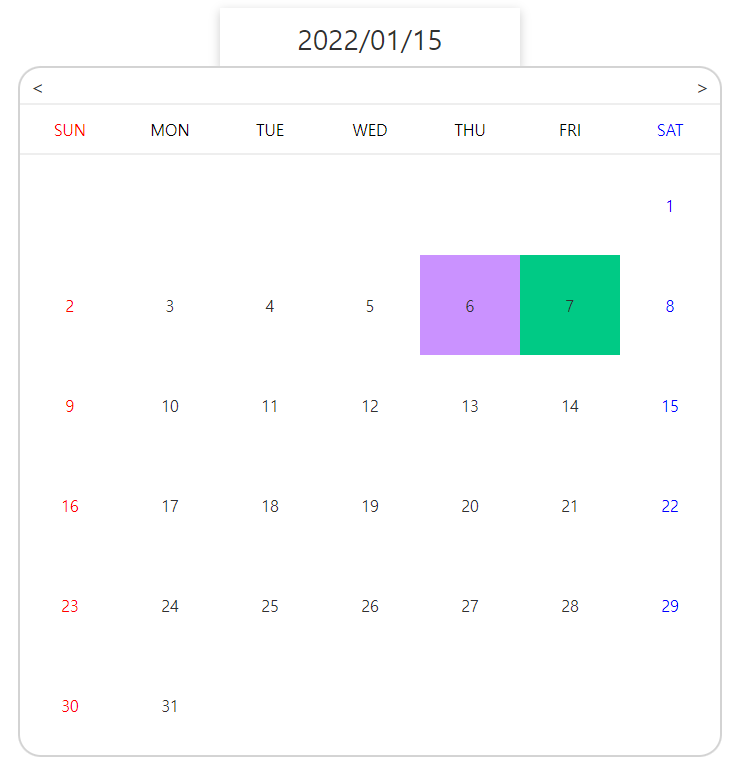
- calendar 클래스에 active 추가 시 달력 표시
- date hover 시 회색 표시
- 오늘 날짜 : date 클래스에 today 클래스 추가 시 보라색 표시
- 선택한 날짜 : date 클래스에 selected 클래스 추가 시 초록색 표시
SCSS
계층구조, 변수, 조건문/반복문 등
&.active
grid
.dates {
      // !
      display: grid;
      grid-template-columns: repeat(7, 1fr);

      .date {
        display: flex;
        justify-content: center;
        align-items: center;
        color: #313131;
        height: 100px;
        width: 100px;
        cursor: pointer;
        transition: 0.3s;

        &:hover {
          background-color: #f3f3f3;
        }

        &.today {
          background-color: #ca92ff;
        }

        &.selected {
          background-color: #00ca85;
        }

        &:nth-child(7n + 2) {
          color: red;
        }

        &:nth-child(7n + 1) {
          color: blue;
        }

        &:first-child {
          grid-column-start: 7;
        }
      }
    }
참고자료
CSS Grid(그리드)는 2차원(행과 열)의 레이아웃 시스템을 제공
출처 - CSS Grid 완벽 가이드

JS Bin Test
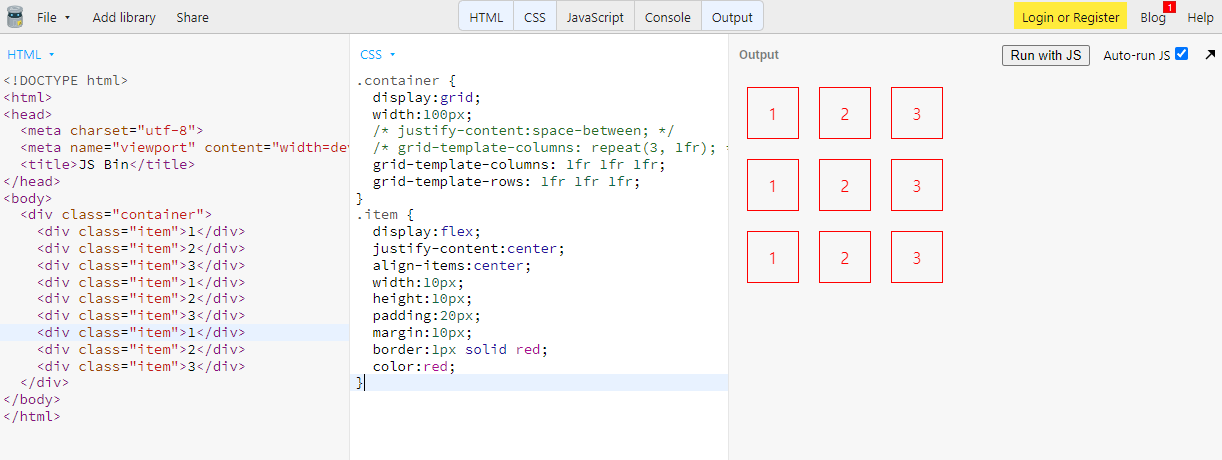
캘린더 구현을 위한 grid, grid-template-columns, grid-template-rows 이해
fr : fraction
src/scss/style.scss
    .dates {
      // 캘린더 grid
      display: grid;
      grid-template-columns: repeat(7, 1fr);

      .date {
        display: flex;
        justify-content: center;
        align-items: center;
        color: #313131;
        height: 100px;
        width: 100px;
        cursor: pointer;
        transition: 0.3s;

		// hover했을 때 bg
        &:hover {
          background-color: #f3f3f3;
        }

        // 오늘 날짜 bg
        &.today {
          background-color: #ca92ff;
        }

        // 선택한 날짜 bg
        &.selected {
          background-color: #00ca85;
        }

        // ! js로 동적으로 구현할 예정
        // 일요일 (2, 9, 16, 23번째 ...)
        &:nth-child(7n + 2) {
          color: red;
        }

        // ! js로 동적으로 구현할 예정
        // 토요일 (1, 8, 15, 22번째 ...)
        &:nth-child(7n + 1) {
          color: blue;
        }

        // ! js로 동적으로 구현할 예정
        // 해당 월의 1번째 날짜 (7번째 column부터 시작, 6으로 하면 6번째부터 시작
        &:first-child {
          grid-column-start: 7;
        }
      }
    }
날짜 조회 기능 (1)
1) DatePicker 클래스 및 초기 정보
src/js/index.js
class DatePicker {
  // Public
  // 월 정보 (string array)
  monthData = [
    'January',
    'February',
    'March',
    'April',
    'May',
    'June',
    'July',
    'August',
    'September',
    'October',
    'November',
    'December',
  ];

  // Private
  #clanedarDate = {
    data: '', // 달력이 보이는데 사용될 data 정보
    date: 0,
    month: 0,
    year: 0,
  };

  selectedDate = {
    data: '',
    date: 0,
    month: 0,
    year: 0,
  };

  // 생성자
  constructor() {}

  // 날짜 정보 초기화
  initCalendarDate() {
    const data = new Date(); // 현재 정보로 날짜 신규 생성
    const date = data.getDate(); // 며칠인지 정보
    const month = data.getMonth(); // 몇월인지 정보 (1~12월인데, index로 리턴하므로 0~11인 것 유의)
    const year = data.getFullYear(); // 몇년도인지 정보
    // 위에 것을 calendarDate 객체에 담아주기
    this.#clanedarDate = {
      data,
      date,
      month,
      year,
    };
  }

}

// 인스턴스
new DatePicker();
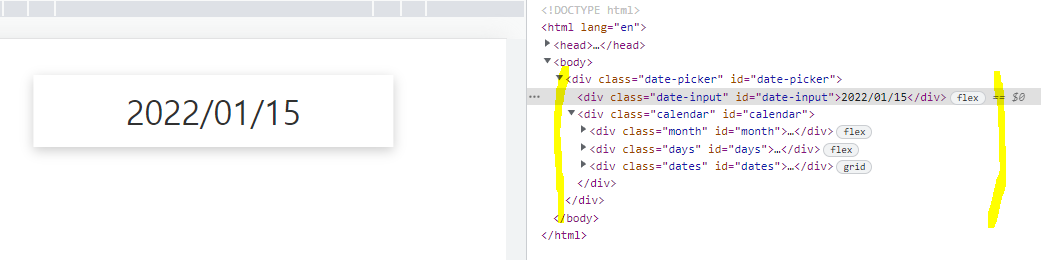
2) field에서 사용될 변수(요소 찾기)
src/js/index.js
class DatePicker {
  monthData = [
    'January',
    'February',
    'March',
    'April',
    'May',
    'June',
    'July',
    'August',
    'September',
    'October',
    'November',
    'December',
  ];

  #clanedarDate = {
    data: '',
    date: 0,
    month: 0,
    year: 0,
  };

  selectedDate = {
    data: '',
    date: 0,
    month: 0,
    year: 0,
  };

  // 탐색한 element들을 상단 filed에 추가
  datePickerEl;
  dateInputEl;
  calendarEl;
  calendarMonthEl;
  monthContentEl;
  nextBtnEl;
  prevBtnEl;
  calendarDatesEl;

  constructor() {
    this.initCalendarDate(); // 초기화
    this.assignElememnt(); // 요소 추가
    this.addEvent(); // 이벤트 추가
  }

  initCalendarDate() {
    const data = new Date();
    const date = data.getDate();
    const month = data.getMonth();
    const year = data.getFullYear();
    this.#clanedarDate = {
      data,
      date,
      month,
      year,
    };
  }

  // 요소 찾기
  assignElememnt() {
    this.datePickerEl = document.getElementById('date-picker');
    this.dateInputEl = this.datePickerEl.querySelector('#date-input');
    this.calendarEl = this.datePickerEl.querySelector('#calendar');
    this.calendarMonthEl = this.calendarEl.querySelector('#month');
    this.monthContentEl = this.calendarMonthEl.querySelector('#content');
    this.nextBtnEl = this.calendarMonthEl.querySelector('#next');
    this.prevBtnEl = this.calendarMonthEl.querySelector('#prev');
    this.calendarDatesEl = this.calendarEl.querySelector('#dates');
  }

  addEvent() {
    // date-input을 눌렀을 때 캘린더가 보이는 이벤트
    this.dateInputEl.addEventListener('click', this.toggleCalendar.bind(this));
  }

  // toggle
  toggleCalendar() {
    this.calendarEl.classList.toggle('active');
  }
}

new DatePicker();
3) 날짜(dates) 동적 생성
기존에 html에 넣어준 date 클래스로 가진 div는 모두 삭제
public/index.html
<div class="month" id="month">
<div class="arrows" id="prev"><</div>
<div class="mth" id="content">
<!-- !현재 월도 동적으로 생성할 예정 -->
</div>
<div class="arrows" id="next">></div>
</div>
<div class="dates" id="dates">
<!-- !날짜들은 동적으로 생성할 예정 -->
</div>업데이트 될 때 해당 월, 일을 index.html에 추가되도록 동적 생성
src/js/index.js
  toggleCalendar() {
    this.calendarEl.classList.toggle('active');
    this.updateMonth(); // 월 업데이트
    this.updateDates(); // 일 업데이트
  }
업데이트 될 때 해당 월 동적 생성
  updateMonth() {
    // console.log(this.#calendarDate.year);
    this.monthContentEl.textContent = `${this.#calendarDate.year} ${
      this.monthData[this.#calendarDate.month]
    }`;
  }
업데이트 될 때 해당 날짜 동적 생성
updateDates() {
// 업데이트 될 때 캘린더에 들어간 날짜를 비우기 (새로 생성해야 하므로)
this.calendarDatesEl.innerHTML = '';
// 날짜가 며칠 있는지 확인
const numberofDates = new Date(
this.#calendarDate.year,
this.#calendarDate.month + 1, // index 0~11이라서 +1
0,
).getDate();
// 총 날짜를 기반으로 element 생성
// console에서 월별 날짜 확인
// new Date(2022,1,0).getDate() // 31
// new Date(2022,2,0).getDate() // 28
// new Date(2022,3,0).getDate() // 31 ...
// fragment 생성
const fragment = new DocumentFragment();
for (let i = 0; i < numberofDates; i++) {
const dateEl = document.createElement('div');
dateEl.classList.add('date');
dateEl.textContent = i + 1; // for문이 0부터 돌게되므로 +1
dateEl.dataset.date = i + 1;
fragment.appendChild(dateEl); // append
}
this.calendarDatesEl.appendChild(fragment);
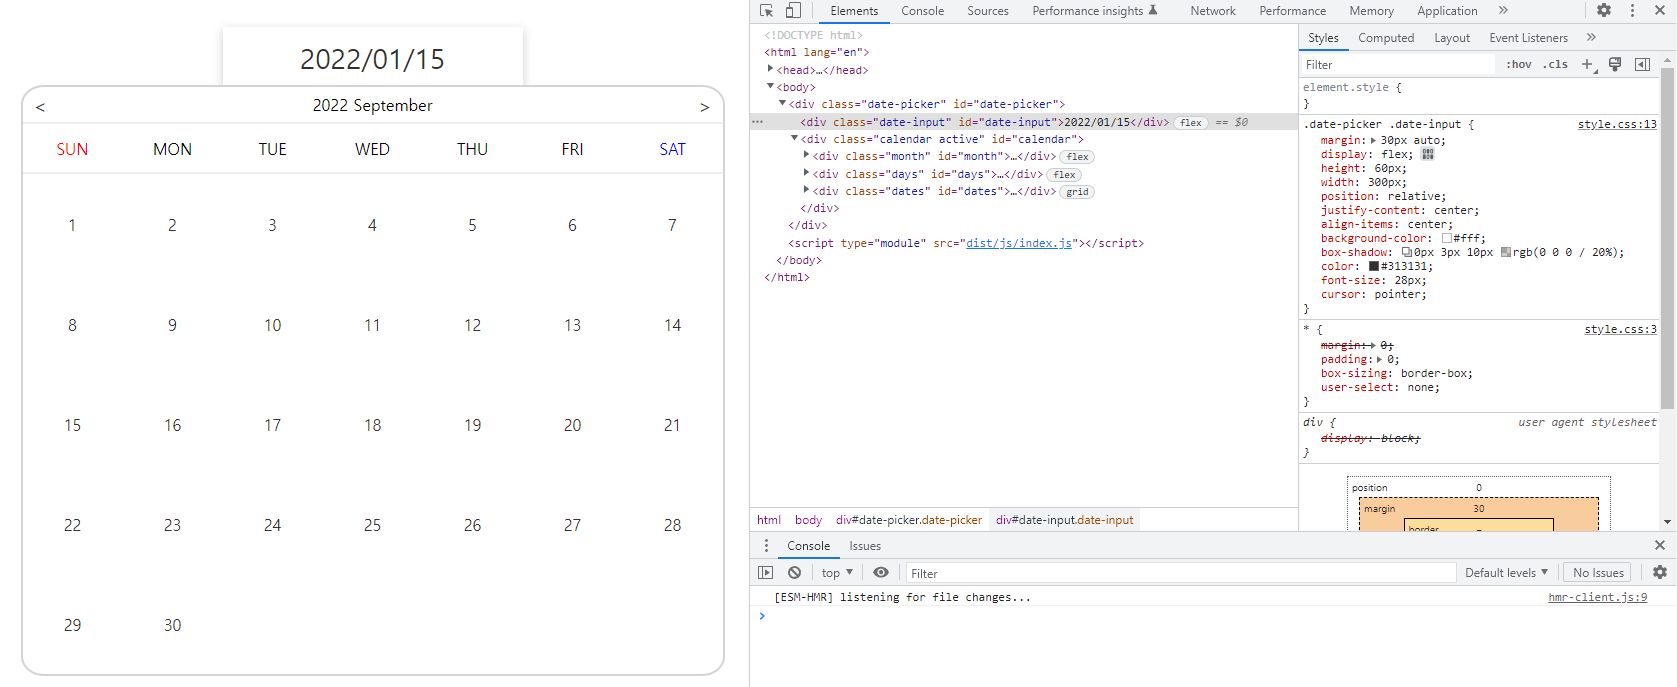
}중간결과
참고자료
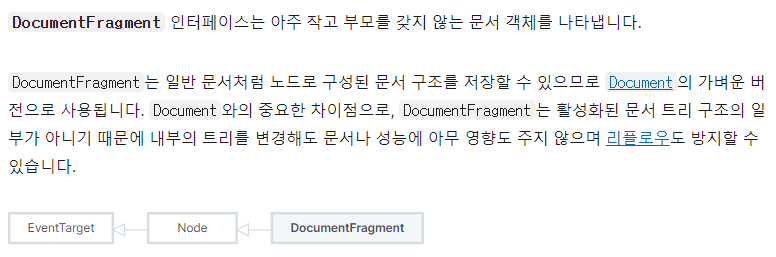
DocumentFragment는 다른 노드를 담는 임시 컨테이너 역할을 하는 특수 목적의 노드이다. 가상의 노드 객체로서, 메모리상에서만 존재하는 비 문서 탬플릿으로 생각하면 된다. parentNode 프로퍼티는 항상 null이다. 하지만 Element처럼, appendChild()와 insertBefore() 등으로 조작할 수 있는 자손 객체를 가질 수 있다.
정리
- snowpack 환경설정 방법 (모듈번들러)
- sass/scss (컴파일)
- grid layout 이해
- 날짜 조회 기능 구현
한 개로 포스팅할까 하다가 일정이 있어서 일단 반만 듣고 정리.. (중간에 uncaught type error 나길래 알고보니 data, date 같은 오타 -_-..)
구글링하며 좋은 자료들 덕분에 공부가 되었다. 프론트엔드 개발의 시작과 끝은 역시 구글링(+유튜브)..^^ 인터랙티브 디벨로퍼로 유명한 김종민 님의 학습 방법 중에 같은 주제도 여러 개를 비교해서 공부하는 것이 좋다는 조언이 있었는데 가령 여러 권의 책을 사서 공부하면 같거나 비슷한 내용도 저자마다 학습하는 방식과 해석하는 방식이 달라서 비교하면서 공부하는 것이 도움이 된다는 요지. (해당 내용이 인상깊었는데 현재는 해당 유튜브 영상이 보이지 않아서 아쉽..)
나는 책을 대신한 여러 개발자들의 블로그 포스팅, 유튜브, GitHub 등의 자료를 서칭하는 걸로 대신하여.. 어떤 사람들은 블로그는 정보가 정확하지 않을 수 있다고 하는데 그런데 책도 재판하거나 개정판이 아니면 시간이 지나면 정보가 달라지거나 예전 것이 된다. 정확하든 정확하지 않든 정보가 최신이 아니든 간에 일단 다양한 사람들의 학습 패턴을 살필 수 있어서 좋고, 어떻게 하면 더 효과적이고 효율적으로 정보를 기억할 수 있는지 분석에도 도움이 되서 난 이 방법이 잘 맞는 것 같다. 또 어떻게 하면 내가 원하는 정보를 얻기 위해 키워드를 잘 추려내고 거기서 유의미한 내용을 솎는 노하우도 터득할 수 있기 때문에.. 그리고 개발은 사실 답이 대체로 정해져있지만 개발자에게 요구하는 것이 문제해결능력이라고 한다면 오답이 되더라도 왜 이런 방식으로 문제를 해결하려고 했는지 그 과정을 확인하는 부분도 있다고 생각하므로 정확한 포스팅만이 꼭 도움이 되리라 생각하지 않는다. (해결해야할 문제는 수백개가 넘고 상황에 따라서 항상 다르기 때문에..?!) 정답을 찾기 위해 나는 어떤 노력을 했고, 어떤 방식으로 이 문제를 풀려고 했는가, 답이 되지 않아도 그 방식을 통해 얻은 유의미한 정보는 무엇인가도 중요하지 않을까?라는 생각을 하는데... 그러다보면 그 과정에서 정답만큼 중요했던 건 무엇일까를 느낄 수 있는 부분이 있다. (이것에 대해 최근에 얻은 깨달음(?)이 있어서 나중에 작성할 예정.. 내가 놓친 것은 무엇이었던가.)
내가 천재 개발자라면 남들이 발표하지 않은 새롭고 흥미로운 주제로 포스팅할텐데 난 아직 그런 레벨은 안 되므로.. 이렇게 TIL을 통해 더 먼저 배운 학습자들을 팔로잉한다는 느낌으로, 나만보기엔 아까운 자료를 발굴한다는 생각으로 포스팅하려고 한다..😄😁