Spring에는 다양한 기능이 많지만, 근본적으로 Spring이 어떤 역할을 하는지 모호하게 알고 있었다.
조금 더 자세하게 정리해보고자 Spring의 3대 철학인 IoC, DI, AOP에 대해 정리했다.
시작은 IoC (Container)
Spring Context
IoC에 대해 이야기 하기 위해서는 Spring에서 제공하는 ApplicationContext에 대한 설명이 선행되어야 한다.
Spring Context(= ApplicationContext)는 빈 객체(Bean)의 인스턴스 주기와 의존성을 관리하는 컨테이너이다.
내부를 까보면 BeanFactory를 확장하고 있는데, AppicationContext에서 AOP 및 이벤트 기능 등 여러가지를 추가로 제공한다. 기본은 BeanFactory에서 제공하는 것과 같다.
생성 및 생명주기, 의존성 주입 등의 책임을 사용자 대신 Spring Context가 가져간다.
다음 코드와 같이 ApplicationContext에 registerSingleton()을 이용해서 인스턴스를 직접 등록할 수 있고, BeanDefinition을 등록할 수도 있다.
@Test
void springContextTest() {
    StaticApplicationContext context = new **StaticApplicationContext();**
    context**.registerSingleton**("hello", Hello.class);

    Hello hello = context.**getBean**("hello", Hello.class);
    assertThat(hello).isNotNull();
}
Spring IoC (Inversion of Control)
Spring IoC (Inversion of Control) 컨테이너
IoC = 제어의 역전
원래 객체가 자신에게 필요한 객체를 직접 생성하거나 관리하던 것에서, 외부 컨테이너가 객체 생성 및 의존성 주입의 역할을 대신하여 객체를 대신 생성하고 주입하는 것이다.
Spring의 경우 ApplicationContext가 이런 외부 컨테이너로서 객체 생성의 책임을 가져갔기 때문에 제어의 역전, 즉 IoC 컨테이너라고 한다.
💡 IoC는 스프링의 3대 철학 중 하나이다 (IoC, AOP, DI)
왜 IoC를 사용할까?
IoC를 사용하는 이유에는 크게 세가지가 있다.
- 객체 간의 결합도 감소
- 코드 유연성 및 확장성
- 테스트 용이성
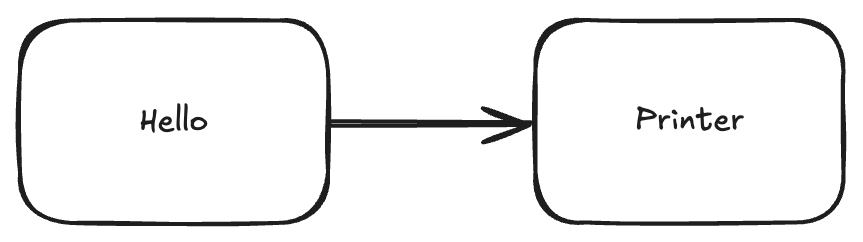
다음과 같이 Hello와 Printer 객체 관계가 있다.
Hello가 필드인 Printer를 직접 생성하게 된다면 클래스 사이 관계가 Composite으로 엮이면서 강한 결합도가 생기게 된다.
public class Hello {
    Printer printer;

    public Hello() {
        this.printer = new Printer();
    }
}
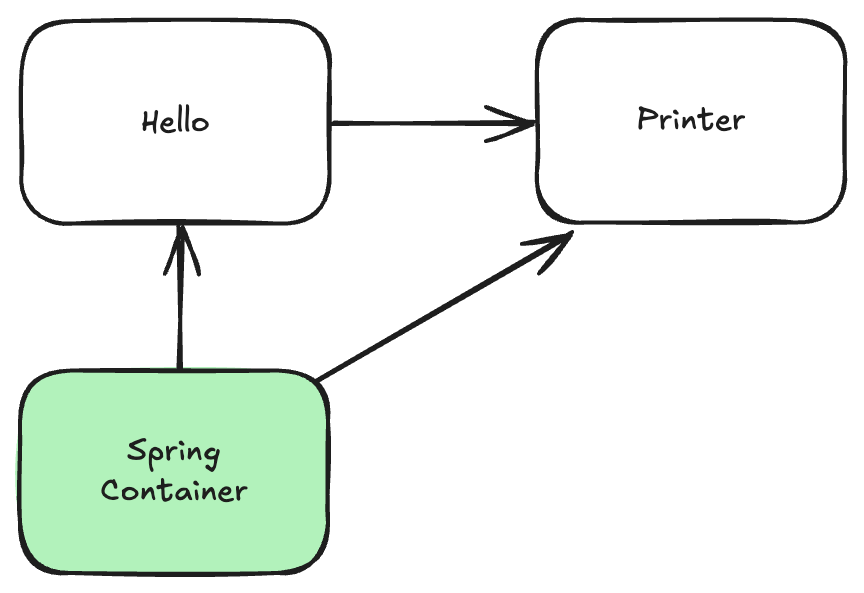
이 과정을 Spring Context가 대체하면서 이런 형태가 된다.
그림으로 보면 그 과정이 와닿지 않을 수 있지만, 직접 생성하지 않고 외부 주입을 통해 결합도가 감소하게 된다.
결합도 감소와 함께 자연스럽게 Printer에 대한 교체도 쉬워지며 확장성 또한 좋아졌다.
public class Hello {
    Printer printer;

    public Hello(Printer printer) {
        this.printer = printer;
    }
}
Bean Definition
BeanDefinition은 Spring Context에 등록하기 위한 빈 객체의 메타정보이다.
인스턴스 등록과 BeanDefinition 등록의 차이점은 인스턴스를 직접 생성하는 것이 아니라 어떻게 생성할 지에 대한 정보만을 넘기기 때문에 구체적인 생명주기가 Spring Context에 의해 관리된다는 것이다.
따라서 BeanDefinition을 통해 등록된 빈 객체는 모든 관리가 컨테이너를 통해 이루어지며 따라서 Spring Context의 모든 기능을 사용할 수 있다는 장점이 있다.
@Test
void springBeanDefinitionTest() {
    StaticApplicationContext context = new StaticApplicationContext();

    BeanDefinition helloDef = **new RootBeanDefinition(Hello.class);**
    helloDef.getPropertyValues().addPropertyValue("name", "sooyang");
    context.registerBeanDefinition("hello", helloDef);

    Hello hello = context.getBean("hello", Hello.class);
}
내가 흔히 사용했던 @Component, @Configuration 역시 BeanDefinition 방식에 해당한다. 이런 방식은 어노테이션 기반 Configuration이기도 하다.
- 어노테이션 기반 Configuration
@Component(컴포넌트 스캐닝 관련)@Configuration,@Bean
    @Configuration
    public class Register {
    		@Bean
    		public Register() {
    				return new Register();
    		}
    }
다른 빈 객체를 주입받으려면?
다음과 같이 Hello 빈 객체 내부에 Printer 빈 객체를 주입받아야 한다면 BeanDefinition에 어떻게 정의해야 할까?
public class Hello {
    String name;
    Printer printer; // Printer도 빈 객체이다
    ...
    public String sayHello() {
        return "Hello " + this.name;
    }

    public void print() {
        this.printer.print(sayHello());
    }
}RuntimeBeanReference를 사용하면 된다.
@Test
void springRuntimeBeanReference() {
    StaticApplicationContext context = new StaticApplicationContext();
    context.registerBeanDefinition("printer", new RootBeanDefinition(Printer.class));

    RootBeanDefinition helloDef = new RootBeanDefinition(Hello.class);
    helloDef.getPropertyValues().addPropertyValue("name", "sooyang");
    helloDef.getPropertyValues().addPropertyValue("printer", new RuntimeBeanReference("printer"));
    context.registerBeanDefinition("hello", helloDef);

    Hello hello = context.getBean("hello", Hello.class);
    hello.print();

    assertThat(context.getBean("printer").toString()).isEqualTo("Hello sooyang");
}
다만 위의 방식은 어노테이션 기반이 아니라 직접 Bean 메타정보를 등록하는 방법이므로 어노테이션 방식에서는 @Autowired 어노테이션을 붙인다.
IoC에 대한 기본 개념은 여기까지 정리해봤다.
마지막에 설명한 RuntimeBeanReference은 의존성 주입과 관련이 깊기 때문에 의존성 역전(DI)에서 이어서 정리해보겠다.