
서비스를 react native로 마이그레이션하면서 기존에 사용하던 다음(카카오) 주소 검색 서비스 api가 네이티브 모듈은 제공하지 않는 관계로 부분적으로 웹뷰로 구현해보았다.
1. react-native-webview 설치
yarn add react-native-webview
# 또는 npm install --save react-native-webview
cd ios && pod install
2. 주소 검색 컴포넌트 및 html 템플릿 구현
import WebView, { WebViewMessageEvent } from 'react-native-webview';

interface DaumPostcodeProps {
  onSubmit: (data: DaumPostcodeData) => void;
}

const DaumPostcode = ({ onSubmit }: DaumPostcodeProps) => {

  const postcodeHTML = `
    <!DOCTYPE html>
    <html>
    <head>
      <meta charset="UTF-8">
      <meta name="viewport" content="width=device-width, initial-scale=1.0, maximum-scale=1.0, minimum-scale=1.0, user-scalable=no">
      <script src="https://t1.daumcdn.net/mapjsapi/bundle/postcode/prod/postcode.v2.js"></script>
      <style>
        body, html { width: 100%; height: 100%; margin: 0; padding: 0; }
        #container { width: 100%; height: 100%; }
      </style>
    </head>
    <body>
      <div id="container"></div>
      <script>
        function init() {
          new daum.Postcode({
            oncomplete: function(data) {
             window.ReactNativeWebView.postMessage(JSON.stringify(data));
            },
            width: '100%',
            height: '100%',
            animation: true,
            hideMapBtn: true,
          }).embed(document.getElementById('container'));
        }

        window.addEventListener('DOMContentLoaded', init);
      </script>
    </body>
    </html>
  `;

  const handleMessage = (event: WebViewMessageEvent) => {
    try {
      const data = JSON.parse(event.nativeEvent.data);
      onSubmit(data);
    } catch (error) {
      console.error('Error', error);
    }
  };

  return (
    <WebView
      className="flex flex-1"
      source={{
        html: postcodeHTML,
        baseUrl: 'https://postcode.map.daum.net',
      }}
      onMessage={handleMessage}
      javaScriptEnabled={true}
      domStorageEnabled={true}
      originWhitelist={['*']}
    />
  );
};

export default DaumPostcode;
1. HTML 템플릿
postcodeHTML
: 다음 주소 검색 API를 로드하고 실행하는 HTML 코드
2. 메시지 핸들링
window.ReactNativeWebView.postMessage()
: WebView에서 선택된 주소 데이터를 React Native로 전달하는 로직
3. WebView 설정
<Webview />
: 필요한 속성을 설정한 WebView 컴포넌트
3. 반환 데이터 타입 정의
- 다음 주소 검색 API가 반환하는 데이터의 타입 정의.
(또는 실제 사용 시 필요한 필드만 사용)
export type DaumPostcodeData = {
  address: string;
  addressEnglish: string;
  addressType: 'R' | 'J';
  apartment: string;
  autoJibunAddress: string;
  autoJibunAddressEnglish: string;
  autoRoadAddress: string;
  autoRoadAddressEnglish: string;
  bcode: string;
  bname: string;
  bname1: string;
  bname1English: string;
  bname2: string;
  bname2English: string;
  bnameEnglish: string;
  buildingCode: string;
  buildingName: string;
  hname: string;
  jibunAddress: string;
  jibunAddressEnglish: string;
  noSelected: 'Y' | 'N';
  postcode: string;
  postcode1: string;
  postcode2: string;
  postcodeSeq: string;
  query: string;
  roadAddress: string;
  roadAddressEnglish: string;
  roadname: string;
  roadnameCode: string;
  roadnameEnglish: string;
  sido: string;
  sidoEnglish: string;
  sigungu: string;
  sigunguCode: string;
  sigunguEnglish: string;
  userLanguageType: 'K' | 'E';
  userSelectedType: 'R' | 'J';
  zonecode: string;
};
4. 웹뷰 사용 및 데이터 핸들링
import { View } from 'react-native';
import React, { useState } from 'react';
import { SafeAreaView } from 'react-native-safe-area-context';
import Typography from '@/components/typography';
import Input from '@/components/input';
import DaumPostcodeAddress, { DaumPostcodeData } from './_components/daum-postcode-address';

const DeliveryAddressCreateScreen = () => {
  const [isPostcodeMode, setIsPostcodeMode] = useState(false);
  const [form, setForm] = useState({
    address: '',
    addressDetail: '',
    zipCode: '',
  });

  const handleDaumPostcode = (data: DaumPostcodeData) => {
    let fullAddress = data.address;
    let extraAddress = '';

    if (data.addressType === 'R') {
      if (data.bname !== '') {
        extraAddress += data.bname;
      }
      if (data.buildingName !== '') {
        extraAddress +=
          extraAddress !== '' ? `, ${data.buildingName}` : data.buildingName;
      }
      fullAddress += extraAddress !== '' ? ` (${extraAddress})` : '';
    }

    setForm(prev => ({
      ...prev,
      address: fullAddress,
      zipCode: String(data.zonecode),
    }));
    setIsPostcodeMode(false);
  };

  return (
    <SafeAreaView className="flex-1">
      {isPostcodeMode ? (
        <DaumPostcodeAddress onSubmit={handleDaumPostcode} />
      ) : (
        <View className="flex gap-[16] px-[16]">
          <View>
            <Typography fontType="m14" className="text-gray-400">
              주소
            </Typography>
            <Input
              className="bg-gray-20 rounded-12 w-full px-[12] py-[9]"
              value={form.address}
              placeholder="건물, 지번 또는 도로명 검색"
              onTouchStart={() => setIsPostcodeMode(true)}
            />
            {form.address && (
              <Input
                className="bg-gray-20 rounded-12 w-full mt-[4] px-[12] py-[9]"
                value={form.addressDetail}
                placeholder="상세 주소 | 예) 모모아파트 101동 101호"
                onChangeText={(value) => setForm(prev => ({ ...prev, addressDetail: value }))}
              />
            )}
          </View>
        </View>
      )}
    </SafeAreaView>
  );
};

export default DeliveryAddressCreateScreen;
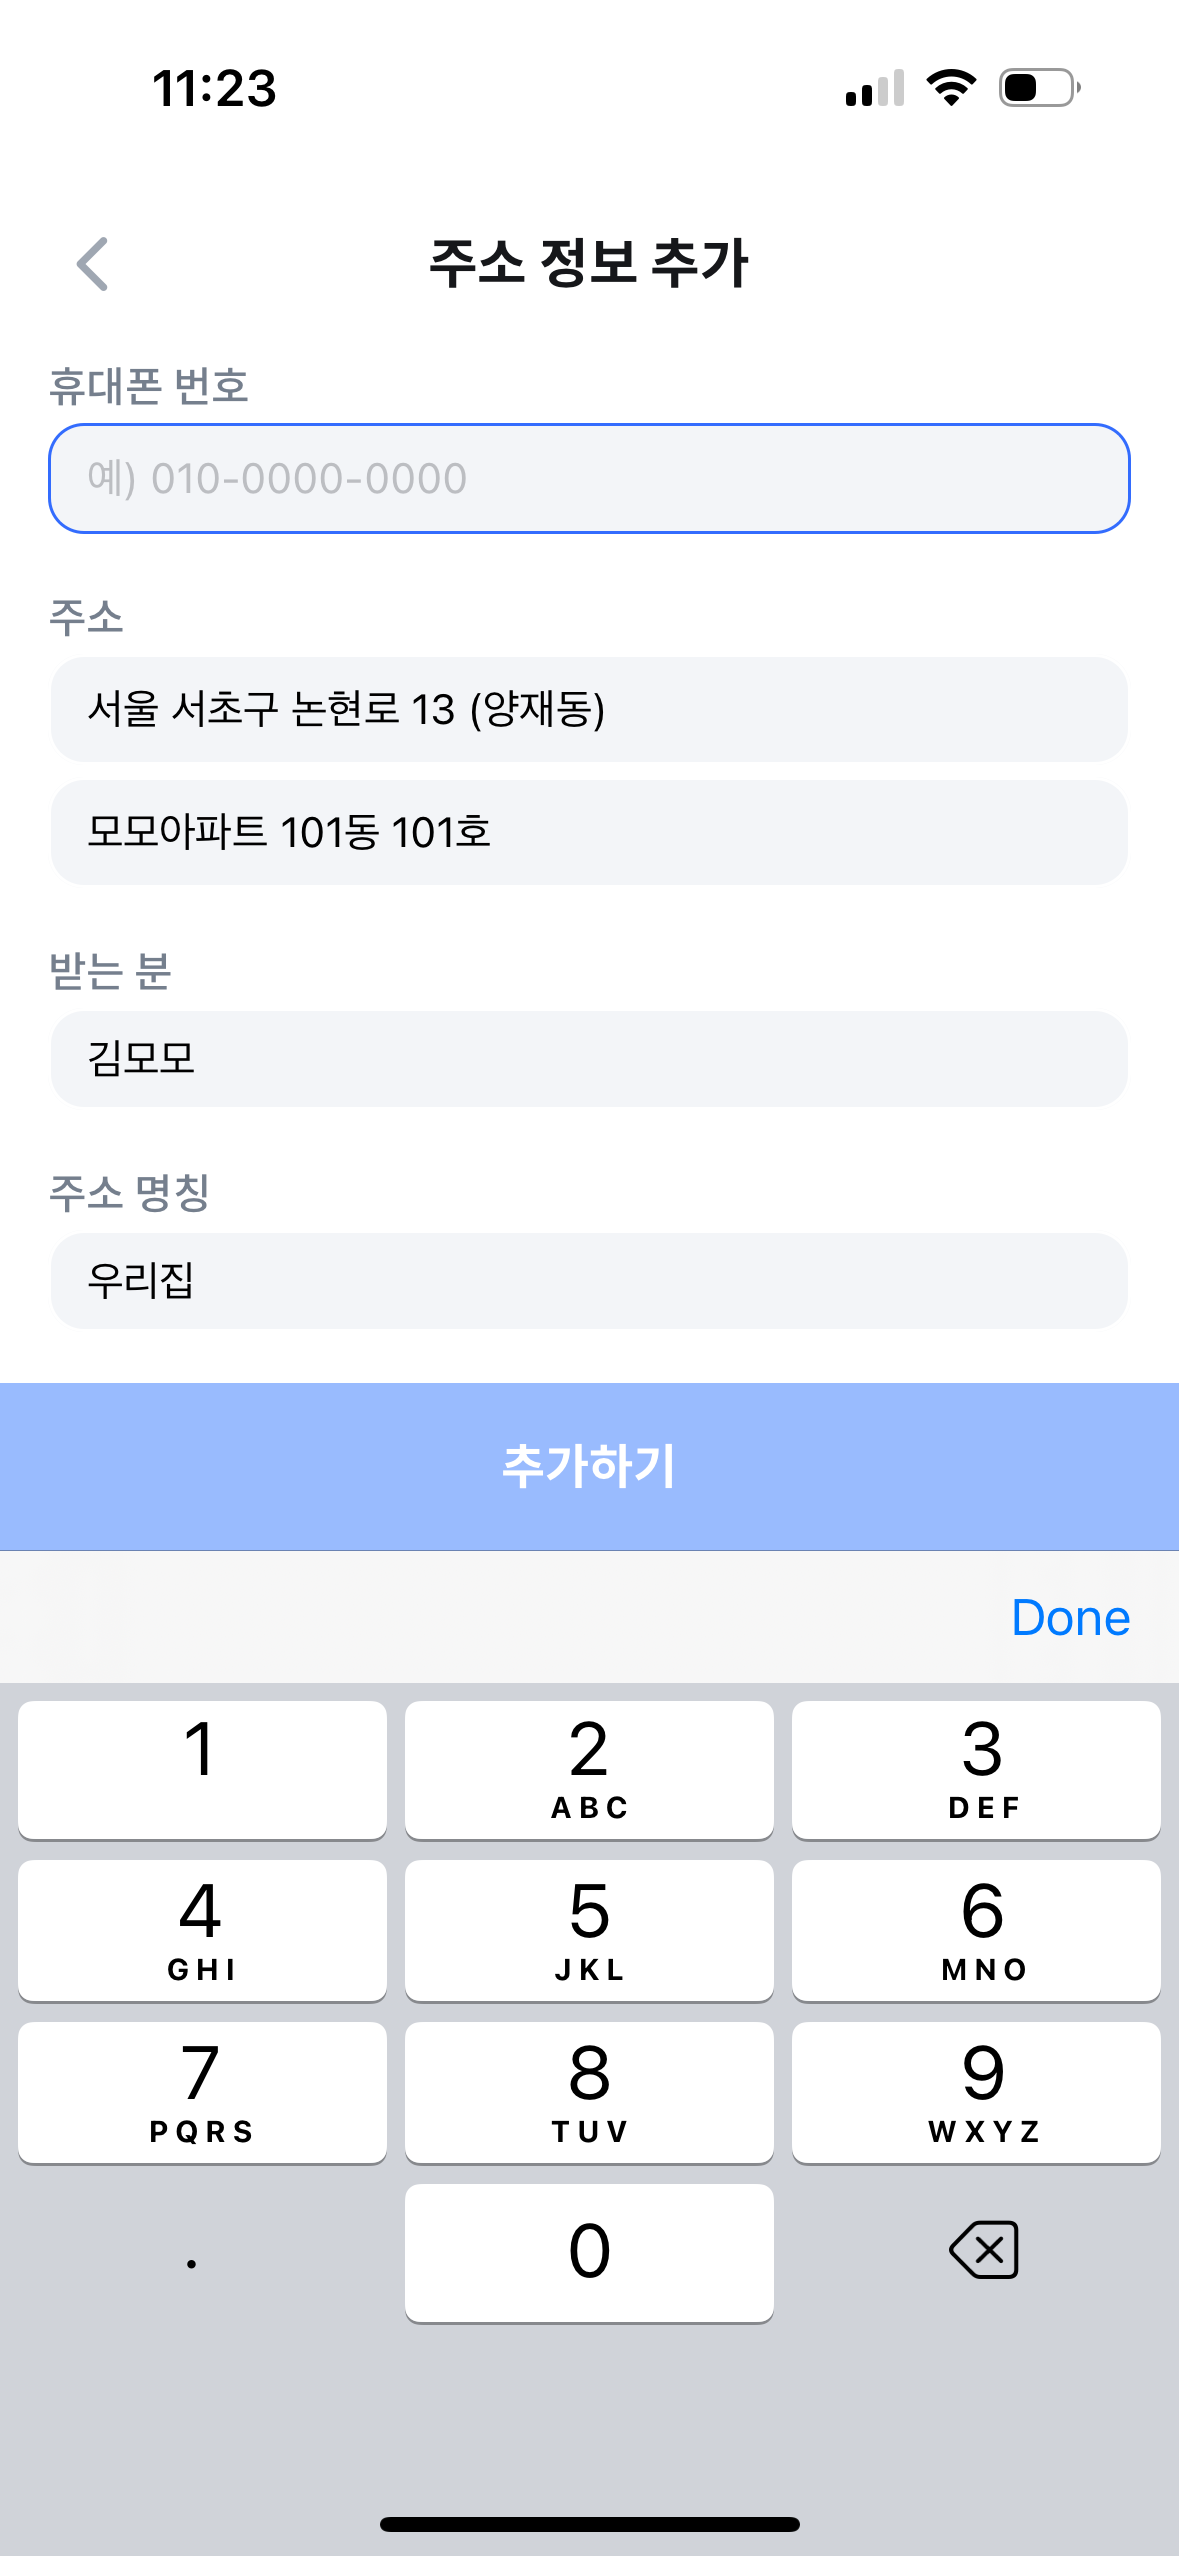
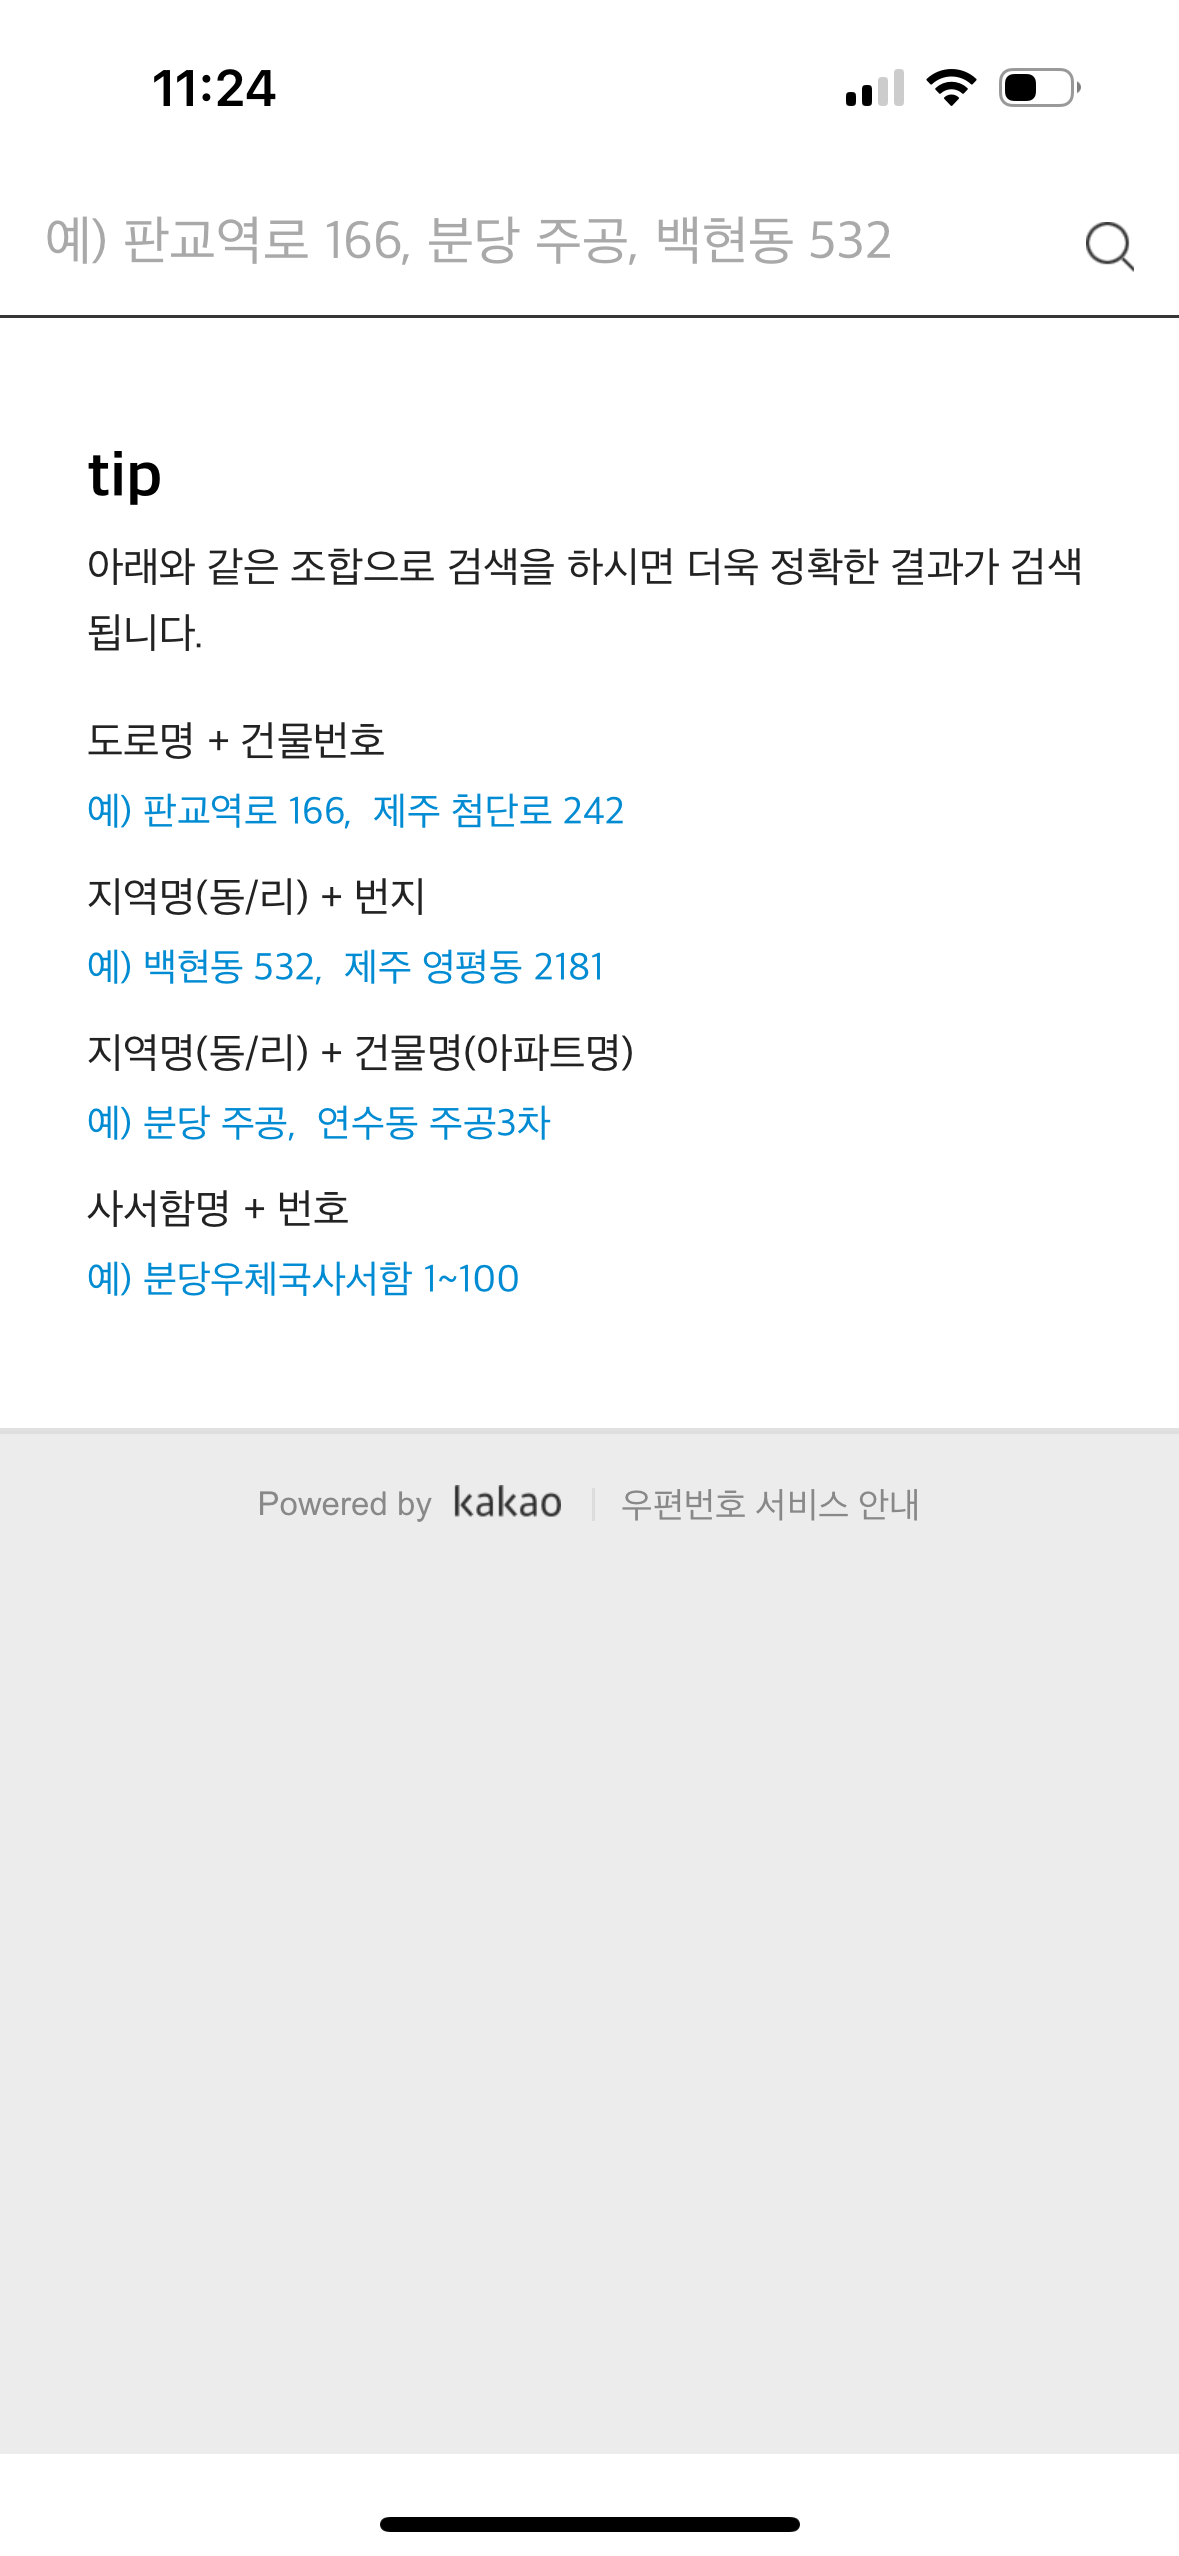
isPostcodeMode상태를 사용해 주소 입력 화면과 주소 검색 화면을 토글 처리- 주소 입력 필드(
address)를 터치하면isPostcodeMode를true로 설정해 주소 검색 화면을 표시. - 주소가 선택되면
handleDaumPostcode함수가 호출되어 선택된 주소를 폼 상태에 저장하고isPostcodeMode를false로 설정해 주소 입력 화면으로 복귀하는 방식으로 사용했다.
(받아온 주소 데이터를 처리하는handleDaumPostcodes는 공식 문서의 사용 예시 참고)