우선 실행 영상부터 보고오자구!
설계
- collectionView의 cell들이 무한스크롤이 되야한다. ( 앞,뒤로 )
- collectionView의 cell이 display이 될 때 확대, 넘어갈 때 축소되어야 한다.
1. 앞 뒤 무한 스크롤
우선 무한 스크롤을 하기위해 cell에 들어가는 정보 리스트의 3배 만큼 section을 만들어 주었다.
 func numberOfSections(in collectionView: UICollectionView) -> Int {
        return viewList.count * 3
}
그리고 3배를 만들고
indexPath의 section이 원래 cellList크기의 * 3 - 1 이나 0이면 원래 자리로 돌려줬다.
if x == 0 {
     self.cantAnimation = true
     collectionView.setContentOffset(CGPoint(x: self.view.frame.width * CGFloat( self.viewList.count ), y: self.collectionView.contentInset.top), animated: false)
}
else if x == self.viewList.count * 3 - 1{
     self.cantAnimation = true
     collectionView.setContentOffset(CGPoint(x: self.view.frame.width * CGFloat(self.viewList.count * 2 - 1), y: self.collectionView.contentInset.top), animated: false)
}
여기서 동반되어야하는 필수조건은 collectionview의 width가 반드시 superView의 frame과 같아야한다.
그리고 이것을
func collectionView(_ collectionView: UICollectionView, willDisplay cell: UICollectionViewCell, forItemAt indexPath: IndexPath)에 넣어줬다.
사실 이렇게 되면 무한 스크롤은 끝났다. 하지만 이렇게만 하고 실행시키면
뭔가 뚝뚝 끊기는 느낌이 있을것이다.func scrollViewDidScroll(_ scrollView: UIScrollView) { if scrollView.contentOffset.x == 0 { scrollView.setContentOffset(CGPoint(x: self.view.frame.width * CGFloat( self.viewList.count ), y: scrollView.contentInset.top), animated: false) } else if scrollView.contentOffset.x == CGFloat((self.viewList.count * 3 - 1)) * view.frame.width { scrollView.setContentOffset(CGPoint(x: self.view.frame.width * CGFloat(self.viewList.count * 2 - 1), y: scrollView.contentInset.top), animated: false) } }이렇게 offset계산을 통해 스크롤하고 그것을 didscroll에서 실행 시키면 끊기는 느낌없이 잘 스크롤이 될것이다.
Pop animation
우선 pop animation을 하기 위해서 2가지를 고민했다.
- scroll에 따라 애니메이션을 실행시키고 각 cell들을 그에 맞게 확대 축소한다.
- 일정 범위로 스크롤이 되면 자동으로 scroll시키고 그 사이에 touch이벤트를 받지 않고, 애니메이션을 실행 시킨다.
이번 애니메이션의 목표상 자연스럽고, 또 버튼이 존재하기 때문에 2번을 채택하였다.
우선 코드부터 보자!!
let x = indexPath.section
collectionView.isScrollEnabled = false
 let curCell = collectionView.cellForItem(at: IndexPath(row: 0, section: curIdx))
cell.transform = CGAffineTransform(scaleX: 0.5, y: 0.5)
collectionView.setContentOffset(CGPoint(x: self.view.frame.width * CGFloat(x), y: self.collectionView.contentInset.top), animated: true)
 UIView.animate(withDuration: 0.3, delay: 0, options: [], animations: {
                cell.transform = .identity
                curCell?.transform = CGAffineTransform(scaleX: 0.5, y: 0.5)
})
코드에 원리는 간단하다.
다음 뷰가 인지되면 scroll을 enabled 하지않고 하고 애니메이션을 시작합니다.
우선 다음 셀의 크기를 반으로 줄입니다.
그리고 애니메이션 상에서 다음 셀을 원래대로, 이번 셀을 반으로 줄이는 행동을 반복합니다.
그 후 클로저로 위에 있던 연산을 처리합니다.
{ _ in
if x == 0 {
	self.cantAnimation = true
	collectionView.setContentOffset(CGPoint(x: self.view.frame.width * CGFloat( self.viewList.count ), y: self.collectionView.contentInset.top), animated: false)
		  }
else if  x ==  self.viewList.count * 3 - 1 {
	self.cantAnimation = true
	collectionView.setContentOffset(CGPoint(x: self.view.frame.width * CGFloat(self.viewList.count * 2 - 1), y: self.collectionView.contentInset.top), animated: false)
}
self.curIdx = x
collectionView.isScrollEnabled = true
}
그리고 현재 Cell의 섹션을 가리키는 idx를 x로 업데이트합니다.
그래서 최종코드는
func collectionView(_ collectionView: UICollectionView, willDisplay cell: UICollectionViewCell, forItemAt indexPath: IndexPath) {
        if (cantAnimation) {
            cantAnimation.toggle()
            self.curIdx = indexPath.section
        }
        else {
            let x = indexPath.section
            collectionView.isScrollEnabled = false
            let curCell = collectionView.cellForItem(at: IndexPath(row: 0, section: curIdx))
            cell.transform = CGAffineTransform(scaleX: 0.5, y: 0.5)
            collectionView.setContentOffset(CGPoint(x: self.view.frame.width * CGFloat(x), y: self.collectionView.contentInset.top), animated: true)
            UIView.animate(withDuration: 0.3, delay: 0, options: [], animations: {
                    cell.transform = .identity
                    curCell?.transform = CGAffineTransform(scaleX: 0.5, y: 0.5)
                }){ _ in
                    if x == 0 {
                        self.cantAnimation = true
                        collectionView.setContentOffset(CGPoint(x: self.view.frame.width * CGFloat( self.viewList.count ), y: self.collectionView.contentInset.top), animated: false)
                    }
                    else if  x ==  self.viewList.count * 3 - 1 {
                        self.cantAnimation = true
                        collectionView.setContentOffset(CGPoint(x: self.view.frame.width * CGFloat(self.viewList.count * 2 - 1), y: self.collectionView.contentInset.top), animated: false)
                    }
                    self.curIdx = x
                    collectionView.isScrollEnabled = true
                }

        }
    }
UIView.animate은 비동기이다.
내가 범한 실수는 여기서 나왔다.
원래 마지막에 있던 collectionView의 scrollEnabled가 사실을
UIView.animate(...){
	...
}
collectionView.isScrollEnabled = true
의 형태였다.
즉 animate가 끝났으면 스크롤을 풀어줬다.
이 코드는 무슨 문제가 생길까?
실행영상을 보면 스크롤을 과도하게 빠르게하면 두개씩 여러개씩 넘어간다 왜그럴까?
그 이유는 animate는 비동기적인 처리이다.
위 사실을 몰랐다면 위 코드에서 의문이 생겨야한다.
etContentOffset을 먼저하고 animate를 실행했는데, 왜? 같이 실행되지?
먼저 이동한다음에 커져야하는거 아닌가?
위의 이유도 같다. animate는 내부함수가 비동기적으로 처리되어 있다. 그래서 동시에 실행되는 것처럼 보이는 것이다.
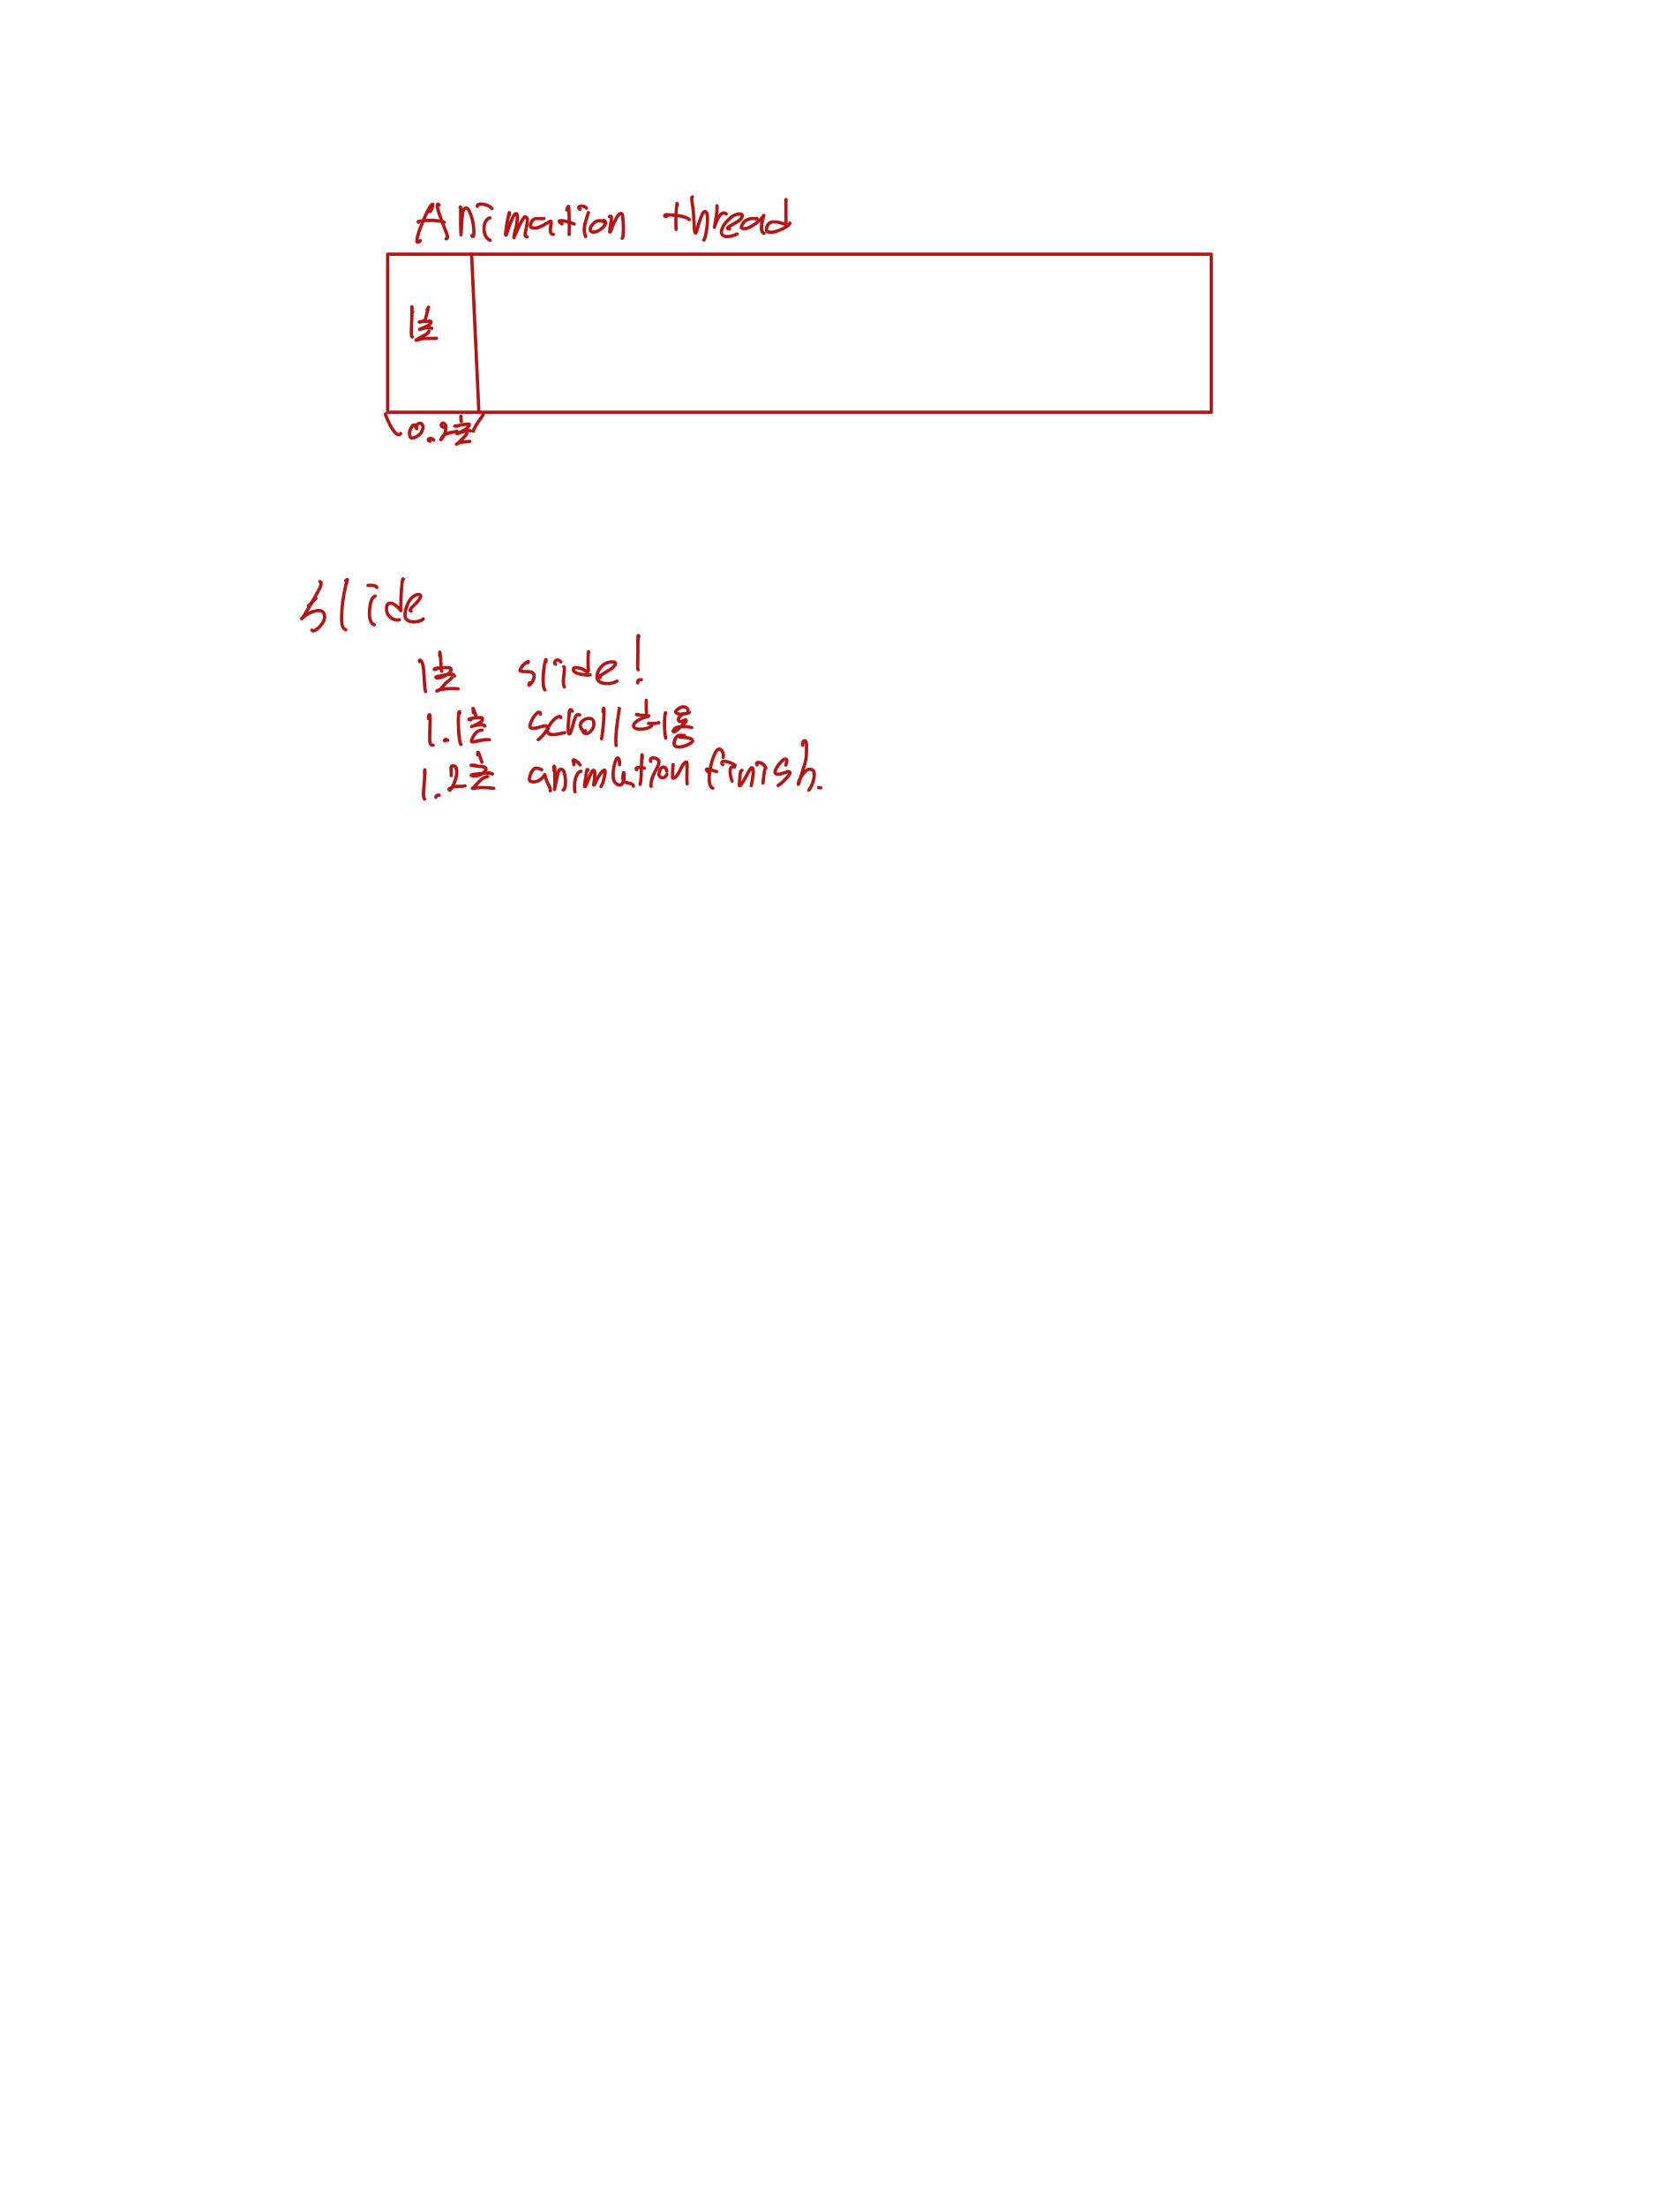
그래서 저 코드를 넣고 빼는게 뭔가 중헌데
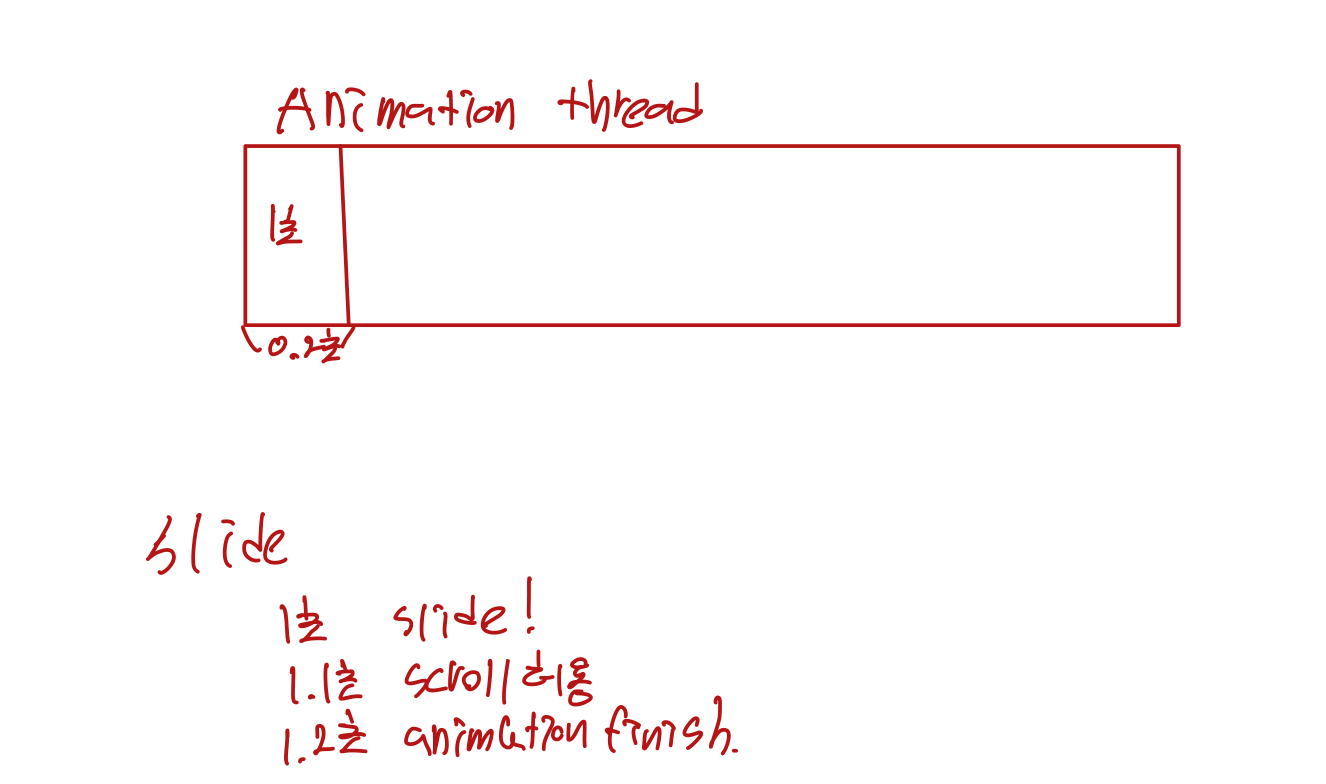
thread에 이렇게 작용할수 있다 그렇게 되면,
1.15초에 slide를 또 할 수 있다는 말이다~
그럼 옆으로 넘어갈테고 그렇게 빠르게 스크롤하면 여러개가 스크롤 되는 앱이 만들어진것이다~~
그래서 animation이 끝나고 실행되는 후행 클로져에 넣어서 위 문제를 해결하였다.
회고
다음 블로그에 주제이기도한데 난 항상 이렇게 만들면 언제든 재활용을 하기 위해 프로토콜로 만든다.
하지만 위 애니메이션은 프로토콜로 만들수가 없었다.
그 이유와 그래서 어떻게 모듈화를 하는 지에 대해선 다음 블로그에 적겠다.
그럼 20000