fetch를 쓰기로 했고, 소셜 로그인 응답도 확인했으니 이제 구체적인 로직을 세워보도록 하겠다.

로그인 로직
우리 서비스 내 로그인 로직은 다음과 같다
1. 카카오/애플 로그인 버튼 클릭
2. 카카오/애플에 토큰 요청하고 받기
3. 받은 토큰으로 우리 서버에 login request api 요청하기
4. 우리 서버에서 DB 검색 및 애플/로그인에 확인 후 200 또는 400 던져주기
5. 200이면 로그인 성공(토큰 저장), 400이면 회원가입 절차 진행
+) 우리 서버에서는 회원가입이 필요하다는 400 code를 702로 던져주는데, 702를 쓰게 되면 비표준 http status code이기 떄문에 직관적으로 코드를 이해하기 어려울 수 있다는 피드백을 받았다. 정 세부적으로 정하고 싶으면 RG-702 이런식으로 지정하는게 좋다고 한다! 난 이미 api가 다 완성되어 있는 상황이기 때문에 변수명을 잘 지정해주는 것으로 코드를 정리하였다.
그럼 이제 로직 하나씩 보도록 하겠당.
카카오/애플에 토큰 요청하고 받기
1,2번에 대한 자세한 내용은 이 포스팅에 정리되어있으니 참고해주세용.
LoginScreen.tsx
import React from 'react';
import { useDispatch } from 'react-redux';
import { Button, Image, View } from 'react-native-ui-lib';
import { KakaoOAuthToken, loginWithKakaoAccount } from '@react-native-seoul/kakao-login';
import type { NativeStackScreenProps } from '@react-navigation/native-stack';
import AUTH_ACTION_TYPE, { authActions } from '../../../redux/auth';
import { AuthStackParamList } from '../../../routes/types';
import { onAppleButtonPress } from './utils';

type Props = NativeStackScreenProps<AuthStackParamList, 'Login'>;

const LoginScreen = ({ navigation }: Props) => {
  const dispatch = useDispatch();

  const signInWithKakao = async (): Promise<void> => {
    const result: KakaoOAuthToken = await loginWithKakaoAccount();
    dispatch(
      authActions.logInAction({
        snsToken: result.accessToken,
        isKakao: true,
        type: AUTH_ACTION_TYPE.login.request,
      })
    );
  };

  const signInWithApple = async (): Promise<void> => {
    const appleToken = await onAppleButtonPress();
    dispatch(authActions.logInAction({ snsToken: appleToken, isKakao: false }));
  };

  return (
    <View flex paddingH-16>
      <View flex center>
        <Image
          key="alji-main-logo"
          source={{
            uri: 'https://rg-rn-app.s3.ap-northeast-2.amazonaws.com/logos/verticalLogoWithText.png',
          }}
          style={{ width: 200, height: 200 }}
        />
      </View>
      <View width="100%" marginB-88>
        <Button
          label="카카오로 계속하기"
          onPress={signInWithKakao}
          size={Button.sizes.large}
          marginB-16
          backgroundColor="#FEE500"
          color="#191919"
          text70BL
        />
        <Button
          label="APPLE ID로 계속하기"
          onPress={signInWithApple}
          size={Button.sizes.large}
          backgroundColor="#000000"
          text70
        />
      </View>
    </View>
  );
};

export default LoginScreen;
kakao는 외부 라이브러리에서 바로 import해서 쓰는데, apple은 코드가 나와있어서 내가 따로 빼줬다.
utils.tsx
import { appleAuth } from '@invertase/react-native-apple-authentication';

export async function onAppleButtonPress() {
  const appleAuthRequestResponse = await appleAuth.performRequest({
    requestedOperation: appleAuth.Operation.LOGIN,
    requestedScopes: [appleAuth.Scope.EMAIL, appleAuth.Scope.FULL_NAME],
  });

  const credentialState = await appleAuth.getCredentialStateForUser(appleAuthRequestResponse.user);

  if (credentialState === appleAuth.State.AUTHORIZED) {
    return appleAuthRequestResponse.identityToken
  }
}
saga.tsx
import { call, put, all, takeLatest } from 'redux-saga/effects';
import AUTH_ACTION_TYPE, { RESET_STORE } from '.';
import { createAPI, poster, setItemToAsync } from '../../hooks/requests';
import { LoginProps, SignUpProps } from './types';
import * as RootNavigation from '../../routes/navigation';
interface Result {
  message: string;
  code: number;
  status: boolean;
  data: {
    accessToken: string;
  };
}

export function* logInSaga({ snsToken, isKakao }: LoginProps) {
  const url = isKakao ? createAPI('oauth/kakao/signin') : createAPI('oauth/apple/signin');
  const body = isKakao
    ? JSON.stringify({ accessToken: snsToken })
    : JSON.stringify({ identityToken: snsToken });

  try {
    const result: Result = yield call(poster, { url, body });

    if (result.code === 702) {
      yield put({
        type: AUTH_ACTION_TYPE.login.fail,
      });
      yield RootNavigation.replace('SignUp', { token: snsToken, isKakao });
    } else {
      const { data } = result;
      const { accessToken } = data;
      yield setItemToAsync('idToken', accessToken);
      yield put({
        type: AUTH_ACTION_TYPE.login.success,
      });
      yield RootNavigation.resetRoot('MainTab');
    }
  } catch (error) {
    console.log(error);
    yield put({
      type: AUTH_ACTION_TYPE.login.fail,
    });
  }
}

export default function* authSaga() {
  yield all([
    takeLatest<string, (...args: LoginProps[]) => unknown>(
      AUTH_ACTION_TYPE.login.request,
      logInSaga
    ),
  ]);
}
saga 딥 다이브
위 saga 파일에서 있었던 이슈는 다음과 같다.
1. body를 JSON.stringify 해줘야 한다는 것
아예 파싱 자체를 못하는 것 같았다. 안하니 토큰 값 없다는 에러가 났었음.
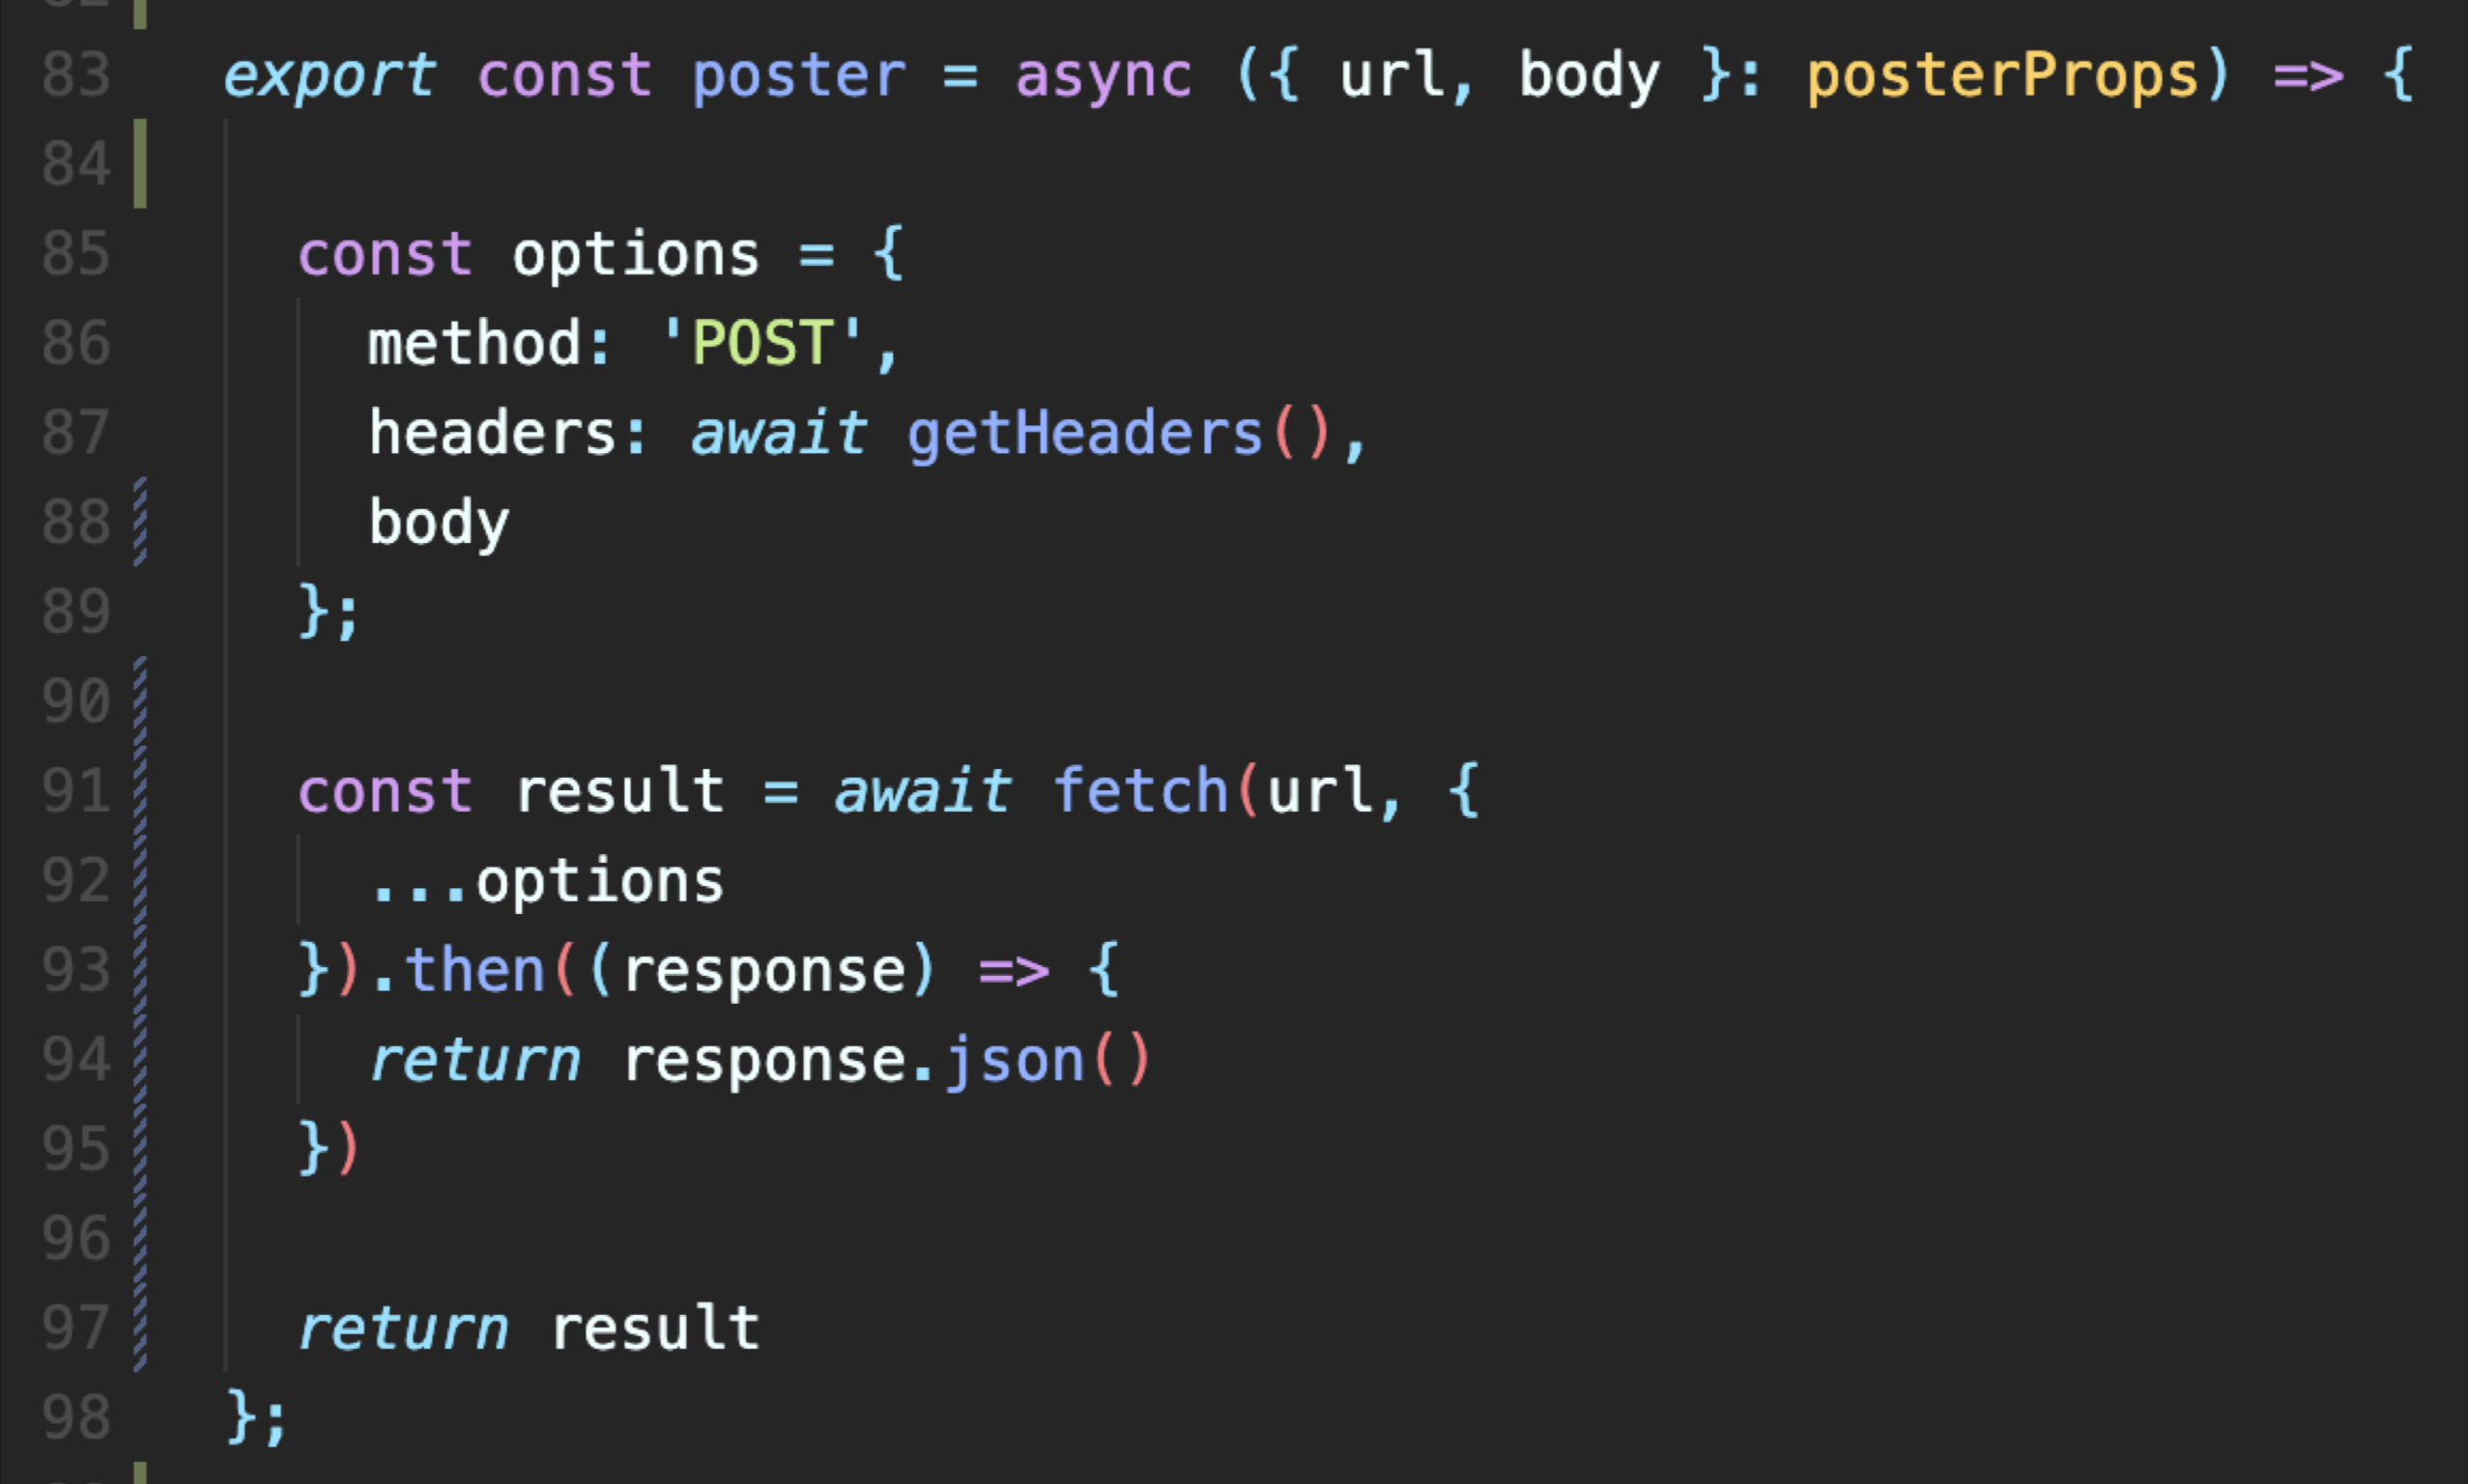
2. poster 만들기
post 요청 보내는걸 추상화 하려는데 fetch를 처음 써봐서 아래와 같이 조금 헤맸다. RN네트워크공식문서 여기를 보고 열심히 따라해봄. fetch에서 return 하거나 console 찍는데 Promise 객체가 계속 나왔다. ㅠ 결국 다음과 같이 poster를 만들 수 있었다!
getHeaders.tsx
const getHeaders = async () => {
  const headers = {
    'Content-Type': 'application/json',
    'Authorization': '',
  };
  const idToken = await getItemFromAsync('idToken');
  if (idToken) {
    headers.Authorization = `Bearer ${idToken}`;
  }
  return headers;
};
이렇게 썼었는데 지개가 코드리뷰를 해줘서
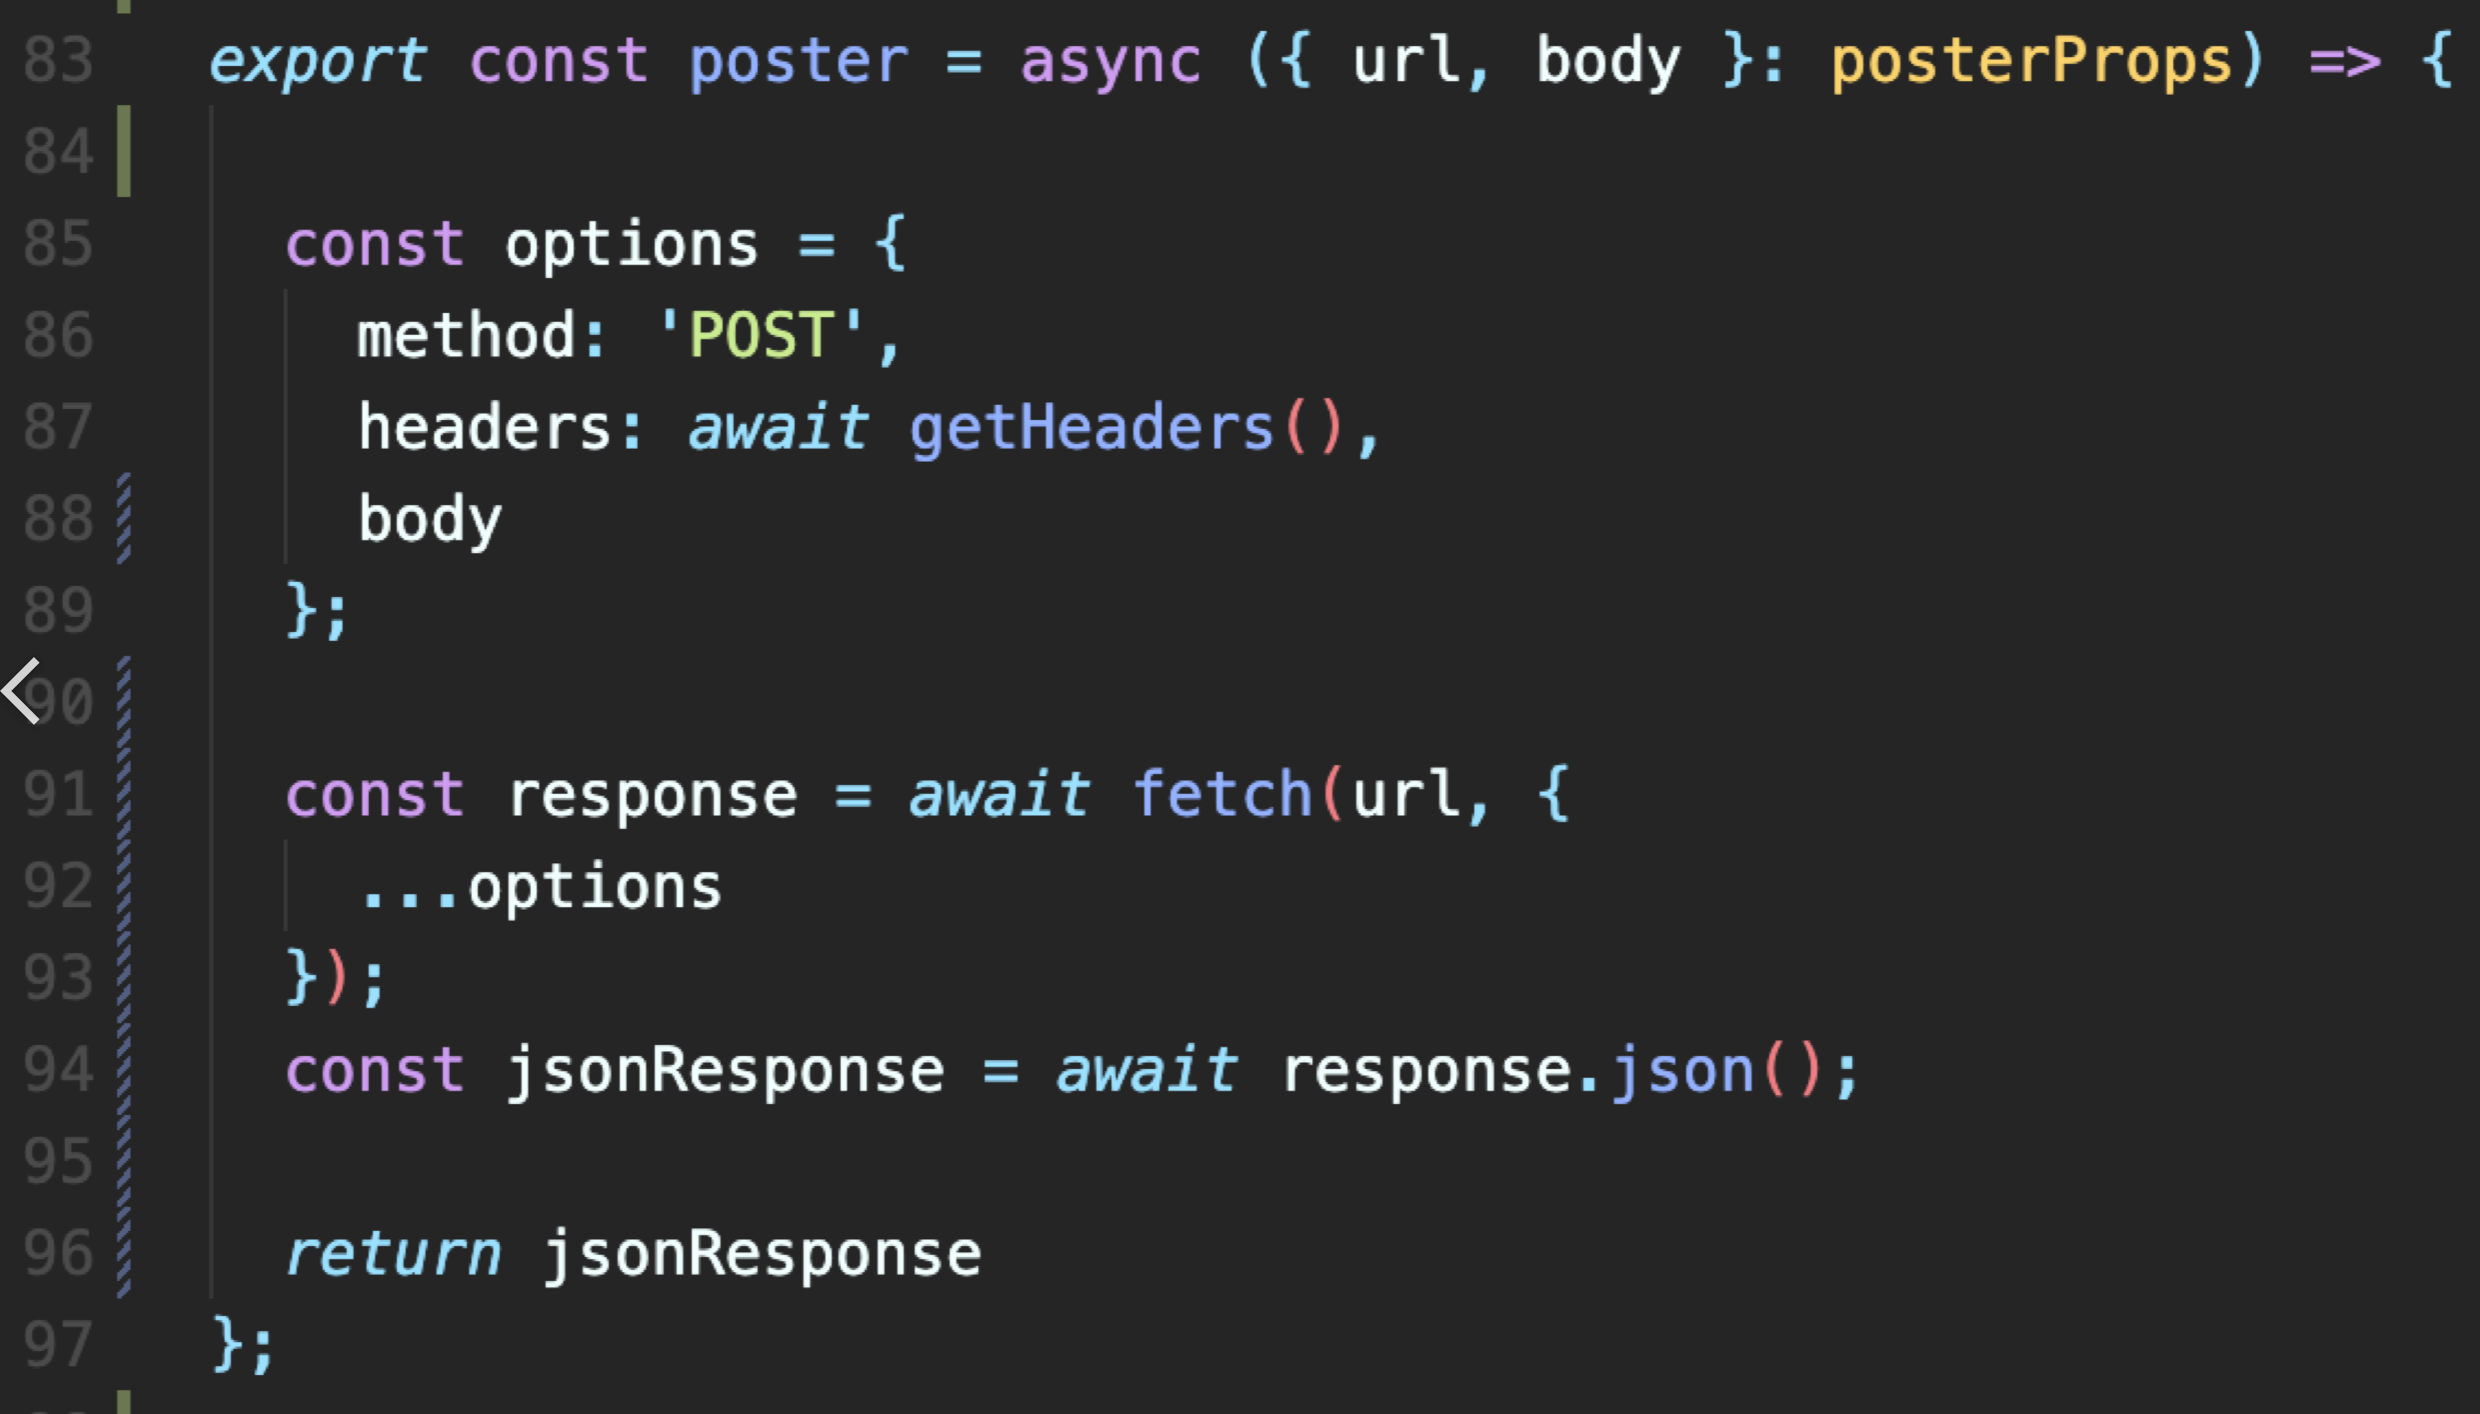
이렇게 수정했다! 훨씬 깔끔해짐! 고마우다
3. 비동기 처리
error Error: call: argument of type {context, fn} has undefined or null `fn`이런 에러가 났다.
async await 걸려고 했는데, saga에서는 지원 안한다!
여기 참조
redux-saga doesn't support async generators그렇구나 ! yield가 있었는데 내가 무슨짓을..?ㅜㅜ
call을 쓰는걸 몰랐다! 차암나 ㅠㅜ
yield call 은 (함수, 인자) 이렇게 써줘야해서
고치니 해결! 참고
4. setItemToAsync
asyncStorage를 쓰는데 아 이것은..!!

이것은..?!
https://reactnative.dev/docs/asyncstorage
여기서 쓰려했는데 Deprecated..!! 라고 한다. 왜지 ^^
AsyncStorage has been extracted from react-native core and will be removed in a future release. It can now be installed and imported from @react-native-community/async-storage instead of 'react-native'.그래서 여기서 새것을 찾았다.
https://reactnative.directory/?search=storage
여기서 제일 다운로드수가 많은!
npm install @react-native-async-storage/async-storage
npx pod-install
요걸 사용했더니 문제 해결 완-
5. 처리 이후 navigate하는 방법
navigate 또는 push 이런걸 사용해서 간단히,, 될리가 없지 난 심지어 타입스크립트인데^^
한참을 헤맨 끝에 Ref를 써서 해결했다!
공식문서에 잘 나와있음..
routes/navigation/index.tsx
import { createNavigationContainerRef, StackActions, StackActionType } from '@react-navigation/native';
import * as React from 'react';
import { RootStackParamList } from '../types';

export const navigationRef = createNavigationContainerRef<RootStackParamList>();

export function navigate(name: keyof RootStackParamList, params: any) {
  if (navigationRef.isReady()) {
    navigationRef.navigate(name, params);
  }
}

export function replace(name: string, params?: object | undefined) {
  navigationRef.current?.dispatch(StackActions.replace(name, params));
}

export function push(name: string, params?: object | undefined) {
  navigationRef.current?.dispatch(StackActions.push(name, params));
}

export function resetRoot(name: string) {
  navigationRef.current?.resetRoot({
    index: 0,
    routes: [{ name }],
  });
}
다음과 같이 작성해주고, saga에선 이런식으로 쓰면 된다!
import * as RootNavigation from '../../routes/navigation';

yield RootNavigation.replace('SignUp', { token: snsToken, isKakao });
쉽지 않았다^^
7. takeLatest Type 지정
redux-saga랑 typescript같이 처음 써보는데,, 복병이 많았다^^
처음엔 saga에서
  yield all([
    takeLatest(
      AUTH_ACTION_TYPE.login.request,
      logInSaga
    ),
이 부분에서 타입 에러가 났다. 그래서 LoginProps에 type: string 을 추가해주었더니 이번에는 아래와 같이 dispatch에서 type을 써줘야하게 됐다. (type?로 수정하면 다시 takeLatest부분에서 에러가 났다)
dispatch(authActions.logInAction({ snsToken: appleToken, isKakao: false, type: AUTH_ACTION_TYPE.login.request, }));
한참을 낑낑 거렸는데 지개가 믓찌게 해결해주었다.
  yield all([
    takeLatest<string, (...args: LoginProps[]) => unknown>(
      AUTH_ACTION_TYPE.login.request,
      logInSaga
    ),
takeLatest를 까봤을때의 리턴값이랑 나의 loginSaga 리턴값이 달라서 그런 것 같았다.
export function takeLatest<P extends ActionPattern, Fn extends (...args: any[]) => any>(
  pattern: P,
  worker: Fn,
  ...args: HelperWorkerParameters<ActionMatchingPattern<P>, Fn>
): ForkEffect<never>
여기에 나와있는 내용을 적용시켜 해결해주어따 키키
추가적인 코드 리뷰
+) 대/소문자 수정,, 보통 TYPE를 대문자로 쓰고 오브젝트 안의 내용을 소문자로 쓴다고 한다! 나는 반대로 쓰고 있었음ㅎㅎ 그래서 모조리 AUTH_ACTION_TYPE으로 바꿨당.
+) 린트 설정,, multi line 이 적용이 안되어서 prettier랑 eslint 건드리면서 난리를 쳤는데 알고보니 tsx에만 적용이 안되었던 것이다,, 쓸데없는걸로 시간을 낭비하게 한 것 같아서 지개에게 미안했다 ^^!