Github Actions, AWS CodeDeploy를 활용한 CI/CD - Node.js(1)
📌 Node.js 프로젝트를 Github Actions, AWS CodeDeploy를 활용하여 CI/CD 하는 과정을 다룹니다.
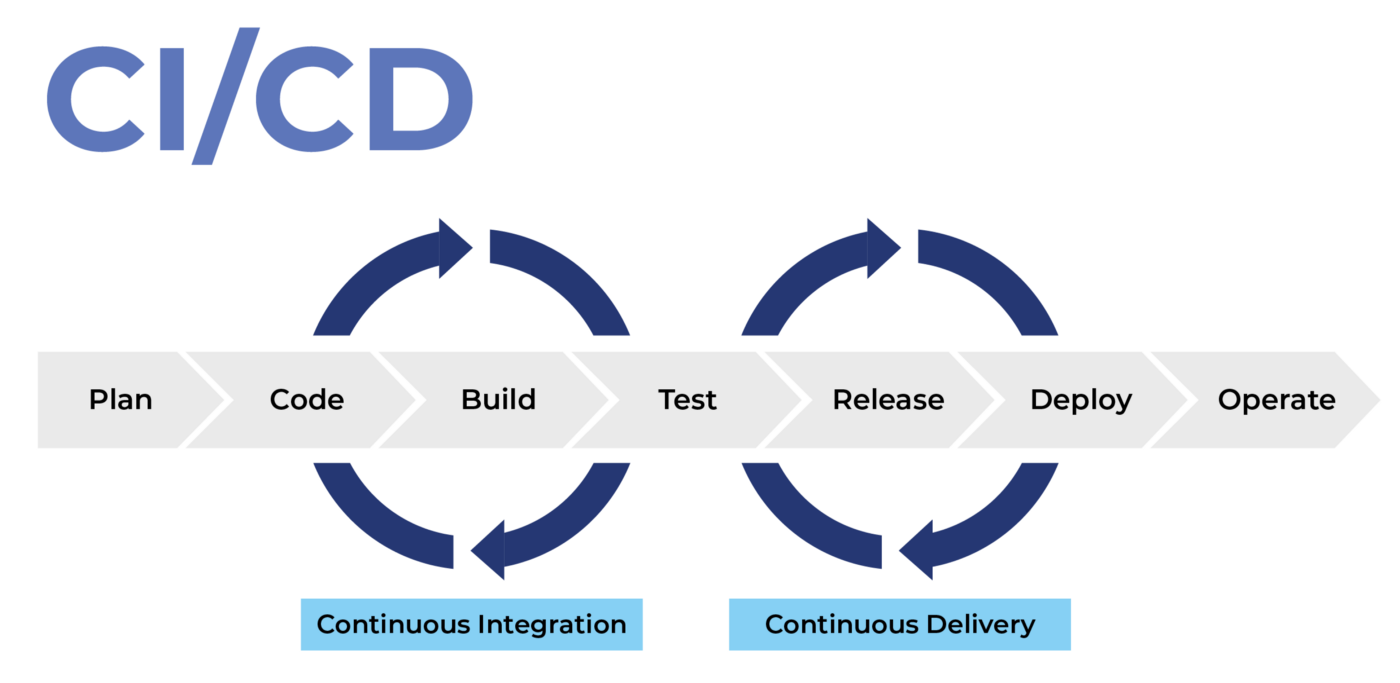
CI/CD란?
CI
CI는 Continuous Integration의 약자로 지속적인 통합을 의미합니다.
쉽게 말하면 빌드/테스트 자동화 과정이라고 할 수 있는데, CI를 성공적으로 구현할 경우 애플리케이션에 대한 새로운 코드 변경 사항이 발생할 때마다 Build, Test를 수동으로 하지 않아도 프로그램이 자동으로 이러한 과정들을 진행해줍니다.
CD
CD는 Continuous Delivery 또는 Continuous Deployment의 약자로 지속적인 제공, 지속적인 배포를 의미합니다.
CI 과정을 거치면 Build, Test 과정을 모두 거치기 때문에, 배포 단계 전에 애플리케이션에 문제가 없는지 검증이 가능합니다. 문제가 없다는 것이 검증이 되면, 검증된 애플리케이션을 실제 프로덕션 환경으로 자동으로 배포해줍니다.
Github 환경변수 등록하기
CI 과정은 Github Actions를 활용해 진행합니다.
.env 파일은 깃허브에 올리지 않기 때문에 사용할 키 값들을 깃허브에 등록해줘야합니다.
Repository의 Settings > Security > Secrets > Actions 로 이동해줍니다.
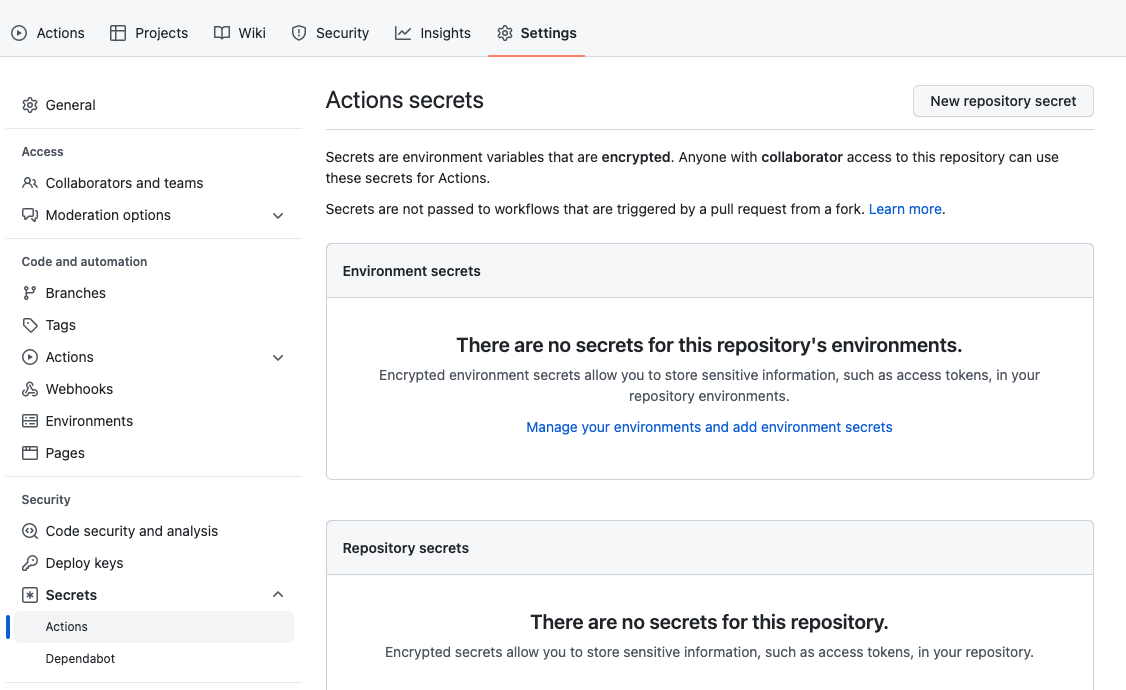
New Repository secret 을 클릭해줍니다.

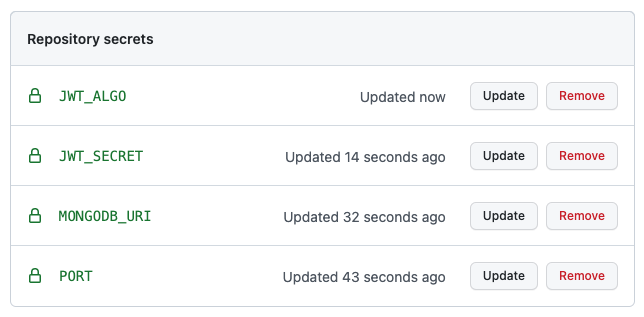
.env 파일의 키 값들을 위와 같이 모두 등록해줍니다.
Github Actions workflow 생성
프로젝트 최상단에 .github/workflows/deploy.yml 파일을 생성해줍니다.
전체 코드 deploy.yml
# This workflow will do a clean install of node dependencies, cache/restore them, build the source code and run tests across different versions of node
# For more information see: https://help.github.com/actions/language-and-framework-guides/using-nodejs-with-github-actions

name: deploy

on:
  push:
    branches: [develop]
  pull_request:
    branches: [develop]

jobs:
  build:
    runs-on: ubuntu-18.04

    strategy:
      matrix:
        node-version: [16.15.1]
        # See supported Node.js release schedule at https://nodejs.org/en/about/releases/

    steps:
      - name: Checkout source code.
        uses: actions/checkout@v2

      - name: Use Node.js ${{ matrix.node-version }}
        uses: actions/setup-node@v2
        with:
          node-version: ${{ matrix.node-version }}

      - name: Check Npm -v
        run: npm -v

      - name: create env file
        working-directory: ./
        run: |
          pwd
          touch .env
          echo PORT=${{ secrets.PORT }} >> .env
          echo MONGODB_URI=${{ secrets.MONGODB_URI }} >> .env
          echo JWT_SECRET=${{ secrets.JWT_SECRET }} >> .env
          echo JWT_ALGO=${{ secrets.JWT_ALGO }} >> .env
          cat .env

      - name: build server files
        working-directory: ./
        run: |
          yarn
          yarn run build
on:
  push:
    branches: [develop]
  pull_request:
    branches: [develop]
develop 브랜치에 Push하거나 Pull Request했을 때 Workflow를 Triger(실행)합니다.
jobs:
  build:
    runs-on: ubuntu-18.04

    strategy:
      matrix:
        node-version: [16.15.1]
        # See supported Node.js release schedule at https://nodejs.org/en/about/releases/
runs-on 에는 사용할 가상 환경의 인스턴스를 지정해줍니다.
node-version 에는 사용할 node의 버전을 명시합니다.
steps:
      - name: Checkout source code.
        uses: actions/checkout@v2

      - name: Use Node.js ${{ matrix.node-version }}
        uses: actions/setup-node@v2
        with:
          node-version: ${{ matrix.node-version }}

      - name: Check Npm -v
        run: npm -v

      - name: create env file
        working-directory: ./
        run: |
          pwd
          touch .env
          echo PORT=${{ secrets.PORT }} >> .env
          echo MONGODB_URI=${{ secrets.MONGODB_URI }} >> .env
          echo JWT_SECRET=${{ secrets.JWT_SECRET }} >> .env
          echo JWT_ALGO=${{ secrets.JWT_ALGO }} >> .env
          cat .env

      - name: build server files
        working-directory: ./
        run: |
          yarn
          yarn run build
Checkout source code. step은 Github의 repository에 올려둔 코드를 CI 서버로 내려받은 후에 특정 브랜치로 전환하는 과정입니다.
Use Node.js ${{ matrix.node-version }} step은 명시한 Node를 버전에 맞게 설치하는 과정입니다.
create env file step은 Github에 등록한 환경변수들로 .env 파일을 생성해주는 과정입니다.
build server files step에서는 yarn 명령어로 필요한 dependency들을 설치한 후에 빌드를 해주는 과정입니다.
Github Actions 확인
deploy.yml 파일을 Repository에 등록한 이후 develop 브랜치에 Push, Pull Request하면 워크플로우가 실행됩니다.
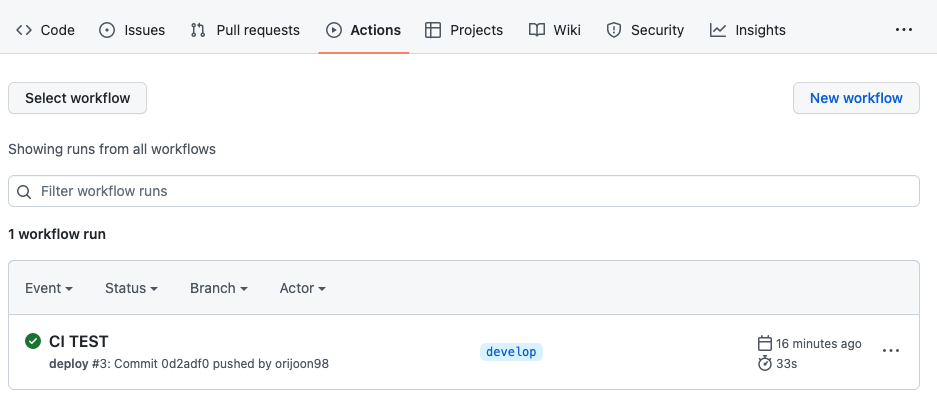
깃허브 Repository의 Actions에 들어가보면 CI가 정상적으로 실행된 것을 확인할 수 있습니다.
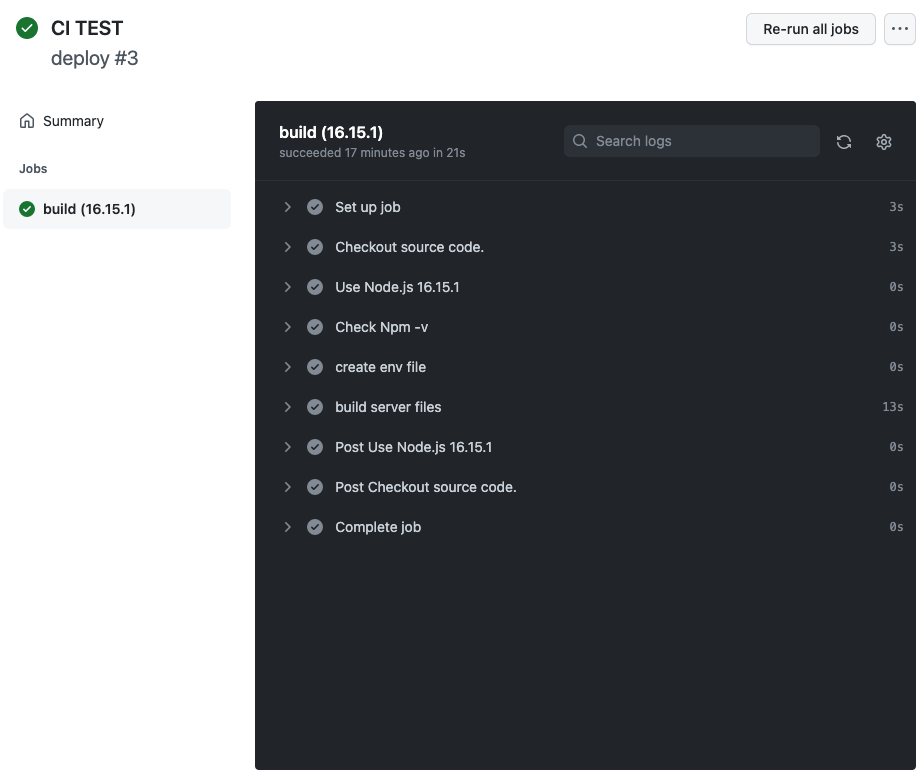
Workflow를 클릭해보면 deploy.yml 파일에 등록한 step별로 실행된 결과와 로그를 확인할 수 있습니다.
다음 글에서는 AWS CodeDeploy를 활용한 CD 과정을 집중적으로 살펴보겠습니다.

상세한 설명 감사합니다. 많은 도움이 되었어요 : )