이제 Stateful에 대한 개념을 모두 익혔으니 State가 있는 앱을 만들어보도록 하자.
다들 알겠지만 뽀모도로 타이머라고 25분 일하고 5분 쉬는 등을 보여주는, 생산성에 좋은 앱을 하나 만들 것이다!
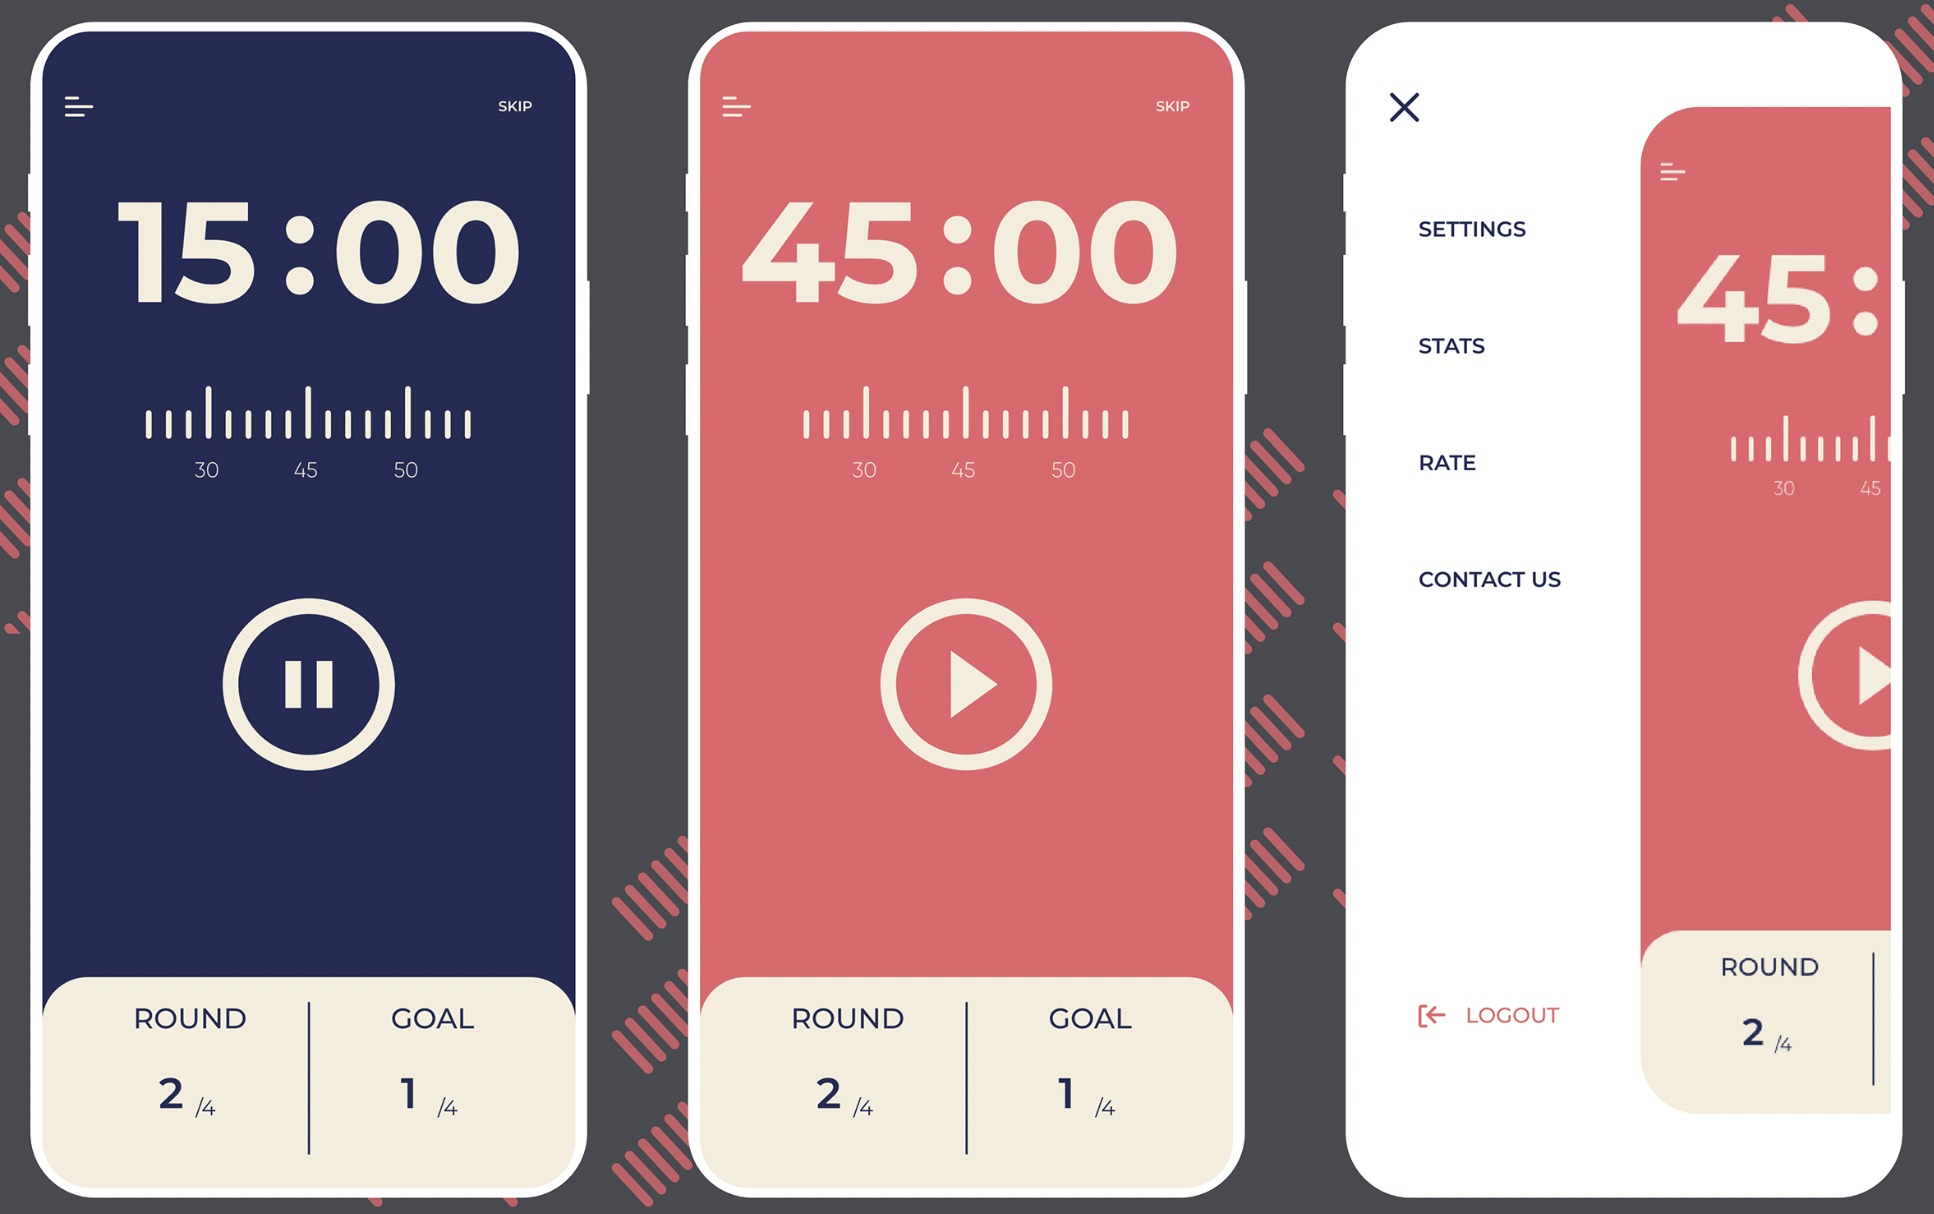
여기 사이트를 참고하여 UI를 짜보고, State를 넣어보자.
Stateless UI 구현
목표를 설정하고, 얼마나 했는지, 시간이 지나면 파란색, 시간 중에는 빨간색 등등 상태를 구현할 것이 많다. 일단은 UI부터 구현할 것이다.
우선 색상은 적혀있어서 색상부터 구현하고 시작하겠다.
import 'package:flutter/material.dart';
import 'package:toolfix/screens/home_screen.dart';
void main() {
runApp(const App());
}
class App extends StatelessWidget {
const App({super.key});
Widget build(BuildContext context) {
return MaterialApp(
theme: ThemeData(
scaffoldBackgroundColor: const Color(0xFFE7626C),
colorScheme: ColorScheme.fromSwatch(
backgroundColor: const Color(0xFFE7626C),
),
textTheme: const TextTheme(
displayLarge: TextStyle(
color: Color(0xFF232B55),
),
),
cardColor: const Color(0xFFF4EDDB),
),
home: const HomeScreen(),
);
}
}
ThemeData를 통해 구현했으니 나중에 BuildContext를 통해서 자식 위젯에도 사용할 수 있을 것이다.
그리고 Stateless인데 UI를 크게 보면 정적이므로 Stateless로 했다. home 속성에 Stateful한 위젯인 HomeScreen을 넣을 것이다.
HomeScreen 위젯 UI 구현
lib/screens/home_screen.dart를 만들고 st를 치면 Stateful 위젯 만들기 스니펫이 나온다.
엔터한다음 이름도 변경해주자.
import 'package:flutter/material.dart';
class HomeScreen extends StatefulWidget {
const HomeScreen({super.key});
State<HomeScreen> createState() => _HomeScreenState();
}
class _HomeScreenState extends State<HomeScreen> {
Widget build(BuildContext context) {
return const Placeholder();
}
}이제 UI를 짜겠다. 노가다다. 간단히 짚고 넘어가는 곳만 얘기하고 넘어가겠다.
Flexible 사용기
class _HomeScreenState extends State<HomeScreen> {
Widget build(BuildContext context) {
return Scaffold(
body: Column(
children: [
Flexible(
child: Container(),
),
],
),
);
}
}Scaffold를 만들고 Flexible를 넣었다.
Flexible은 부모 위젯의 공간 분배를 조절하여 자식 위젯의 크기와 배치를 유연하게 조정할 수 있는 위젯이다.
약간 CSS의 FlexBox와 비슷한 느낌의 위젯이다. display: flex;하고 막 flex: 1; 이런 식으로 사용하는 것과 유사하다.
보통 Row나 Column의 자식으로 쓰인다.
사용 예시
return Scaffold(
  body: Column(
    children: [
      Flexible(
        flex: 1,
        child: Container(
          decoration: const BoxDecoration(
            color: Colors.red,
          ),
        ),
      ),
      Flexible(
        flex: 2,
        child: Container(
          decoration: const BoxDecoration(
            color: Colors.blue,
          ),
        ),
      ),
      Flexible(
        flex: 1,
        child: Container(
          decoration: const BoxDecoration(
            color: Colors.green,
          ),
        ),
      ),
    ],
  ),
);
각각 Flexible의 컨테이너에 다른 색과, flex 비율을 1, 2, 1 이런 식으로 할당해줬다. 이렇게 설정하면 두 번째 Flexible 위젯이 첫 번째와 세 번째 Flexible 위젯보다 더 많은 공간을 할당받게 된다.
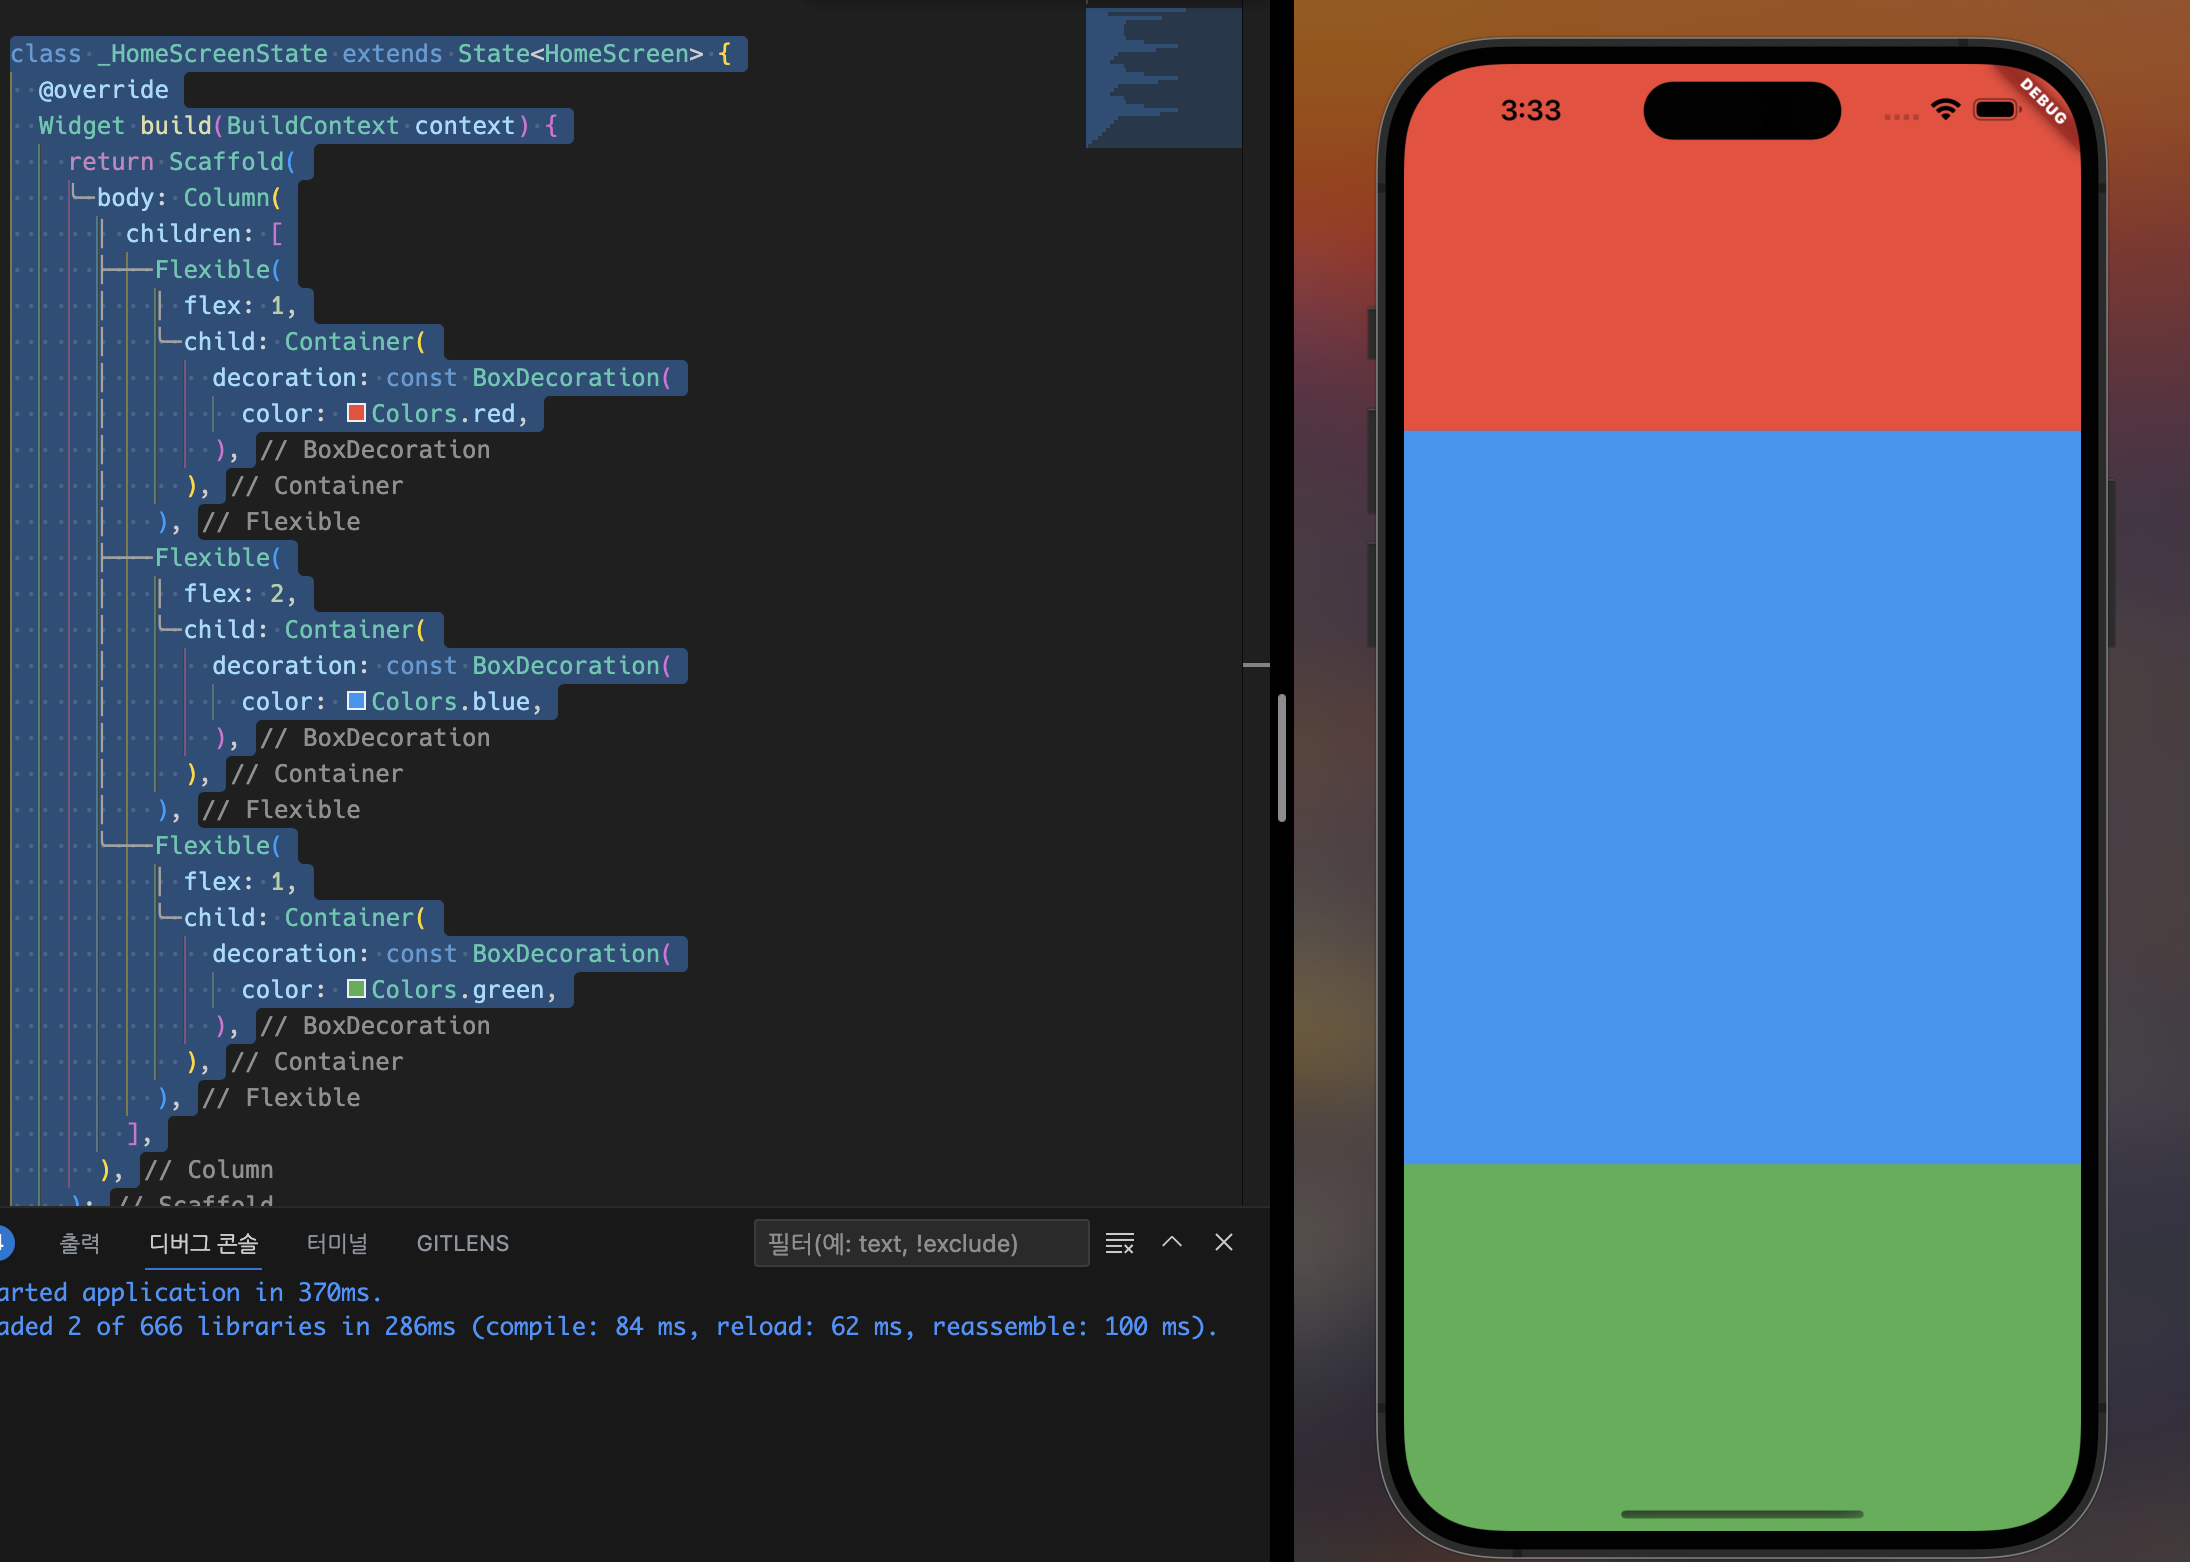
실제로 봐도 그렇다.
즉, Flexible 위젯은 부모 위젯에서 사용 가능한 공간이 변할 때 동적으로 크기를 조정할 수 있어서 다양한 디바이스와 화면 크기에 유연하게 대응할 수 있다.
스마트폰마다 width, height가 다 다르기에, 하드코딩으로 400px 뭐 이런 식으로 하는 게 디자인 통일성이 없어 안좋을 수도 있다.
이어서 디자인 해보자.
theme 사용법 복습
간단하게 저번에 했던 것 복습하고 가겠다. main.dart에서 theme을 설정했으니 사용하면 된다.
Flexible(
flex: 1,
child: Container(
alignment: Alignment.bottomCenter,
child: Text(
'25:00',
style: TextStyle(
color: Theme.of(context).cardColor,
fontSize: 89,
fontWeight: FontWeight.w600,
),
),
),
),
Flexible(
flex: 3,
child: Center(
child: IconButton(
iconSize: 120,
color: Theme.of(context).cardColor,
onPressed: () {},
icon: const Icon(Icons.play_circle_outline),
),
),
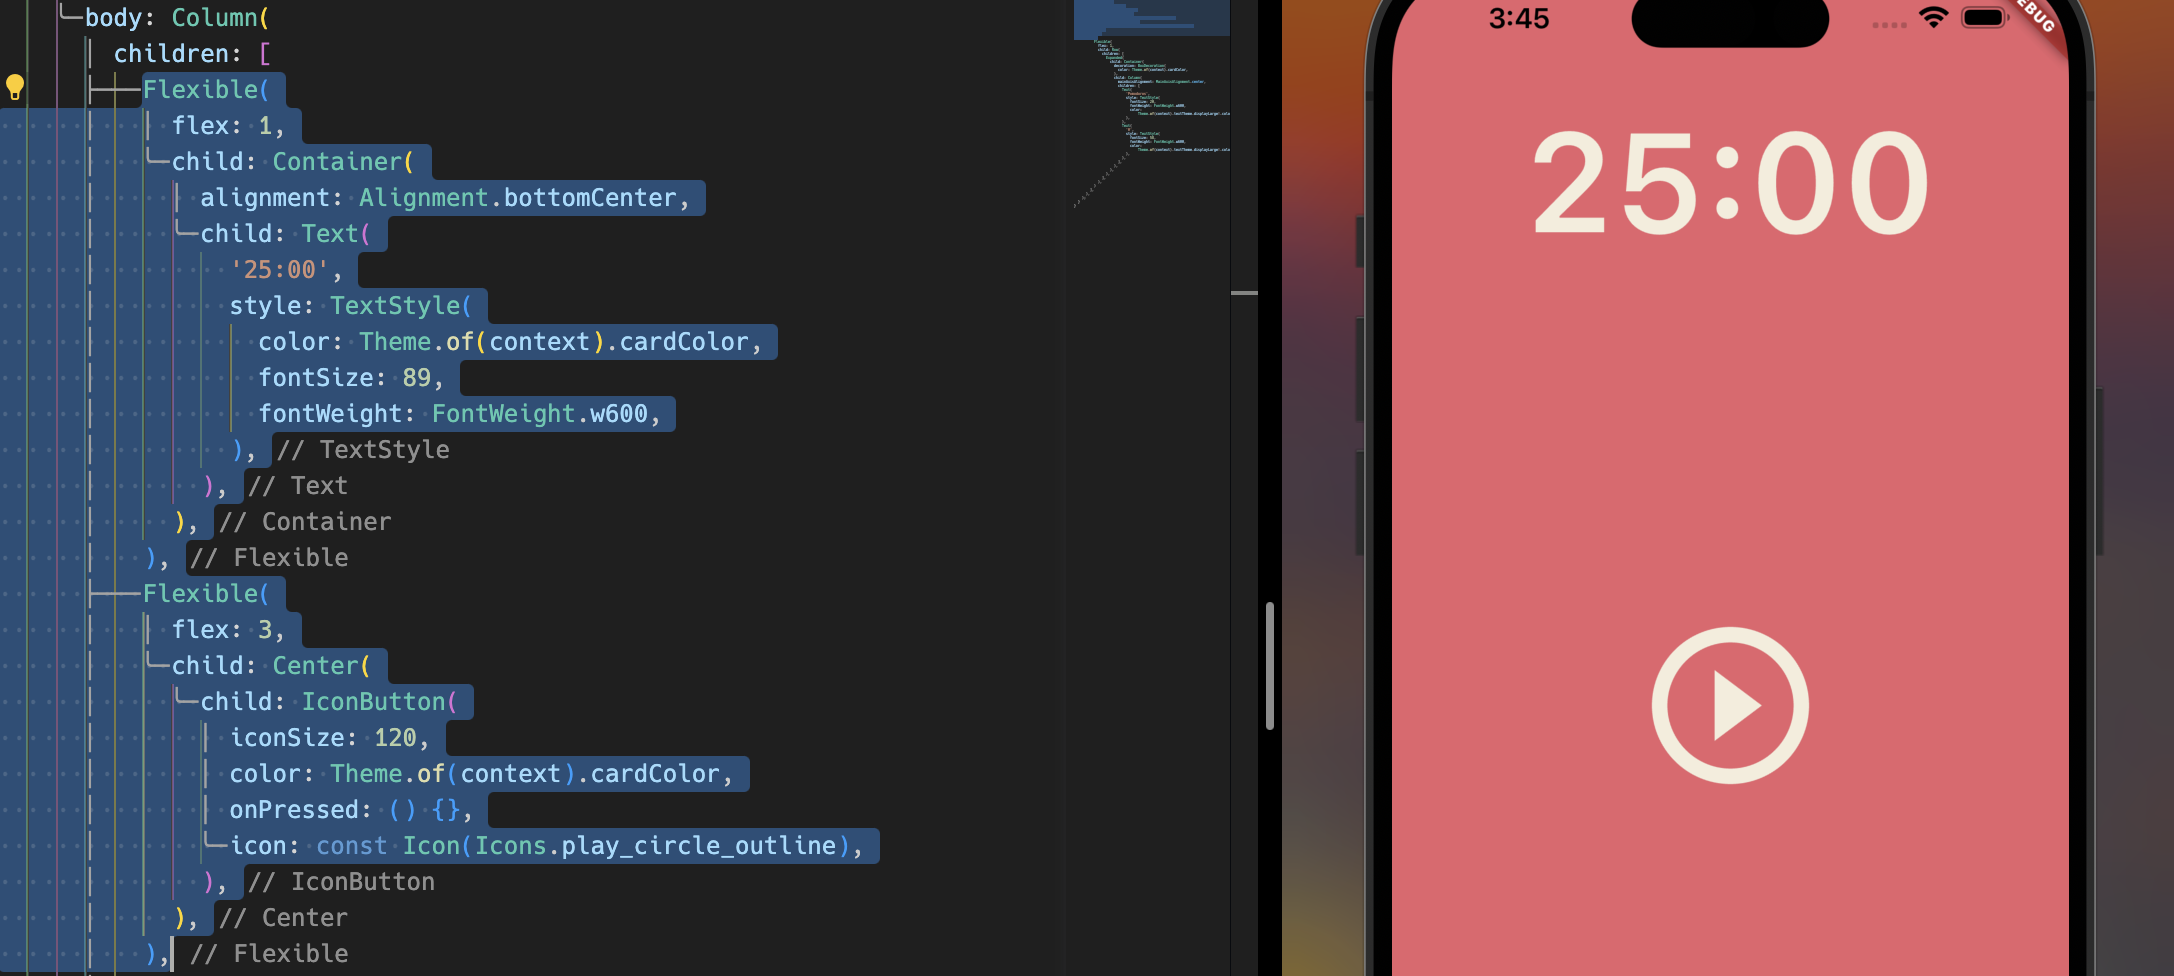
),이런 식으로 말이다. 재사용 가능하고, 색 통일도 쉽게 할 수 있어서 좋다.
결과
import 'package:flutter/material.dart';
class HomeScreen extends StatefulWidget {
const HomeScreen({super.key});
State<HomeScreen> createState() => _HomeScreenState();
}
class _HomeScreenState extends State<HomeScreen> {
Widget build(BuildContext context) {
return Scaffold(
body: Column(
children: [
Flexible(
flex: 1,
child: Container(
alignment: Alignment.bottomCenter,
child: Text(
'25:00',
style: TextStyle(
color: Theme.of(context).cardColor,
fontSize: 89,
fontWeight: FontWeight.w600,
),
),
),
),
Flexible(
flex: 3,
child: Center(
child: IconButton(
iconSize: 120,
color: Theme.of(context).cardColor,
onPressed: () {},
icon: const Icon(Icons.play_circle_outline),
),
),
),
Flexible(
flex: 1,
child: Row(
children: [
Expanded(
child: Container(
decoration: BoxDecoration(
color: Theme.of(context).cardColor,
),
child: Column(
mainAxisAlignment: MainAxisAlignment.center,
children: [
Text(
'Pomodoros',
style: TextStyle(
fontSize: 20,
fontWeight: FontWeight.w600,
color:
Theme.of(context).textTheme.displayLarge!.color,
),
),
Text(
'0',
style: TextStyle(
fontSize: 58,
fontWeight: FontWeight.w600,
color:
Theme.of(context).textTheme.displayLarge!.color,
),
),
],
),
),
),
],
),
)
],
),
);
}
}UI를 짜서 만들어보았다.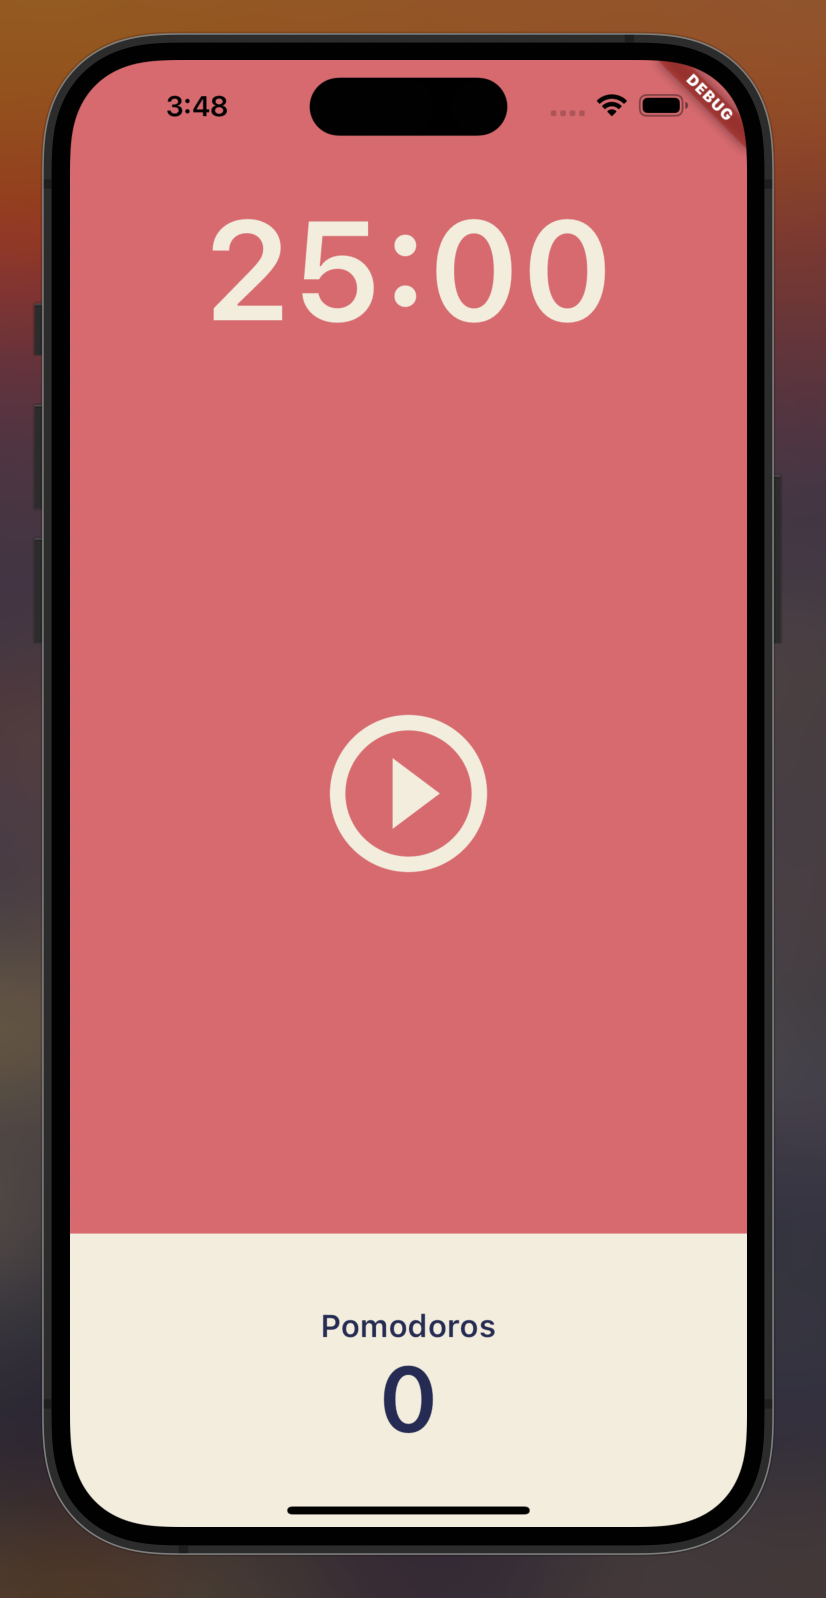
아주 예쁘게 됐다. 이제 저기 숫자, 버튼에 Stateful 로직을 추가하여 살아움직이게 만들어보자!!


고생하셨습니다!!