1. Custom Hooks
-
개발자가 스스로 커스텀한 훅을 의미한다.
이를 이용해 반복되는 로직을 함수로 뽑아내어 재사용할 수 있다. -
여러 url을
fetch할 때, 여러input에 의한 상태 변경 등 반복되는 로직을 동일한 함수에서 작동하게 하고 싶을 때 커스텀 훅을 주로 사용한다. 이를 이용하면- 상태관리 로직의 재활용이 가능하고
- 클래스 컴포넌트보다 적은 양의 코드로 동일한 로직을 구현할 수 있으며
- 함수형으로 작성하기 때문에 보다 명료하다는 장점이 있습니다. (e.g.
useSomething)
예시
-
예를 들어 이런 컴포넌트가 있다. 해당 컴포넌트는 실제 React 공식 문서에 있는 컴포넌트이다.
//FriendStatus : 친구가 online인지 offline인지 return하는 컴포넌트 function FriendStatus(props) { const [isOnline, setIsOnline] = useState(null); useEffect(() => { function handleStatusChange(status) { setIsOnline(status.isOnline); } ChatAPI.subscribeToFriendStatus(props.friend.id, handleStatusChange); return () => { ChatAPI.unsubscribeFromFriendStatus(props.friend.id, handleStatusChange); }; }); if (isOnline === null) { return 'Loading...'; } return isOnline ? 'Online' : 'Offline'; } //FriendListItem : 친구가 online일 때 초록색으로 표시하는 컴포넌트 function FriendListItem(props) { const [isOnline, setIsOnline] = useState(null); useEffect(() => { function handleStatusChange(status) { setIsOnline(status.isOnline); } ChatAPI.subscribeToFriendStatus(props.friend.id, handleStatusChange); return () => { ChatAPI.unsubscribeFromFriendStatus(props.friend.id, handleStatusChange); }; }); return ( <li style={{ color: isOnline ? 'green' : 'black' }}> {props.friend.name} </li> ); } -
FriendStatus컴포넌트는 사용자들이 온라인인지 오프라인인지 확인하고,FriendListItem컴포넌트는 사용자들의 상태에 따라 온라인이라면 초록색으로 표시하는 컴포넌트이다.
- 이 두 컴포넌트는 정확하게 똑같이 쓰이는 로직이 존재하고 있다. 이 로직을 빼내서 두 컴포넌트에서 공유할 수는 없을까? Custom Hook을 사용한다면 가능하다.
function useFriendStatus(friendID) {
  const [isOnline, setIsOnline] = useState(null);

  useEffect(() => {
    function handleStatusChange(status) {
      setIsOnline(status.isOnline);
    }

    ChatAPI.subscribeToFriendStatus(friendID, handleStatusChange);
    return () => {
      ChatAPI.unsubscribeFromFriendStatus(friendID, handleStatusChange);
    };
  });

  return isOnline;
}- 두 컴포넌트에서 사용하기 위해 동일하게 사용되고 있는 로직을 분리하여 함수
useFriendStatus로 만든다. 이렇게 Custom Hook을 정의할 때는 일종의 규칙이 필요하다.- Custom Hook을 정의할 때는 함수 이름 앞에
use를 붙이는 것이 규칙이다.
- 대개의 경우 프로젝트 내의
hooks디렉토리에 Custom Hook을 위치시킨다.
- Custom Hook으로 만들 때 함수는 조건부 함수가 아니어야 한다. 즉
return하는 값은 조건부여서는 안된다. 그렇기 때문에 위의 이useFriendStatusHook은 온라인 상태의 여부를 boolean 타입으로 반환하고 있다.
- Custom Hook을 정의할 때는 함수 이름 앞에
- 이렇게 만들어진 Custom Hook은 Hook 내부에
useState와 같은 React 내장 Hook을 사용하여 작성할 수 있다.
- 일반 함수 내부에서는 React 내장 Hook을 불러 사용할 수 없지만 Custom Hook에서는 가능하다는 것 또한 알아두면 좋을 점이다.
-
이제 이
useFriendStatusHook을 두 컴포넌트에 적용해 보자.function FriendStatus(props) { const isOnline = useFriendStatus(props.friend.id); if (isOnline === null) { return 'Loading...'; } return isOnline ? 'Online' : 'Offline'; } function FriendListItem(props) { const isOnline = useFriendStatus(props.friend.id); return ( <li style={{ color: isOnline ? 'green' : 'black' }}> {props.friend.name} </li> ); }- 이렇게 로직을 분리해 Custom Hook으로 만들면 두 컴포넌트는 더 직관적으로 확인이 가능해진다.
- 그러나 같은 Custom Hook을 사용했다고 해서 두 개의 컴포넌트가 같은
state를 공유하는 것은 아니다. 그저 로직만 공유할 뿐,state는 컴포넌트 내에서 독립적으로 정의되어 있다.
2. Custom Hook의 예시
여러 url을 fetch할 때 쓸 수 있는 useFetch Hook
const useFetch = ( initialUrl:string ) => {
	const [url, setUrl] = useState(initialUrl);
	const [value, setValue] = useState('');

	const fetchData = () => axios.get(url).then(({data}) => setValue(data));

	useEffect(() => {
		fetchData();
	},[url]);

	return [value];
};

export default useFetch;
여러 input에 의한 상태 변경을 할 때 쓸 수 있는 useInputs Hooks
import { useState, useCallback } from 'react';

function useInputs(initialForm) {
  const [form, setForm] = useState(initialForm);
  // change
  const onChange = useCallback(e => {
    const { name, value } = e.target;
    setForm(form => ({ ...form, [name]: value }));
  }, []);
  const reset = useCallback(() => setForm(initialForm), [initialForm]);
  return [form, onChange, reset];
}

export default useInputs;
3. custom hook 실습
custom hook을 이용하여 useEffect 로직 분리하기
useEffecthook을 이용한 로직은 반복되는 로직이 많다.
특히 API를 통해 데이터를 받아와 처리하는 로직은 반복적일 수밖에 없다.
- 이러한 로직을 custom hook으로 만들어 분리하고 필요한 컴포넌트마다 적용을 한다면 컴포넌트들을 좀 더 직관적으로 관리할 수 있다.
- App 컴포넌트에 들어있는
useEffecthook 로직을util폴더 내의hooks.js파일에 분리해 보고, 직관적으로 파악할 수 있도록hooks.js의 이름도 변경해보자.
✅ App.js
import "./styles.css";
import useFetch from "./util/useFetch";

export default function App() {
  const data = useFetch("data.json");

  return (
    <div className="App">
      <h1>To do List</h1>
      <div className="todo-list">
        {data &&
          data.todo.map((el) => {
            return <li key={el.id}>{el.todo}</li>;
          })}
      </div>
    </div>
  );
}
✅ useFetch.js (hooks.js)
import { useEffect, useState } from "react";

const useFetch = (fetchUrl) => {
  const [data, setData] = useState();

  useEffect(() => {
    fetch(fetchUrl, {
      headers: {
        "Content-Type": "application/json",
        Accept: "application/json"
      }
    })
      .then((response) => {
        return response.json();
      })
      .then((myJson) => {
        setData(myJson);
      })
      .catch((error) => {
        console.log(error);
      });
  }, [fetchUrl]);
  return data;
};

export default useFetch;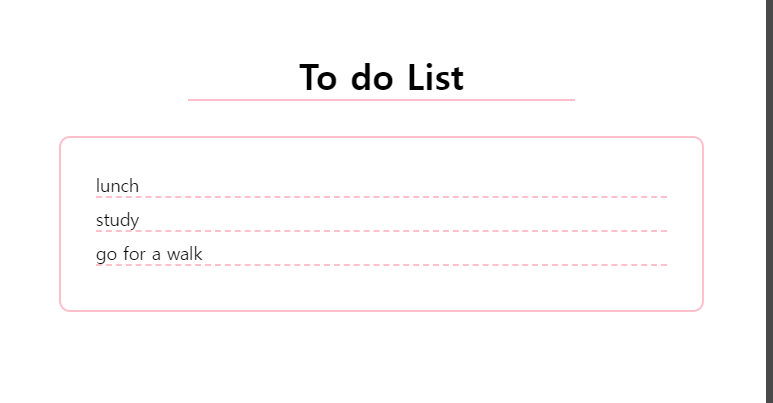
custom hook을 이용하여 input 로직 분리하기
input또한 반복적으로 사용되는 로직을 가지고 있는 컴포넌트이다.
이런 식으로 앱 내에 반복적으로 사용되고 관리되는 로직은 많다. (input,form,button등)
input도 지금은 2개 정도 있어 관리가 크게 요구되지 않는다. 그러나 후에 회원가입 컴포넌트를 만들거나, 앱의 볼륨이 커지게 된다면input은 굉장히 많이 사용되는 UI 중 하나이기 때문에 반복되는 로직을 관리해야 하는 필요성이 생긴다.
- 이런 컴포넌트 또한 custom hook을 이용하여 로직을 분리하여 관리할 수 있다.
컴포넌트 내에 반복되는 로직을 분리를 해 관리를 하면 컴포넌트들을 좀 더 깔끔하게 관리할 수 있다.
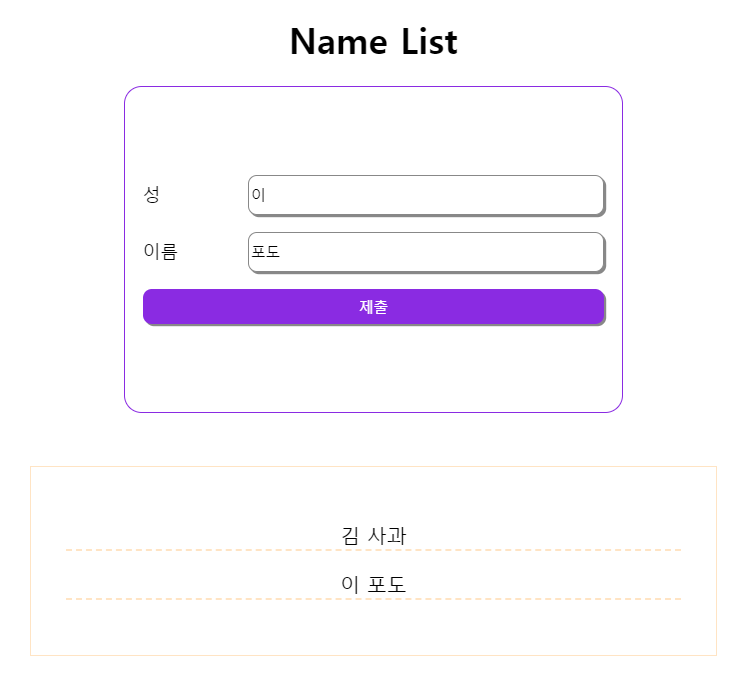
- App 컴포넌트에 들어 있는
input을Input컴포넌트로 바꾼 후, custom hook을 이용하여input의 로직을 분리해보자.
✅ App.js
import { useState } from "react";
import useInput from "./util/useInput";
import Input from "./component/Input";
import "./styles.css";

export default function App() {
  const [nameArr, setNameArr] = useState([]);
  const [FirstNameInput, firstNameValue] = useInput(Input);
  const [LastNameInput, lastNameValue] = useInput(Input);

  const handleSubmit = (e) => {
    e.preventDefault();
    setNameArr([...nameArr, `${firstNameValue} ${lastNameValue}`]);
  };

  return (
    <div className="App">
      <h1>Name List</h1>
      <div className="name-form">
        <form onSubmit={handleSubmit}>
          <div className="name-input">
            <label>성</label>
            {FirstNameInput()}
          </div>
          <div className="name-input">
            <label>이름</label>
            {LastNameInput()}
          </div>
          <button>제출</button>
        </form>
      </div>
      <div className="name-list-wrap">
        <div className="name-list">
          {nameArr.map((el, idx) => {
            return <p key={idx}>{el}</p>;
          })}
        </div>
      </div>
    </div>
  );
}
✅ Input.js
function Input({ value, setValue }) {
  return (
    <input
      value={value}
      onChange={(e) => setValue(e.target.value)}
      type="text"
    />
  );
}

export default Input;
✅ useInput.js
import { useState, useCallback } from "react";

function useInput(Input) {
  const [value, setValue] = useState("");

  const Component = useCallback(() => {
    return <Input value={value} setValue={setValue} />;
  }, [value]);

  return [Component, value];
}

export default useInput;