GraphQL Java kickstart
Java 생태계에서 GraphQL 을 사용하는 것은 쉽지 않다. 백엔드에서 쓸만한 구현체가 GraphQL Java 외에는 없다시피 하기 떄문이다.
그런 상황에서 GraphQL Java Tools라는 라이브러리를 발견했다. GraphQL Java Kickstart라는 github 그룹에서 관리하는 라이브러리인데 설명이나 공식 문서를 보면 graphql-java를 기반으로 여러 유용한 기능들을 제공하는 그룹으로 보인다.
GraphQL Java Tools에 주목했던 이유는 스키마를 만드는 방식 때문이다. GraphQL Java에서 매우 아쉬운 점이 타입을 정의 할 때 builder 패턴처럼 코드로 스키마를 정의 한다. 이런 방식은 아무래도 직관적이지 못하다.
반면 GraphQL Java Tools는 GraphQL Tools (https://github.com/ardatan/graphql-tools)에서 영감을 받아 만들어져 좀 더 직관적인 방식으로 스키마를 정의 할 수 있다. 차이가 있다면 GraphQL Tools 에서는 문자열로 스키마를 정의해 설정 하지만 GraphQL Java Tools에서는 graqhql 파일에 스키마를 설정한다.
이렇게 직접 스키마를 파일로 관리한다면 프론트 엔드 작업자와 별도의 문서 없이 코드로 커뮤니케이션을 할 수 있지 않을까 하는 기대를 가진다.
의존성 설정하기
gradle 이든 maven 이든 특별하게 해줄 것 없이 라이브러리만 잘 불러오면 된다. 이 글에서는 maven + Spring boot를 기반으로 설정을 진행한다.
...
<!-- Spring boot starter 설정 -->
<dependency>
    <groupId>com.graphql-java-kickstart</groupId>
    <artifactId>graphql-spring-boot-starter</artifactId>
    <version>11.0.0</version>
</dependency>
<!-- GraphiQL 설정. 원한다면 GraphQL Playground 도 사용할 수 있다. -->
<dependency>
    <groupId>com.graphql-java-kickstart</groupId>
    <artifactId>graphiql-spring-boot-starter</artifactId>
    <version>11.0.0</version>
    <scope>runtime</scope>
</dependency>
<dependency>
    <groupId>com.graphql-java-kickstart</groupId>
    <artifactId>graphql-java-tools</artifactId>
    <version>11.0.0</version>
</dependency>
<!-- GraphQL test 의존성 설정 -->
<dependency>
    <groupId>com.graphql-java-kickstart</groupId>
    <artifactId>graphql-spring-boot-starter-test</artifactId>
    <version>11.0.0</version>
    <scope>test</scope>
</dependency>
전체 설정은 여기에서 볼 수 있다.
GraphQL Java Tools 문서에서는 kotlin 의존성을 추가하라고 되어 있지만 그러지 않아도 동작하는데에 지장은 없었다.
GraphQL 설정하기
GraphQL Spring boot starter를 통해 application.yml 파일로 여러 설정할 수 있다.
좀 더 자세한 설정은 GraphQL Spring boot starter 문서에서 확인 할 수 있다.
GraphQL Java Tools 설정
graphql:
  tools:
    # resource 디렉토리 내의 스키마 파일의 위치 설정
    schema-location-pattern: "**/*.graphqls"
    # 스키마 확인 기능을 사용하여 타입 시스템
    introspection-enabled: true
schema-location-pattern 옵션을 사용해 스키마파일의 경로를 지정할 수 있다. 기본값으로 graphqls 확장자의 파일을 읽도록 되어 있다. 기본값을 사용할 경우 resource 디렉토리 내의 graphqls 확장자의 파일을 읽는다.
기본값 설정에서 알 수 있듯이 복수의 graphqls 파일을 설정할 수 있다.
GraphQL Servlet 설정
graphql:
  tools:
    ...
  servlet:
     # GraphQL 요청을 받을 endpoint 설정
     mapping: /graphql
     # 사용여부
     enabled: true
     # CORS 검사 사용 여부
     corsEnabled: true
     # CORS 설정
     cors:
        # Allowed origin 도메인 설정
        # List 로 받기 때문에 여러 도메인을 설정 할 수 있다.
        allowed-origins: http://some.domain.com
특별한 경우가 아닌 이상 기본값으로 사용해도 문제가 없다.
GraphiQL 나 GraphQL Playground 도 문서를 참고해 설정할 수 있다.
GraphQL 설정하기
스키마 파일 작성하기
GraphQL Java Tools 에 별다른 설정을 하지 않았다면 Spring 프로젝트 기본 구조에서 resources 하위에 xxx.graphqls 파일로 작성하면 된다.
아래 예시처럼 여러 파일에 나누어서 작성이 가능하다.
resources
ㄴ graphql
   ㄴ root.graphqls
   ㄴ account.graphqls
   ㄴ user.graphqls
Root Resolver 설정하기
GraphQL Java Tools를 사용하기 위해서는 Root Resolver 를 설정 해야 한다. Root Resolver란 Query, Mutation, Subscription 같은 GraphQL 기본 객체들을 의미한다.
schema {
    query: Query
    mutation: Mutation
}

type Query {
    user (
        userId: ID
        name: String
        email: String
    ) : User!
}
만약 이런 Query 를 설정했다면 Query 타입을 위한 Root Resolver 를 설정 해야 한다.
@Component
@RequiredArgsConstructor
public class Query implements GraphQLQueryResolver {

    private final UserService userService;

    public User user(Long userId, String name, String email) {
        var criteria = UserCriteria.builder()
                .userId(userId)
                .name(name)
                .email(email)
                .build();
        return this.userService.getUser(criteria);
    }
}
Mutation 또한 마찬자기로 설정 할 수 있다.
type Mutation {
    save (input: AccountInput!) : Account!
    withdrawal (input: AccountInput!) : Account!
}

input AccountInput {
    accountNumber: String!
    amount: Int!
}
@Component
@RequiredArgsConstructor
public class Mutation implements GraphQLMutationResolver {
private final AccountService accountService;
public Account save(AccountInput input) throws AccountException {
var criteria = AccountCriteria.builder()
.accountNumber(input.getAccountNumber())
.amount(input.getAmount())
.build();
return this.accountService.saveAmount(criteria);
}
public Account withdrawal(AccountInput input) throws AccountException {
var criteria = AccountCriteria.builder()
.accountNumber(input.getAccountNumber())
.amount(input.getAmount())
.build();
return this.accountService.withdrawalAmount(criteria);
}
}type 별 Resolver 설정하기
만약 User 란 타입을 아래와 같이 설정 했다면 accounts 를 불러오기 위해 User 타입의 resolver 를 설정해주어야 한다.
type User {
    userId: ID!
    name: String!
    email: String!
    accounts: [Account]
}
@Component
@RequiredArgsConstructor
public class UserResolver implements GraphQLResolver<User> {
private final AccountService accountService;
public List<Account> accounts(User user) {
var criteria = AccountCriteria.builder()
.userId(user.getUserId())
.build();
return this.accountService.fetchAccounts(criteria);
}
}Test 설정하기
GraphQL Java Tool를 사용한 테스트는 Mockup MVC 테스트와 비슷하다고 생각하면 된다.
GraphQL Java Tools 를 사용할 경우 SpringBootTest 어노테이션 사용시 RANDOM_PORT 를 의무적으로 설정행야 한다. 번거로운 점은 graphql 테스트가 아니더라도 RANDOM_PORT를 설정해야 한다는 점이다.
@ExtendWith(SpringExtension.class)
@SpringBootTest(webEnvironment = SpringBootTest.WebEnvironment.RANDOM_PORT)
class SomeTests {

    // ...

}
GraphQL Java Tools 는 테스트를 위해 GraphQLTestTemplate 객체를 지원한다.
이 객체는 파일로 저장한 graqhql 쿼리를 읽어드려 요청을 전송하거나 문자열로 정의한 쿼리를 실행하는 등 여러 기능을 지원한다.
파일로 정의된 쿼리 실행
먼저 파일로 정의된 쿼리를 실행하는 방법을 알아보자.
test/resources 하위에 아래 내용의 파일을 생성해 테스트할 쿼리를 정의하자. 파일 이름이나 확장자는 편한대로 작성한다.
이 글에서는 user.graqhqls 라고 정의했다.
query {
    user {
        userId
        email
        accounts {
            accountNumber
            amount
        }
    }
}
위의 파일에 정의된 쿼리를 읽어와 grahql 요청을 전송하는 테스트를 작성한다.
@ExtendWith(SpringExtension.class)
@SpringBootTest(webEnvironment = SpringBootTest.WebEnvironment.RANDOM_PORT)
class UserResolverTests {

    @Autowired
    private GraphQLTestTemplate graphQLTestTemplate;

    @Test
    void userTest() throws IOException {
        // test/resources/user.graphqls 파일을 읽어와 해당 쿼리를 전송한다.
        var response = this.graphQLTestTemplate.postForResource("user.graphqls");

        /* response 내용 예시
        {
            "user":
                {
                    "userId":"1",
                    "email":"test@test.com",
                    "accounts": [
	                    {
                            "accountNumber":"123",
                            "amount":200
                        }
                 ]
             }
         }
        */
        var result = response.readTree().get("data");
        Assertions.assertNotNull(result.asText());
    }
}
GraphQL 실행하기
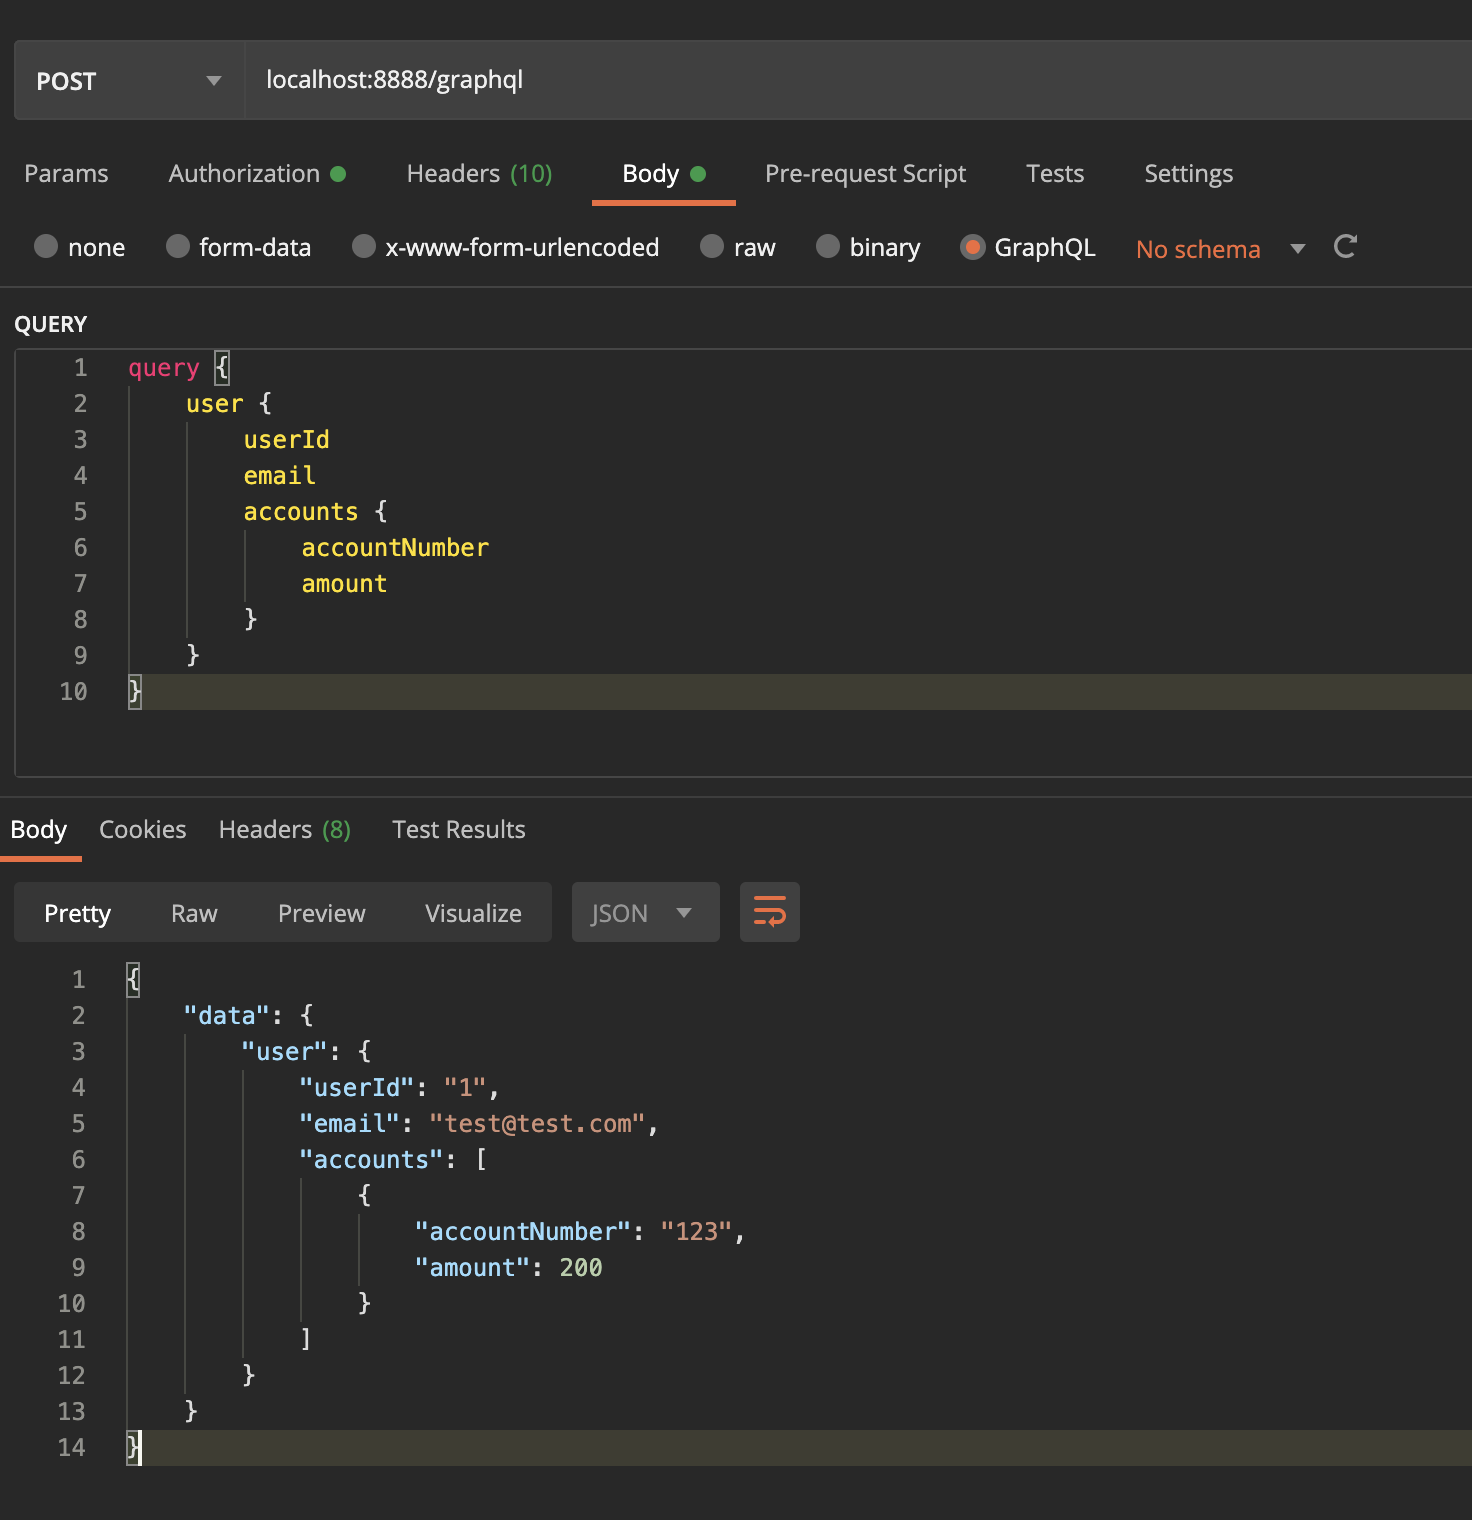
이제 모든 설정이 끝났다. /graphql 로 POST 요청을 하면 데이터를 확인 할 수 있다.
Postman 으로 요청을 하면 쉽게 확인 할 수 있다.
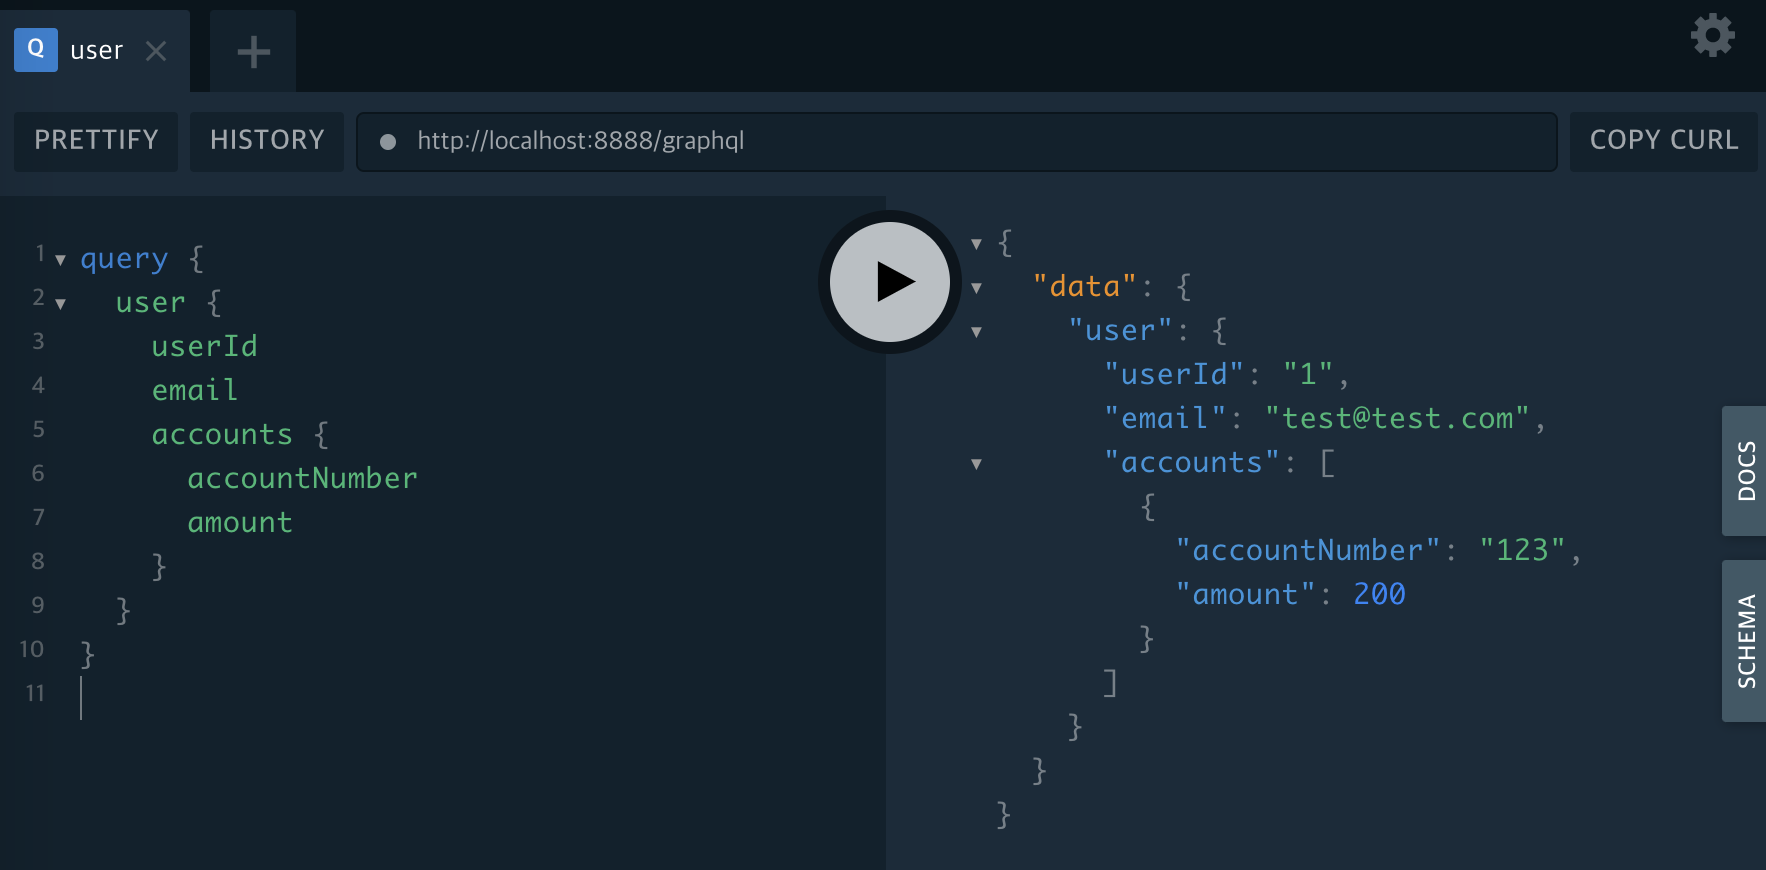
또는 /playground 이나 /graphiql 에서 graphql 쿼리를 직접 확인해 볼 수 있다.
전체 코드는 여기에서 확인 할 수 있다.

좋은 글 감사합니다!