The hero editor
앱이 이제 기본적인 title을 가지고 있으니 영웅들의 정보를 보여줄 컴포넌트를 만들고 그 컴포넌크를 둘 앱 쉘이 필요함.
Create the heroes component
CLI를 사용해서 이름이heores인 컴포넌트를 생성해줌.
ng generate component heroesCLI가 src/app/heroes/폴더를 생성하고 HeroesComponent 파일을 생성함.
HeroesComponent 클래스 파일은 아래와 같음.
// app/heroes/heroes.component.ts (initial version)
import { Component, OnInit } from '@angular/core';

@Component({
  selector: 'app-heroes',
  templateUrl: './heroes.component.html',
  styleUrls: ['./heroes.component.css']
})
export class HeroesComponent implements OnInit {

  constructor() { }

  ngOnInit(): void {
  }

}
항상 Component를 앵귤러 코어 라이브러리에서 @Component로 컴포넌트 클래스에서 import 해줘야함.
@Componetn는 컴포넌트의 앵귤러 메타데이터를 특정해주는 데코레이터 함수임.
CLI는 아래와 같은 메타데이터 property를 생성함.
1. selector — 컴포넌트의 CSS element selector
2. templateUrl — 컴포넌트 템플릿 파일의 위치
3. styleUrls — 컴포넌트의 private CSS 스타일 파일의 위치
selector app-hereos는 부모 컴포넌트 템플릿에서 이 컴포넌트를 나타내는거임.
ngOnInit()은 lifeycle hook임. 앵귤러는 컴포넌트를 실행한 후 ngOnInit()을 거의 바로 실행함.
항상 컴포넌트를 export해서 이 컴포넌트를 다른 곳에서import 할 수 있도록 해야함.(e.g. AppModule)
Add a hero property
HeroesComponent에 이름이 'Windstrom'인 hero property 추가하기.
// heroes.component.ts (hero property)
hero = 'Windstorm';
Show the hero
heroes.component.html 템플릿 파일을 열어서 기본으로 생성된 걸 다 지우고 위에서 만든 hero property를 binding 해줌.
<h2>{{hero}}</h2>Show the HeroesComponent view
HeroesComponent를 보여주려면 AppComponent 쉘의 템플릿에 추가해야함.
app-heroes는 HeroesComponent를 나타내는 element selector임. 따라서 <app-heroes> element를 AppComponent 템플릿 파일에 아래처럼 추가하기.
// src/app/app.component.html
<h1>{{title}}</h1>
<app-heroes></app-heroes>
이렇게 가져올 수 있는거는 app.module.ts에 ㅇ
결과물 아래처럼 나옴.

Create a Hero interface
Hero 인터페이스를 src/app 안에 만들어서 id랑 name property를 부여함.
// src/app/hero.ts

export interface Hero {
  id: number;
  name: string;
}
HeroesComponent 클래스로 가서 작성한 Hero 인터페이스를 import하고 hero property를 Hero 타입으로 리택토리하면서 값도 초기화 해줌.
// src/app/heroes/heroes.component.ts
import { Component, OnInit } from '@angular/core';
import { Hero } from '../hero';

@Component({
  selector: 'app-heroes',
  templateUrl: './heroes.component.html',
  styleUrls: ['./heroes.component.css']
})
export class HeroesComponent implements OnInit {
  hero: Hero = {
    id: 1,
    name: 'Windstorm'
  };

  constructor() { }

  ngOnInit(): void {
  }
지금은 페이지가 이상하게 나오는데 hero를 string에서 obejct로 바꿨기 때문임.
Show the hero object
템플릿의 바인딩을 hero의 name과 id가 나오도록 해줌.
<!--
	heroes.component.html (HeroesComponent's template)
-->
<h2>{{hero.name}} Details</h2>
<div><span>id: </span>{{hero.id}}</div>
<div><span>name: </span>{{hero.name}}</div>
Format with the UppercasePipe
<!--
	heroes.component.html (HeroesComponent's template)
-->
<h2>{{hero.name | uppercase}} Details</h2>hero.name을 대문자로 나오게 binding을 바꿔줌. interpolation binding안의 |(pipe operator) 다음에 나오는 uppercase 내장된 UppercasePipe를 작동시킴.
Pipe는 스트링, 화폐단위, 날짜 등 여러 데이터를 format해서 보여주는게 좋은 방법임. 앵귤러는 미리 만들어진 파이프들을 가지고 있고 직접 파이프를 만들어 사용할 수도 있음.
Edit the hero
사용자가 hero의 name을 <input> textbox로 수정할 수 있어야함.
textbox는 hero의 name property를 보여줄 수 있어야하고 업데이트 할 수도 있어야함. 이 말은 데이터가 컴포넌트 클래스에서 사용자 화면으로 갔다가 사용자 화면에서 컴포넌트 클래스로 다시 와야함.
이 데이터 흐름을 자동화하기 위해서는 <input> element와 hero.name property 사이에 two-way data binding 만들어야함.
Two-way binding
HeroesComponent의 템플릿을 아래처럼 리팩토링함.
<!--
src/app/heroes/heroes.component.html (HeroesComponent's template)
-->
<div>
  <label for="name">Hero name: </label>
  <input id="name" [(ngModel)]="hero.name" placeholder="name">
</div>
[(ngModel)]은 앵귤러의 two-way data binding syntax임.
여기서 [(ngModel)]은 hero.name property를 HTML textbox에 바인딩해서 데이터가 양방향으로 이동할 수 있도록함. hero.name property에서 textbox로, textbox에서 hero.name으로 돌아가도록 함.
The missing FormsModule
위처럼 [(ngModel)]를 추가하면 아래 에러가 나오면서 앱이 작동을 멈춤.
Template parse errors:
Can't bind to 'ngModel' since it isn't a known property of 'input'.
ngModel valid한 Angular directive지만 기본설정으로는 그렇지 않음.
ngModel은 FormsModule에 optional하게 붙어있어 사용하기 위해서는 opt-in해야함.
AppModule
앵귤러는 앱이 필요한 파일들과 라이브러리 그리고 어플리케이션의 조각들이 잘 합쳐지는지를 알아야하는데 이 정보를 메타데이터라함.
메타데이터의 일부는 컴포넌트 클래스 안에 있는ㄷ @Component 데코레이터 안에 있음. 다른 중요한 메타데이터는 @NgModule 데코레이터 안에 있음.
가장 중욜한 NgModule 데코레이터는 top-level AppModule 클래스에 있음.
앵귤러 CLI는 프로젝트를 생성할 때 src/app/app.module.ts에 있는 AppModule 클래스를 생성함. 이 클래스에 FormModule을 opt-in해야함.
Angular flow는 아래 참조하기
링크
Import FormsModule
AppModule(app.module.ts)를 열어서 FormsModule 심볼을 @angular/forms라이브러리에서 import 해야함.
// app.module.ts (FormsModule symbol import)
import { FormsModule } from '@angular/forms'; // <-- NgModel lives here
그리고 FormModule을 앱이 필요한 외부 모듈들을 담고 있는 리스트인 @NgModule의 import 배열에 추가해줌.
imports: [
  BrowserModule,
  AppRoutingModule,
  FormsModule
],
이제 에러 없이 잘 작동함.
Declare HeroesComponent
모든 컴포넌트는 오직 하나의 NgModule에만 선언되어야함.
HeroesComponent를 @NgModule에 선언 안해줬는데 앱이 동작할 수 있었던 이유는 다음과 같음.
앵귤러 CLI가 AppModule안에 HeroesComponent를 생성할 때 넣어줬기 때문임.
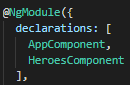
src/app/app.module.ts를 열어보면 상단에 HeroesComponent가 import 된 것을 볼 수 있음.

HeroesComponent는 @NgModule.declarations 배열안에 선언되어 있음.