Front-end 국비지원 #049일
JQuery Slide
숫자 카운트 슬라이드 만들기
결과
HTML
<body>
<div id="wrap">
<div class="visual">
<ul class="n-slide">
<li>
<div class="section-img1"></div>
<div class="section-text">
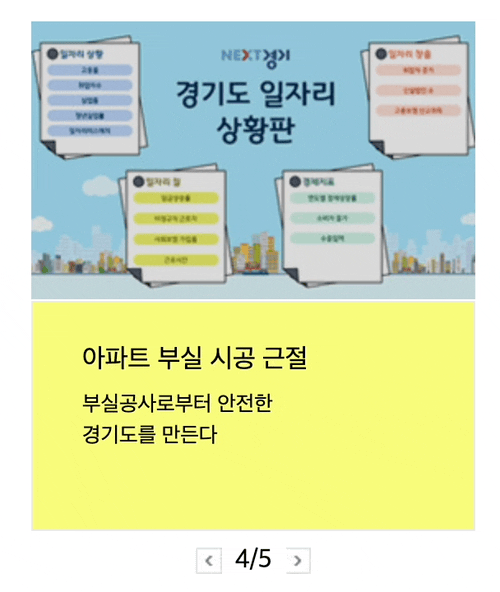
<h4>아파트 부실 시공 근절</h4>
<p>부실공사로부터 안전한 <br> 경기도를 만든다</p>
</div>
</li>
<li>
<div class="section-img2"></div>
<div class="section-text">
<h4>아파트 부실 시공 근절</h4>
<p>부실공사로부터 안전한 <br> 경기도를 만든다</p>
</div>
</li>
<li>
<div class="section-img3"></div>
<div class="section-text">
<h4>아파트 부실 시공 근절</h4>
<p>부실공사로부터 안전한 <br> 경기도를 만든다</p>
</div>
</li>
<li>
<div class="section-img4"></div>
<div class="section-text">
<h4>아파트 부실 시공 근절</h4>
<p>부실공사로부터 안전한 <br> 경기도를 만든다</p>
</div>
</li>
<li>
<div class="section-img5"></div>
<div class="section-text">
<h4>아파트 부실 시공 근절</h4>
<p>부실공사로부터 안전한 <br> 경기도를 만든다</p>
</div>
</li>
</ul>
<div class="arrow">
<img src="./image/arrow1.jpg" alt="prev" class="prev">
<img src="./image/arrow2.jpg" alt="next" class="next">
</div>
<div class="pager-num">
<p class="on">1/5</p>
<p>2/5</p>
<p>3/5</p>
<p>4/5</p>
<p>5/5</p>
</div>
</div>
</div>CSS
.visual{position: relative; width: 270px; height: 336px; margin: 100px auto;}
.visual .n-slide{position: relative; width: 100%; overflow: hidden; height: 100%;}
.visual .n-slide>li{position: absolute; top: 0; left: 100%; width: 100%;}
.visual .n-slide>li:first-child{left: 0;}
.visual .n-slide>li>.section-img1{width: 100%; height: 170px; background: url(../image/section1.jpg)no-repeat;}
.visual .n-slide>li>.section-img2{width: 100%; height: 170px; background: url(../image/section2.jpg)no-repeat;}
.visual .n-slide>li>.section-img3{width: 100%; height: 170px; background: url(../image/section3.jpg)no-repeat;}
.visual .n-slide>li>.section-img4{width: 100%; height: 170px; background: url(../image/section4.jpg)no-repeat;}
.visual .n-slide>li>.section-img5{width: 100%; height: 170px; background: url(../image/section5.jpg)no-repeat;}
.visual .n-slide>li>.section-text{width: 100%; height: 140px; padding: 27px 30px; border: 1px solid #ebebeb; box-sizing: border-box; background: #f7fa7c;}
.visual .n-slide>li>.section-text:hover{background: tomato;}
.visual .n-slide>li>.section-text:hover h4{color: white;}
.visual .n-slide>li>.section-text:hover p{color: white;}
.visual .n-slide>li>.section-text h4{font-size: 16px; line-height: 1; margin-bottom: 10px; font-weight: normal;}
.visual .n-slide>li>.section-text p{font-size: 13px; line-height: 19px; overflow: hidden; text-overflow: ellipsis;}
.visual .arrow .prev{position: absolute; left: 100px; bottom: 0;}
.visual .arrow .next{position: absolute; right: 100px; bottom: 0;}
.visual .pager-num{position: absolute; bottom: 0; left: 50%; transform: translateX(-50%);}
.visual .pager-num p{display: none;}
.visual .pager-num .on{display: block;}
script
//오토슬라이드
$(function(){
    let btnSlide=$('.n-slide>li');
    let pagerBtn=$('.pager-num>p');
    let leftBtn=$('.prev');
    let rightBtn=$('.next');
    let current=0;
    let btnSlideInterval;

    autoSlide();
    function autoSlide(){
        btnSlideInterval=setInterval(function(){
            let prev=btnSlide.eq(current);
            let prevBtn=pagerBtn.eq(current);
            move(prev, 0, '-100%');
            prevBtn.removeClass('on')
            current++;
            if(current==btnSlide.size()){
                current=0;
            }

            let next=btnSlide.eq(current);
            let nextBtn=pagerBtn.eq(current);
            move(next, '100%',0);
            nextBtn.addClass('on');
        },2000);
    }

    function move(tg, start, end){
        tg.css('left',start).stop().animate({left:end},500);
    }

    //멈춤
    $('.visual').hover(function(){
        clearInterval(btnSlideInterval);
    },function(){
        autoSlide();
    });

    //오른쪽버튼
    rightBtn.click(function(){
            let prev=btnSlide.eq(current);
            let prevBtn=pagerBtn.eq(current);
            move(prev, 0, '-100%');
            prevBtn.removeClass('on')
            current++;
            if(current==btnSlide.size()){
                current=0;
            }

            let next=btnSlide.eq(current);
            let nextBtn=pagerBtn.eq(current);
            move(next, '100%',0);
            nextBtn.addClass('on');
    });
    //왼쪽버튼
    leftBtn.click(function(){
            let prev=btnSlide.eq(current);
            let prevBtn=pagerBtn.eq(current);

            move(prev, 0, '100%');
            prevBtn.removeClass('on')
            current--;
            if(current==-btnSlide.size()){
                current=0;
            }

            let next=btnSlide.eq(current);
            let nextBtn=pagerBtn.eq(current);
            move(next, '-100%',0);
            nextBtn.addClass('on');
    });
});
어제 만든 불릿버튼 슬라이드와 코드는 거의 같다. 하지만 다른건 숫자 카운팅인데 크게 다르지 않게 만들었다.
ex ) 불릿과 마찬가지로addClass,removeClass로
01/05class=on02/0503/0504/0505/05
클릭하는 해당 버튼과 자동으로 넘어가는 함수에게 eq(current)와 해당되는 숫자에on를 넣어준다.
문제해결
원래 해보고싶은것은
<div class=count>01</div>이
div하나로 클래스를 지정하고text를 함수로 넣어 변할 때 마다 텍스트를 바꾸고 싶었는데 쉽지가 않았다. 일단 관공서 슬라이드 카운팅은 10장이고 01~10 까지 카운팅이 되는데 1~9까지는 01~09로 나타내야하고 10부터는 다시 두자리 이므로 10이 되면 되는데 이부분도 며칠동안 구글로 찾아봤지만 쉽지는 않아보였다. 다음에 꼭 해결해 보면 여기다가 써보겠다.
Git & Github

1. git 이란?
리누스 토르발스가 개발한 분산형 버전 관리 시스템(VCS)이다.
git은 소프트웨어 개발자들이 자신의 코드를 효과적으로 관리할 수 있도록 도와주는 소프트웨어이다. git을 통해 개발자들은 프로젝트를 서로 공유하여 각자의 영역을 개발 후 병합할 수 있다.
참고 : https://git-scm.com/book/ko/v2 (공식 한글 매뉴얼)
2. git 설치방법
windows 설치방법
- git 을 검색 또는 https://git-scm.com/ 에 들어간다.

- 홈페이지에서 download를 클릭한다.
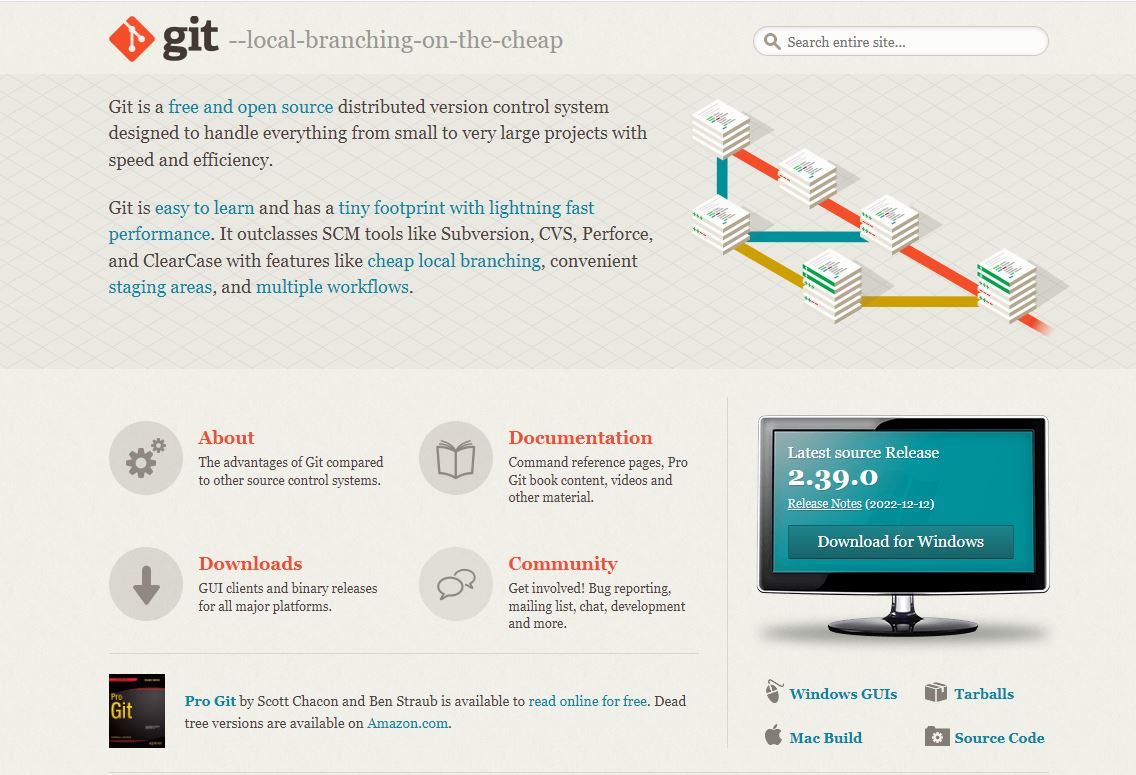
- 운영체제 별로 다운로드 링크가 있으며 해당 os에 맞게 설치한다.
- 설치캡쳐는 없지만 설치는 그냥 아무것도 건들이지 않고 체크박스도 그대로 next버튼을 클릭하여 설치를 완료한다.
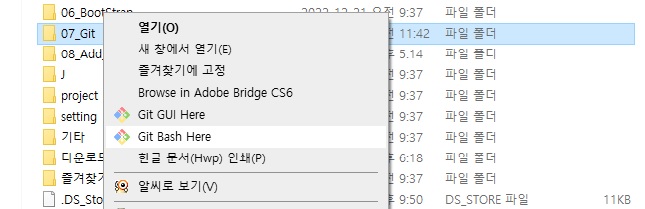
- 다음 해당하는 폴더를 선택 후 오른쪽 마우스를 클릭하면 'Git Bash Here' 가 있다. 클릭을 한다.
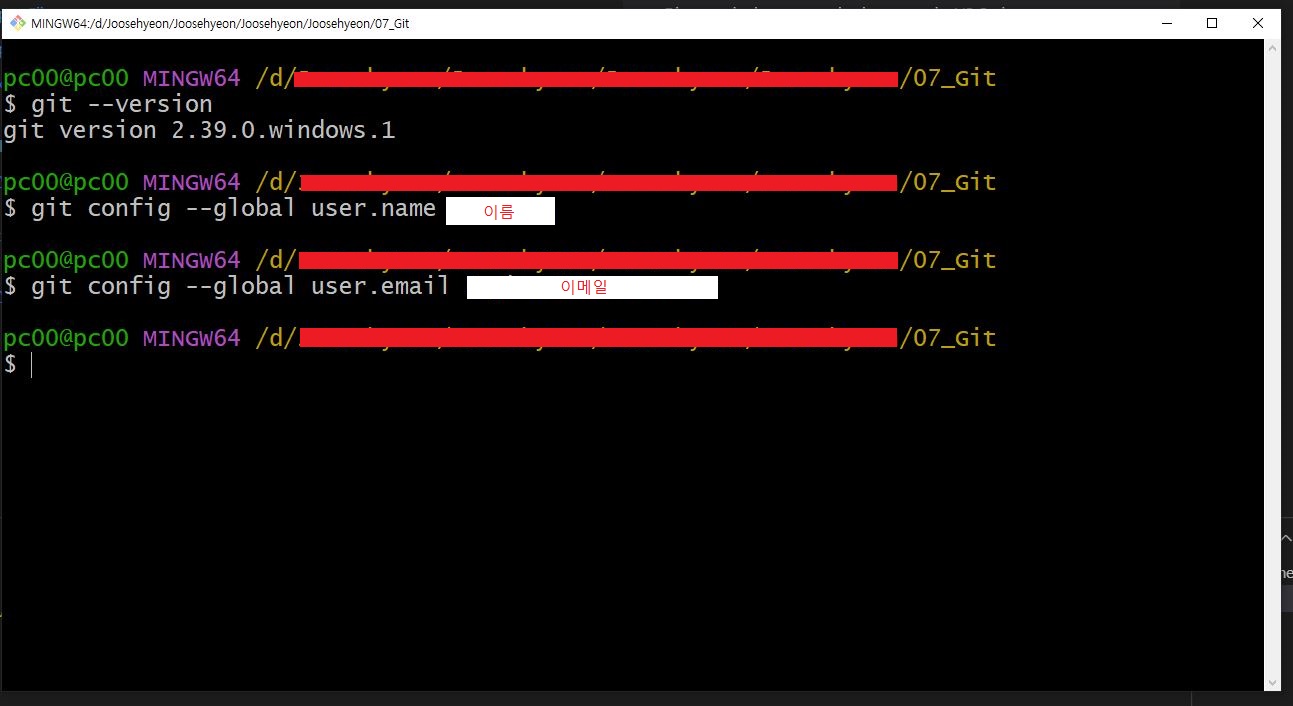
- 터미널 창이 뜨는데 여기서
$ git --version: 버전을 확인
$ git config --global user.name "이름": 이름 등록
$ git config --global user.email "이메일": 이메일 등록
을 한다.
- 비쥬얼스튜디오코드(vscode)를 열고
ctrl+`혹은 'terminal' > 'new terminal' 을 선택한다.
- Git Bash 를 선택하고 순서대로 명령어를 치고 Git Hub와 연결한다.
mac os 설치방법
- git 을 검색 또는 https://git-scm.com/ 에 들어간다.
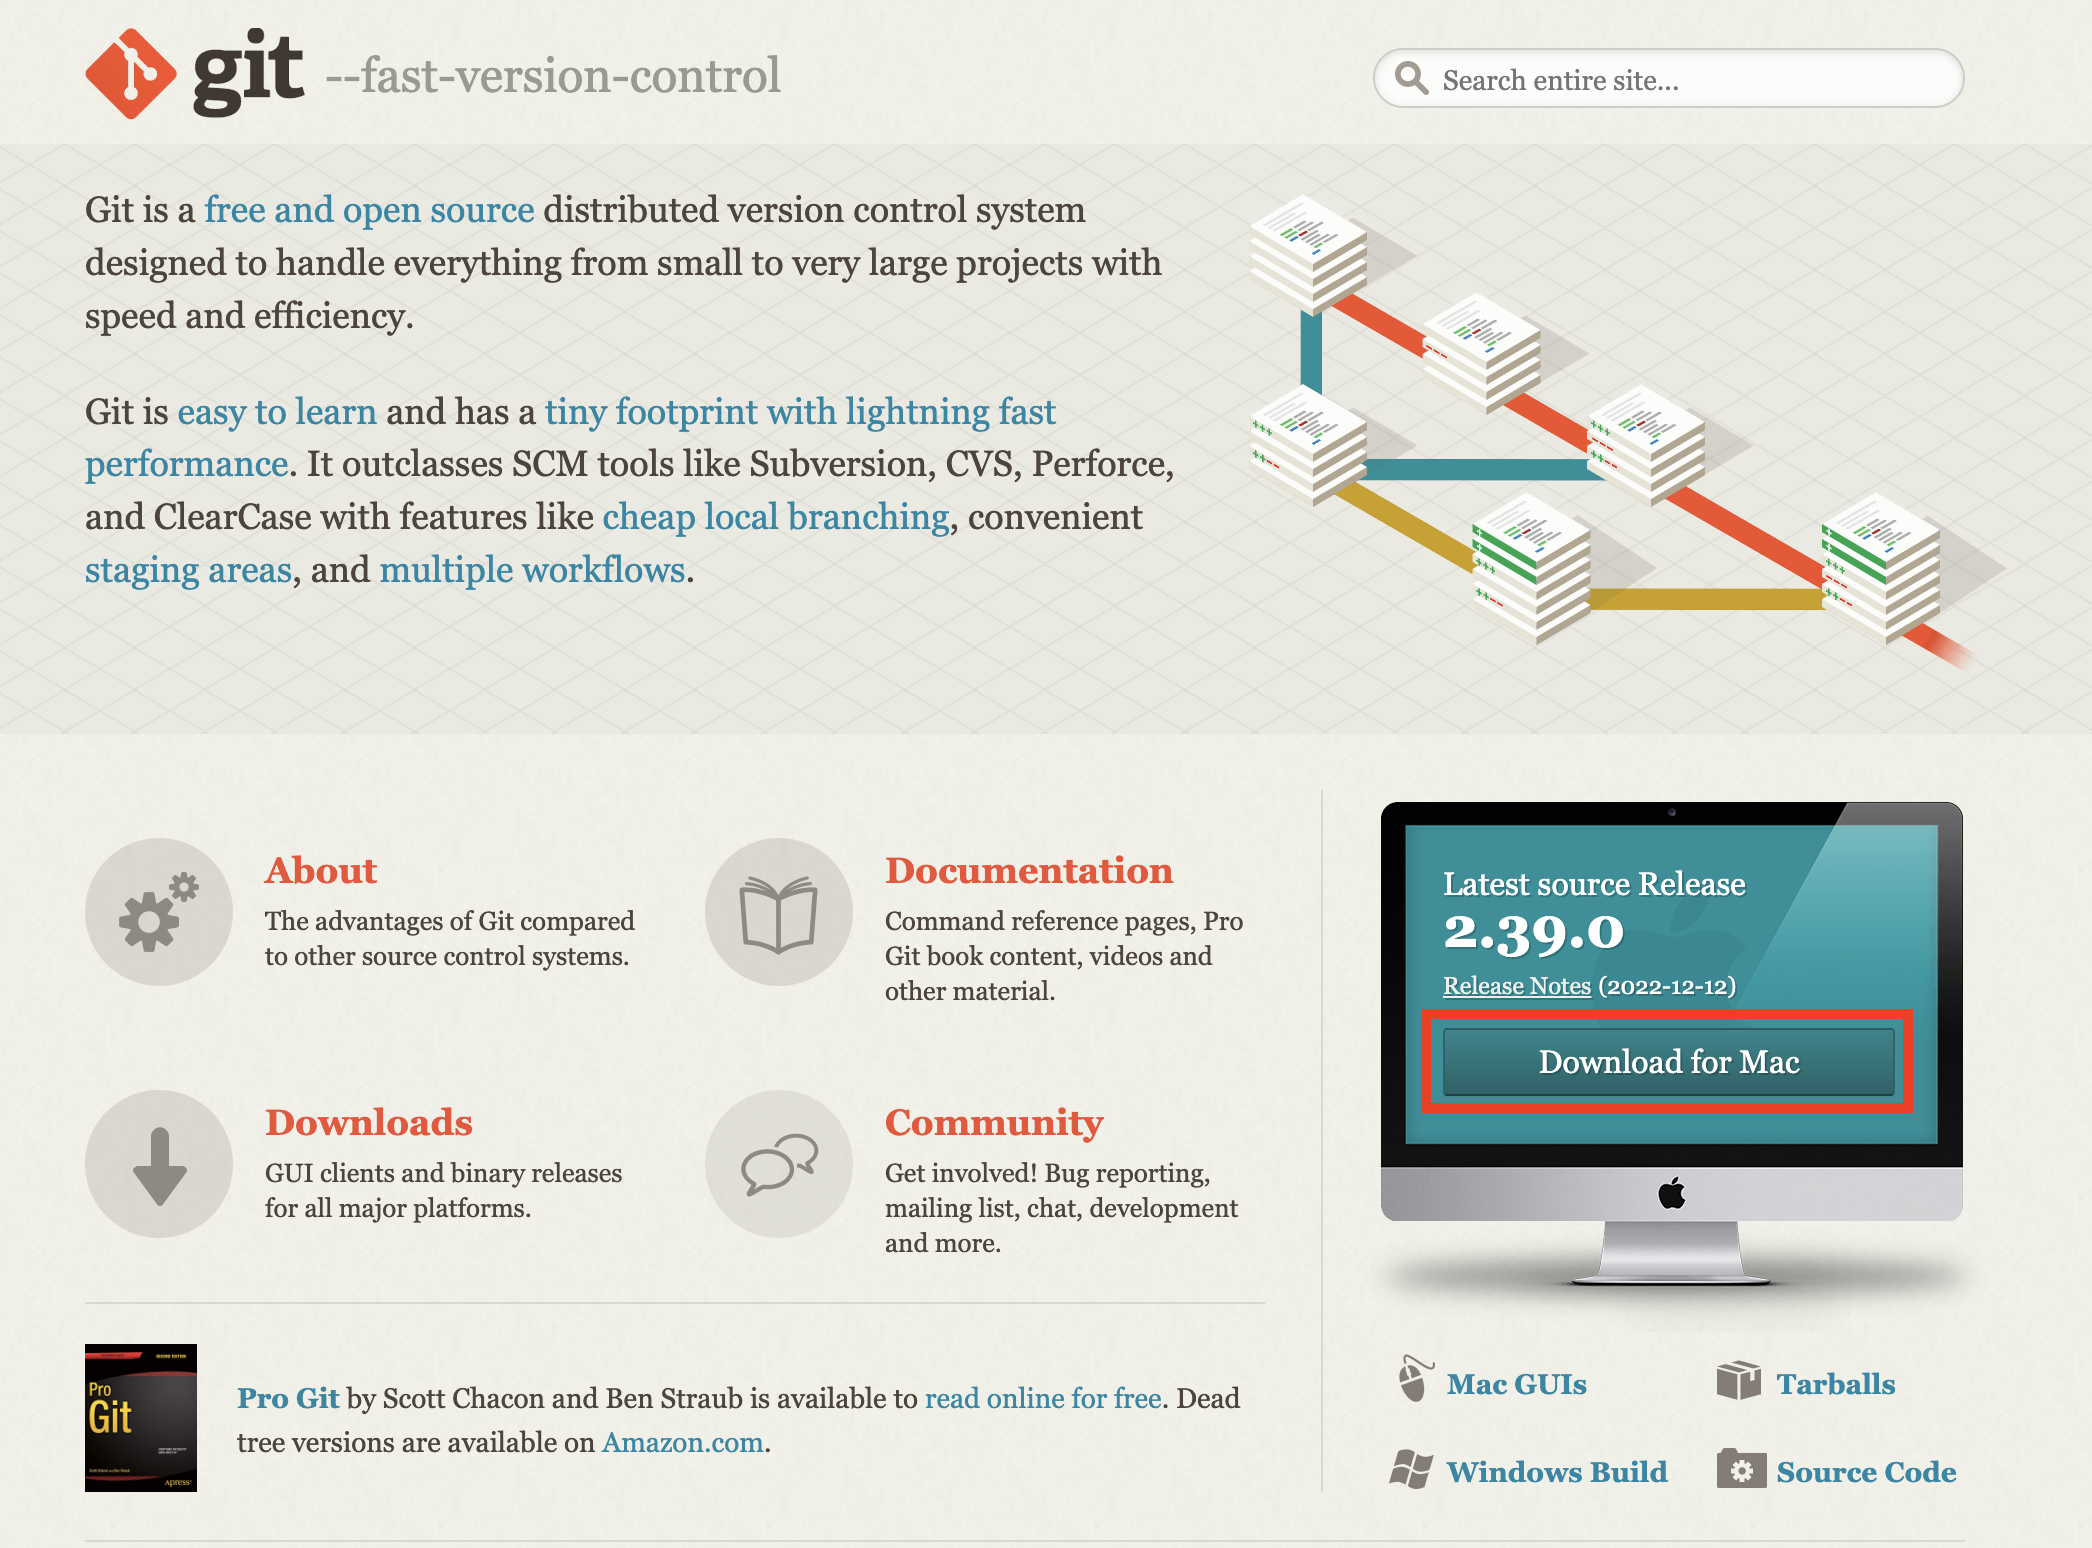
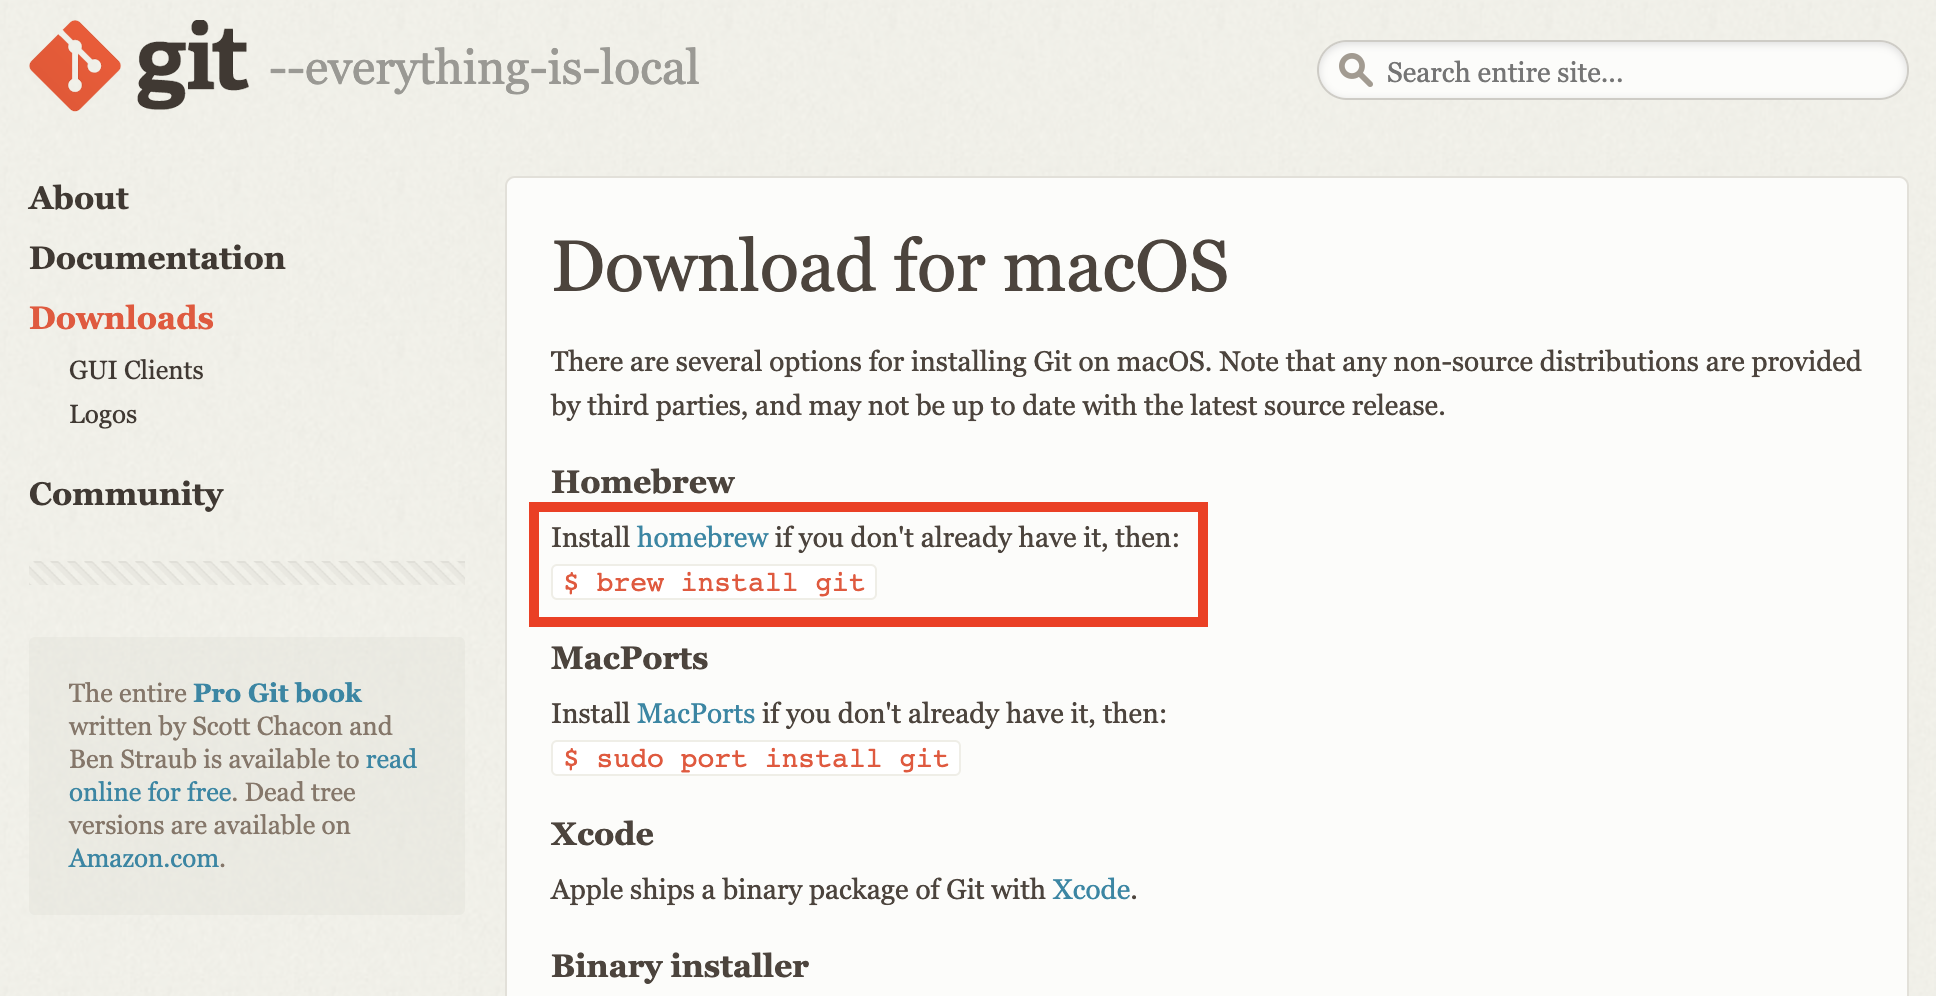
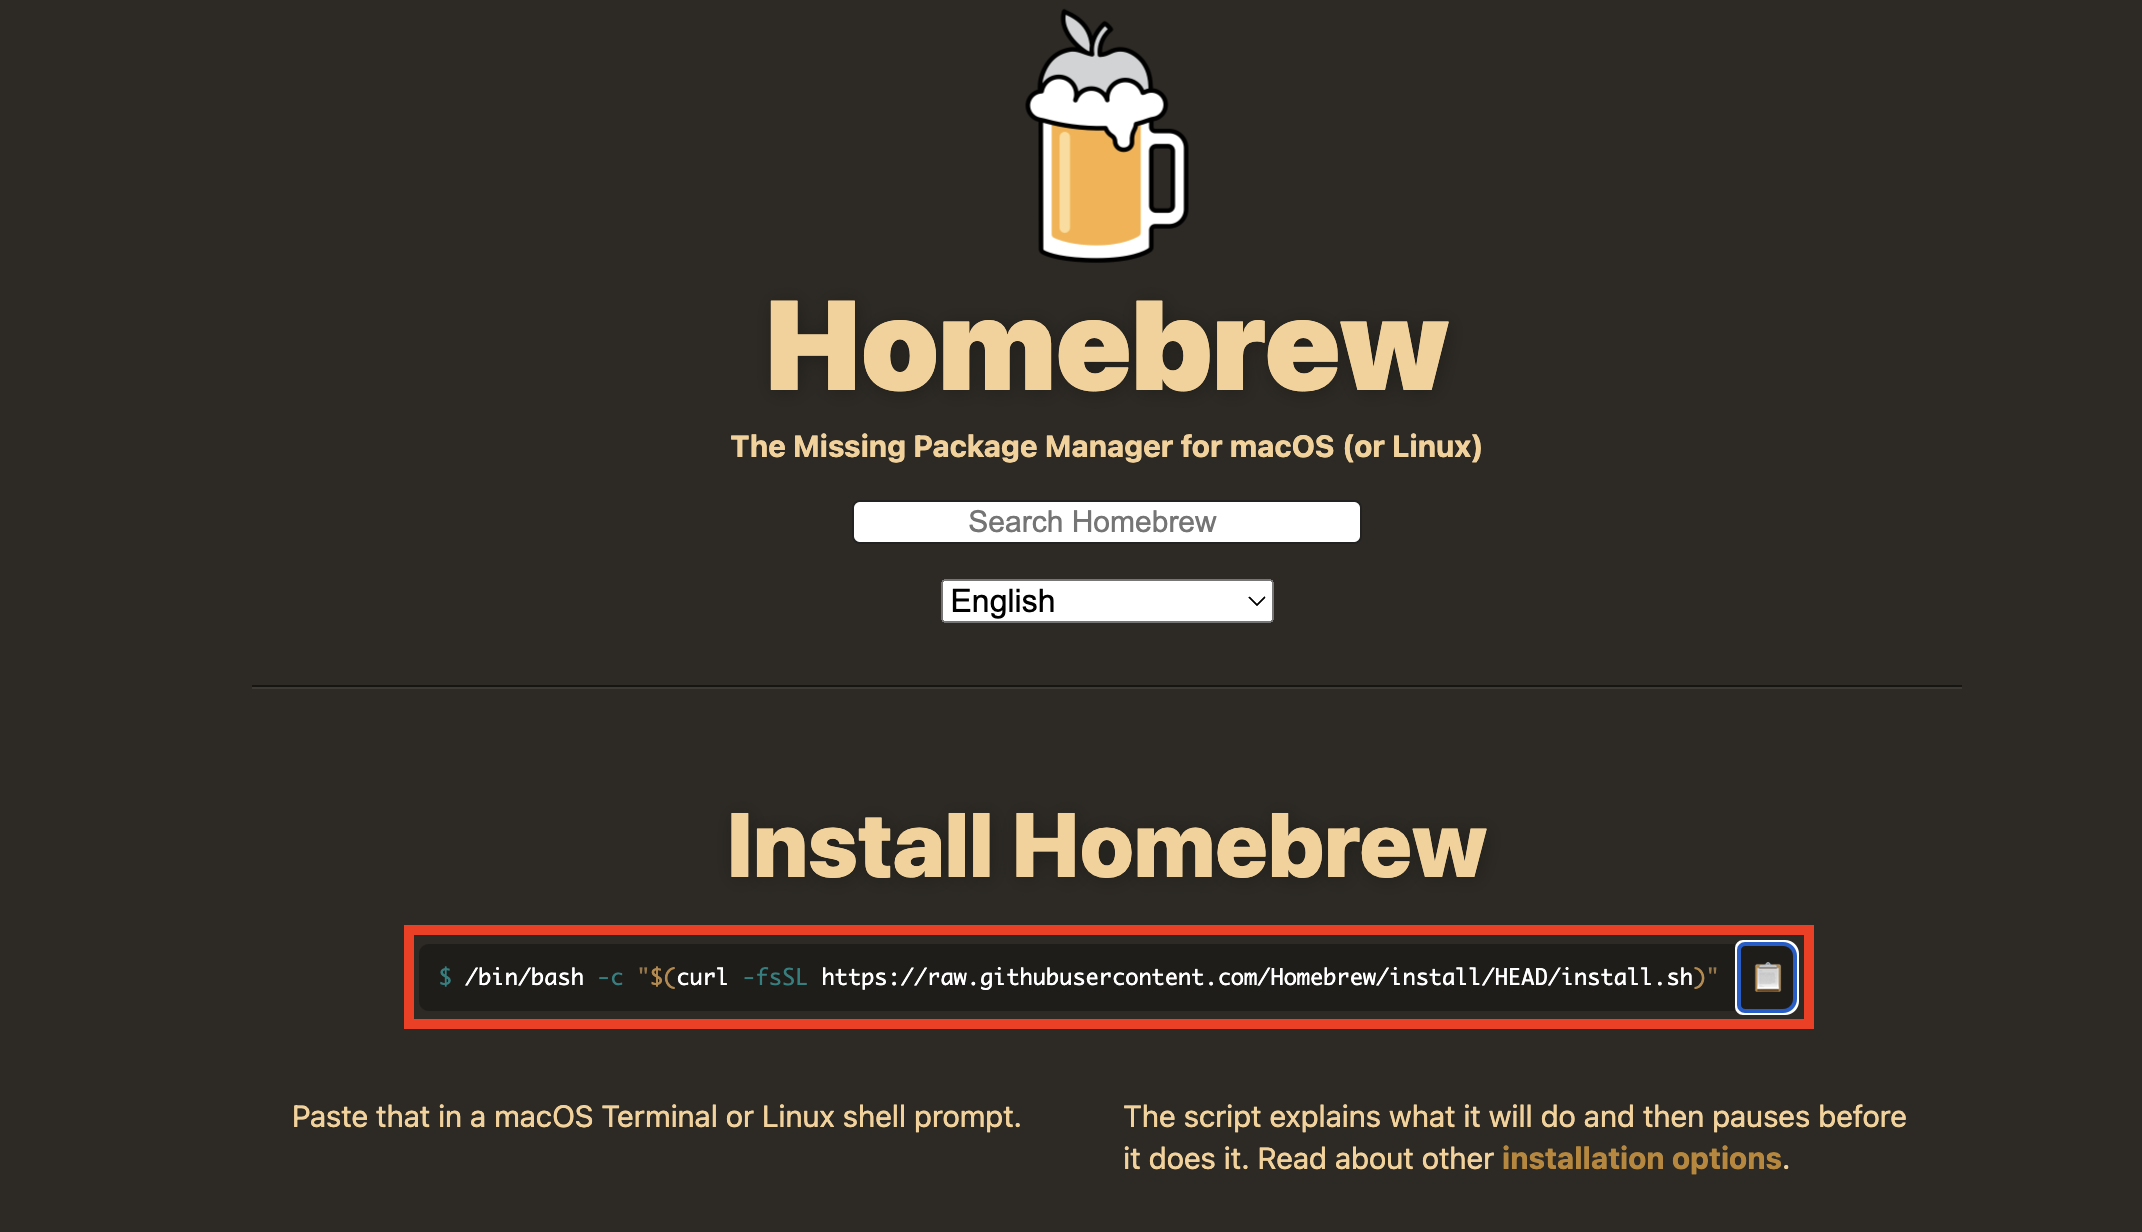
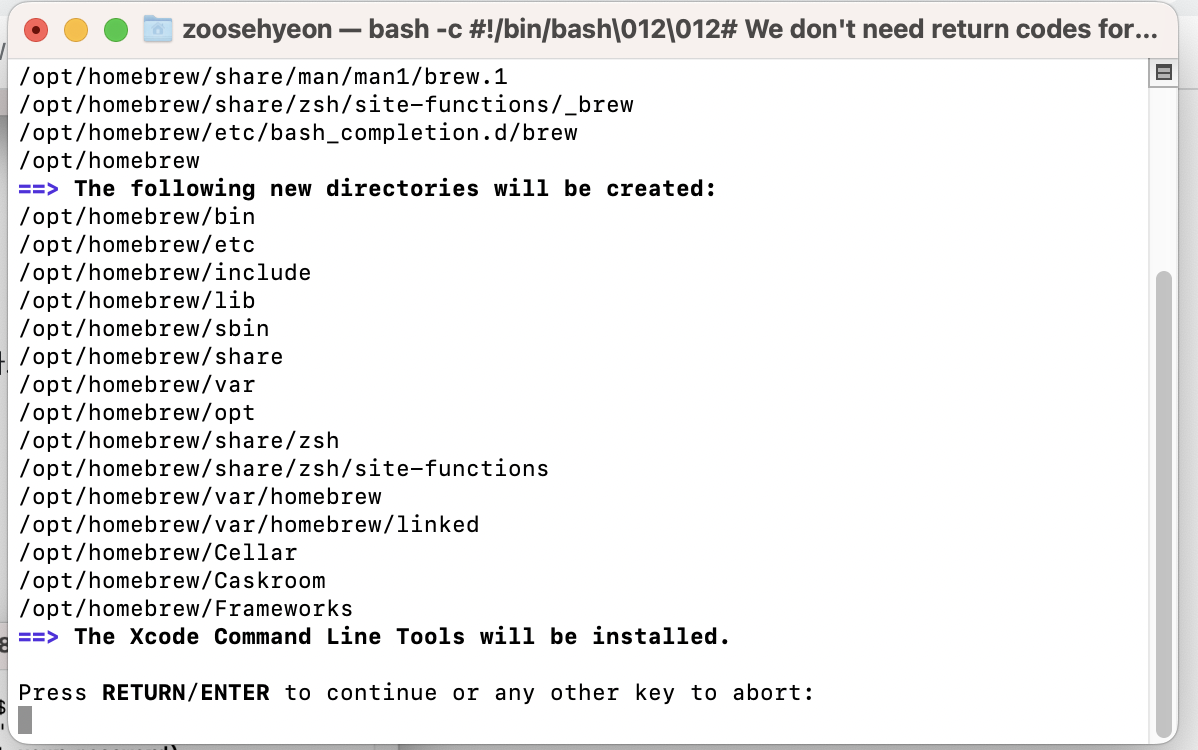
- macOS 버전을 누르면 Homebrew를 깔라고 나온다.
- Homebrew 화면이 뜨는데 여기서 나온 링크를 복사한다.
- mac 터미널을 실행시키고 링크를 붙여넣기 한다.
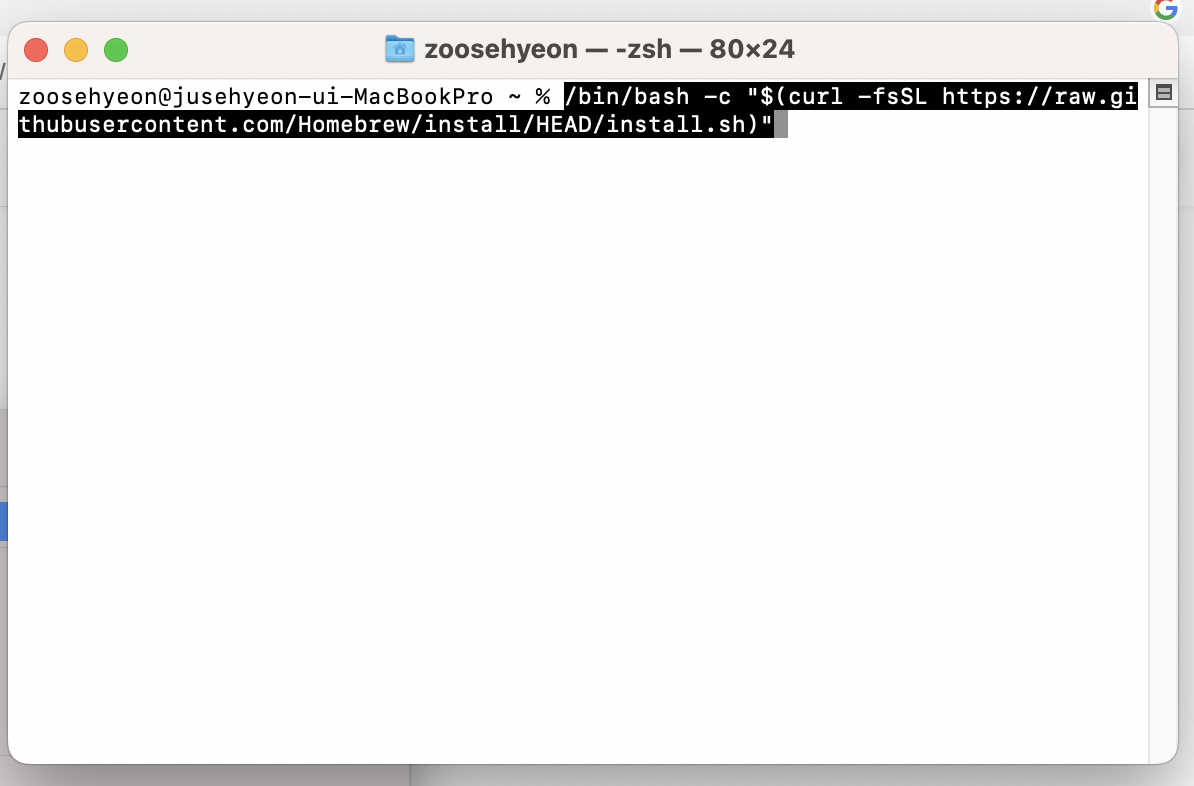
- 인스톨이 시작된다.
- 인스톨이 완료된다.
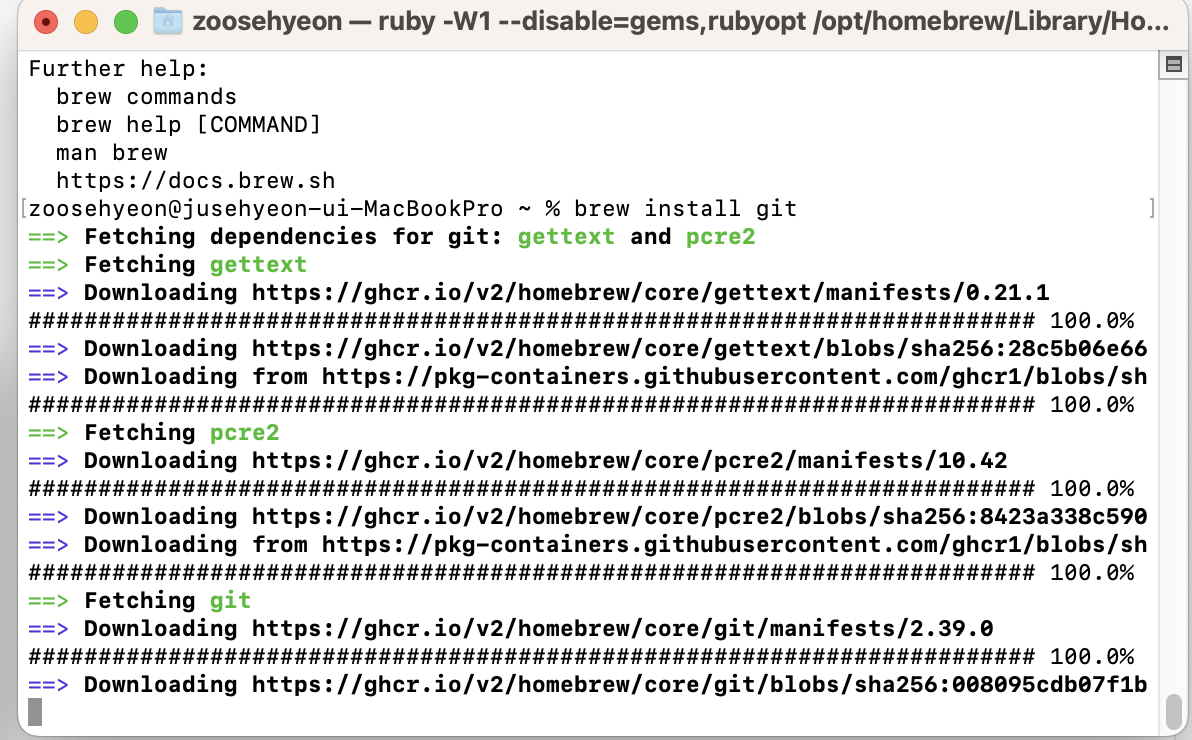
- vscode 터미널을 켜고 bash를 선택한다.

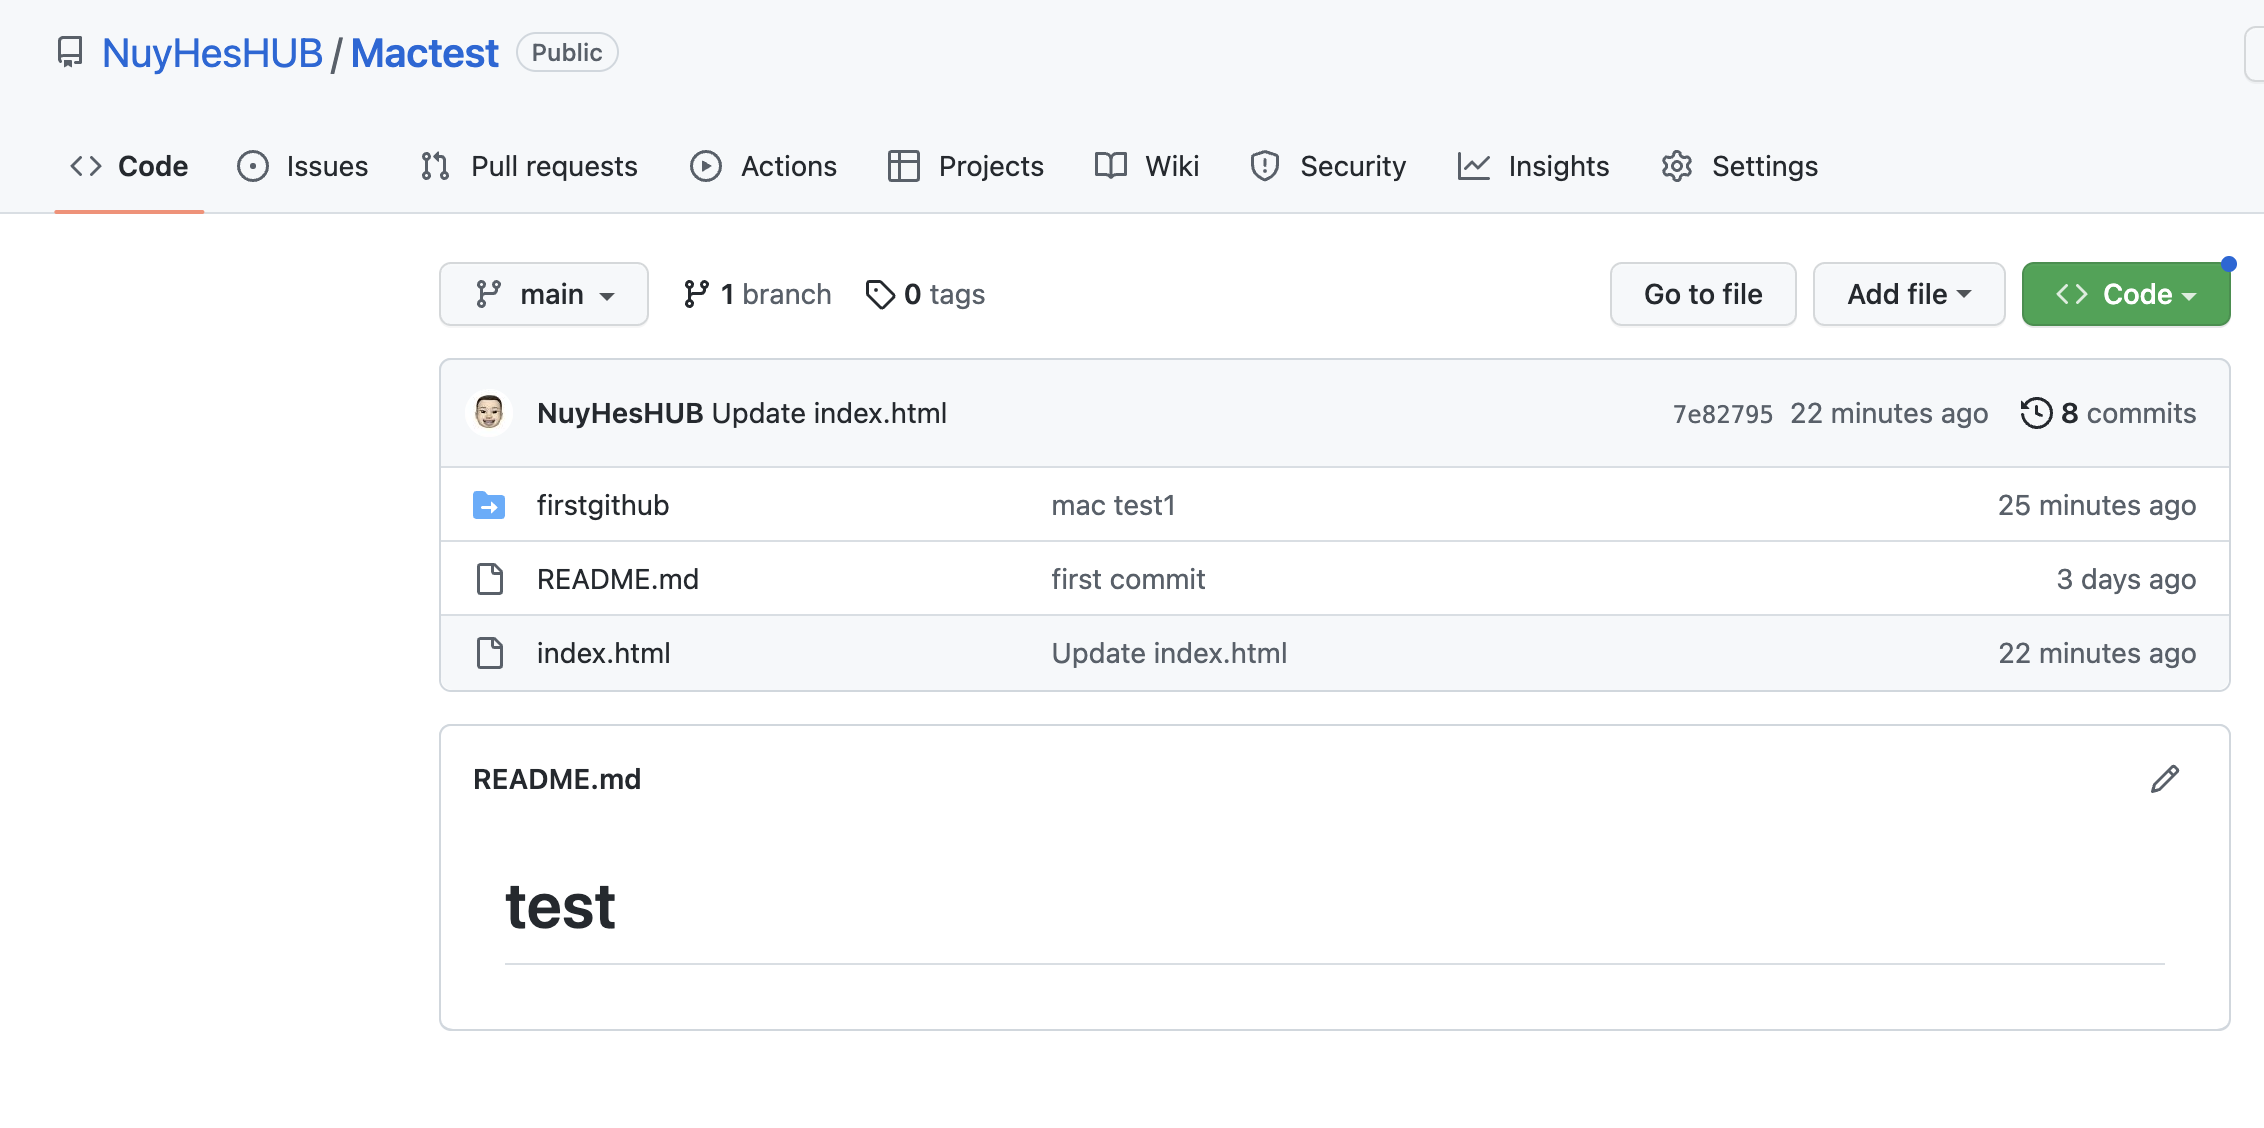
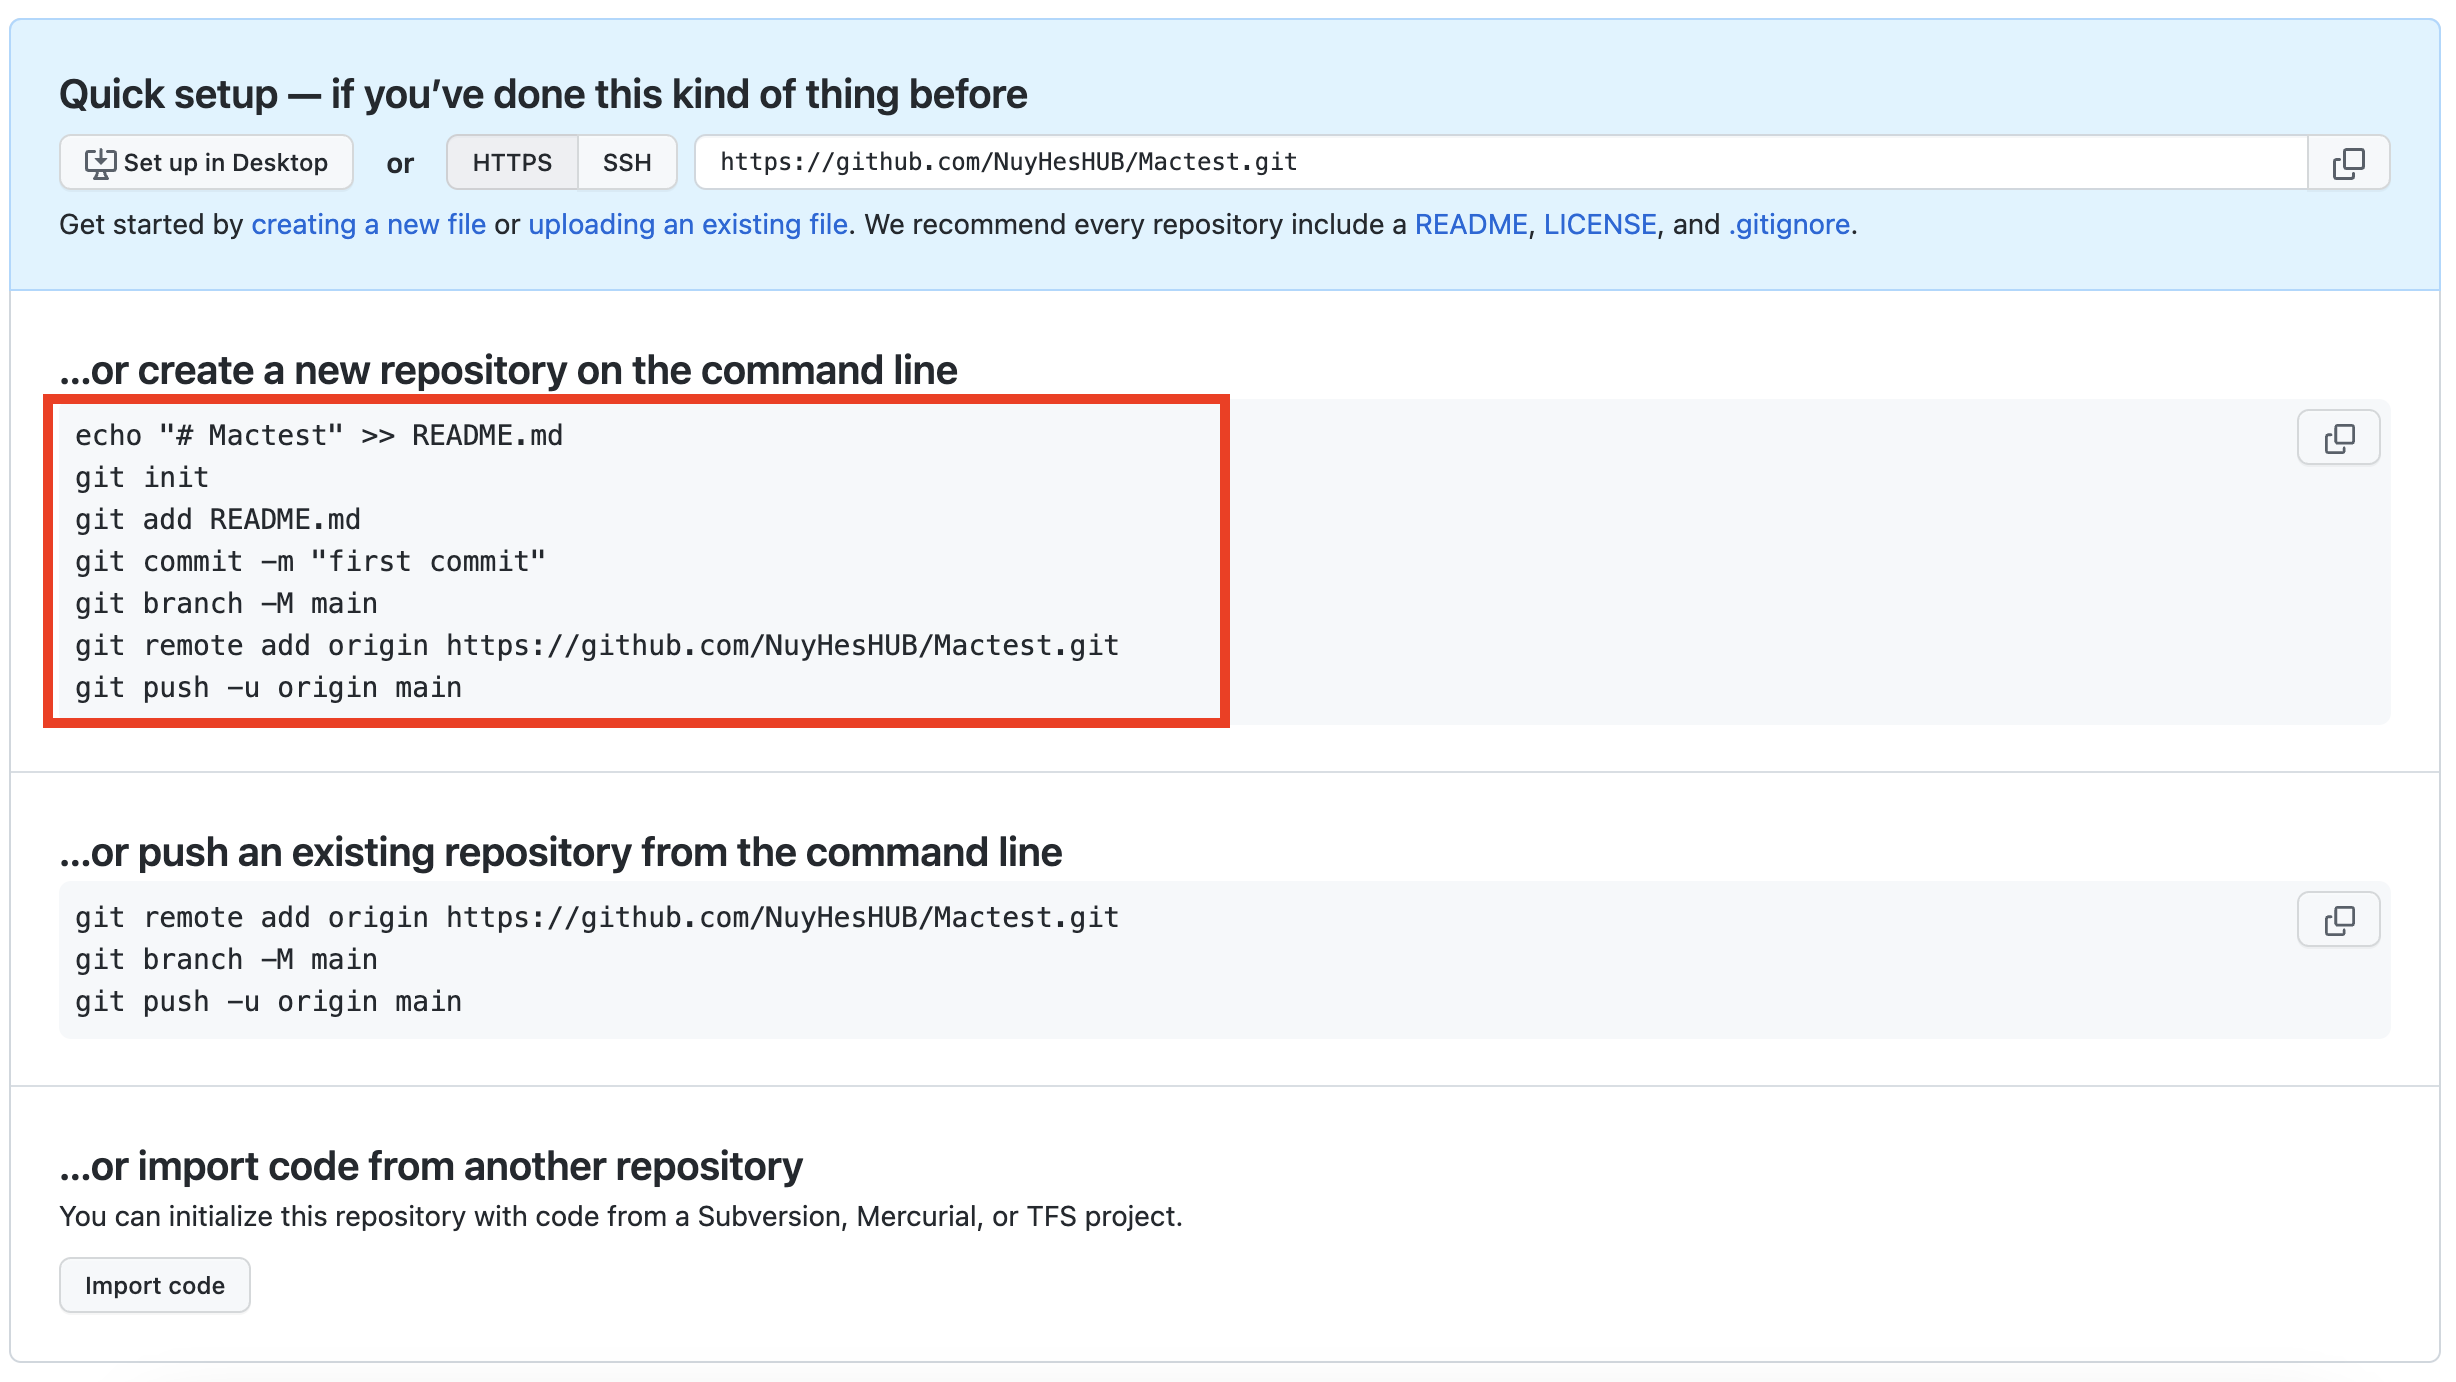
- Git Hub에서 새로운 저장소를 생성하면 나오는 창이다. 이부분을 Git에서 입력해주면 서버와 연결이 된다.

모든파일은 git add . 를 쓰고나서 push 한다.
- git push -u origin main 까지 완료하고 나면 Git Hub 저장소에 업로드 된다.