열심히 README 작성..
README 링크
NFS 서버 구현
Network File System
클라이언트 컴퓨터의 사용자가 네트워크 상의 파일을 직접 연결된 스토리지에 접근하는 방식과 비슷한 방식으로 접근하도록 도움
- NFS 패키지 설치
[root@nfs ~]# yum -y install nfs-utils
[root@nfs ~]# rpm -qa nfs-utils
nfs-utils-1.3.0-0.68.el7.2.x86_64- 공유할 디렉토리 추가 및 권한 설정
[root@nfs ~]# vi /etc/exports
/share 192.168.56.*(rw,sync)
# share 디렉토리에 해당 IP 접근가능, 읽기 쓰기 권한
# sync -> NFS가 쓰기 작업할 때마다 디스크 동기화
[root@nfs ~]# mkdir /share
[root@nfs ~]# chmod 707 /share
[root@nfs ~]# cp /boot/vm* /share
[root@nfs ~]# ls /share/
vmlinuz-0-rescue-bb9afee5d305ab46b7f34ffc7d08f145 vmlinuz-3.10.0-862.el7.x86_64- nfs 시스템 재시작
[root@nfs ~]# systemctl restart nfs-server
[root@nfs ~]# systemctl enable nfs-server
Created symlink from /etc/systemd/system/multi-user.target.wants/nfs-server.service to /usr/lib/systemd/system/nfs-server.service.- 서비스 가동 확인
[root@nfs ~]# exportfs -v
/share 192.168.56.*(sync,wdelay,hide,no_subtree_check,sec=sys,rw,secure,root_squash,no_all_squash)- 웹서버에서 NFS 서버에서 공유된 디렉토리 확인
[root@server ~]# showmount -e 192.168.56.110
Export list for 192.168.56.110:
/share 192.168.56.*- 최종적으로 nfs서버에서 열린 port
[root@nfs ~]# firewall-cmd --list-all
public (active)
  target: default
  icmp-block-inversion: no
  interfaces: enp0s3 enp0s8
  sources:
  services: ssh dhcpv6-client nfs
  ports: 111/udp 20048/udp
  protocols:
  masquerade: no
  forward-ports:
  source-ports:
  icmp-blocks:
  rich rules:
[root@nfs ~]# cat /etc/services | grep 111/udp
sunrpc 111/udp portmapper rpcbind # RPC 4.0 portmapper UDP
[root@nfs ~]# cat /etc/services | grep 20048/udp
mountd 20048/udp # NFS mount protocol- NFS 공유 디렉토리와 마운트할 디렉토리 생성
[root@server ~]# mkdir /webShare- 생성한 디렉토리와 마운트
[root@server ~]# mount -t nfs NFS서버 IP:/share /webShare- 위의 마운트는 일시적으로, 영구 마운트를 하기 위해선 /etc/fstab파일에 설정
[root@server ~]# vi /etc/fstab
...
NFS서버 IP:/share /webShare nfs defaults 0 0- 마운트 확인
[root@server ~]# df -T
Filesystem            Type     1K-blocks    Used Available Use% Mounted on
...
192.168.56.110:/share nfs4 58690816 5528320 53162496 10% /webShare- 서버에서 파일 생성
[root@nfs ~]# touch /share/nfstest
[root@nfs ~]# ls /share/
nfstest vmlinuz-0-rescue-bb9afee5d305ab46b7f34ffc7d08f145 vmlinuz-3.10.0-862.el7.x86_64- 웹서버에서 마운트 디렉토리에 공유가 되었는가 확인
[root@server ~]# ls /webShare
nfstest vmlinuz-0-rescue-bb9afee5d305ab46b7f34ffc7d08f145 vmlinuz-3.10.0-862.el7.x86_64- nfs 구축 완료
IP 대신 도메인 쓰기
- zone 파일 수정
[root@dns named]# vi word.project.com.zone
nfs A 192.168.56.110- named 시스템 재시작
[root@dns named]# systemctl restart named- /etc/fstab 수정
[root@server ~]# df -T
Filesystem            Type     1K-blocks    Used Available Use% Mounted on
...
nfs.word.project.com:/share nfs4 58690816 5528320 53162496 10% /webShare- mount 재설정
[root@server ~]# mount -a- 마운트 확인
[root@server ~]# df -T
Filesystem                  Type     1K-blocks    Used Available Use% Mounted on
/dev/sda2                   xfs       58690564 5159712  53530852   9% /
devtmpfs                    devtmpfs   1007968       0   1007968   0% /dev
tmpfs                       tmpfs      1023848    9460   1014388   1% /run
tmpfs                       tmpfs      1023848       0   1023848   0% /sys/fs/cgroup
tmpfs                       tmpfs       204772      12    204760   1% /run/user/42
nfs.word.project.com:/share nfs4 58690816 5528576 53162240 10% /webShare- 웹서버에서 생성한 파일 공유 확인
[root@server ~]# touch /webShare/webtest
[root@nfs ~]# ls /share/
...  webtest
NFS에 외부 접속 시 생긴 오류들
[root@server ~]# showmount -e 192.168.56.110
clnt_create: RPC: Port mapper failure - Unable to receive: errno 113 (No route to host)
[root@nfs ~]# cat /etc/services | grep 2049
nfs 2049/tcp nfsd shilp # Network File System
nfs 2049/udp nfsd shilp # Network File System
nfs 2049/sctp nfsd shilp # Network File System
[root@nfs ~]# cat /etc/services | grep 111/tcp
sunrpc 111/tcp portmapper rpcbind # RPC 4.0 portmapper TCP위의 두 port열지 않아서 발생한 오류
둘 다 열었는데 안돼 ...
참고자료
[root@nfs ~]# firewall-cmd --permanent --add-port=111/udp
success
[root@nfs ~]# firewall-cmd --reload
success
udp로 포트를 열어준다 2049는 제거
[root@server ~]# showmount -e 192.168.56.110
rpc mount export: RPC: Unable to receive; errno = No route to host
111/udp 열고 나서 오류가 바뀌었음
참고자료
해당 오류는 아래 포트 추가로 해결
[root@nfs ~]# firewall-cmd --permanent --add-port=20048/udp
success
왜 TCP에선 실패하고 UDP로 하니까 성공했는가는 연구중
nfs는 tcp가 필요한데 왜 udp만 열어야 가능할까 생각했는데, udp만 열어도 되는게 아니라 nfs서비스 실행시 자체적으로 tcp연결이 되었고, udp를 추가적으로 열어줘서 가능했던것
로드 밸런싱 구축
DNS를 이용하여 도메인 정보를 조회하는 시점에서 다른 IP정보를 통해 트래픽을 분산하는 기법
- zone 파일에 second 서버 ip 추가
[root@dns named]# vi word.project.com.zone
server A 192.168.56.110- dns 서비스 재시작
[root@dns named]# systemctl restart named- nslookup으로 확인
[root@server ~]# nslookup
> server.word.project.com
Server:         10.0.2.10
Address:        10.0.2.10#53

Name:   server.word.project.com
Address: 192.168.56.106
Name:   server.word.project.com
Address: 192.168.56.110- server2 에 테스트용 페이지 생성
<html><body><h1>It server2</h1>
</body></html>- 웹서비스 재시작
[root@nfs ~]# systemctl restart httpd로드 밸선싱 테스트 시 생긴 오류
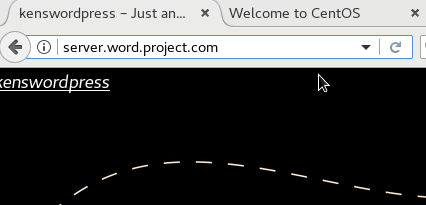
server1 화면으로만 접속이 됨

-> 세션이 계속 유지되기 때문에 생기는 일
zone 파일에서 TTL 값을 낮춰주면 해결
[root@dns named]# vi word.project.com.zone
...
server	1	IN  A       192.168.56.106
server	1	IN  A       192.168.56.110
...
server2로도 접속이 되는 화면

