
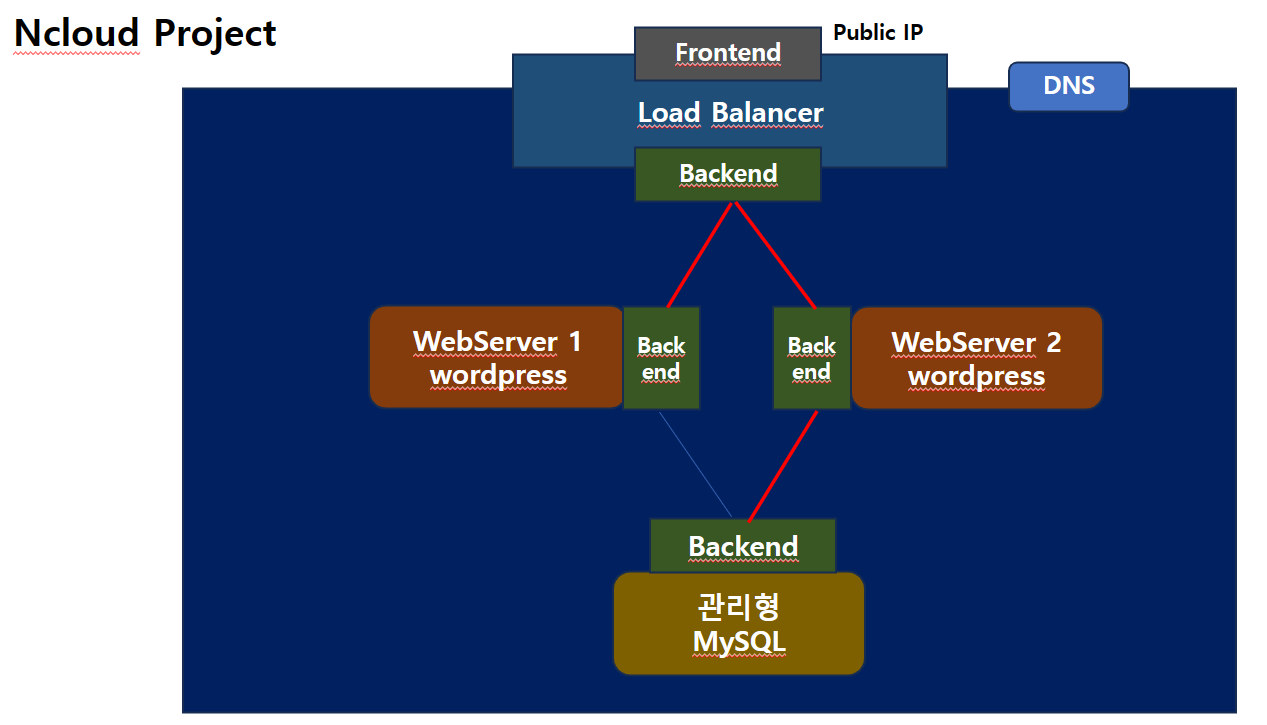
구조


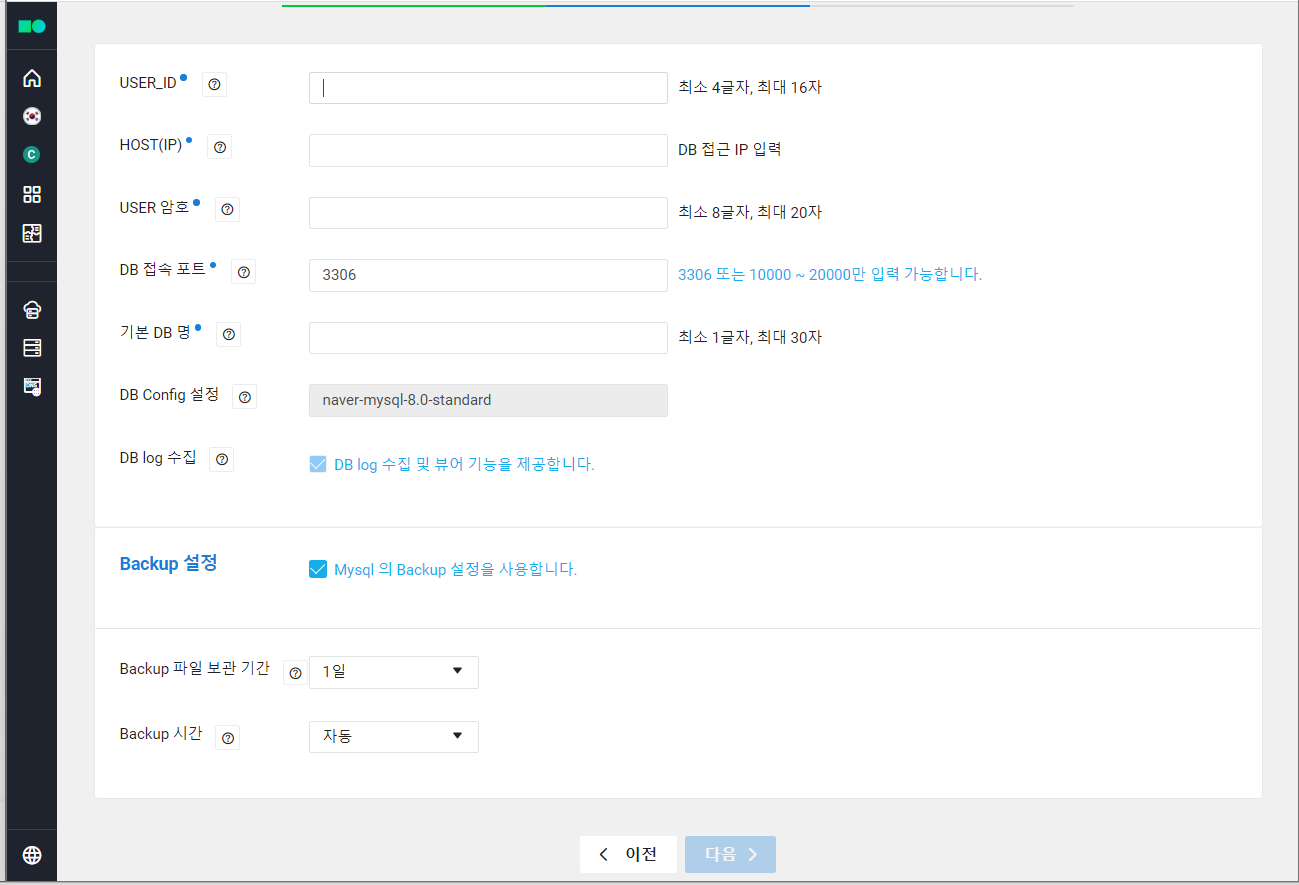
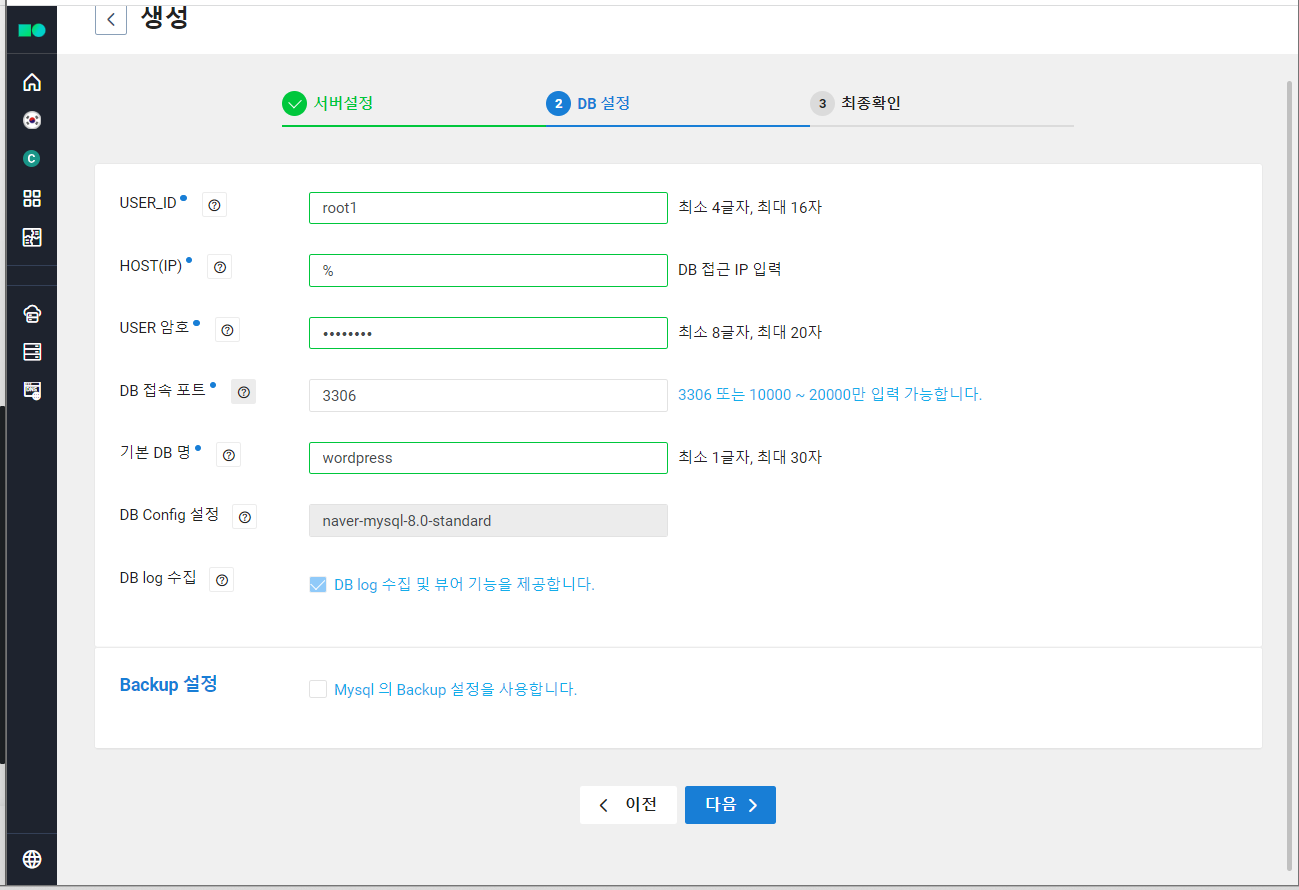
ID: root, admin은 불가능
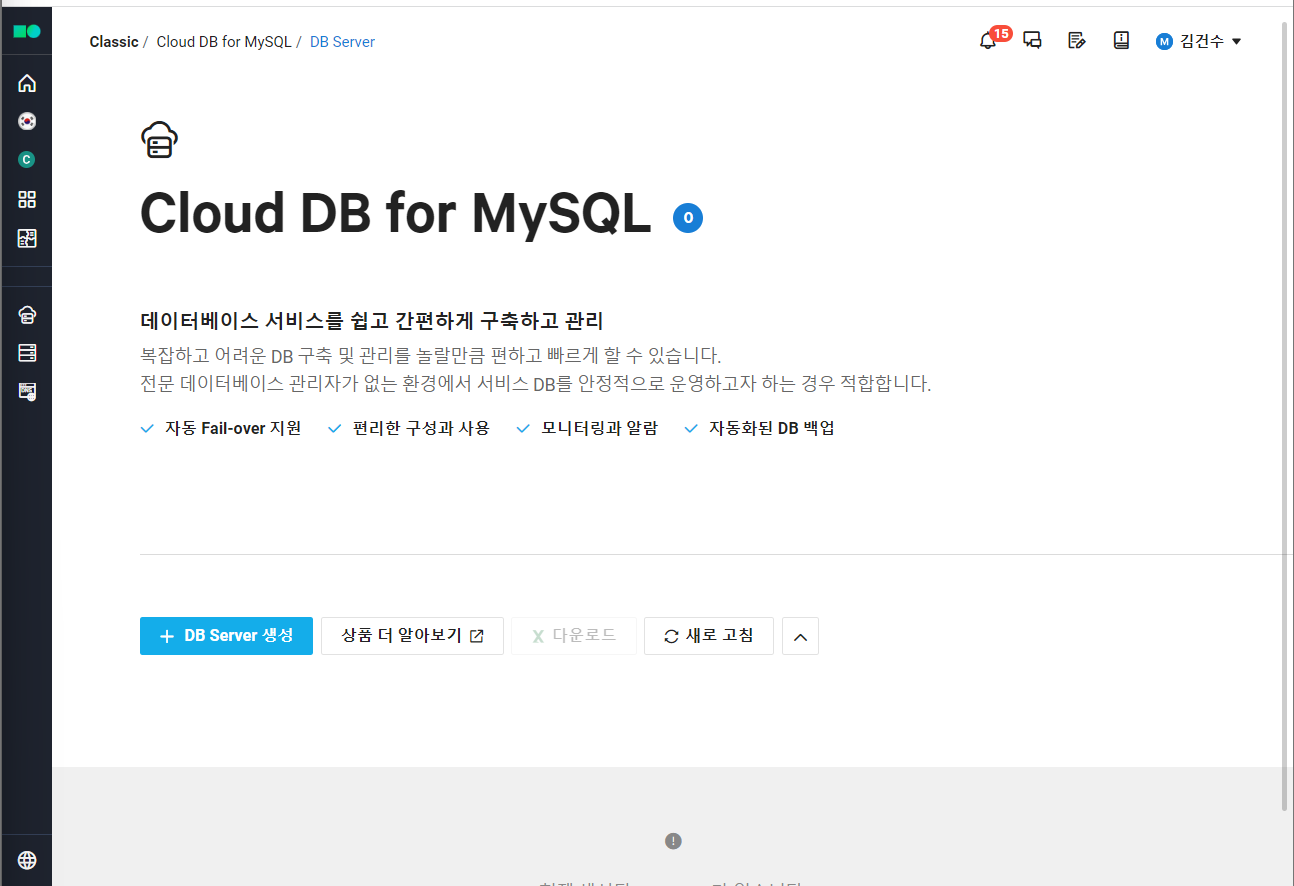
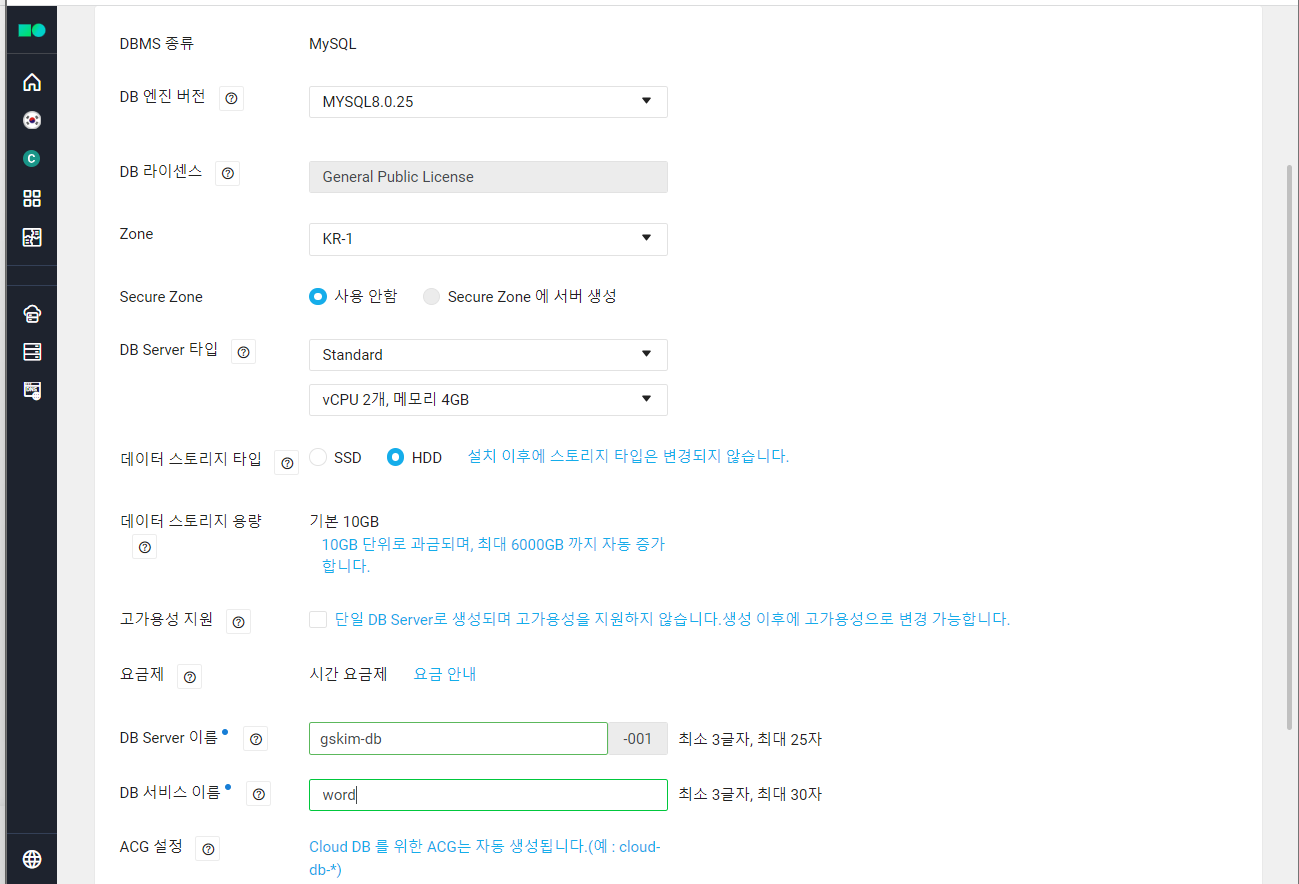
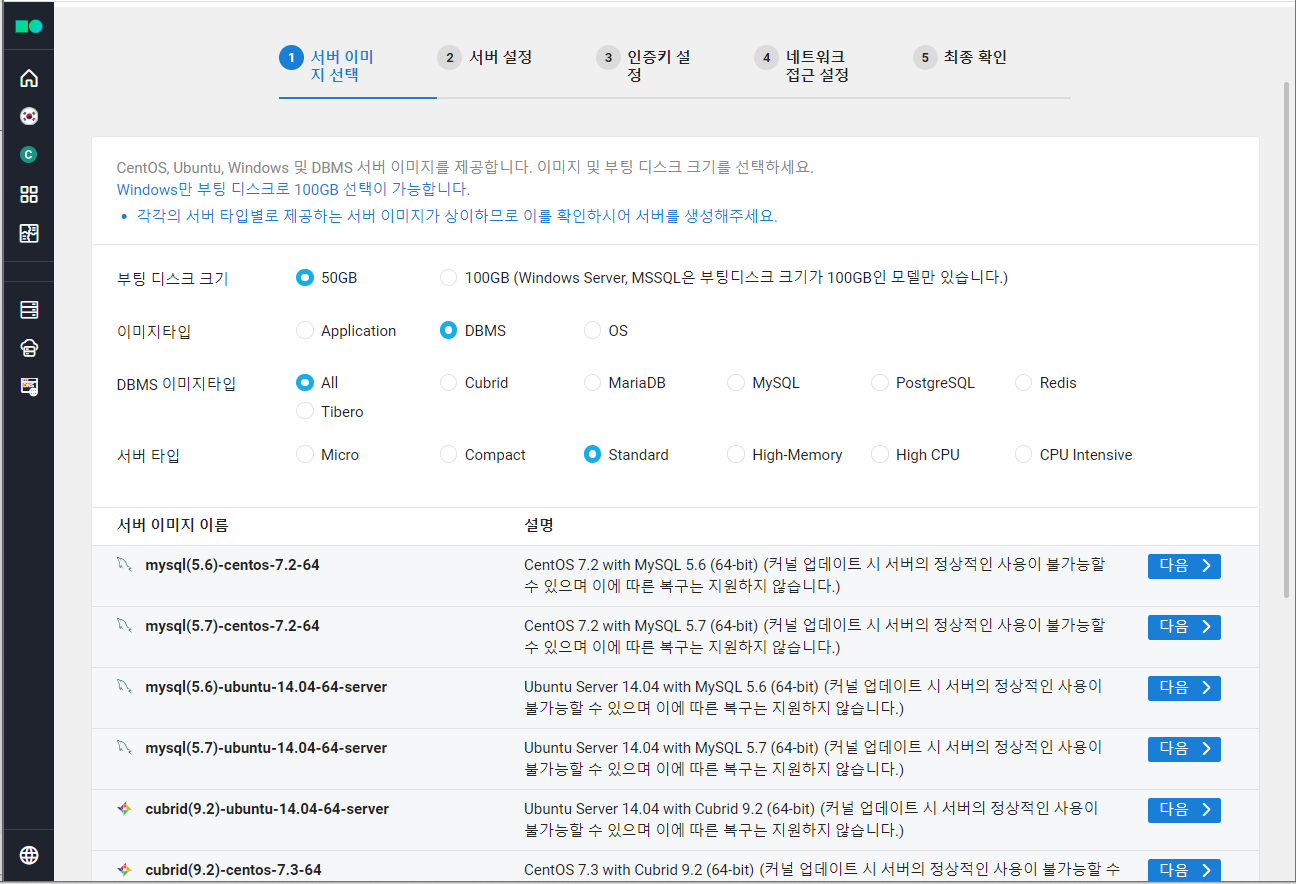
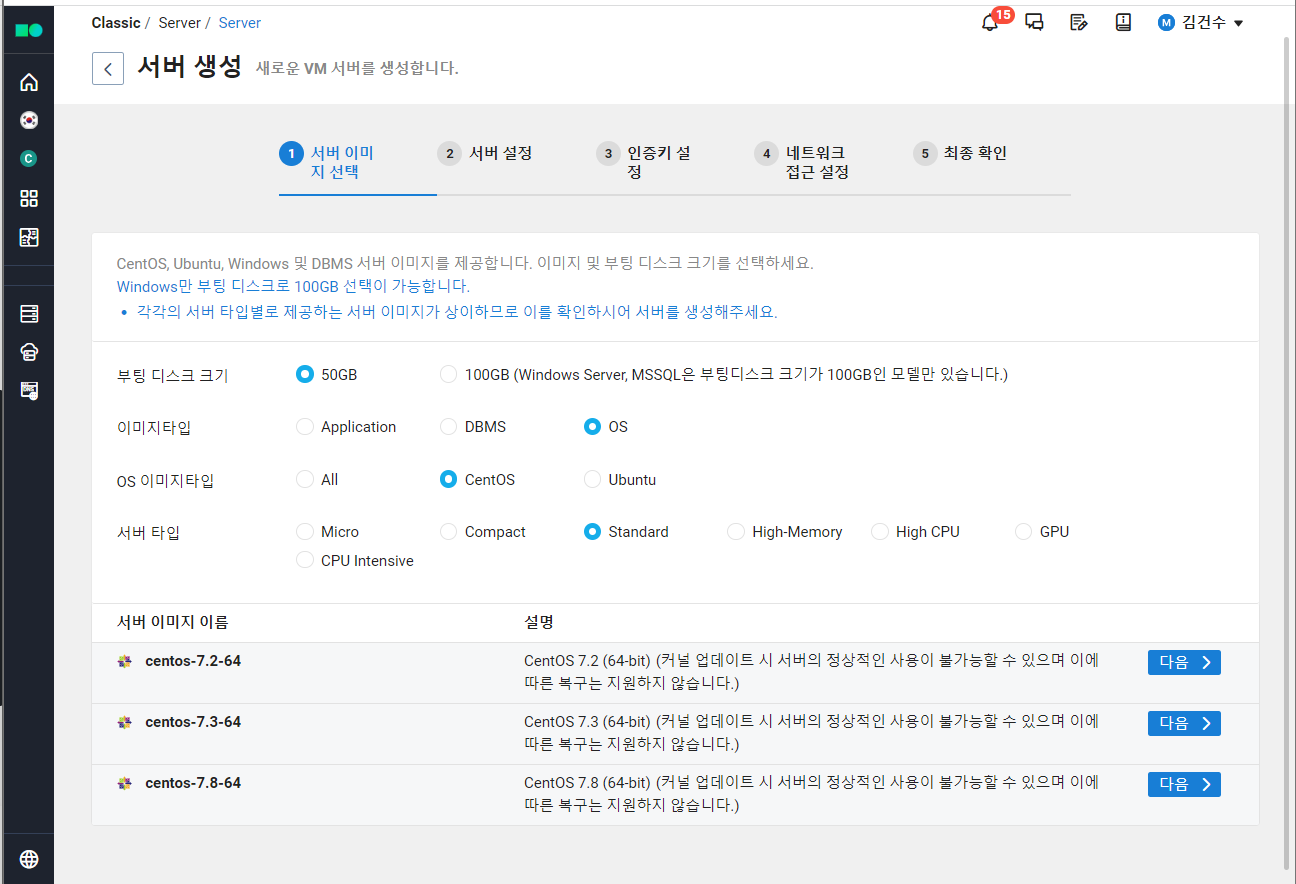
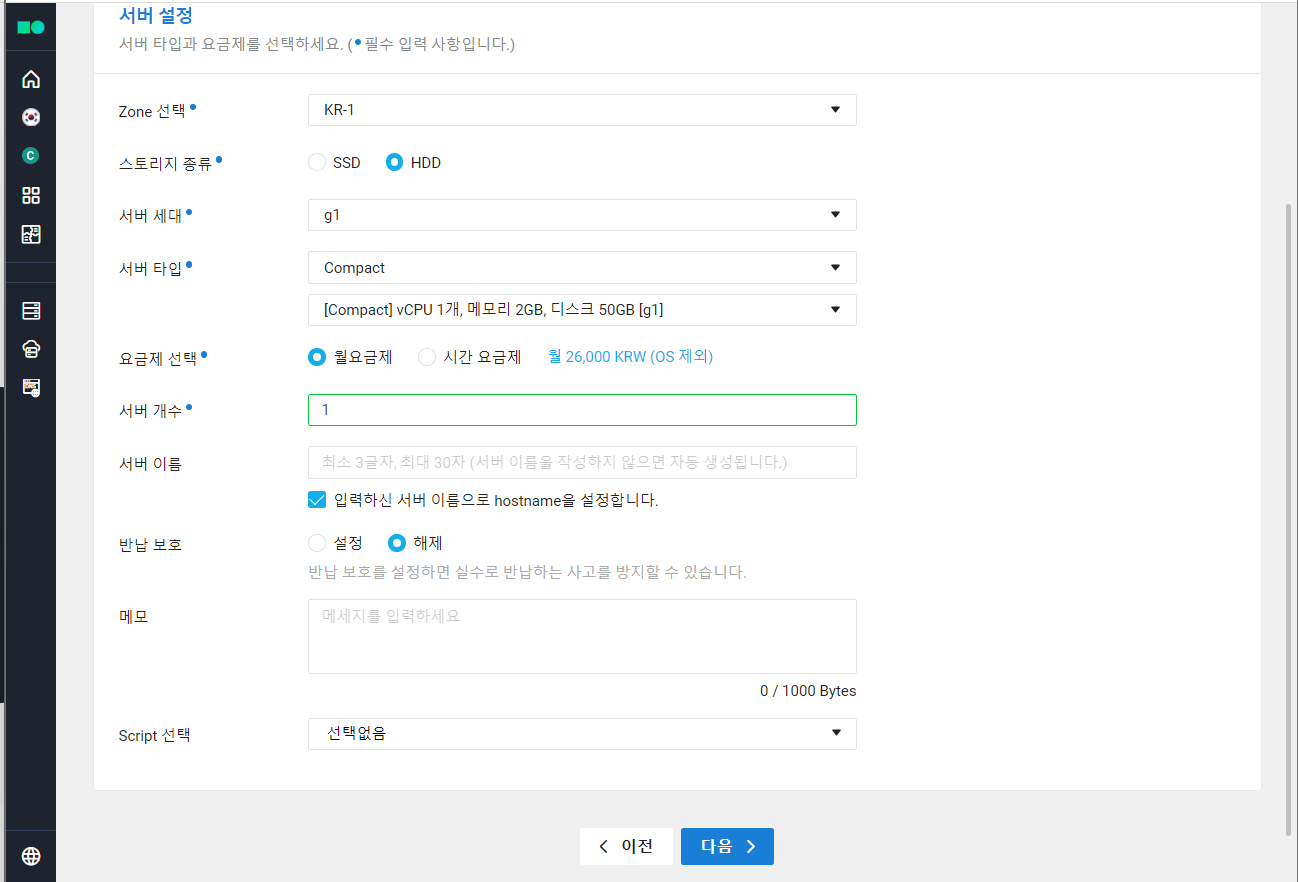
1. DB 서버 생성

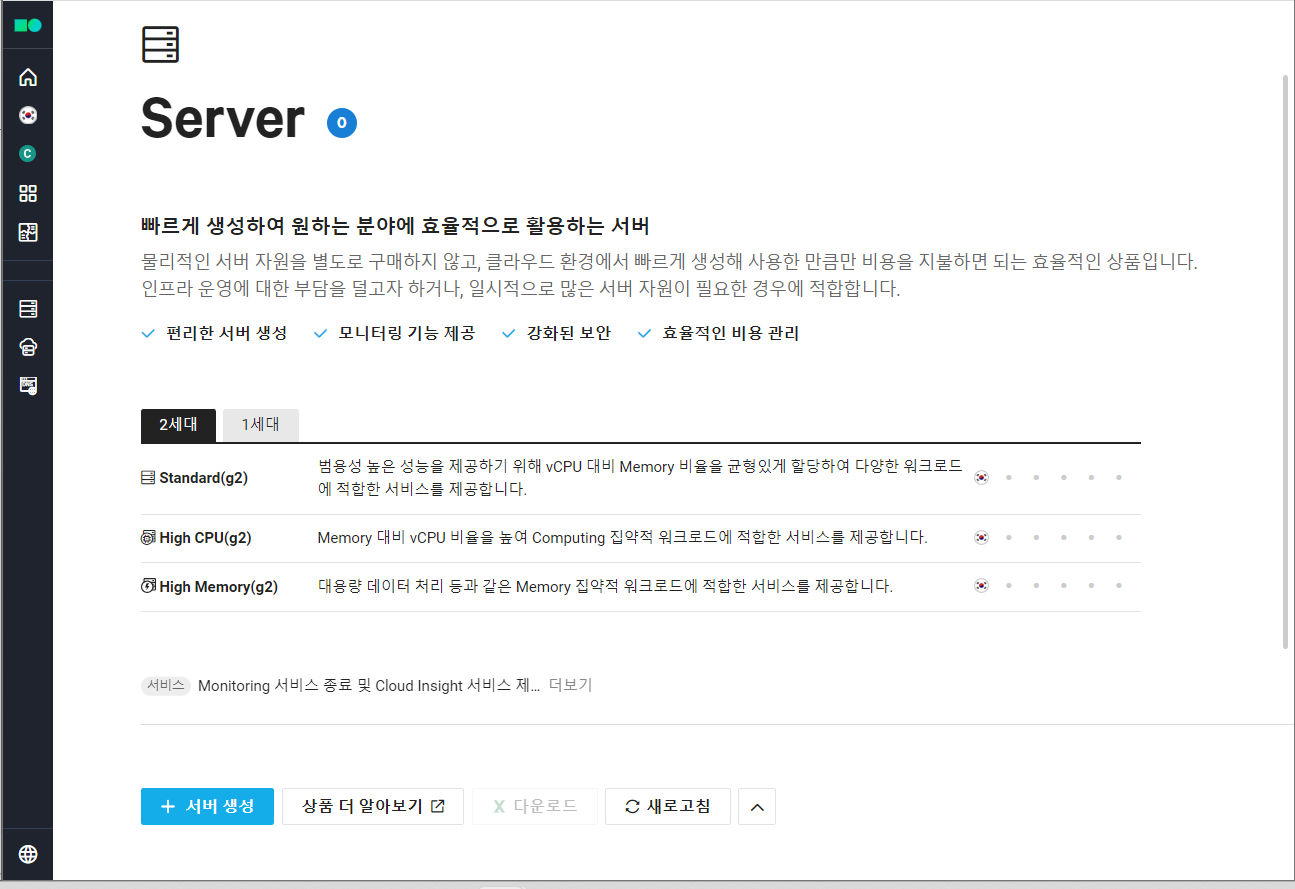
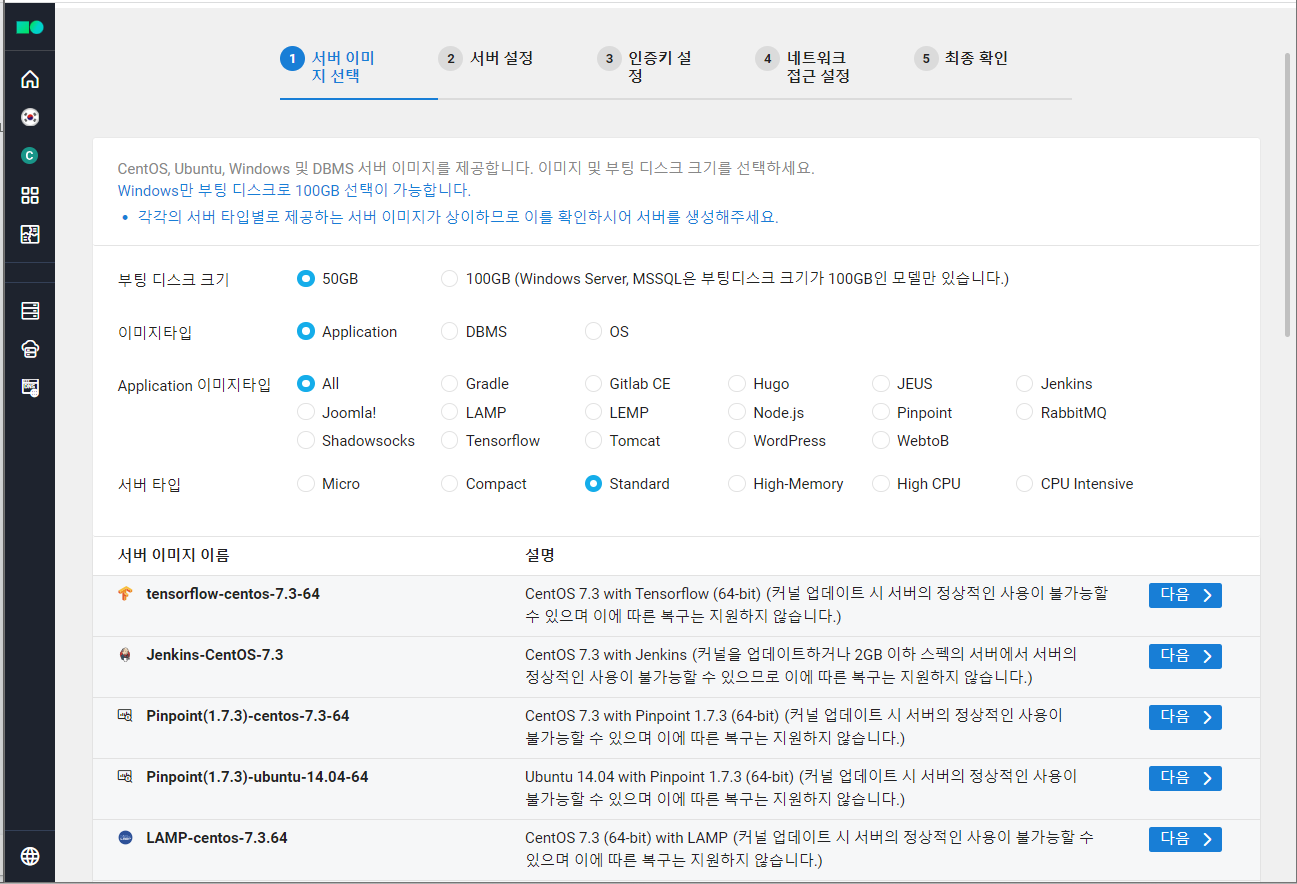
2. WEB 서버 생성
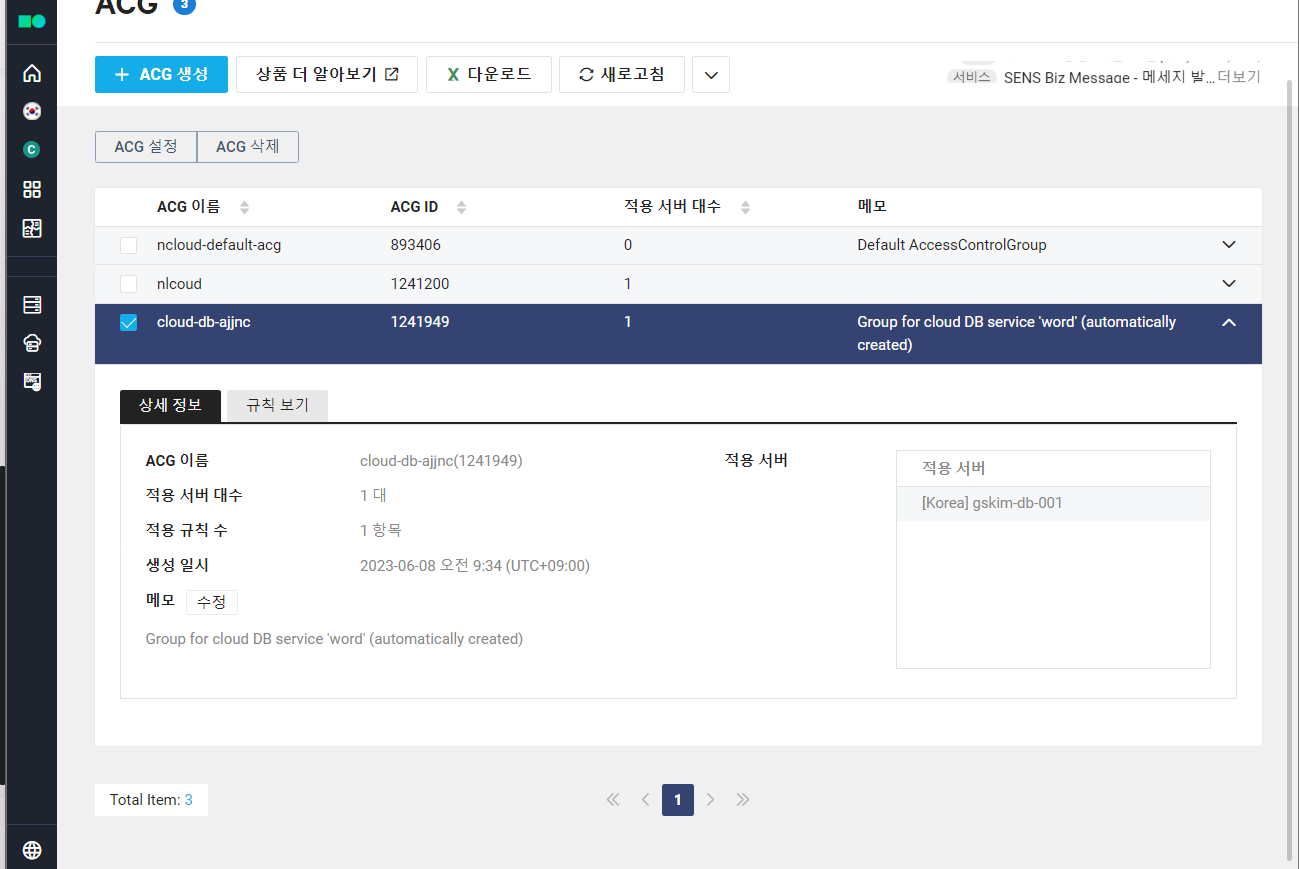
3. ACG 생성
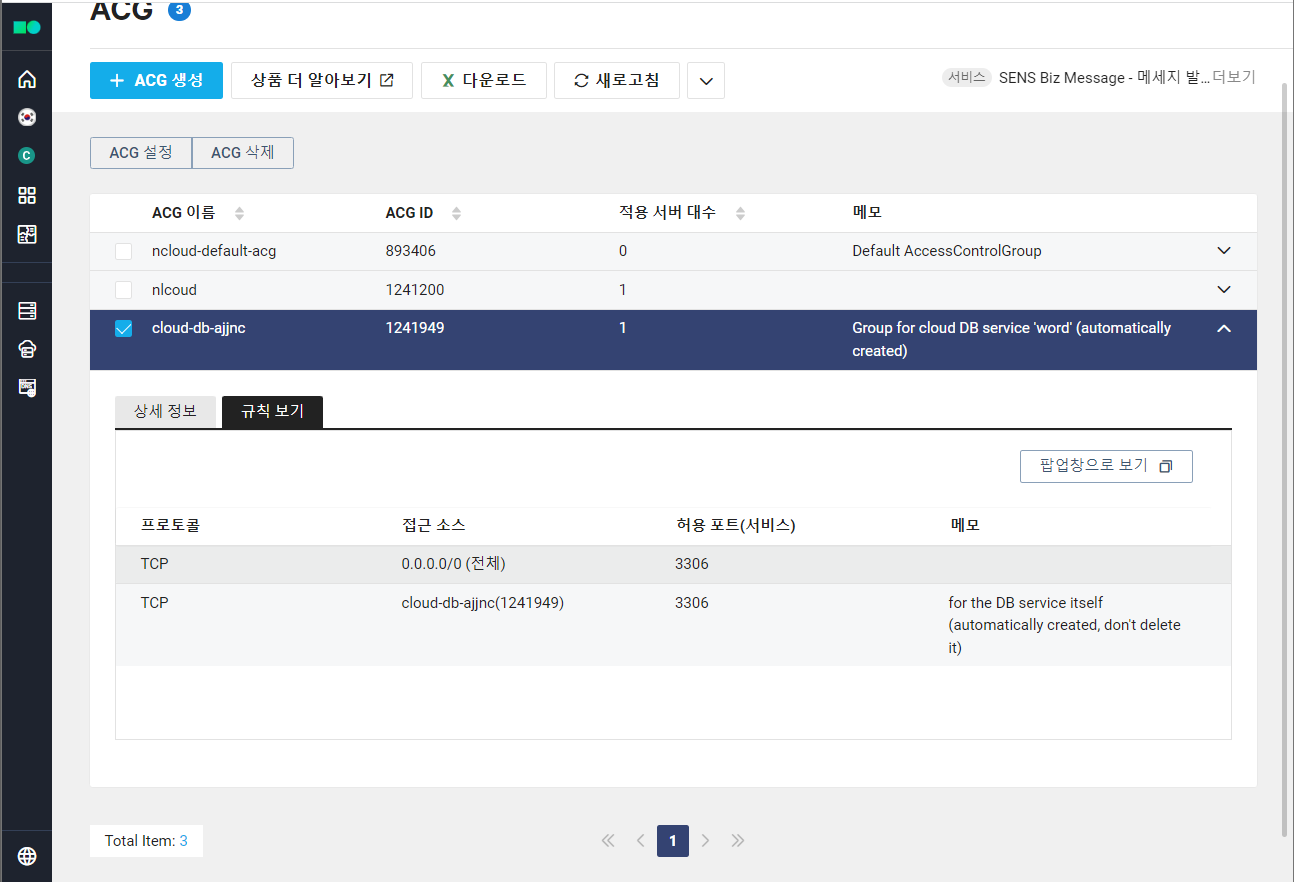
어떤 포트 번호를 열지, 서버의 방화벽 규칙 설정 가능.
- DB: 22, 80, 3306 /TCP port Open
- WEB: 22, 80 /TCP port Ope
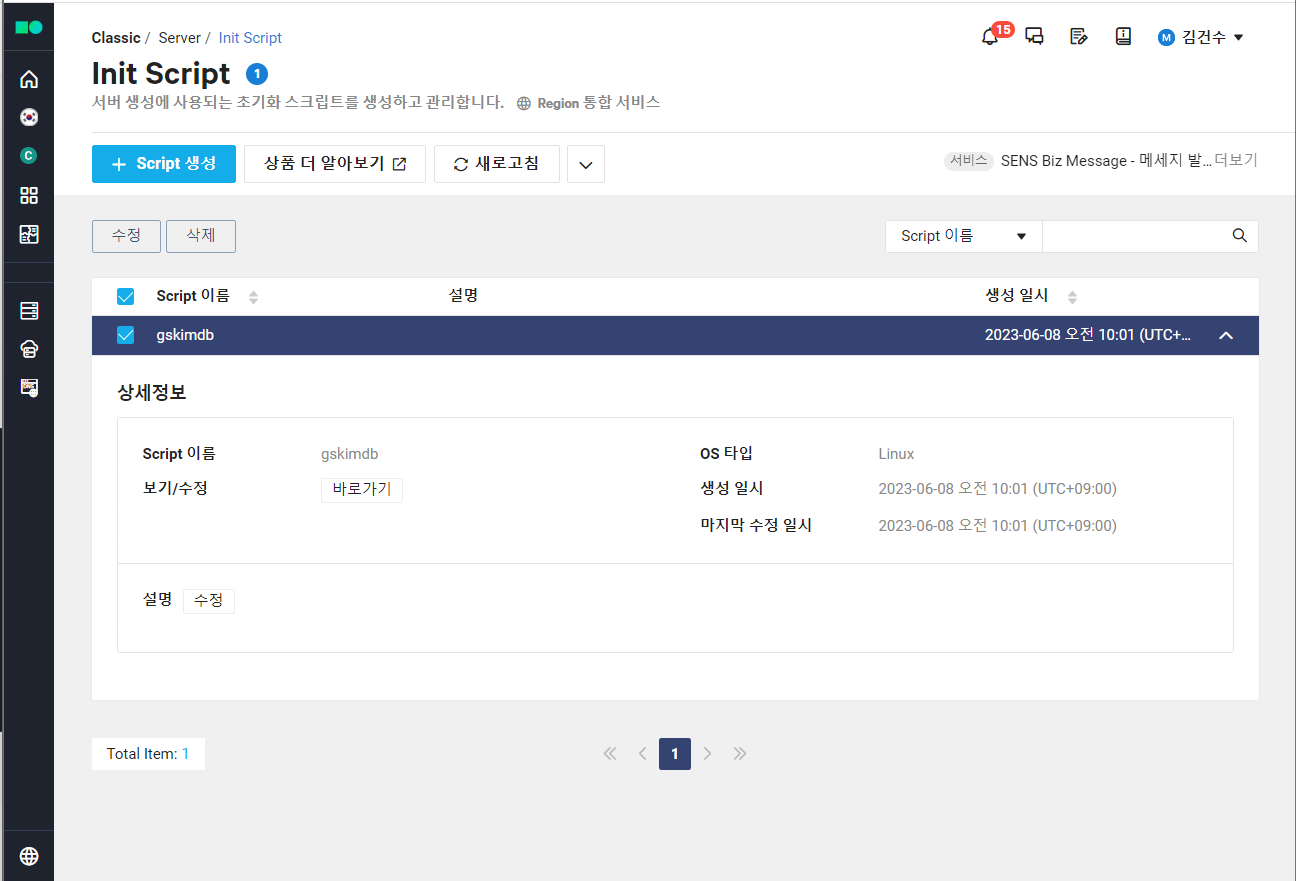
4. Init Script 생성
WEB 서버에 적용할 서버 초기화 스크립트 생성 및 관리
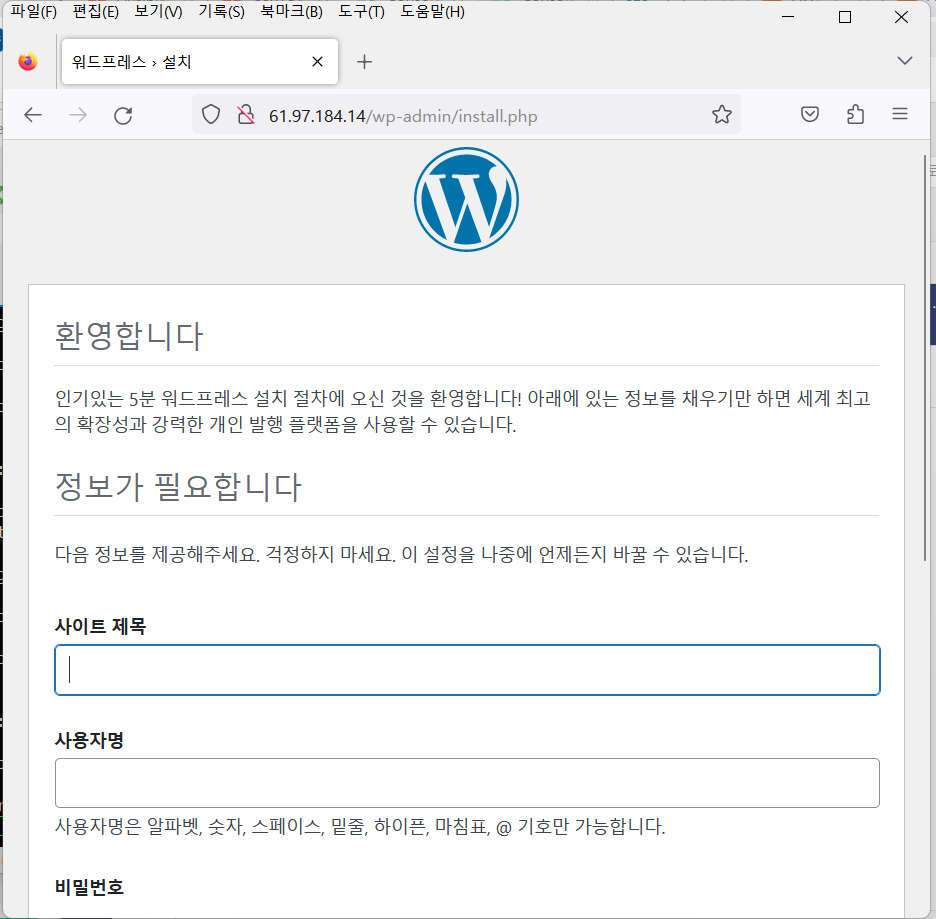
5. 연결 확인
각 서버 생성을 완료하고 배포하여 WEB 서버의 IP로 접속이 되는지 확인
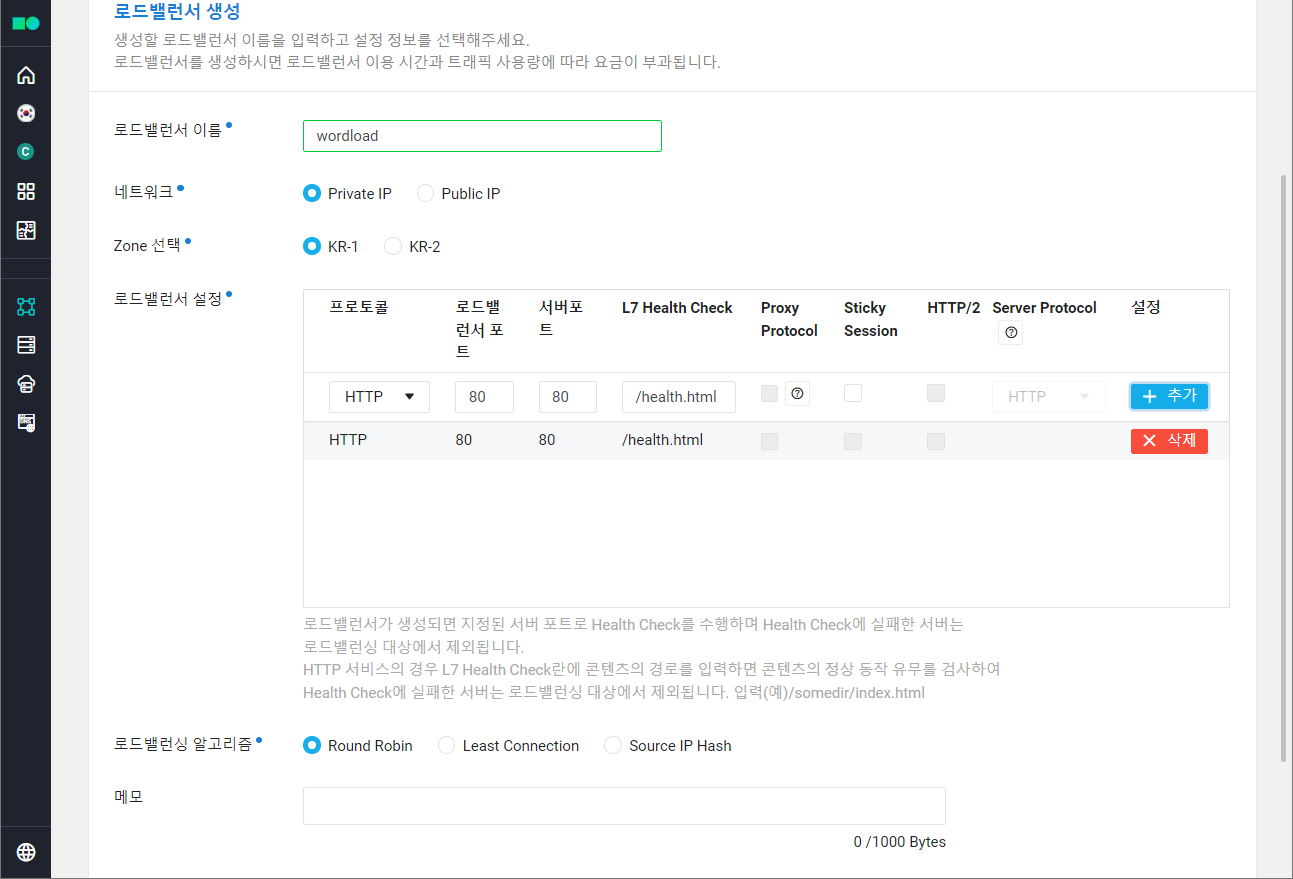
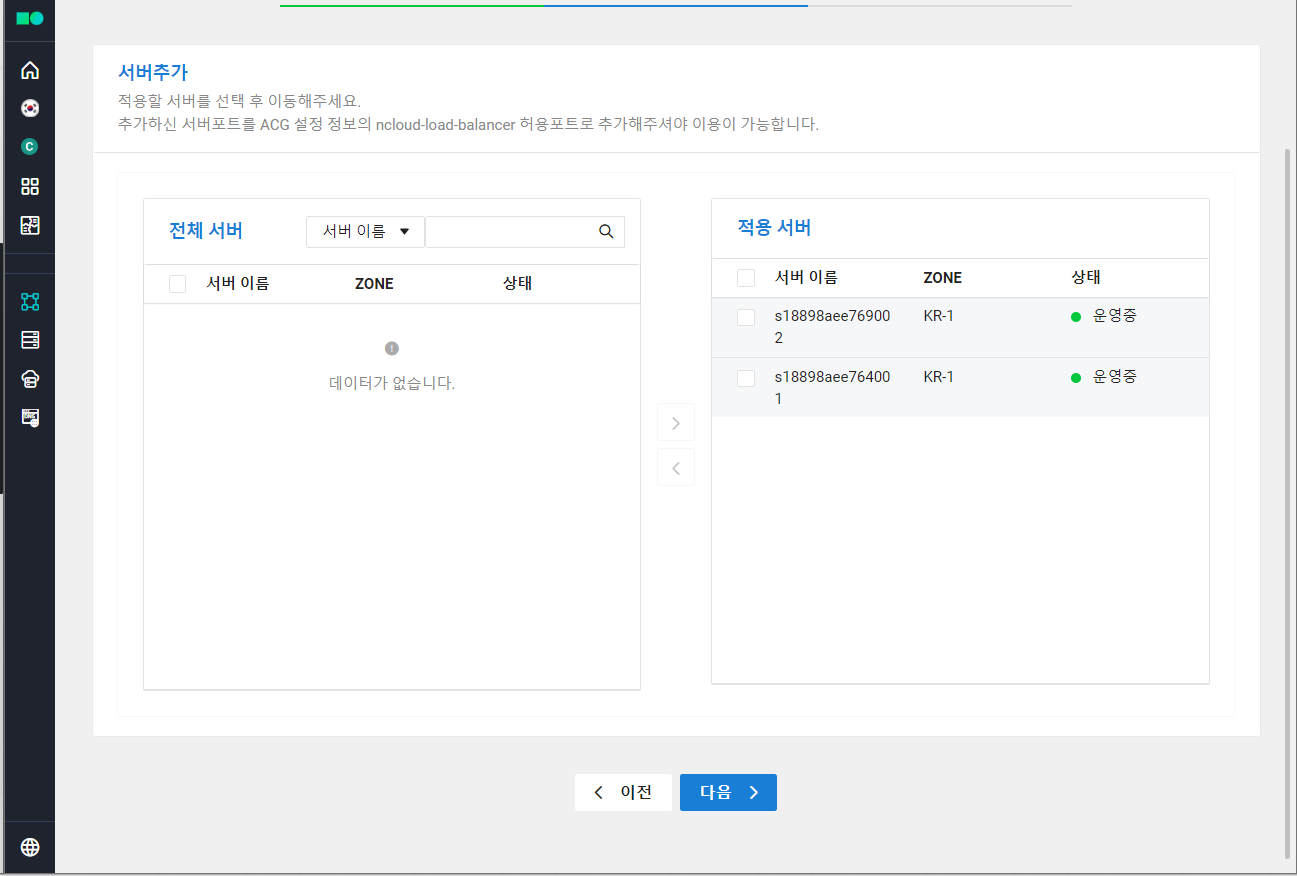
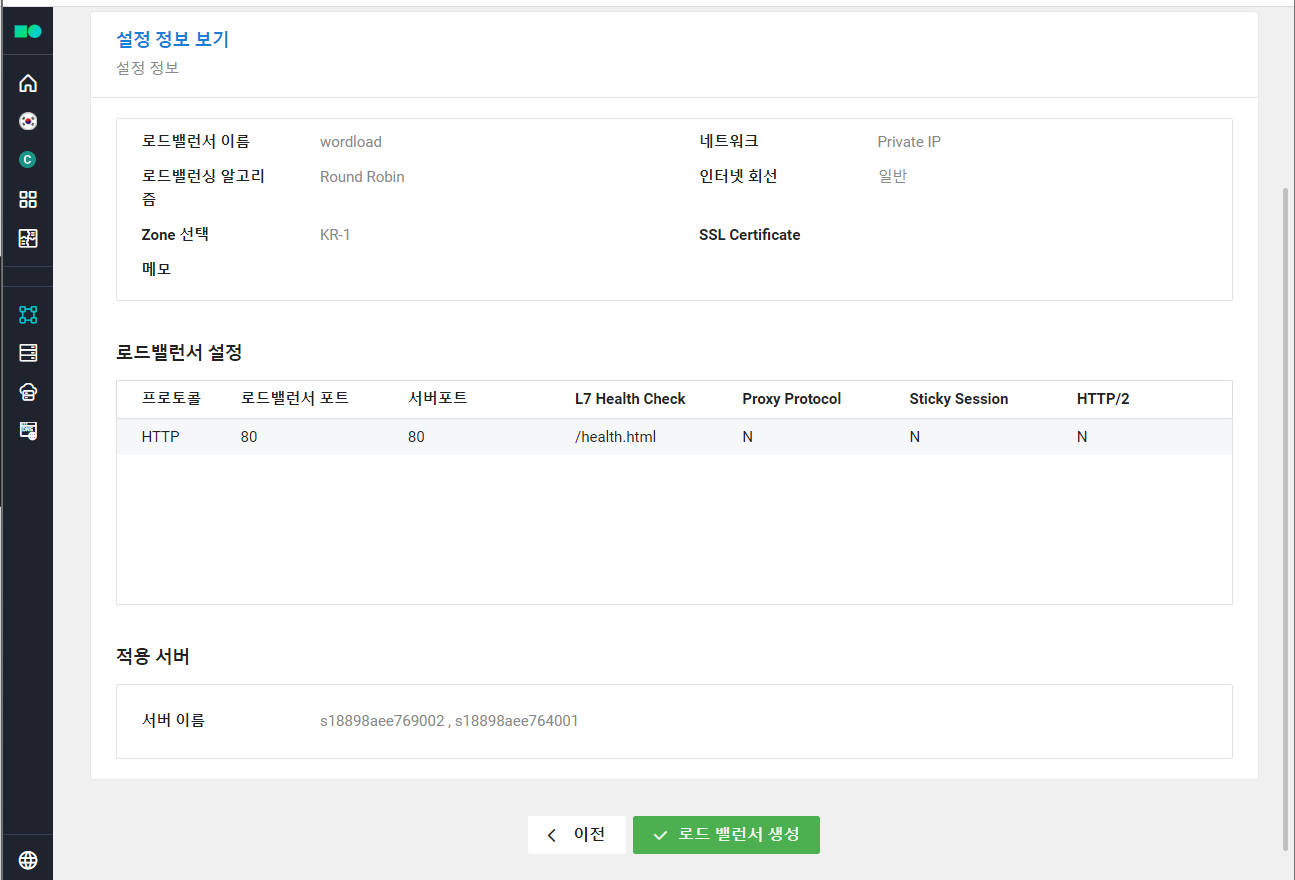
6. Load Balancer 생성
WEB 서버의 트래픽 관리를 위한 로드 밸런서 생성. 외부 통신이 필요하므로 네트워크는 Public IP로 설정.
- health check를 위한 설정 추가
- 로드 밸런싱 대상 서버들을 적용 서버로 추가
- 접속 정보의 주소값 복사
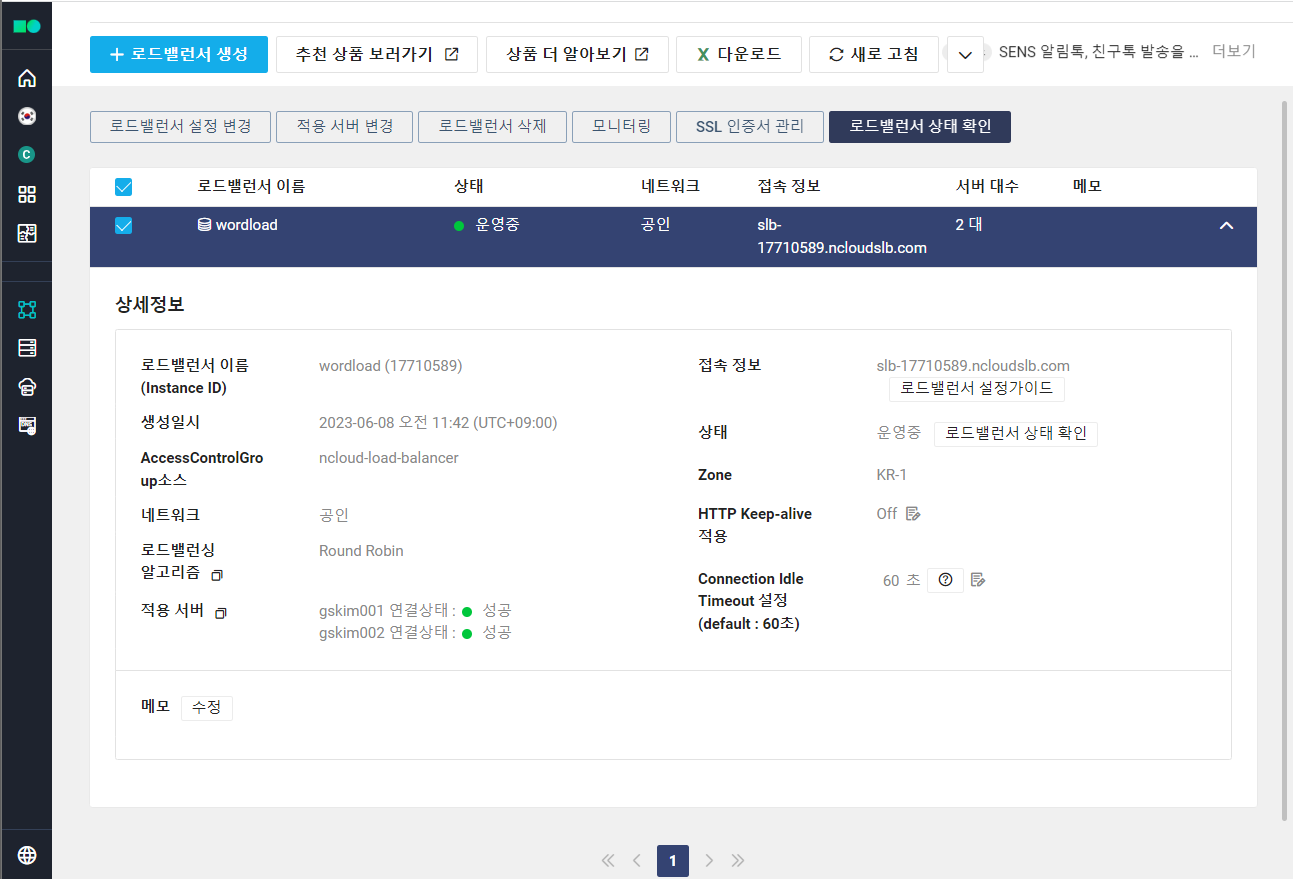
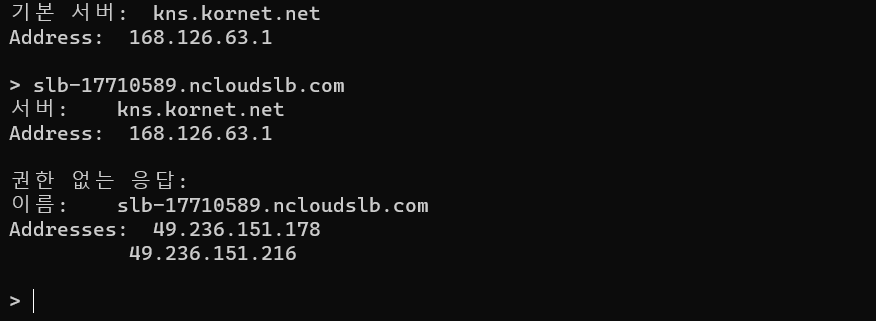
7. CMD 창에서 nslookup을 이용해 연결 확인
6.에서 복사해뒀던 로드 밸런서의 주소 값을 입력해 연결 및 IP 주소 확인
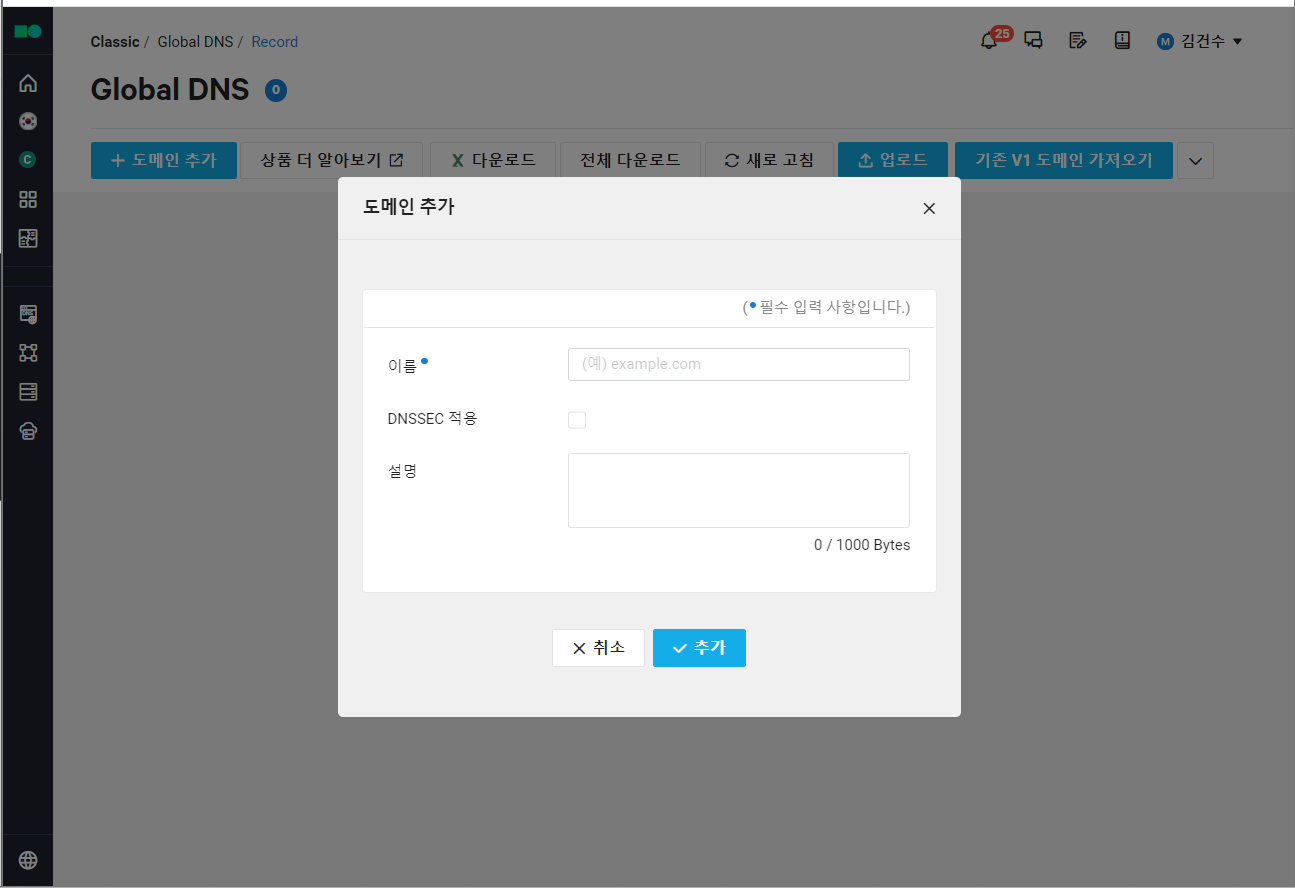
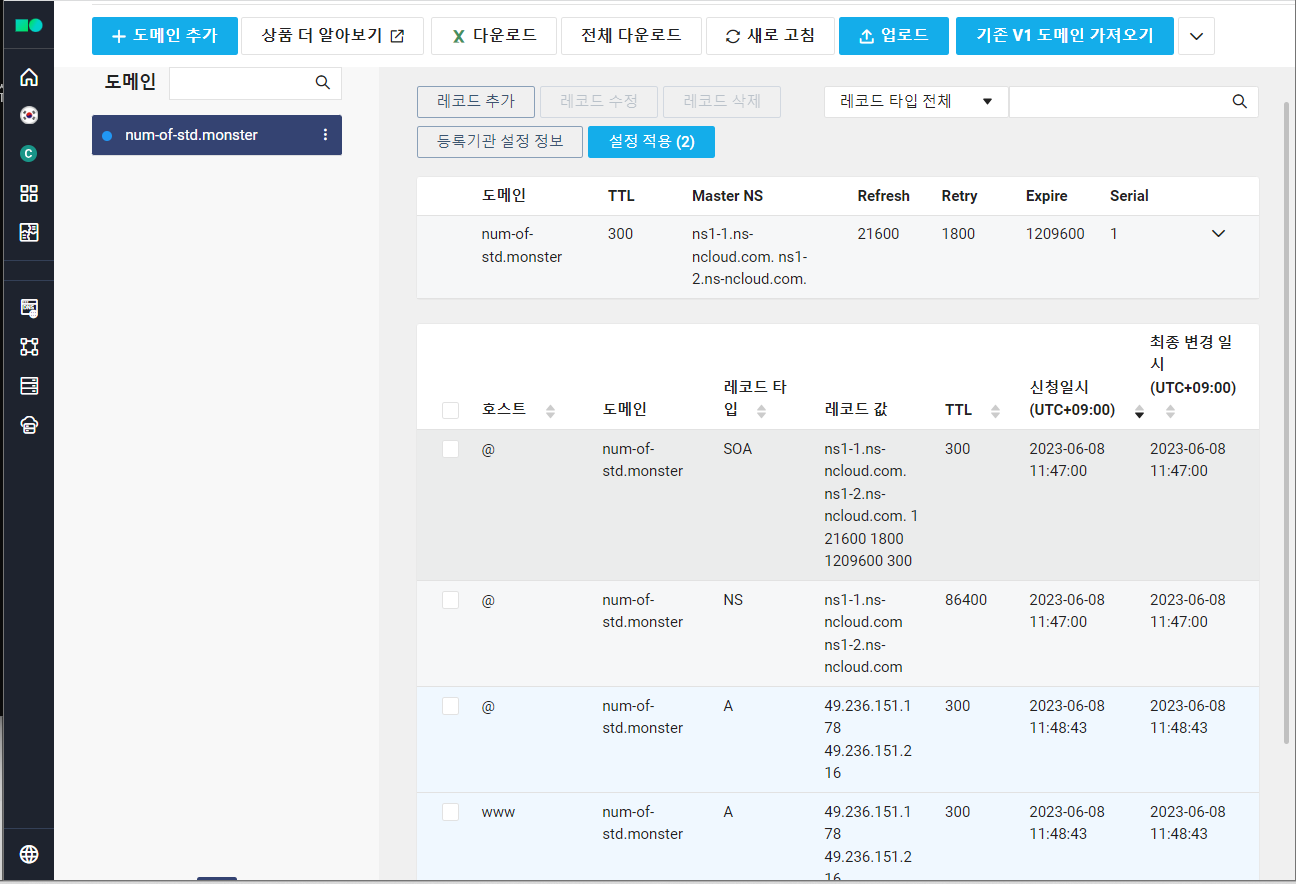
8. Global DNS 생성
- 자신이 사용하는 도메인 이름을 입력
- 7.에서 복사한 로드 밸런서의 IP Address 값을 입력해 대상이 로드 밸런서의 IP를 바라보도록 지정
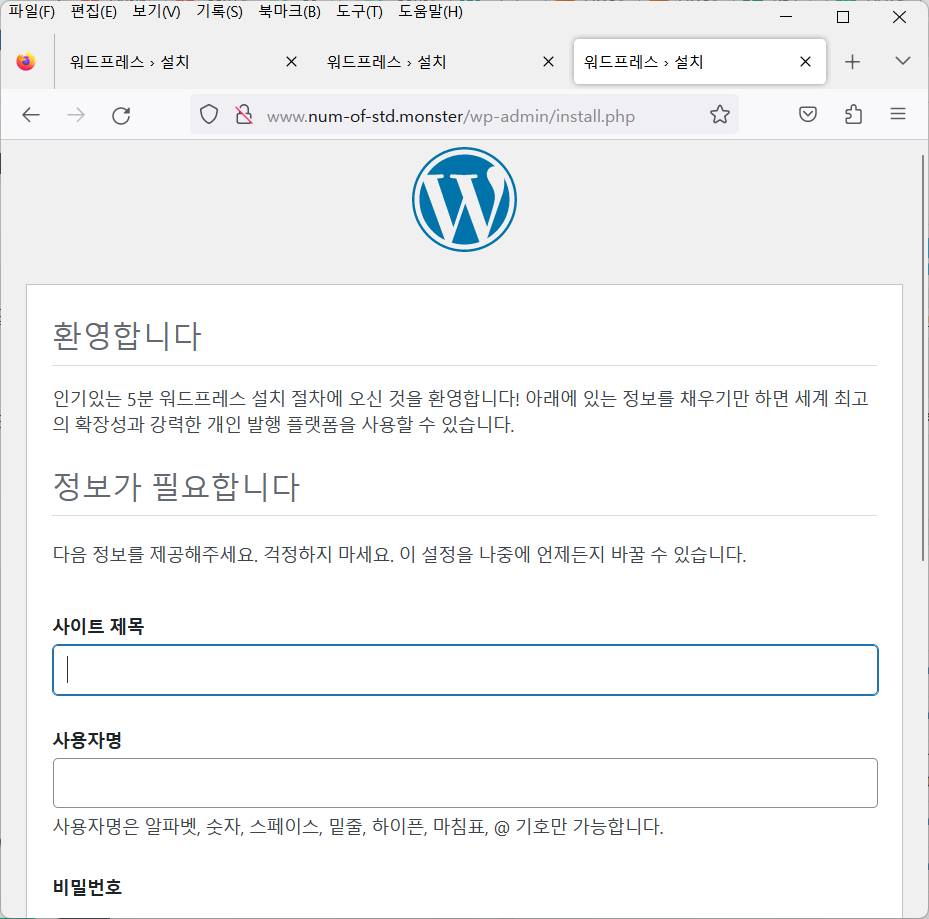
9. www로 접속해도 정상적으로 연결됨을 확인 가능
요약
- DB 서버 생성
- web 서버 생성
- 방화벽 설정 - 포트 열기
- init script 작성
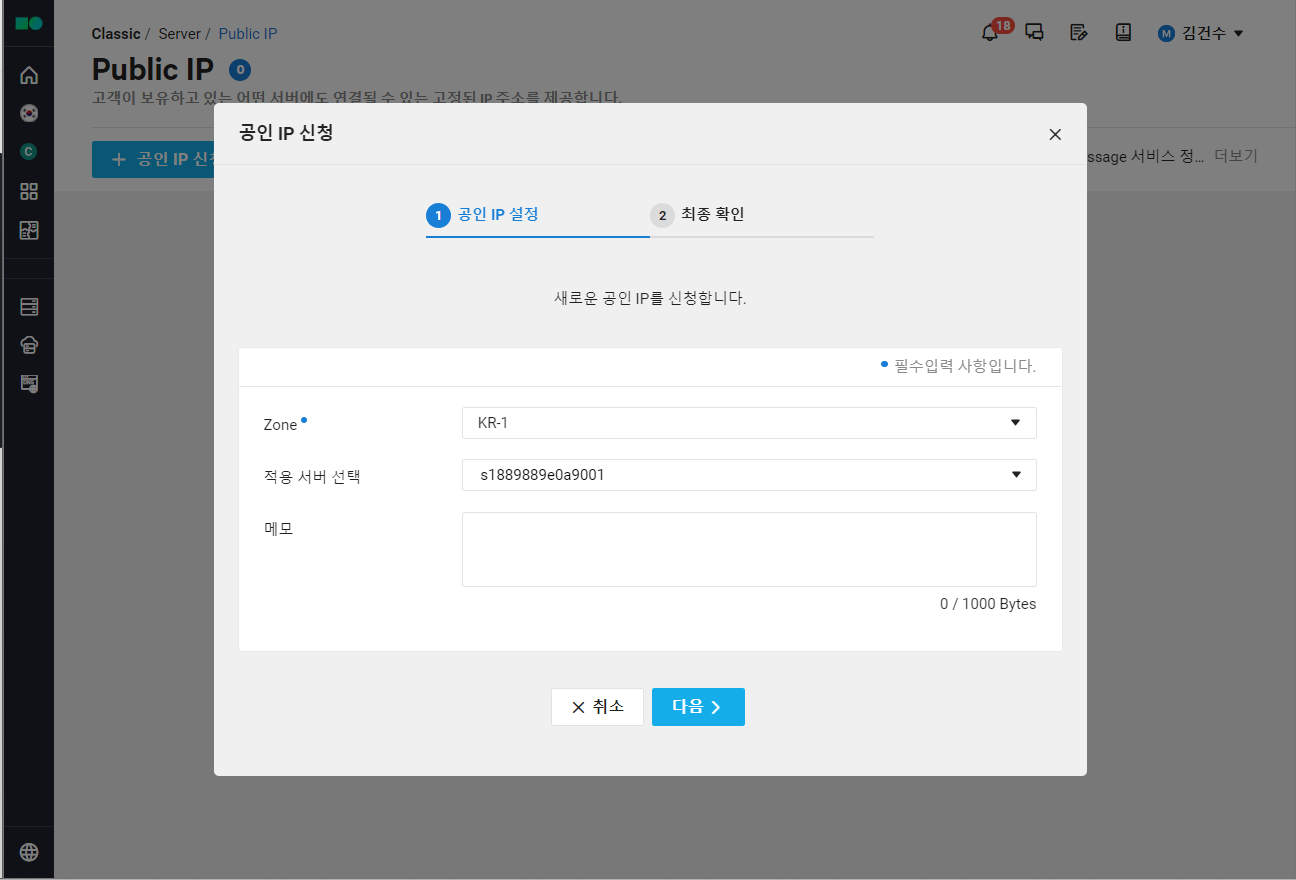
- Public IP 할당 - IP
- Init script에 html 생성 코드 추가 필요 - http로는 health check가 불가능하기 때문에 html파일이 필요함
cat > /var/www/html/health.html << EOF-> EOF가 입력되면 입력이 저장된 health.html을 생성 및 입력 종료
- load balancer 생성 - 생성 후 cmd창에서 nslookp을 통해 접속되는지 확인
- global DNS 생성 - DNS가 load balancer의 IP를 바라보도록 설정
실습 후 사용한 서비스 삭제는 필수.
WEB 서버 linux script 코드 내용
#! /bin/bash
yum install -y wget
yum install -y httpd
wget https://ko.wordpress.org/wordpress-5.8.6-ko_KR.tar.gz
tar xvfz wordpress-5.8.6-ko_KR.tar.gz
cp -a wordpress/* /var/www/html/
cp /var/www/html/wp-config-sample.php /var/www/html/wp-config.php
sed -i 's/DirectoryIndex index.html/DirectoryIndex index.php/g' /etc/httpd/conf/httpd.conf
yum install -y epel-release yum-utils
yum install -y http://rpms.remirepo.net/enterprise/remi-release-7.rpm
yum-config-manager --enable remi-php74
yum install -y php php-common php-opcache php-mcrypt php-cli php-gd php-curl php-mysqlnd
sed -i 's/database_name_here/wordpress/g' /var/www/html/wp-config.php
sed -i 's/username_here/root1/g' /var/www/html/wp-config.php
sed -i 's/password_here/It12345!/g' /var/www/html/wp-config.php
sed -i 's/localhost/db-gsd3a.cdb.ntruss.com/g' /var/www/html/wp-config.phpcat > /var/www/html/health.html << EOF
<html><body><h1>health test</h1></body></html> EOF (health.html 내용은 임의로 작성함)systemctl start httpd
