
Swagger란?
Simplify API development for users, teams, and enterprises with the Swagger open source and professional toolset. Find out how Swagger can help you design and document your APIs at scale.
출처 : https://swagger.io/스웨거는 Rest API를 설계하고, 개발하고, 테스트하는데 도움을 주는 Tool 입니다.
일반적으로 Swagger를 통해서 API 문서를 만들고, API 테스트도 진행을 하는 용도로 사용되며, 더불어 API 설계, 개발, 모니터링까지 다양한 기능을 제공한다.
Springboot 버전
- 권장 Springboot 버전 : 2.7.9
- 적용할 Swagger 버전 : springfox 3.0
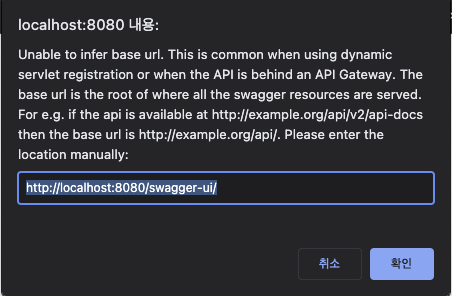
들어가기에 앞서... Springboot 3.0 대의 버전은 Swagger 적용 시 어려움이 많다. 특히 "Unable to infer base url." 아무리 잡아보려고 해도 잡히지가 않으니, Springboot 2.0대 버전을 권장한다.!!!!!!!! 나는 2.7.9 버전을 사용했다.
[해결하지 못한 에러..]
Springboot에 Swagger 적용하기
- 먼저 build.gradle에 아래 2개의 라이브러리를 적용한다.
// build.gradle 적용
implementation 'io.springfox:springfox-boot-starter:3.0.0'
implementation 'io.springfox:springfox-swagger-ui:3.0.0'- SwaggerConfig 파일 작성
- SpringBoot를 사용하는 경우 cofig 파일의 annotation을 @Configuration만 작성하면 된다.
@Configuration
public class SwaggerConfig {

    @Bean
    public Docket api() {
        return new Docket(DocumentationType.SWAGGER_2)
                .select()
                .apis(RequestHandlerSelectors.any())
                .paths(PathSelectors.any())
                .build()
                .apiInfo(apiInfo());
    }

    private ApiInfo apiInfo() {
        return new ApiInfoBuilder()
                .title("Swagger 문서 제목")
                .description("Swagger 문서 설명")
                .version("1.0")
                .build();
    }
}- 만약 기본 Spring을 사용한다면 @Configuration과 @EnableSwagger2를 사용해주어야 한다.
@Configuration
@EnableSwagger2
public class SwaggerConfig {
	//...code
}- application.yml 설정
- 아래 설정을 추가해준다.
    mvc:
        pathmatch:
            matching-strategy: ant_path_matcher
기본적으로 Gradle 라이브러리 추가와 설정만 추가해준다면 자연스럽게 Swagger가 적용된다.
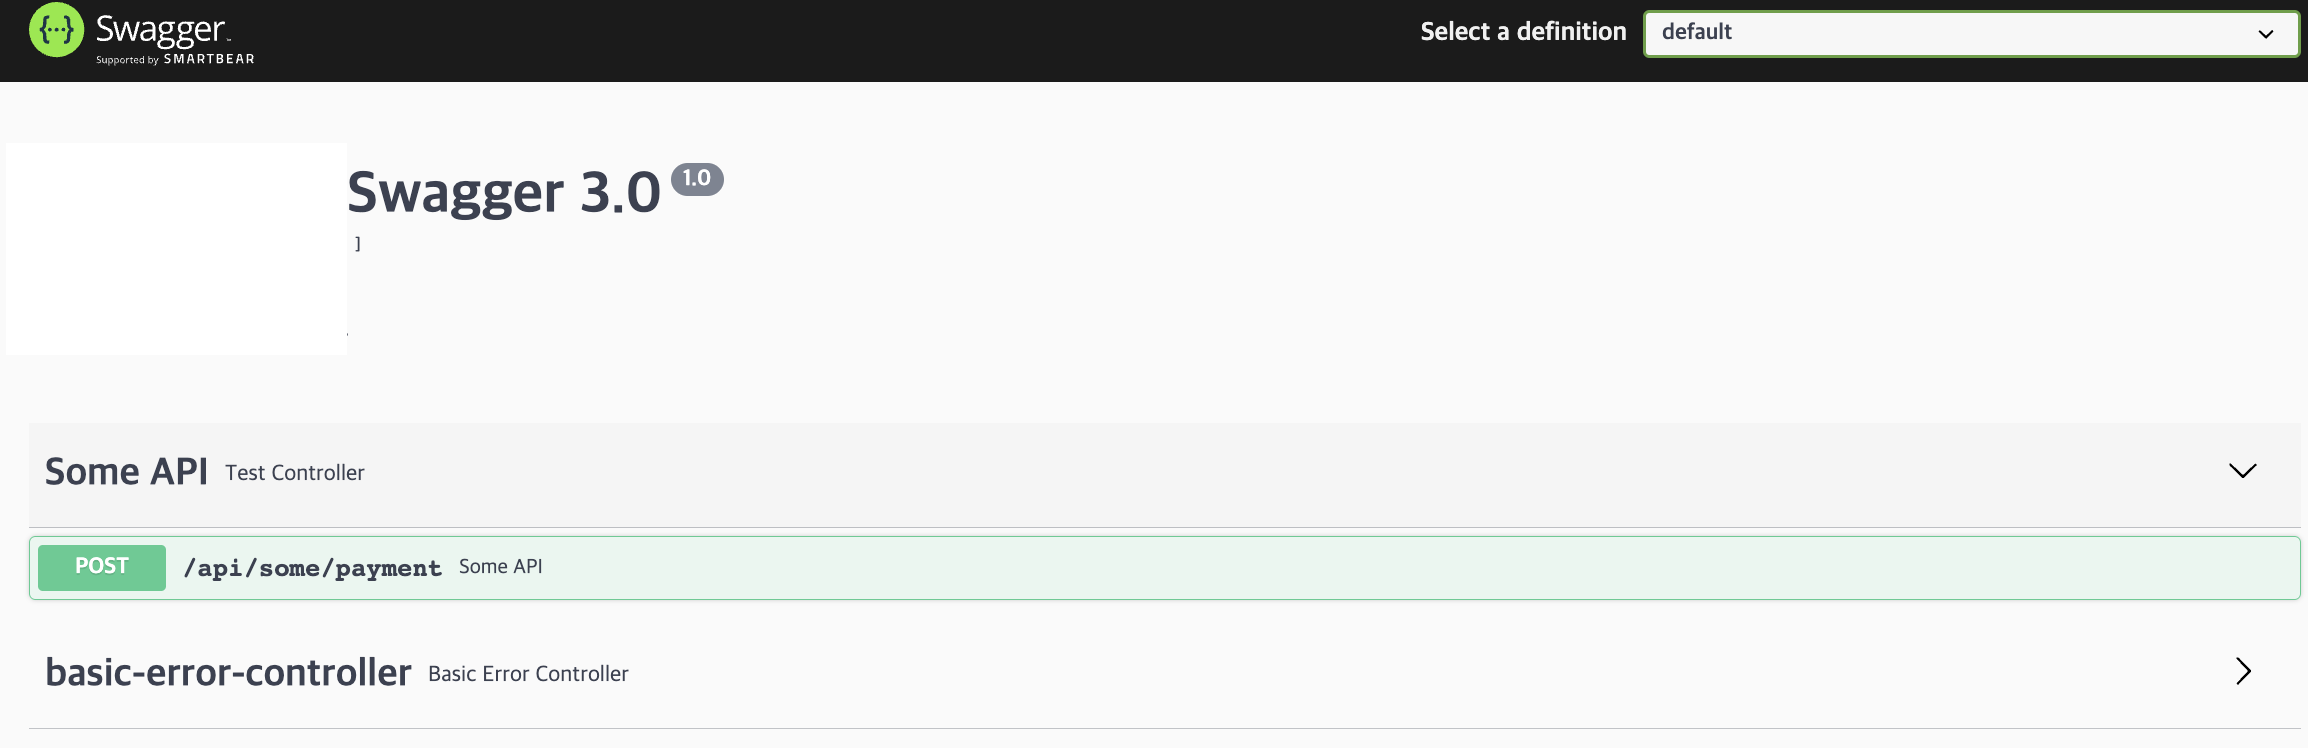
아래 Swagger 3.0의 접속 주소로 접속하면 Swagger가 뜨는 것을 볼 수 있다.
Swagger 3.0 접속 주소 : http://localhost:8080/swagger-ui/
Swagger 2.0 접속 주소 : http://localhost:8080/swagger-ui.html
만약 적용을 했는데도 에러가 나는 경우는 Spring Security 설정이나, Springboot 버전 문제일 확률이 높다.
적용이 잘 되었다면 아래와 같이 정상적으로 작동한다.
문서 정규화 하기
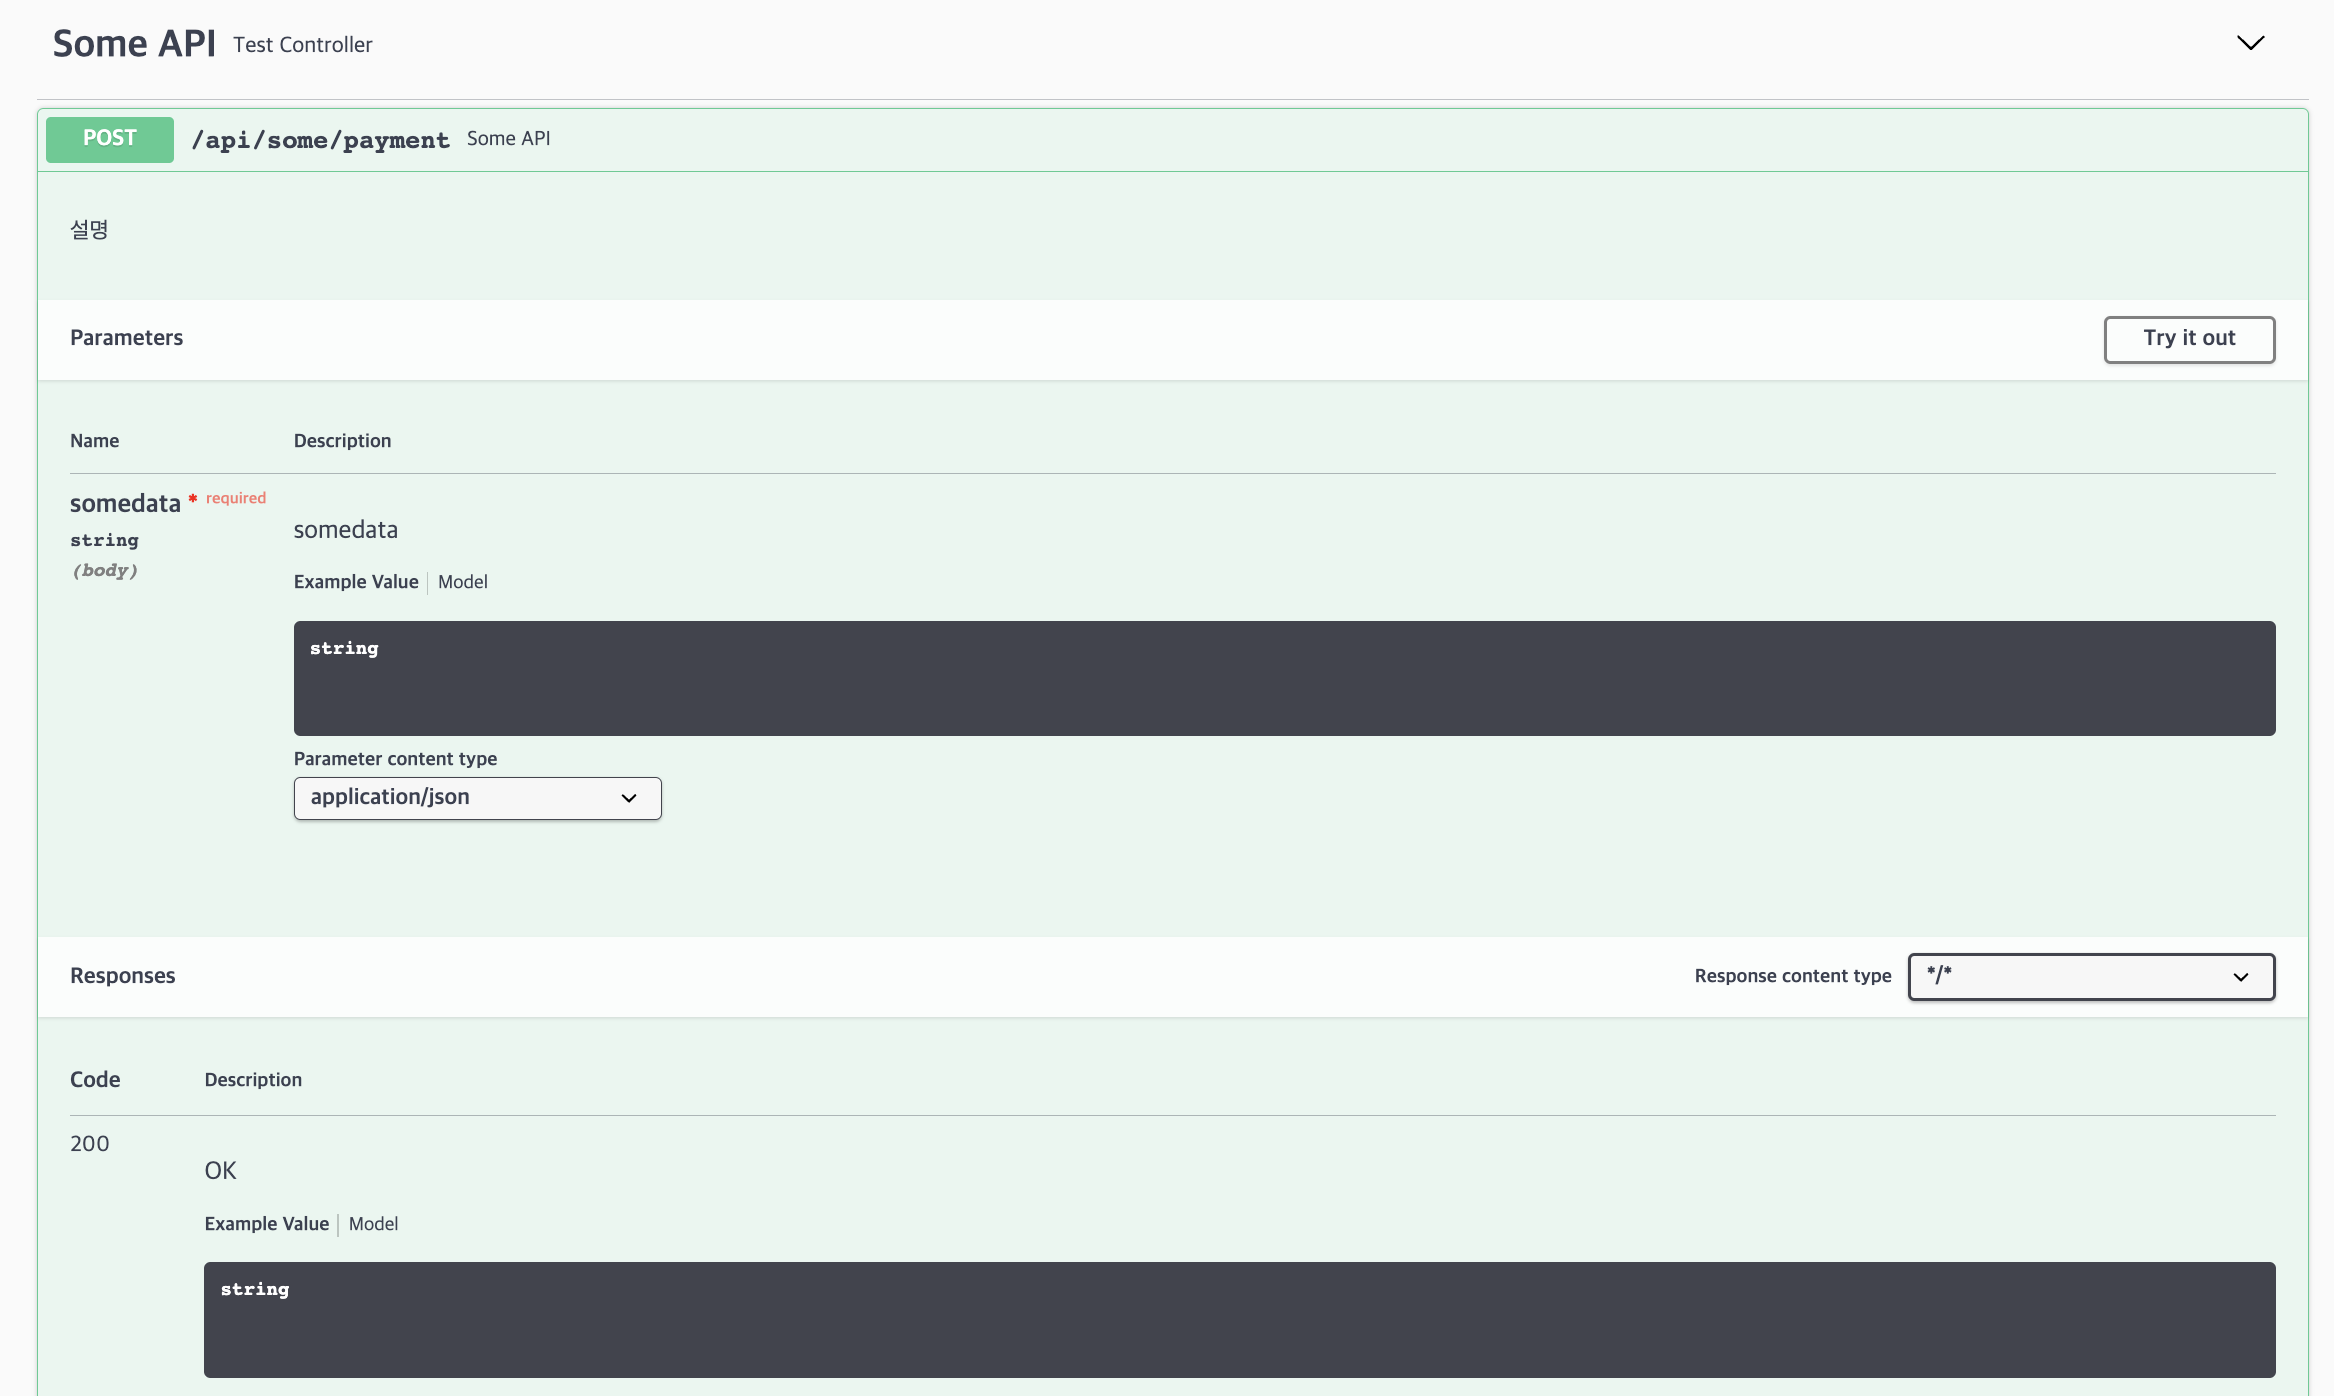
기본적으로 controller에 대한 이름, 메서드 정의, In/out에 대한 정의를 할 수 있다.
- @Api(tags = "") : 해당 컨트롤러의 API 명을 지정합니다.
- @Operation(summary = "", description = "") : 특정 API의 요약과 설명을 지정합니다.
- @ApiResponse : API 결과에 따른 코드와 설명을 추가합니다.
@Api(tags = "Some API")
@RestController
@RequestMapping("/api/some")
public class SomeTestRestController {

	@Operation(summary = "Some API", description = "설명")
    @ApiResponses(value = {
            @ApiResponse(responseCode = "success", description = "성공"),
            @ApiResponse(responseCode = "fail")})
    @PostMapping(path="payment")
    public String someAPI(@RequestBody SomeData somedata){
        return ''
    }
}
적용자체는 간단하지만, Springboot 3.0.4에 적용하려고 하다가 몇시간을 날려먹었다. 여러분은 고생하시지말고 꼭 안정적인 Springboot 2.0대의 버전을 사용하길 바랍니다.