Student
로그인
// 127.0.0.1:9090/ROOT/student2/login.do
@GetMapping(value = "/login.do")
public String loginGET() {
    try {
        return "/student2/login";
    } catch (Exception e){
        e.printStackTrace();
        return "redirect:/home.do";
    }
}
Student2Controller.java에 login.get을 추가하고
<body>
    <h3>로그인(student2)</h3>
    <form th:action="@{/student2/loginaction.do}" method="post">
        아이디 : <input type="text" name="id" autofocus /><br />
        암호 : <input type="text" name="password" value="a" /><br />
        <input type="submit" value="로그인" />
    </form>
</body>
login.html을 생성한다.
@Configuration   // 환경설정파일. 서버가 구동되기전에 호출됨.
@EnableWebSecurity // 시큐리티를 사용
@Slf4j
@RequiredArgsConstructor
public class SecurityConfig {

    final SecurityServiceImpl  memberTableService; // member테이블과 연동되는 서비스
    final SecurityServiceImpl1 student2TableService; //student2테이블과 연동되는 서비스
    // 관리자 테이블과 연동하는 서비스 ...


    @Bean   // 객체를 생성함. (자동으로 호출됨.)
    @Order(value = 1) // 순서를 먼저 설정
    public SecurityFilterChain filterChain1(HttpSecurity http) throws Exception {
        log.info("SecurityConfig => {}", "start filter chain2");

        // 127.0.0.1:9090/ROOT/student2/login.do
        // 127.0.0.1:9090/ROOT/student2/logout.do
        // 127.0.0.1:9090/ROOT/student2/loginaction.do
        // 위의 두개의 주소만 필터함.
        http.antMatcher("/student2/login.do")
            .antMatcher("/student2/loginaction.do")
            .authorizeRequests()
            .anyRequest().authenticated().and();

        //http.antMatcher("/student2/logout.do").authorizeRequests().permitAll();

        // 로그인 처리
        http.formLogin()
            .loginPage("/student2/login.do")
            .loginProcessingUrl("/student2/loginaction.do")
            .usernameParameter("id")
            .passwordParameter("password")
            .defaultSuccessUrl("/student2/home.do")
            .permitAll();

        http.userDetailsService(student2TableService);
        return http.build();
    }


    @Bean   // 객체를 생성함. (자동으로 호출됨.)
    @Order(value = 2)  //마지막 숫자로 변경
    public SecurityFilterChain filterChain(HttpSecurity http) throws Exception {
        log.info("SecurityConfig => {}", "start filter chain1");

        // 권한 설정
        http.authorizeRequests()
            .antMatchers("/customer/join.do").permitAll()
            .antMatchers("/seller/join.do").permitAll()
            .antMatchers("/admin/join.do").permitAll()
            .antMatchers("/admin", "/admin/*").hasAuthority("ROLE_ADMIN")  // 주소가 9090/ROOT/admin  ~~ 모든것
            .antMatchers("/seller", "/seller/*").hasAnyAuthority("ROLE_ADMIN", "ROLE_SELLER")
            .antMatchers("/customer", "/customer/*").hasAnyAuthority("ROLE_CUSTOMER")
            .anyRequest().permitAll();

        // 403페이지 설정(접근권한 불가 시 표시할 화면)
        http.exceptionHandling().accessDeniedPage("/403page.do");

        // 로그인 처리
        http.formLogin()
            .loginPage("/login.do")  //
            .loginProcessingUrl("/loginaction.do") //action은
            .usernameParameter("id")
            .passwordParameter("password")
            .successHandler(new LoginSuccessHandler())
            //.defaultSuccessUrl("/home.do") // 로그인 성공시 이동할 페이지
            .permitAll();

        // 로그아웃 처리(GET은 안됨 반드시 POST로 호출해야 됨.)
        http.logout()
            .logoutUrl("/logout.do")
            //.logoutSuccessUrl("/home.do")
            .logoutSuccessHandler(new CustomLogoutSuccessHandler())
            .invalidateHttpSession(true)
            .clearAuthentication(true)
            .permitAll();

        //post는 csrf를 전송해야하지만, 주소가 /api로 시작하는 모든url은  csrf가 없어도 됨
        http.csrf().ignoringAntMatchers("/api/**");

        //서비스 등록( 자동등록됨. 생략가능  )
        http.userDetailsService(memberTableService);
        return http.build();
    }


    // 정적 자원에 스프링 시큐리티 필터 규칙을 적용하지 않도록 설정, resources/static은 시큐리티 적용받지 않음.
    @Bean
    public WebSecurityCustomizer webSecurityCustomizer() {
        return (web) -> web.ignoring().requestMatchers(PathRequest.toStaticResources().atCommonLocations());
    }

    // 회원가입에서 사용했던 암호화 알고리즘 설정, 로그인에서도 같은 것을 사용해야 하니까
    @Bean  // 서버구동시 자동으로 실행됨 => @Bean
    public PasswordEncoder passwordEncoder() {
        return new BCryptPasswordEncoder();
    }
}
SecurityConfig.java를 위 코드를 수정, 추가한다.
// 로그인에서 로그인 버튼 ->  loadUserByusername으로 이메일 정보를 넘김
// student2 테이블과 연동되는 서비스
@Service
@Slf4j
@RequiredArgsConstructor
public class SecurityServiceImpl1 implements UserDetailsService {
    final String format = "SecurityServiceImpl1 => {}";
    final Student2Repository s2Repository;

    @Override
    public UserDetails loadUserByUsername(String username) throws UsernameNotFoundException {
        // 이메일을 이용해서  student2테이블에서 정보를 꺼낸 후 User타입으로 변환해서 리턴하면
        // 시큐리티가 비교후에 로그인 처리를 자동으로 수행함.
        log.info(format, username);
        Student2 obj = s2Repository.findById(username).orElse(null);
        if(obj != null) { // 이메일이 있는 경우
            return User.builder()
                .username(obj.getEmail())
                .password(obj.getPassword())
                .roles("STUDENT2").build();
        }

        // 이메일이 없는 경우
        return User.builder().username("_").password("_").roles("_").build();
    }
}
service 폴더에 SecurityServiceImpl1.java를 생성한다.
홈화면
// 127.0.0.1:9090/ROOT/student2/home.do
@GetMapping(value = "/home.do")
public String homeGET(@AuthenticationPrincipal User user, Model model) {
    try {
        model.addAttribute("user", user);
        return "/student2/home";
    } catch (Exception e){
        e.printStackTrace();
        return "redirect:/home.do";
    }
}
Student2Controller에 homeGET을 추가한다.
<body>
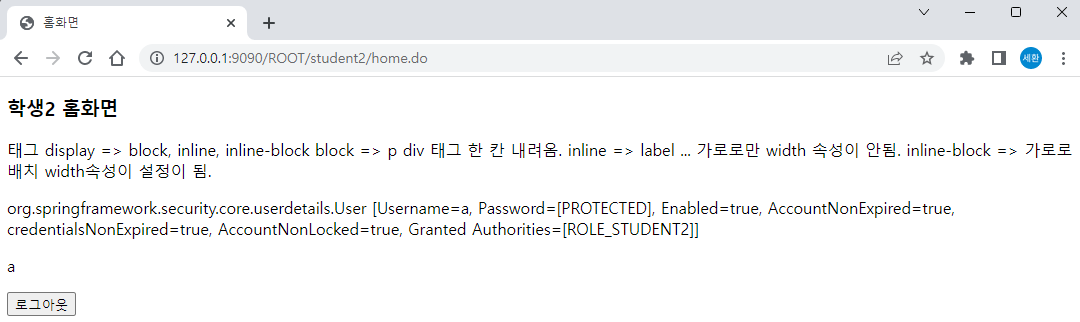
<h3>학생2 홈화면</h3>
태그 display => block, inline, inline-block
block => p div 태그 한 칸 내려옴.
inline => label ... 가로로만 width 속성이 안됨.
inline-block => 가로로 배치 width속성이 설정이 됨.
<p th:text="${user}"></p>
<p th:text="${user.username}"></p>
<form th:action="@{/student2/logout.do}" method="post">
<input type="submit" value="로그아웃" />
</form>
</body>home.html을 생성한다.
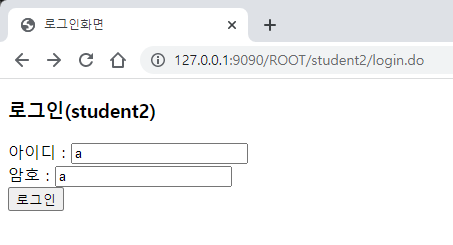
아이디와 암호를 입력하고 로그인 버튼을 누르면
성공적으로 로그인이 된다.
JwtUtil2.java
<dependency>
	<groupId>io.jsonwebtoken</groupId>
	<artifactId>jjwt-api</artifactId>
	<version>0.11.5</version>
</dependency>
<dependency>
	<groupId>io.jsonwebtoken</groupId>
	<artifactId>jjwt-impl</artifactId>
	<version>0.11.5</version>
	<scope>runtime</scope>
</dependency>
<dependency>
	<groupId>io.jsonwebtoken</groupId>
	<artifactId>jjwt-jackson</artifactId>
	<version>0.11.5</version>
	<scope>runtime</scope>
</dependency>
pom.xml에 dependency를 추가한다.
// 컨트롤러x, 서비스x, 엔티티x ...
@Component
public class JwtUtil2 {

    private final String BASEKEY = "asdfasdfasdfasdf";

    // 토큰생성하는 메소드
    public String createJwt( String id, String name ) throws Exception {
        // 1. header정보
        Map<String, Object> headerMap = new HashMap<>();
        headerMap.put("typ","JWT"); //타입
        headerMap.put("alg", "HS256"); // hash알고리즘

        // 2. 토큰에 포함시킬 사용자 정보들..
        Map<String, Object> claimsMap = new HashMap<>();
        claimsMap.put("id", id);   // 아이디
        claimsMap.put("name", name); // 이름

        // 3. 토큰의 만료시간 ex) 2시간 => 현재시간 + 1000 * 60 * 60 * 2
        Date expiredTime = new Date();
        expiredTime.setTime( expiredTime.getTime() + 1000 * 60 * 60 * 8 );

        // 4. 키 발행
        byte[] keyBytes = DatatypeConverter.parseBase64Binary(BASEKEY);
        Key signKey = new SecretKeySpec(keyBytes, SignatureAlgorithm.HS256.getJcaName());

        // 1 ~ 4의 정보를 이용해서 토큰 생성
        JwtBuilder builder = Jwts.builder()
            .setHeader(headerMap)
            .setClaims(claimsMap)
            .setSubject("TEST")
            .setExpiration(expiredTime)
            .signWith(signKey, SignatureAlgorithm.HS256);

        // 토큰을 String 타입으로 변환
        return builder.compact();
    }

    // 토큰에 대해서 검증하고 데이터를 추출하는 메소드
    public boolean checkJwt(String token) throws Exception{
        try {
            // 1. key 준비
            byte[] keyBytes = DatatypeConverter.parseBase64Binary(BASEKEY);

            Claims claims = Jwts.parserBuilder()
                .setSigningKey(keyBytes)
                .build()
                .parseClaimsJws(token)
                .getBody();
            System.out.println( "추출한 아이디 => " + claims.get("id"));
            System.out.println( "추출한 이름   => " + claims.get("name"));
            return true;
        }
        catch(ExpiredJwtException e1) {
            System.err.println("만료시간 종료" + e1.getMessage());
            return false;
        }
        catch(JwtException e2) {
            System.err.println("토큰오류" + e2.getMessage());
            return false;
        }
        catch(Exception e) {
            System.out.println("e1과 e2 오류 아닌 모든 오류" + e.getMessage());
            return false;
        }
    }
}
restcontroller 폴더에 JwtUtil2.java를 생성한다.
final JwtUtil2 jwtUtil2; // 컴포넌트 객체 생성

//127.0.0.1:9090/ROOT/api/student2/login.json
@PostMapping(value="/login.json")
public Map<String, Object> loginPOST(@RequestBody Student2 student2) {
Map<String, Object> retMap = new HashMap<>();
    try {
        // 1. 이메일, 암호 전송 확인
        log.info("{}", student2.toString());

        // 2. 이메일을 이용해서 정보를 가져옴.
        Student2 retStudent2 = s2Repository.findById(student2.getEmail()).orElse(null);

        // 3. 실패시 전송할 데이터
        retMap.put( "status", 0 );

        // 4. 암호가 일치하는지 확인 => 전송된 hash되지 않은 암호와 DB에 해시된 암호 일치 확인
        if(  bcpe.matches( student2.getPassword(), retStudent2.getPassword()) ) {
            retMap.put( "status", 200 );
            retMap.put( "token", jwtUtil2.createJwt(retStudent2.getEmail(), retStudent2.getName() ) );
        }
    } catch (Exception e) {
        e.printStackTrace();
        retMap.put( "status", -1 );
        retMap.put( "error", e.getMessage() );
    }
    return retMap;
}
RestStudent2Controller.java에 위 코드를 추가한다.
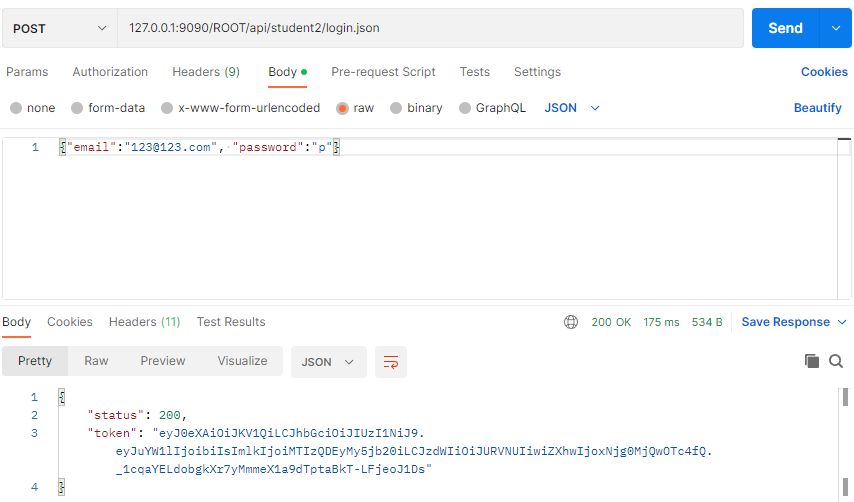
db에 저장되어있는 이메일과 암호를 입력하면 아래 토큰이 나온다.

이메일(아이디)는 세션에 저장되어 있고, 토큰을 입력하면 일치한다는 뜻인 200이 출력된다.
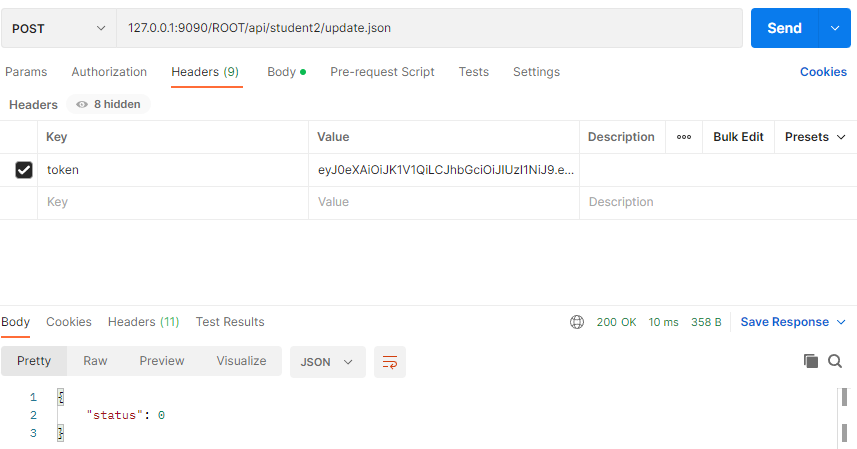
일치하지 않은 토큰을 입력하면 실패 시 전달값인 0이 출력된다.