1. Json Server
- json 파일을 사용하여 간단한 REST API Mock server를 구축할 수 있는 툴
- 간단한 공부용에 사용하기 적합
restAPI 라는 이름의 폴더 생성 후 경로 진입
$ mkdir restAPI
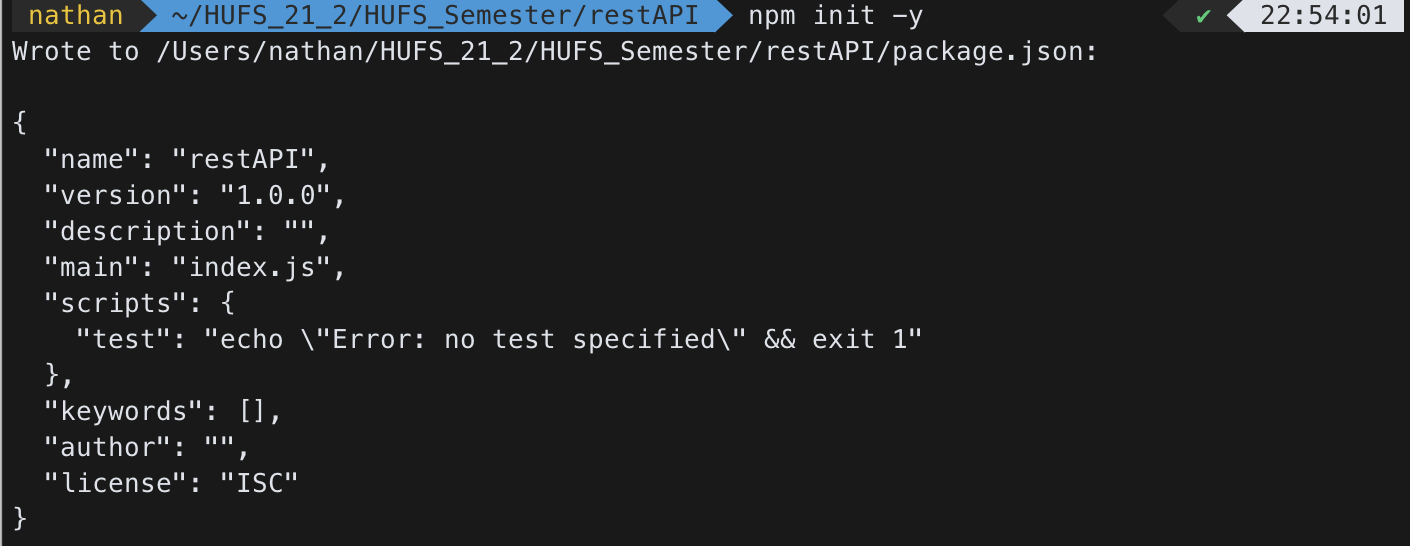
$ cd restAPIPackage.json을 기본 값으로 생성
$ npm init -y아래와 같이 나오게 된다.
Npm을 사용하여 json-server 라이브러리 설치
$ npm install json-server아래와 같이 설치가 된 것을 확인할 수 있다.

Json-server setting
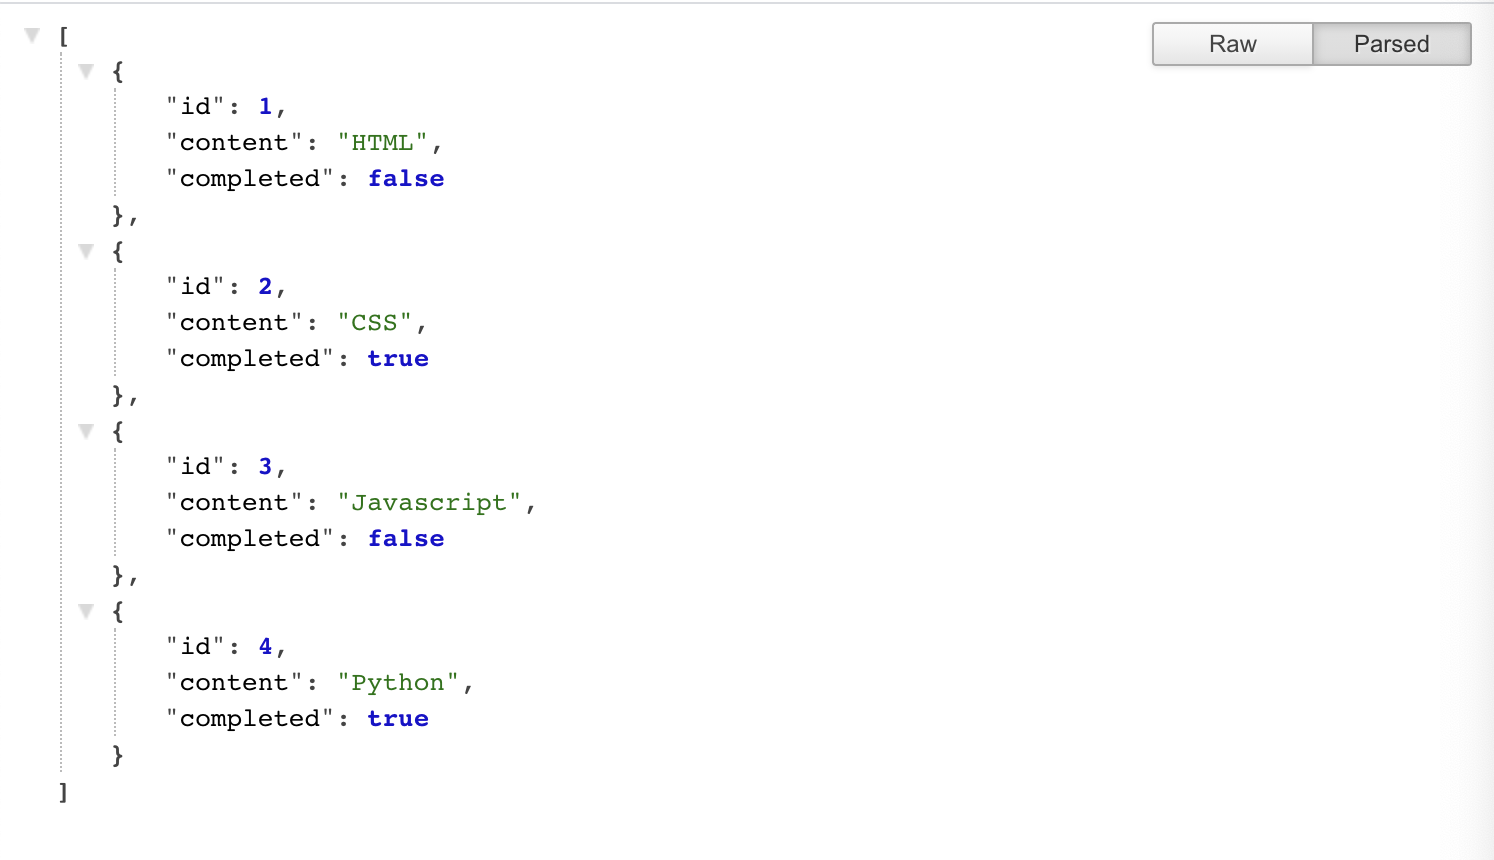
- restAPI.json이라는 파일을 만들고 아래의 코드를 넣어준다.
{
    "todos": [
        {
            "id": 1,
            "content": "HTML",
            "completed": false
        },
        {
            "id": 2,
            "content": "CSS",
            "completed": true
        },
        {
            "id": 3,
            "content": "Javascript",
            "completed": false
        },
        {
            "id": 4,
            "content": "Python",
            "completed": true
        }
    ]
}-
키와 밸류값이 각각 존재하는 형태로 이루어짐
-
package.json 수정하기(아래의 코드처럼 start 키 삽입)
{
  "name": "restAPI",
  "version": "1.0.0",
  "description": "",
  "main": "index.js",
  "scripts": {
    "test": "echo \"Error: no test specified\" && exit 1",
    "start": "node_modules/.bin/json-server --watch restAPI.json --port 8001"
  },
  "keywords": [],
  "author": "",
  "license": "ISC",
  "dependencies": {
    "json-server": "^0.16.3"
  }
}- start가 의미하는 바?
- json 서버를 켤 때
node_modules/.bin/json-server --watch restAPI.json --port 8001명령어를 쳐야하는데, 길고 복잡하기 때문에 단축어 느낌으로 저장을 해둔 것. npm start라는 명령어를 통해 실행이 가능하다.
- json 서버를 켤 때
package.json에 정의된 start 명령어 실행
$ npm start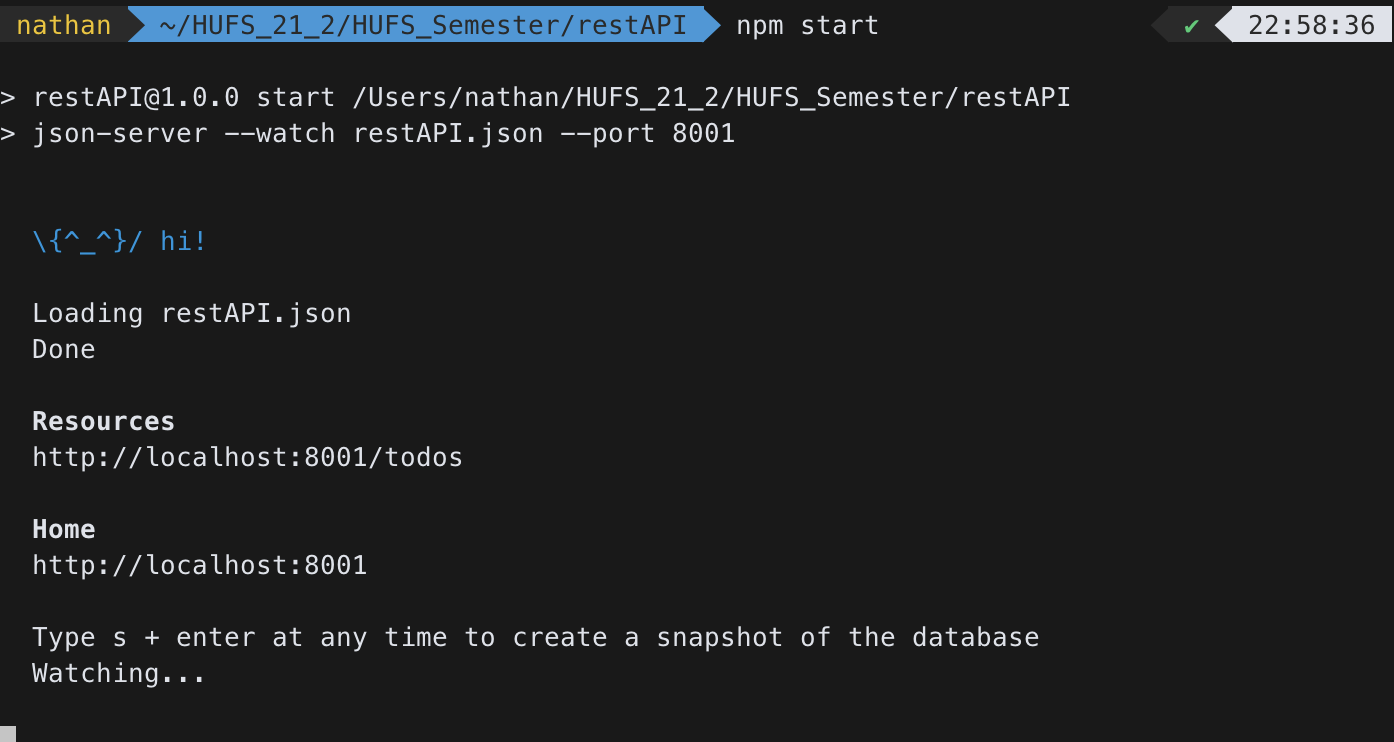
- 터미널에 다음과 같이 뜬다면 서버를 켜는데 성공한 것이다.
http://localhost:8001/todos 해당 리소스로 넘어가보자.
- url 끝에
http://localhost:8001/todos/1이렇게 id 값을 붙여주면 해당 id를 가진 값만 보여주는 페이지로 이동하게 된다.

2. REST API (with Python)
- 실습에 앞서
python requests라이브러리를 사용할 예정이므로, pip를 사용해서requests를 설치할 것이기 때문에 우선 가상환경을 만들어준다.
$ python3 -m venv venv
$ source venv/bin/activaterequests라이브러리 설치
$ pip3 install requests
$ pip list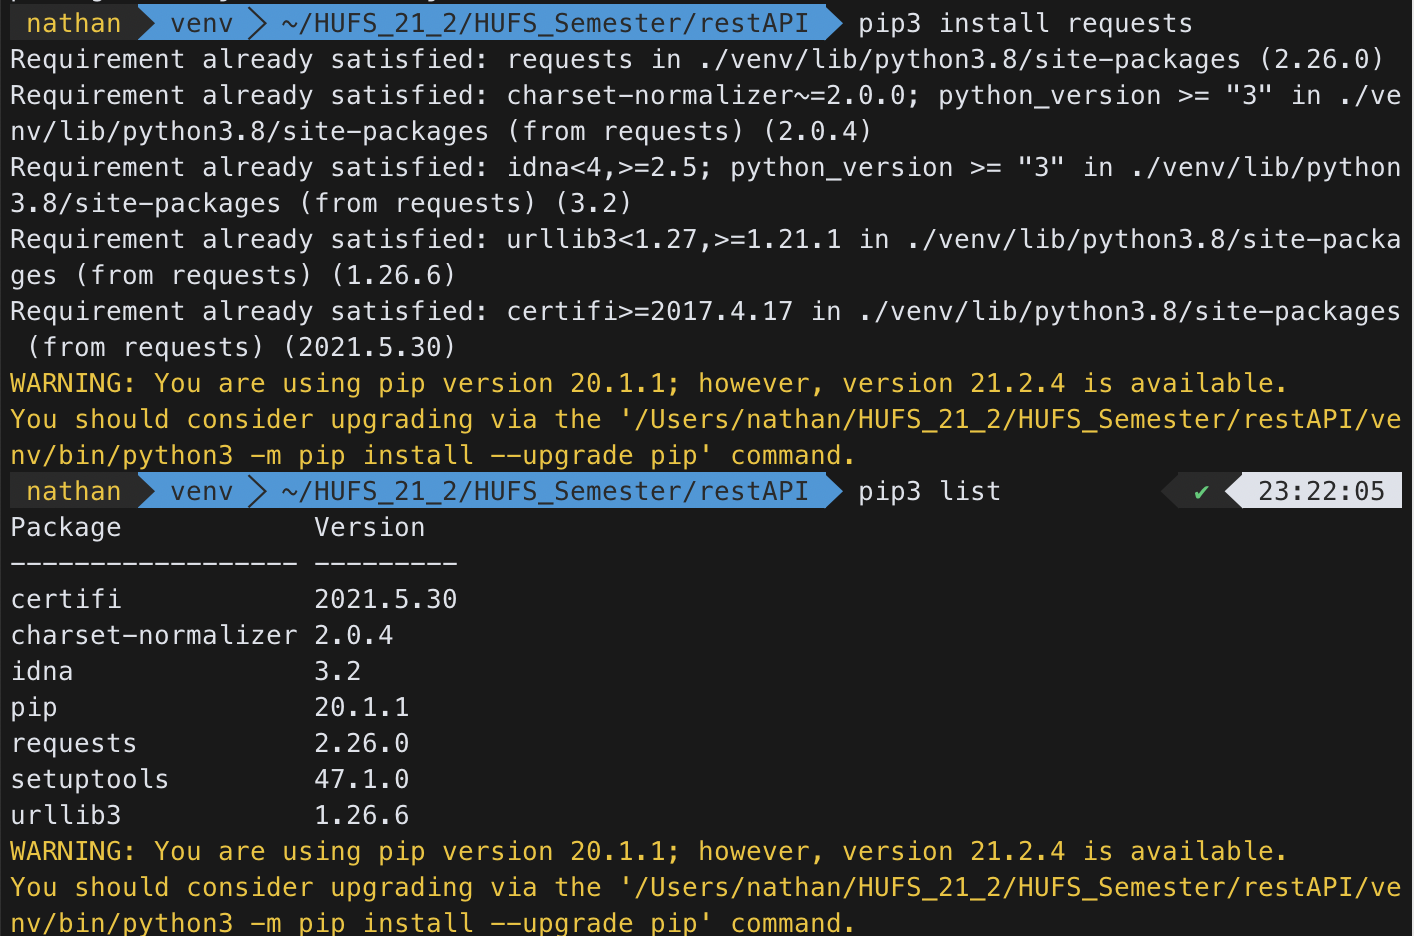
GET
restAPI_GET.py 라는 파일을 만든 후 아래의 코드를 넣어준다.
import requests
import json

url_item = "http://localhost:8001/todos"

response = requests.get(url_item)

print(response.text)- 이러면 json-server가 켜져있는 상태에서 아래와 같이 터미널 창에 뜨는 것을 확인할 수 있다.

POST
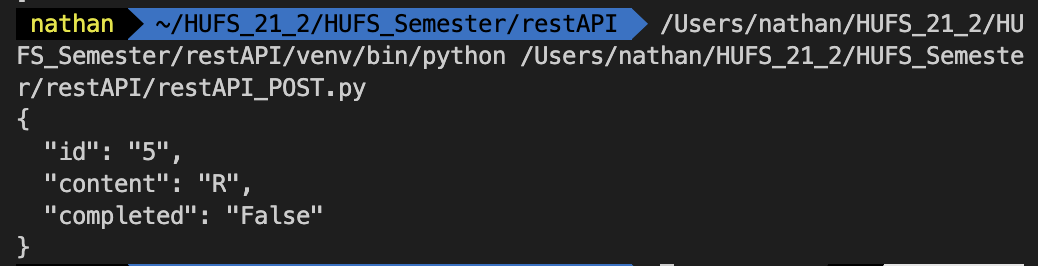
restAPI_POST.py 라는 파일을 만든 후 아래의 코드를 넣어준다.
import requests
import json

url_items="http://localhost:8001/todos"

new_item = {
    "id": 5,
    "content": "R",
    "completed": False
}
response = requests.post(url_items, data=new_item)

print(response.text)- 이러면 json-server가 켜져있는 상태에서 아래와 같이 터미널 창에 뜨는 것을 확인할 수 있다.
PUT (전체적인 갱신 - Update)
restAPI_PUT.py 라는 파일을 만든 후 아래의 코드를 넣어준다.
import requests
import json

url_items="http://localhost:8001/todos/4"

new_item = {
    "id": 4,
    "content": "CPP",
    "completed": False
}
response = requests.put(url_items, data=new_item)

print(response.json())-
이러면 json-server가 켜져있는 상태에서 아래와 같이 터미널 창에 뜨는 것을 확인할 수 있다.

-
response.json()이나response.text나 사실상 같다.
PATCH (일부분 갱신 - Update)
restAPI_PATCH.py 라는 파일을 만든 후 아래의 코드를 넣어준다.
import requests
import json

url_items="http://localhost:8001/todos/4"

new_item = {
    "id": 4,
    "content": "CPP",
    "completed": False
}
response = requests.put(url_items, data=new_item)

print(response.json())- 이러면 json-server가 켜져있는 상태에서 아래와 같이 터미널 창에 뜨는 것을 확인할 수 있다.

DELETE
restAPI_DELETE.py 라는 파일을 만든 후 아래의 코드를 넣어준다.
import requests
import json

url_items="http://localhost:8001/todos/4"

new_item = {
    "id": 4,
    "content": "CPP",
    "completed": False
}
response = requests.put(url_items, data=new_item)

print(response.json())- 이러면 json-server가 켜져있는 상태에서 아래와 같이 터미널 창에 뜨는 것을 확인할 수 있다. (빈 객체가 넘어오고 json 파일에는 삭제가 되어있음)


나는 날마다 모든 면에서 점점 더 나아지고 있다.