
1. AWS CLI configure 설정
C:\Users\Desktop\learn-terraform-aws> aws configure
AWS Access Key ID : AAAAAAAAAAAAAAAAAAAA
AWS Secret Access Key : AAAAAAAAAAAAAAAAAAAAAAAAAAAAAAAAAAAAAAAA
Default region name [none]: ap-northeast-2
Default output format [nonw]: json
C:\Users\Desktop\learn-terraform-aws>
2. main.tf 파일 생성
$ touch main.tf


terraform {
  required_providers {
    aws = {
      source  = "hashicorp/aws"
      version = "~> 3.27"
    }
  }

  required_version = ">= 0.14.9"
}

# provider :: terraform 에서 aws configure 값을 참조해서 생성자를 정의함
# 여기에 직접 Accesskey를 넣을 수 있지만, 보안상의 이유로 추천하지 않음
provider "aws" {
  profile = "default"
  region  = "ap-northeast-2"
}

# resource :: 실제로 생성할 인프라 자원
resource "aws_instance" "app_server" {
  # Amazon Linux2 ami
  ami           = "ami-0e4a9ad2eb120e054"
  instance_type = "t2.micro"

  tags = {
    Name = "ExampleAppServerInstance"
  }
}


// 디렉토리를 다운로드 하면서 앞서 정의한 provider 가 다운로드 및 세팅된다
$ terraform init
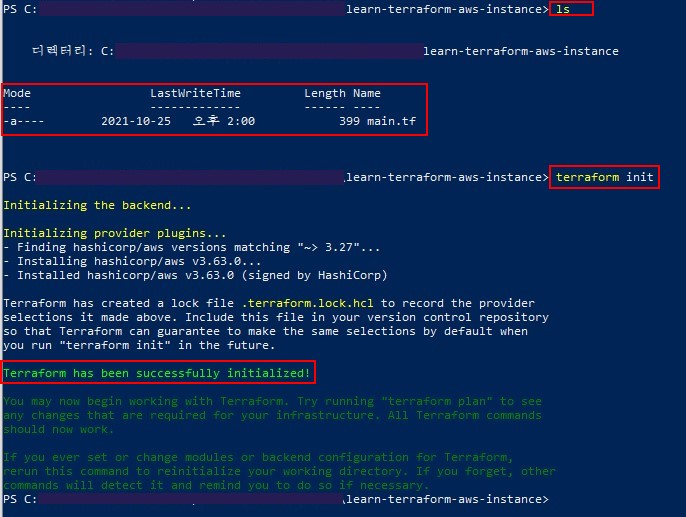
위와 같이 "Terraform has been successfully initialized!" 라는 문구가 띄워지면 정상적으로 된 것이다.
3. terraform 배포
# 변경된 파일이 있다면 구성을 맞추기 위해 현재 디렉토리의 구성을 자동으로 업데이트
$ terraform fmt

# 구성이 형식적으로 오류가 없는지 유효성을 검사
$ terraform validate

# 테라폼 인프라 배포
$ terraform apply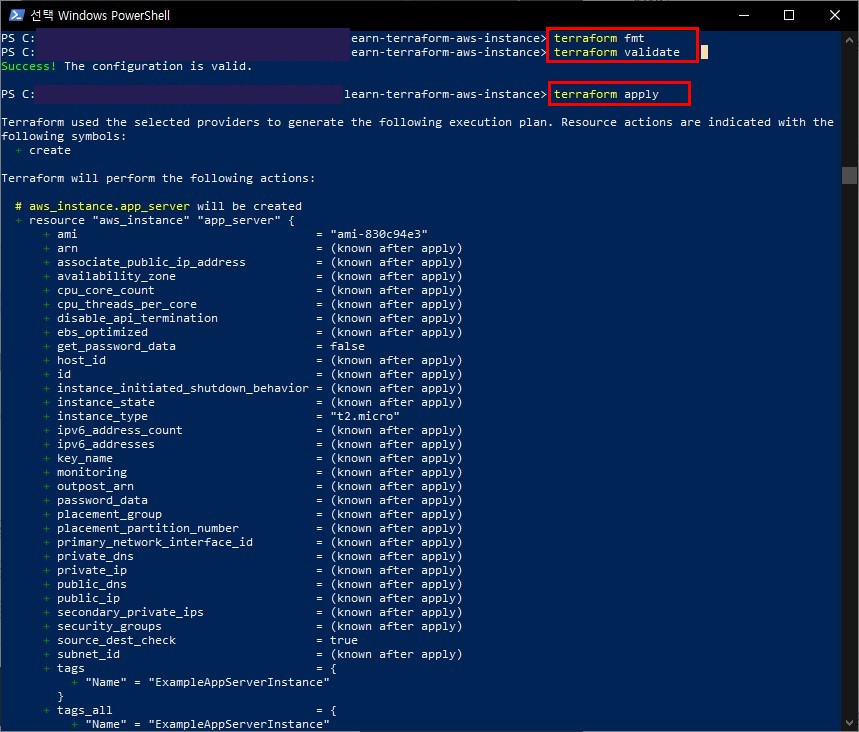
apply 배포 후, 위의 사진처럼 코드로 설정한 것들이 어떻게 생성될 것인지 쭉 보여준다.
설정한 것들이 맞다면 yes, 수정해야하는 사항이 있다면 no를 입력하면 된다.
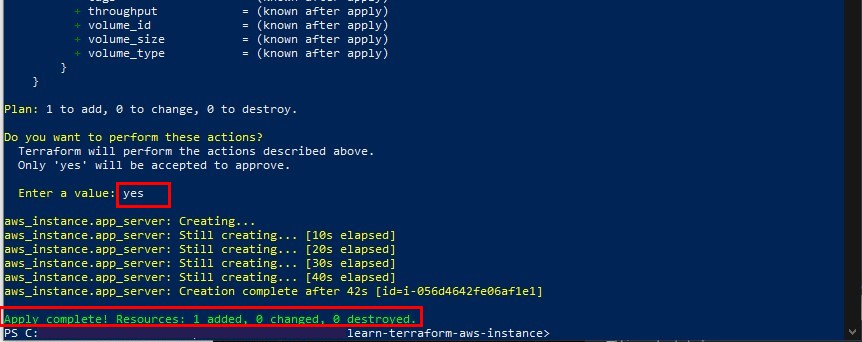
아래 사진은 yes를 입력하여 EC2를 생성했다.
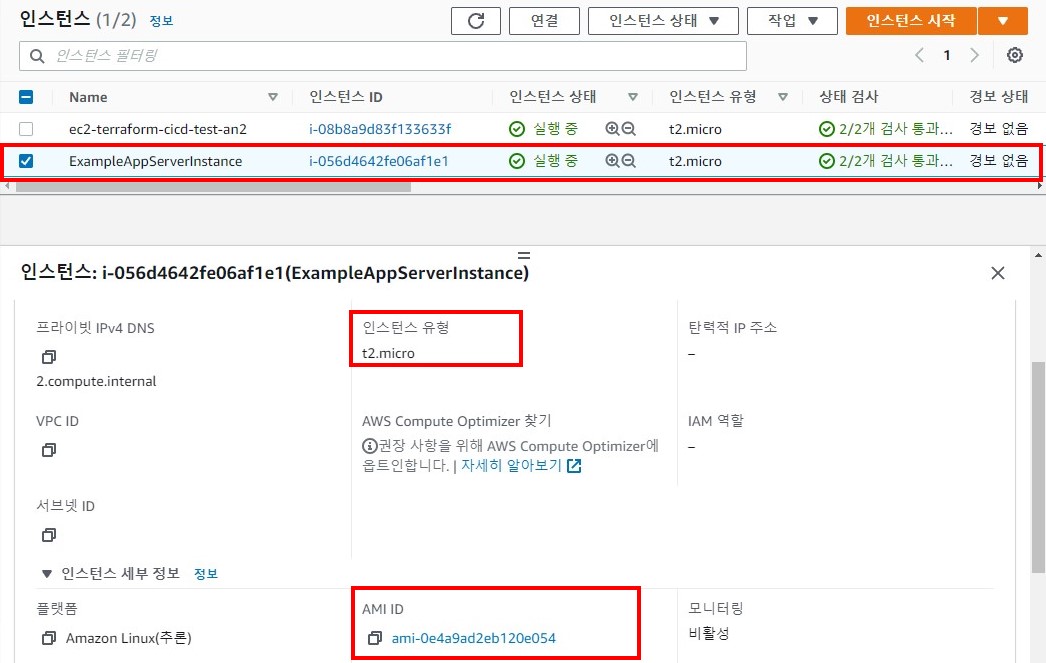
콘솔에서도 위에서 지정한대로 t2.micro 타입으로 Amazon Linux2로 생성된 것을 확인 할 수 있다.
참고
https://learn.hashicorp.com/tutorials/terraform/aws-build?in=terraform/aws-get-started