String
String
컴퓨터가 문자를 어떻게 저장하는지에 대해 생각해 보자. 먼저 52개의 다른 데이터를 구분하기 위해서는 이기 때문에 6개의 0과 1 구분이 필요하다. 문자를 표현한다면 영문자의 개수는 총 26개이고 대소분자까지 구분하면 두 배인 52개이다. 따라서 0과 51까지 알파벳 하나를 숫자 하나에 대치해 두고 나중에 문자로 바꿔 주는 것이다. 이 아이디어에서 기반하여 데이터를 특정한 신호로 전환하는 과정이 Encoding이고 특정 신호에서 데이터를 해석하는 과정이 Decoding이다.
문자를 표현할 때 서로 다른 컴퓨터가 서로 다른 문자 인코딩을 사용한다면 한 컴퓨터에서 보낸 데이터가 다른 컴퓨터에서 다르게 해석되는 문제가 발생된다. 따라서 문자 인코딩의 표준이 필요하다.
ASCII Code
이 문자열 인코딩 방법으로 처음 등장한 게 아스키 코드이다. American Standard Code for Information Interchange로 미국 정보 교환 표준 부호이다. 개로 영문자 + 기호를 합쳐 7 비트를 활용한다. 지금도 호환이 되고 있다. 여기에 정상적으로 전송되었는지 확인하기 위한 패러티 비트까지 합쳐서 1 바이트로 표시한다.
public class AlphaToInteger {
    // 숫자로만 이루어진 value 문자열에 대해
    // 각 글자를 숫자 데이터로 해석한 뒤
    // - 48 하면 숫자가 된다
    public int atoi(String value) {
        int result = 0;
        int i = 0;
        // TODO 첫 번째 문자를 사전에 확인
        boolean negative = false;
        if (value.charAt(i) == '-') {
            negative = true;
            // 두 번째 글자부터 확인
            i++;
        }
        // TODO 문자열을 한 글자씩 확인
        for (; i < value.length(); i++) {
            // TODO 자릿수 변환
            result *= 10;
            // TODO 글자를 숫자로 반환
            result += value.charAt(i) - '0';
        }
        if (negative) result  *= -1;
        return result;
    }
    public static void main(String[] args) {
        AlphaToInteger alphaToInteger = new AlphaToInteger();
        System.out.println(alphaToInteger.atoi("12345"));
        System.out.println(alphaToInteger.atoi("-12345"));
    }
}
public class IntegerToAlpha {
public String itoa(int value){
StringBuilder answerBuilder = new StringBuilder();
String result = "";
// 음수라면
if (value < 0) {
value *= -1;
result += "-";
}
// TODO value가 0보다 큰 동안
while(value > 0) {
// TODO valueㄹㄹ 10으로 나눈 나머지를 문자로 변환
char digitChar = (char)(value % 10 + '0');
answerBuilder.append(digitChar);
// TODO value 나누기 10
value /= 10;
}
result += answerBuilder.reverse();
return result;
}
public static void main(String[] args) {
IntegerToAlpha integerToAlpha = new IntegerToAlpha();
System.out.println(integerToAlpha.itoa(1234));
System.out.println(integerToAlpha.itoa(-1234));
}
}Uni Code
문제가 있다면 아스키 코드는 오로지 영어만 표현할 수 있다. 하지만 세계에는 더 다양한 언어들이 존재하고 한글을 표현하려면 2 바이트인 16 비트가 필요하다. 여러 나라의 언어를 처리하기 위한 표준을 위해서 유니코드가 탄생하게 되었다. 현재 지구상에서 통용되는 대부분의 문자를 담고 있고 악보 기호나 이모지까지도 표현 가능하다
Pattern Mapping
한 문자열 안 내부에 다른 문자열이 출현하는지 또는 어디에 출현하는지를 특정하는 문제이다.
Target: Andy loved to sleep on a bed of nails
Pattern: Sleep
완전 탐색인 brute force 알고리즘으로 해결할 수 있다.
타겟의 인덱스인 i와 패턴의 인덱스인 j가 일치하면 함께 인덱스를 올린다. 하지만 만약 불일치한다면 i 에는 i - j 를 할당한 후 i++를 해 주면 되고 j는 다시 0으로 가면 된다. 이 과정을 반복해서 j의 크기가 pattern의 길이만큼 커지면 성공인 것이다.
import java.io.BufferedReader;
import java.io.IOException;
import java.io.InputStreamReader;

public class BFPatternMatching {
    public void solution() throws IOException {
        BufferedReader reader = new BufferedReader(new InputStreamReader(System.in));
        String target = reader.readLine();
        String pattern = reader.readLine();

        int tarIdx = 0;
        int patIdx = 0;
        // TODO tarIdx 전체 길이보다 작을 동안에 반복한다.
        // TODO 존재하는지만 검사하면 된다 했을 경우 patIdx가 pattern.length() 보다 작을 동안에 반복한다.
        while (tarIdx < target.length() && patIdx < pattern.length()) {
            // TODO target[tarIdx] 가 pattern[patIdx] 랑 다를 경우
            if (target.charAt(tarIdx) != pattern.charAt(patIdx)) {
                // TODO tarIdx를 여태까지 이동한 만큼 되돌린다.
                tarIdx -= patIdx;
                // TODO patIdx를 -1로 할당한다.
                patIdx = -1;
            }
            // TODO 다음칸으로 이동한다.
            tarIdx++;
            patIdx++;
        }
        // TODO patIdx == pattern.length() 이면 성공이다. 어디에서 찾았는지 출력한다.
        if(patIdx == pattern.length()) {
            System.out.println(tarIdx - patIdx);
        }
        // TODO 못찾으면 System.out.println("404 Not Found");
        else {
            System.out.println("404 Not Found");
        }
    }
    // qwertyuiuiuytrertyuiopopoiuytrqwertyuytrertywqwertyuiuytrewqwertyuiiuiuiytrewert
    // qwert
    public static void main(String[] args) throws IOException {
        new BFPatternMatching().solution();
    }
}
Optional<>
Optional<String> optionalValue = Optional.ofNullable(/* null이 반환될 수 있는 메소드 */)

if (optionalValue.isPresent()) {  // 데이터를 가지고 있을 때
    System.out.println("Value is present: " + optionalValue.get());
} else {  // 데이터가 존재하지 않을 때
    System.out.println("Value is not present");
}
Spring
JSON
어제의 Service와 Controller를 조금 더 다듬어서 String이 아닌 List를 반환하도록 코드를 바꿔 본다.
// READ ALL
    public List<StudentEntity> readStudentAll() {
        System.out.println(
                this.studentRepository.findAll());
        List<StudentEntity> studentEntityList = this.studentRepository.findAll();
        return studentEntityList;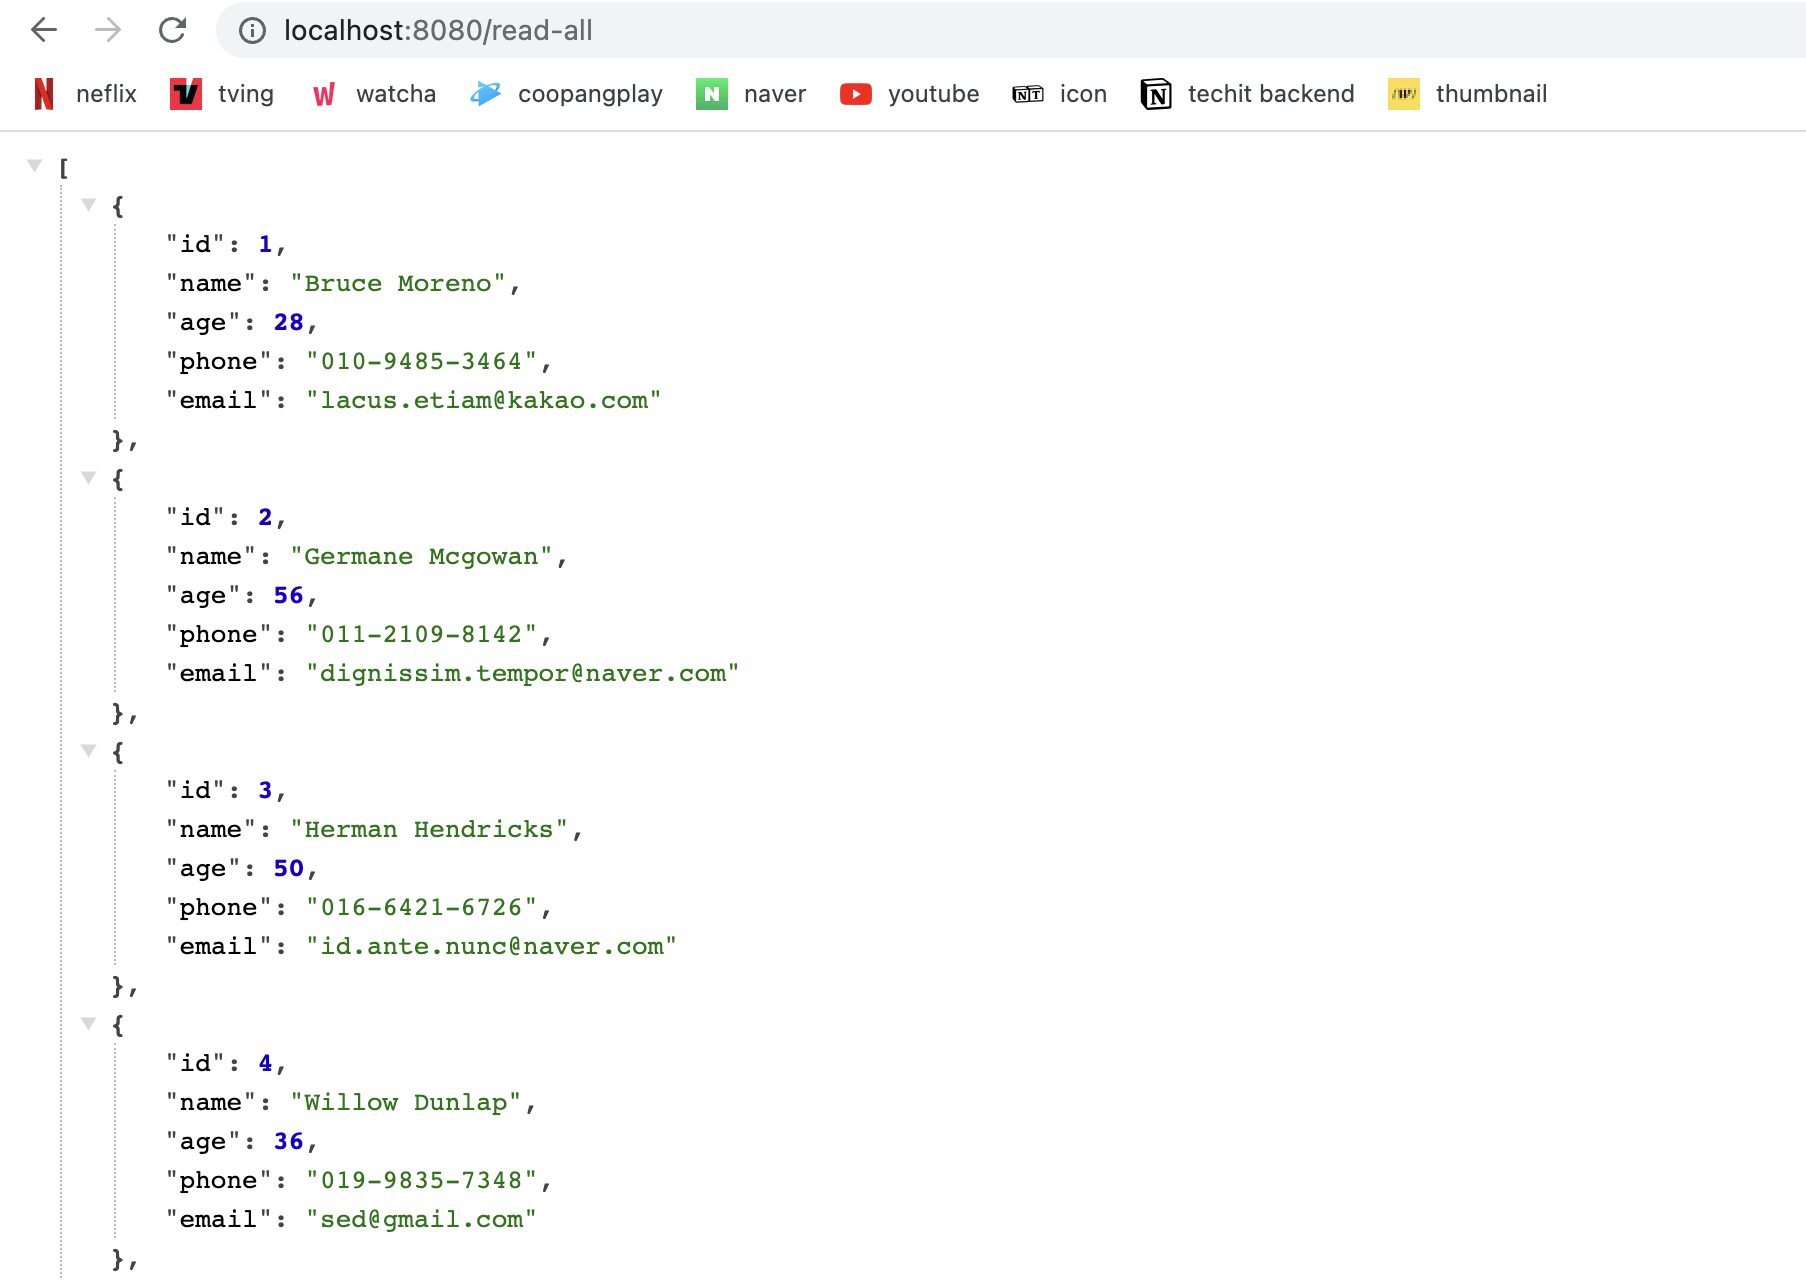
}@GetMapping("read-all")
public @ResponseBody List<StudentEntity> readAll() {
this.service.readStudentAll();
// return "done-read-all";
return this.service.readStudentAll();
}이후 실행하면 JSON으로 나오는 것을 확인할 수 있다.
Entity Protection
Entity는 데이터베이스를 그대로 보여 주는 객체이다. 이를 사용자에게 그대로 돌려 주는 것은 사용자의 정보 노출 위험이 있기 때문에 위험하다. 위의 코드처럼 Entity를 그대로 return type으로 사용해서는 안 된다. 따라서 일반적으로 이렇게 코드를 짜지는 않는다.
이를 위해 Student Dto를 만드는 것이다. Data Transfer Object로 오로지 해당 데이터를 표현하기 위해 사용하는 객체이다. 일종의 디자인 패턴으로 View에서 사용하는 데이터와 Model이 관리하는 데이터의 형태를 분리한다. Entity가 변화했을 때 Dto를 사용하는 View에 영향이 줄어든다. 즉 Entity에서 사용자에게 노출되는 정보를 조절하여 정보를 은닉할 수 있다.
import lombok.Data;

@Data
public class StudentDto {
    private Long id; // Entity.id
    private String name; // Entity.name
    private String email; // Entity.email
}
Service를 구현할 때 Repository에서 데이터를 반환받았다면 Dto를 이용해서 받환받을 수 있도록 코드도 변경해 준다. StudentEntity에 가져와서 공개하고 싶은 정보만 Dto에 저장한 뒤 View로 전달하는 것이다.
public List<StudentDto> readStudentAll() {
        List<StudentDto> studentDtoList = new ArrayList<>();
        for (StudentEntity studentEntity:
             this.studentRepository.findAll()) {
            StudentDto studentDto = new StudentDto();
            studentDto.setId(studentEntity.getId());
            studentDto.setEmail(studentEntity.getEmail());
            studentDto.setName(studentEntity.getName());
            studentDtoList.add(studentDto);
        }
        return studentDtoList;
    }
이 작업을 하나하나 직접 코드로 작성하기 귀찮기 때문에 Dto 안에 메소드로 구현한다. 이 방식을 Static Factory Method Pattern이라고 한다. 만약 StudentDto가 부모 클래스이고 정적 팩토리 패턴을 통해 반환하는 값들을 조절할 수 있다는 장점이 있다. 이는 유지 보수에 더욱 효율적인 코드 작성법이다.
import com.example.jpa.entities.StudentEntity;
import lombok.Data;

@Data
public class StudentDto {
    private Long id; // Entity.id
    private String name; // Entity.name
    private String email; // Entity.email

    // 정적 메소드: 클래스 자체에 속한 메소드
    // 만들어진 StudentDto에서 호출하는 것이 아니라 클래스 틀에서 호출
    public static StudentDto
        fromEntity(StudentEntity studentEntity) {
        StudentDto dto = new StudentDto();
        dto.setId(studentEntity.getId());
        dto.setName(studentEntity.getName());
        dto.setEmail(studentEntity.getEmail());
        return dto;
    }
}
public List<StudentDto> readStudentAll() {
List<StudentDto> studentDtoList = new ArrayList<>();
for (StudentEntity studentEntity:
this.studentRepository.findAll()) {
studentDtoList.add(StudentDto.fromEntity(studentEntity));
}
return studentDtoList;
}Student Skeleton
Entity
package com.example.student.entity;
/* CREATE TABLE students (
*   id INTEGER PRIMARY KEY AUTOINCREMENT,
*   name TEXT,
*   age INTEGER,
*   phone TEXT,
*   email TEXT
* */

import jakarta.persistence.*;
import lombok.Data;

@Entity
@Data
@Table(name = "students")
public class StudentEntity {
    @Id
    @GeneratedValue(strategy = GenerationType.IDENTITY)
    private Long id;
    private String name;
    private Integer age;
    private String phone;
    private String email;
}
Connection
데이터베이스와 연결할 Repository를 생성한다.
import com.example.student.entity.StudentEntity;
import org.springframework.data.jpa.repository.JpaRepository;
import org.springframework.stereotype.Repository;

@Repository
public interface StudentRepository extends JpaRepository<StudentEntity, Long> {

}
Repository에서 접근한 데이터를 Service에서 사용하기 위해 의존성을 주입한다.
import com.example.student.repository.StudentRepository;
import org.springframework.stereotype.Service;

@Service
public class StudentService {
    private final StudentRepository repository;

    public StudentService(StudentRepository repository) {
        this.repository = repository;
    }

    // CREATE
    public void createStudent() {}

    // READ
    public void readStudent() {}

    // READ ALL
    public void readStudentAll() {}

    // UPDATE
    public void updateStudent() {}

    // DELETE
    public void deleteStudent() {}
}
이후 Controller에서 Service를 사용해 주기 위해 의존성을 주입한다.
import org.springframework.http.HttpStatus;
import org.springframework.stereotype.Controller;
import org.springframework.ui.Model;
import org.springframework.web.bind.annotation.GetMapping;
import org.springframework.web.bind.annotation.PostMapping;
import org.springframework.web.bind.annotation.RequestMapping;
import org.springframework.web.server.ResponseStatusException;

@Controller
@RequestMapping("/students")
public class StudentController {
    private final StudentService service;

    public StudentController(StudentService service) {
        this.service = service;
    }

    @GetMapping("")
    public String home(Model model) {
        throw new ResponseStatusException(HttpStatus.NOT_IMPLEMENTED);
    }

    // create.html 응답
    @GetMapping("/create-view")
    public String createView() {
        throw new ResponseStatusException(HttpStatus.NOT_IMPLEMENTED);
    }

    // 새로운 StudentEntity 생성 후 상세보기 페이지로
    @PostMapping("/create")
    public String create() {
        throw new ResponseStatusException(HttpStatus.NOT_IMPLEMENTED);
    }

    // id에 해당하는 StudentEntity의 read.html 응답
    @GetMapping("/{id}")
    public String read() {
        throw new ResponseStatusException(HttpStatus.NOT_IMPLEMENTED);
    }

    // id에 해당하는 StudentEntity의 update.html 응답
    @GetMapping("/{id}/update-view")
    public String updateView(){
        throw new ResponseStatusException(HttpStatus.NOT_IMPLEMENTED);
    }

    // id에 해당하는 StudentEntity 수정 후 상세보기 페이지로
    @PostMapping("/{id}/update")
    public String update() {
        throw new ResponseStatusException(HttpStatus.NOT_IMPLEMENTED);
    }

    // id에 해당하는 StudentEntity delete.html
    @GetMapping("/{id}/delete-view")
    public String deleteView() {
        throw new ResponseStatusException(HttpStatus.NOT_IMPLEMENTED);
    }

    // id에 해당하는 StudentEntity 삭제 후 홈페이지로
    @PostMapping("/{id}/delete")
    public String delete() {
        throw new ResponseStatusException(HttpStatus.NOT_IMPLEMENTED);
    }
}
@RequestMapping("/students") 을 사용하면 localhost:8080/students를 가야 @GetMapping("") 으로 이동한다. 즉 @RequestMapping("/students") 하위 구조에 @GetMapping("") 가 들어가는 것이다.
이후 Service에 함수 이름을 작성하여 기능을 구현해 준다.
이때 StudentEntity를 그대로 전달하기보다 원하는 정보만 컨트롤하여 넘기기 위해 StudentDto를 작성해 준다.
import com.example.student.entity.StudentEntity;
import lombok.Data;

@Data
public class StudentDto {
    private Long id;
    private String name;
    private Integer age;
    private String phone;
    private String email;

    // Static Factory Method Pattern
    public static StudentDto fromEntity(StudentEntity studentEntity) {
        StudentDto studentDto = new StudentDto();
        studentDto.setId(studentEntity.getId());
        studentDto.setName(studentEntity.getName());
        studentDto.setAge(studentEntity.getAge());
        studentDto.setPhone(studentEntity.getPhone());
        studentDto.setEmail(studentEntity.getEmail());
        return studentDto;
    }
}
ReadAll()
이후 ReadAll() 서비스 코드를 수정한다.
public List<StudentDto> readStudentAll() {
        List<StudentDto> studentDtoList = new ArrayList<>();

        for (StudentEntity studentEntity: this.repository.findAll()
             ) {
            studentDtoList.add(StudentDto.fromEntity(studentEntity));
        }
        return studentDtoList;
    }
이후 Controller에서 html로 넘길 수 있도록 만들어 준다.
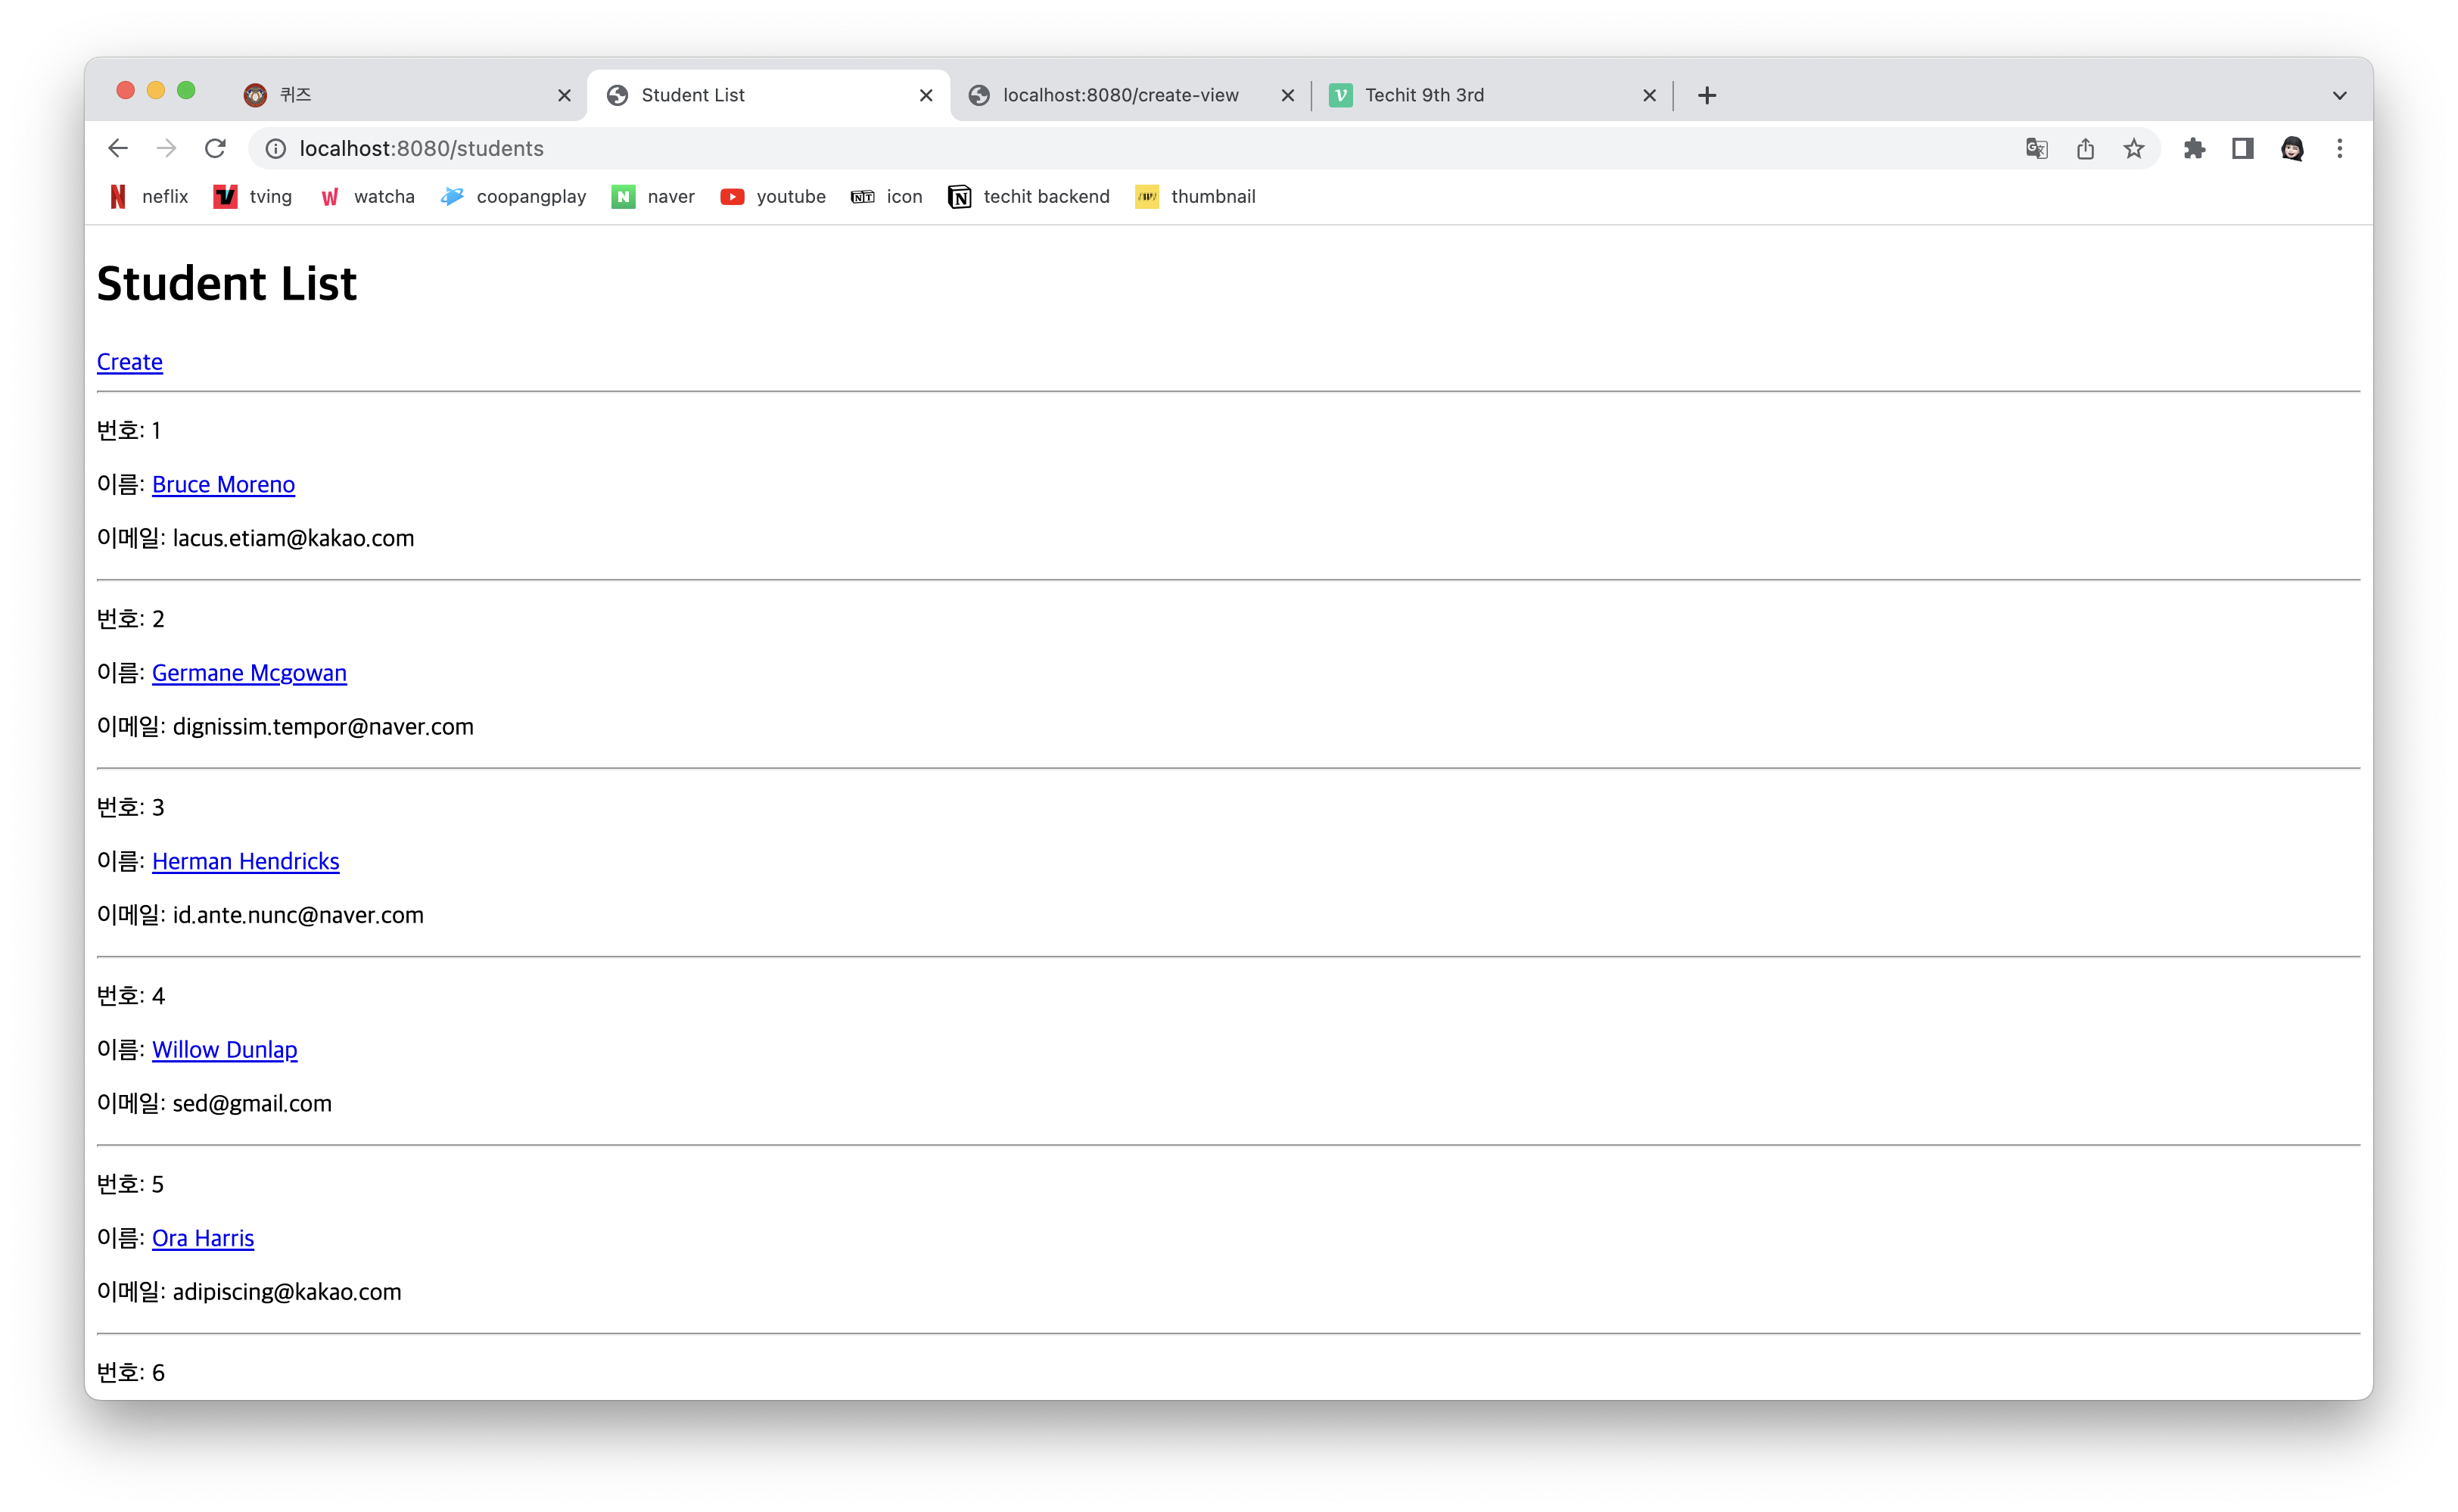
@GetMapping("")
    public String home(Model model) {
        model.addAttribute("studentList", service.readStudentAll());
        return "home";
    }
실행 뒤 localhost:8080/students 에 접속하면 화면이 잘 뜬다.