최신 haproxy를 사용하기 위해서는 패키지 설치를 추천하지만 시간이 부족하여 haproxy를 yum으로 설치합니다.
이 글에서는 다음을 설정합니다.
- yum 설치
- http roundrobin roadbalance
- letsencrypt ssl 인증서 발급
- https 설정
해당 사항을 설정하기 위해서는 다음 조건이 필요합니다.
- 2대 이상의 웹서버
- domain
- 공인 IP 혹은 포트포워딩
2대 이상의 웹 서버는 정상적으로 로드밸런싱이 되고 있는지 확인하기 위해서 필요합니다.
domain과 공인 IP(포트포워딩)은 ssl 인증서를 발급하기 위해서 서버 80번 포트에 접속할 수 있어야 합니다.
domain의 경우 무료 dns혹은 ddns가 있기 때문에 관련 내용을 찾아보시면 됩니다.
공인 IP의 경우 클라우드에서 프리티어로 만들어 보시거나 혹은 집에서 하신다면 공유기 포트포워딩으로 80/tcp하시면 됩니다.
https를 하실경우 https도 하시면 됩니다.
Yum install haproxy
centos7의 경우 1.5.18버전이 설치 가능합니다.
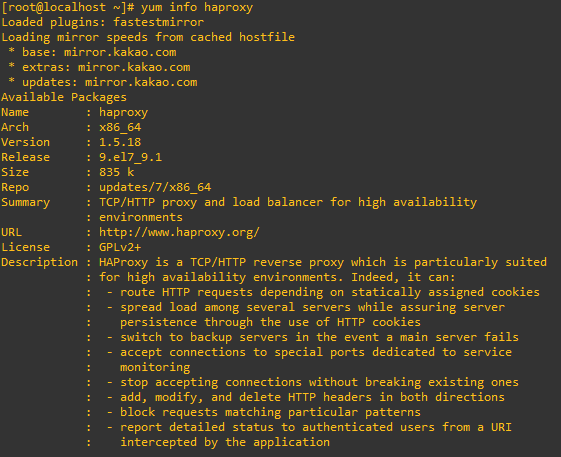
sudo yum -y install haproxy설치가 완료되면 기본적인 설정파일은 다음 경로에 있습니다.
vi /etc/haproxy/haproxy.cfg다음은 기본적으로 정의 되어있는 내용들입니다.
#---------------------------------------------------------------------
# Example configuration for a possible web application.  See the
# full configuration options online.
#
#   http://haproxy.1wt.eu/download/1.4/doc/configuration.txt
#
#---------------------------------------------------------------------

#---------------------------------------------------------------------
# Global settings
#---------------------------------------------------------------------
global
    # to have these messages end up in /var/log/haproxy.log you will
    # need to:
    #
    # 1) configure syslog to accept network log events.  This is done
    #    by adding the '-r' option to the SYSLOGD_OPTIONS in
    #    /etc/sysconfig/syslog
    #
    # 2) configure local2 events to go to the /var/log/haproxy.log
    #   file. A line like the following can be added to
    #   /etc/sysconfig/syslog
    #
    #    local2.*                       /var/log/haproxy.log
    #
    log         127.0.0.1 local2

    chroot      /var/lib/haproxy
    pidfile     /var/run/haproxy.pid
    maxconn     4000
    user        haproxy
    group       haproxy
    daemon
    # turn on stats unix socket
    stats socket /var/lib/haproxy/stats

#---------------------------------------------------------------------
# common defaults that all the 'listen' and 'backend' sections will
# use if not designated in their block
#---------------------------------------------------------------------
defaults
    mode                    http
    log                     global
    option                  httplog
    option                  dontlognull
    option http-server-close
    option forwardfor       except 127.0.0.0/8
    option                  redispatch
    retries                 3
    timeout http-request    10s
    timeout queue           1m
    timeout connect         10s
    timeout client          1m
    timeout server          1m
    timeout http-keep-alive 10s
    timeout check           10s
    maxconn                 3000

#---------------------------------------------------------------------
# main frontend which proxys to the backends
#---------------------------------------------------------------------
frontend  main *:5000
    acl url_static       path_beg       -i /static /images /javascript /stylesheets
    acl url_static       path_end       -i .jpg .gif .png .css .js

    use_backend static          if url_static
    default_backend             app

#---------------------------------------------------------------------
# static backend for serving up images, stylesheets and such
#---------------------------------------------------------------------
backend static
    balance     roundrobin
    server      static 127.0.0.1:4331 check

#---------------------------------------------------------------------
# round robin balancing between the various backends
#---------------------------------------------------------------------
backend app
    balance     roundrobin
    server  app1 127.0.0.1:5001 check
    server  app2 127.0.0.1:5002 check
    server  app3 127.0.0.1:5003 check
    server  app4 127.0.0.1:5004 check
현재 이 설정은 haproxy를 사용하여 웹 서비스를 로드 배런싱하는 예제 구성 파일입니다.
global (전역 설정)
- log : syslog를 사용하여 로그를 기록하며, /var/log/haproxy.log파일에 저장
- daemon : haproxy를 데몬으로 실행하고, pid파일은 /var/run/haproxy.pid에 저장된다.
- maxconn : 최대 연걸 수 제한
- stats socket: haproxy의 상태를 모니터링할 수 있는 UNIX 소켓을 활성화
defaults
- mode http : 모든 리스너, 백엔드에서 http모드를 사용
- httplog : HTTP 요청 및 응답에 대한 상세 로그
- forwardfor : X-Forwarded-For 헤더를 추가하여 클라이언트의 IP 주소를 백엔드 서버로 전달
- redispatch : 연결이 실패하면 다른 백엔드 서버에 재시도
frontend & backend
- ACL : URL 경로에 따라 요청을 분류하고 정적인 자원 요청을 처리할 백엔드 서버와 애플리케이션 요청을 처리할 백엔드 서버를 구분
- use_backend : URL 경로가 정적인 자원을 요청하는 경우, static 백엔드 서버로 요청을 전달, 그 외는 default_backend로 설정한 app 백엔드 서버로 요청을 전달
- balance roundrobin : roundrobin 방식으로 정적인 자원을 처리
- check : 서버의 상태를 확인
결론, frontend와 backend는 모두 주석처리한다.
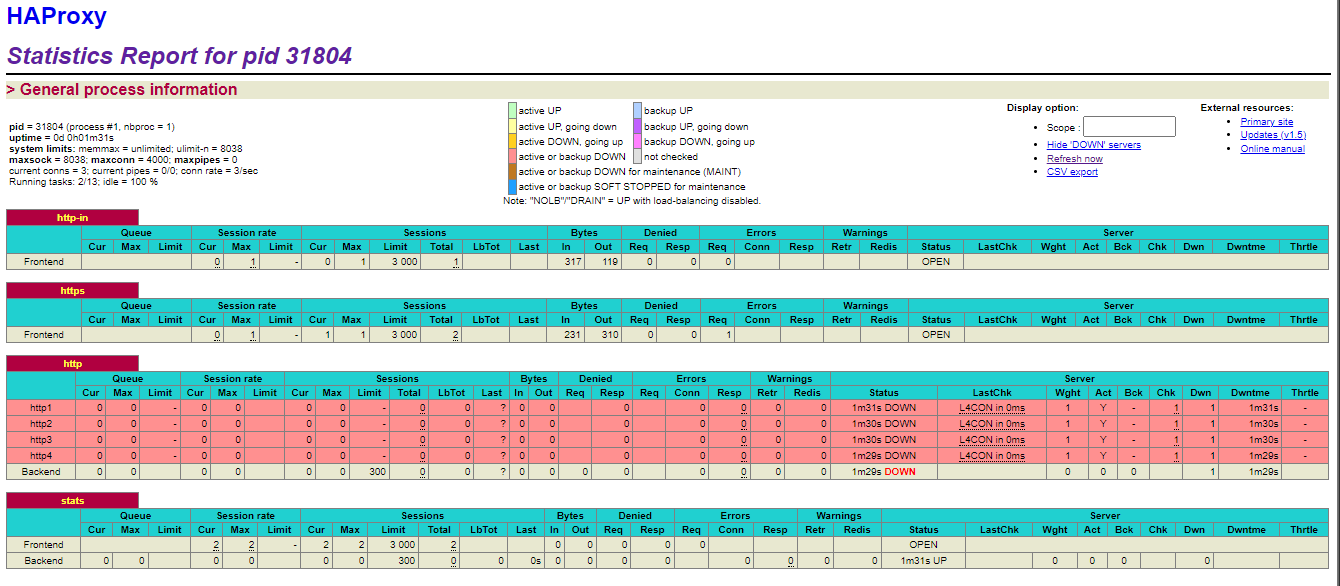
WEB UI 설정
web ui(stats)를 사용하는 옵션이 기본옵션에 없기 때문에 웹에 뛰우기 위해서는 다음 명령어를 haproxy.cfg에 추가하면된다.
vi /etc/haproxy/haproxy.cfglisten stats
bind *:9000
mode http
stats enable
stats hide-version
stats realm Haproxy Statistics
stats uri /설정 후 9000/tcp로 접속하면 정상적으로 웹사이트가 열린다.

HTTP 설정
이 설정에서는 복잡하게 하기보다는 설정하는 방법만을 설명한다.
vi /etc/haproxy/haproxy.cfgfrontend http
bind *:80
default_backend http
backend http
balance roundrobin
server http1 <ip>:80 check
server http2 <ip>:80 check
server http3 <ip>:80 check
server http4 <ip>:80 check이렇게만 설졍해도 php도 http로 가능하다.
certbot ssl 발급
letsencrypt으로 발급하기 위해서는 certbot 프로세서로 발급할수 있다.
centos7에서는 epel-release를 설치해야 다운로드가 가능하다
sudo yum -y install epel-release
sudo yum -y install certbot
만약 certbot --apache 옵션을 사용하고 싶다면 다음 프로세서도 같이 다운로드한다.
sudo yum -y install certbot-apache이제 발급하는 방법은 다음과 같다.
sudo certbot certonly --standalone -d <domain>--apache를 이용한다면 다음과 같아진다.
sudo certbot certonly --apache -d <domain>여기서 주의 할점은 80번 포트로 접속하여 ssl을 발급하게 되는데 haproxy를 80번 포트를 사용하고 있다면 서비스를 중단하고 진행 해야한다.
설치가 완료되면 다음 경로에 기본적으로 설치된다.
/etc/letsencrypt/live/<domain>/
파일을 불러오는것을 간소화 하기 위해서 다음 명령어로 하나로 합친다.
mkdir certs

cat /etc/letsencrypt/live/<domain>/*.pem > /etc/haproxy/certs/ssl.pem
이렇게 되면 문제점이 인증서가 업데이트가 되도 업데이트가 ssl.pem에는 적용이 되지 않기 때문에 cron을 사용하여 주기적으로 업데이트한다.
sudo crontab -e0 6 * * * cat /etc/letsencrypt/live/<domain>/*.pem > /etc/haproxy/certs/ssl.pemHTTPS 설정
이번 설정은 공식문서에서 긁어봤기때문에 설정만 먼저 봅니다.
global
	···
	ca-base /etc/haproxy/certs
    crt-base /etc/haproxy/private
    ···

frontend http-in
  bind *:80
  redirect scheme https if !{ ssl_fc }

frontend https
  bind *:443 ssl crt /etc/haproxy/certs/ssl.pem
  acl is_do_ma_in hdr_end(host) -i do.ma.in
  mode http
    default_backend             http

backend http
    balance     roundrobin
    server  http1 <ip>:443 check
    server  http2 <ip>:443 check
    server  http3 <ip>:443 check
server http4 <ip>:443 check- ca-base : 인증서 파일의 기본 디렉토리 경로를 지정
- crt-base : 개인 키 파일의 기본 디렉토리 경로를 지정
- http-in : HTTP 요청을 받아들이는 프론트엔드로, 클라이언트가 HTTPS가 아닌 요청을 보낼 경우에는 redirect 지시어를 사용하여 HTTPS로 리디렉션
- acl : HTTP 요청의 Host 헤더 값이 do.ma.in으로 끝나는 경우를 체크하여, 이에 해당하는 요청에 대해서만 다음에 나오는 설정 지시어들이 적용
여기서는 간단하게 사용했지만 acl을 이용해서 같은 ip이지만 도메인에 따라서 다르게 접속하게 할수있습니다.
아래는 그 예시로 찾았지만, 적용은 하지않았으니 그점 참고바랍니다.
예시 : www.token.com, cafe.token.com
frontend https
  bind *:443 ssl crt /etc/haproxy/certs/ssl.pem
  acl is_token hdr_end(host) -i www.token.com
  acl is_fake hdr_end(host) -i www.fake.com
  mode http
  use_backend token_backend if is_token
  use_backend fake_backend if is_fake
  default_backend http

backend token_backend
  mode http
  balance roundrobin
  server http1 <token_ip>:443 check
  server http2 <token_ip>:443 check
  server http3 <token_ip>:443 check
  server http4 <token_ip>:443 check
  ssl crt /etc/haproxy/certs/token_ssl.pem

backend fake_backend
  mode http
  balance roundrobin
  server http1 <fake_ip>:443 check
  server http2 <fake_ip>:443 check
  server http3 <fake_ip>:443 check
  server http4 <fake_ip>:443 check
  ssl crt /etc/haproxy/certs/fake_ssl.pem
apache https 설정
vi /etc/httpd/conf/httpd.conf<VirtualHost _default_:443>
ServerName www.securehosting.site
SSLEngine on
SSLCertificateFile /etc/httpd/conf/www.securehosting.site/cert.pem
SSLCertificateKeyFile /etc/httpd/conf/www.securehosting.site/privkey.pem
SSLCertificateChainFile /etc/httpd/conf/www.securehosting.site/chain.pem
SSLCACertificateFile /etc/httpd/conf/www.securehosting.site/fullchain.pem
JkMount /* tomcat
</VirtualHost>설정 완료 후 재시작 시 포트가 열려있는지 확인이 필요
netstat -nlp | grep -i httpd
가끔 443포트가 열리지 않는 경우 하단에 코드를 넣어준다
Listen 443