HTTP 요청 송수신을 지원하는 모든 언어를 사용하여 SSI 서비스를 구축
Hyperledger Aries 프로젝트의 일부로 개발된 에이전트 소프트웨어이며 Aries Cloud Agent는 사용자, 기업 및 기관이 신원 정보를 안전하게 관리하고, 저장하며, 공유할 수 있는 기능을 제공한다. ACA는 분산 신원(DID) 시스템에 연결되어 작동하며, 서로 다른 주체간의 메시지 교환, 자격 증명 발급 및 검증을 지원한다.
주요 기능
- DID 생성 및 관리: ACA는 사용자가 분산 신원(DID) 시스템에 신원을 생성하고 관리할 수 있도록 지원합니다. 이를 통해 사용자는 온라인에서 자신의 신원을 증명하고 관리할 수 있습니다.
- 자격 증명 발급 및 검증: ACA는 발급자와 검증자 간의 자격 증명 발급 및 검증 프로세스를 지원합니다. 사용자는 이를 통해 자격 증명을 발급 받을 수 있고, 필요한 경우 이러한 자격 증명을 검증할 수 있습니다.
- 메시지 교환: ACA는 서로 다른 주체간의 메시지 교환을 지원합니다. 이를 통해 사용자는 신원 정보를 안전하게 공유하고 검증할 수 있습니다.
- Wallet 관리: ACA는 사용자의 신원 정보, 자격 증명 및 개인 키를 저장하는 지갑 기능을 제공합니다. 이를 통해 사용자는 자신의 신원 정보를 안전하게 관리하고 저장할 수 있습니다.
- 분산 원장 연결: ACA는 Hyperledger Indy와 같은 분산 원장과 연결하여 작동합니다. 이를 통해 사용자는 분산 원장에 저장된 신원 정보를 사용할 수 있습니다.
- 프로토콜 구현: ACA는 Aries 프로토콜을 구현하여 서로 다른 주체들이 상호 작용할 수 있는 표준화된 방식을 제공합니다. 이를 통해 다양한 분산 신원 시스템 간의 호환성이 보장됩니다.
데모 실행 해보기
-
GIt Clone
git clone https://github.com/hyperledger/aries-cloudagent-python.git -
demo 또는 docker 폴더 진입
cd demo #or cd docker -
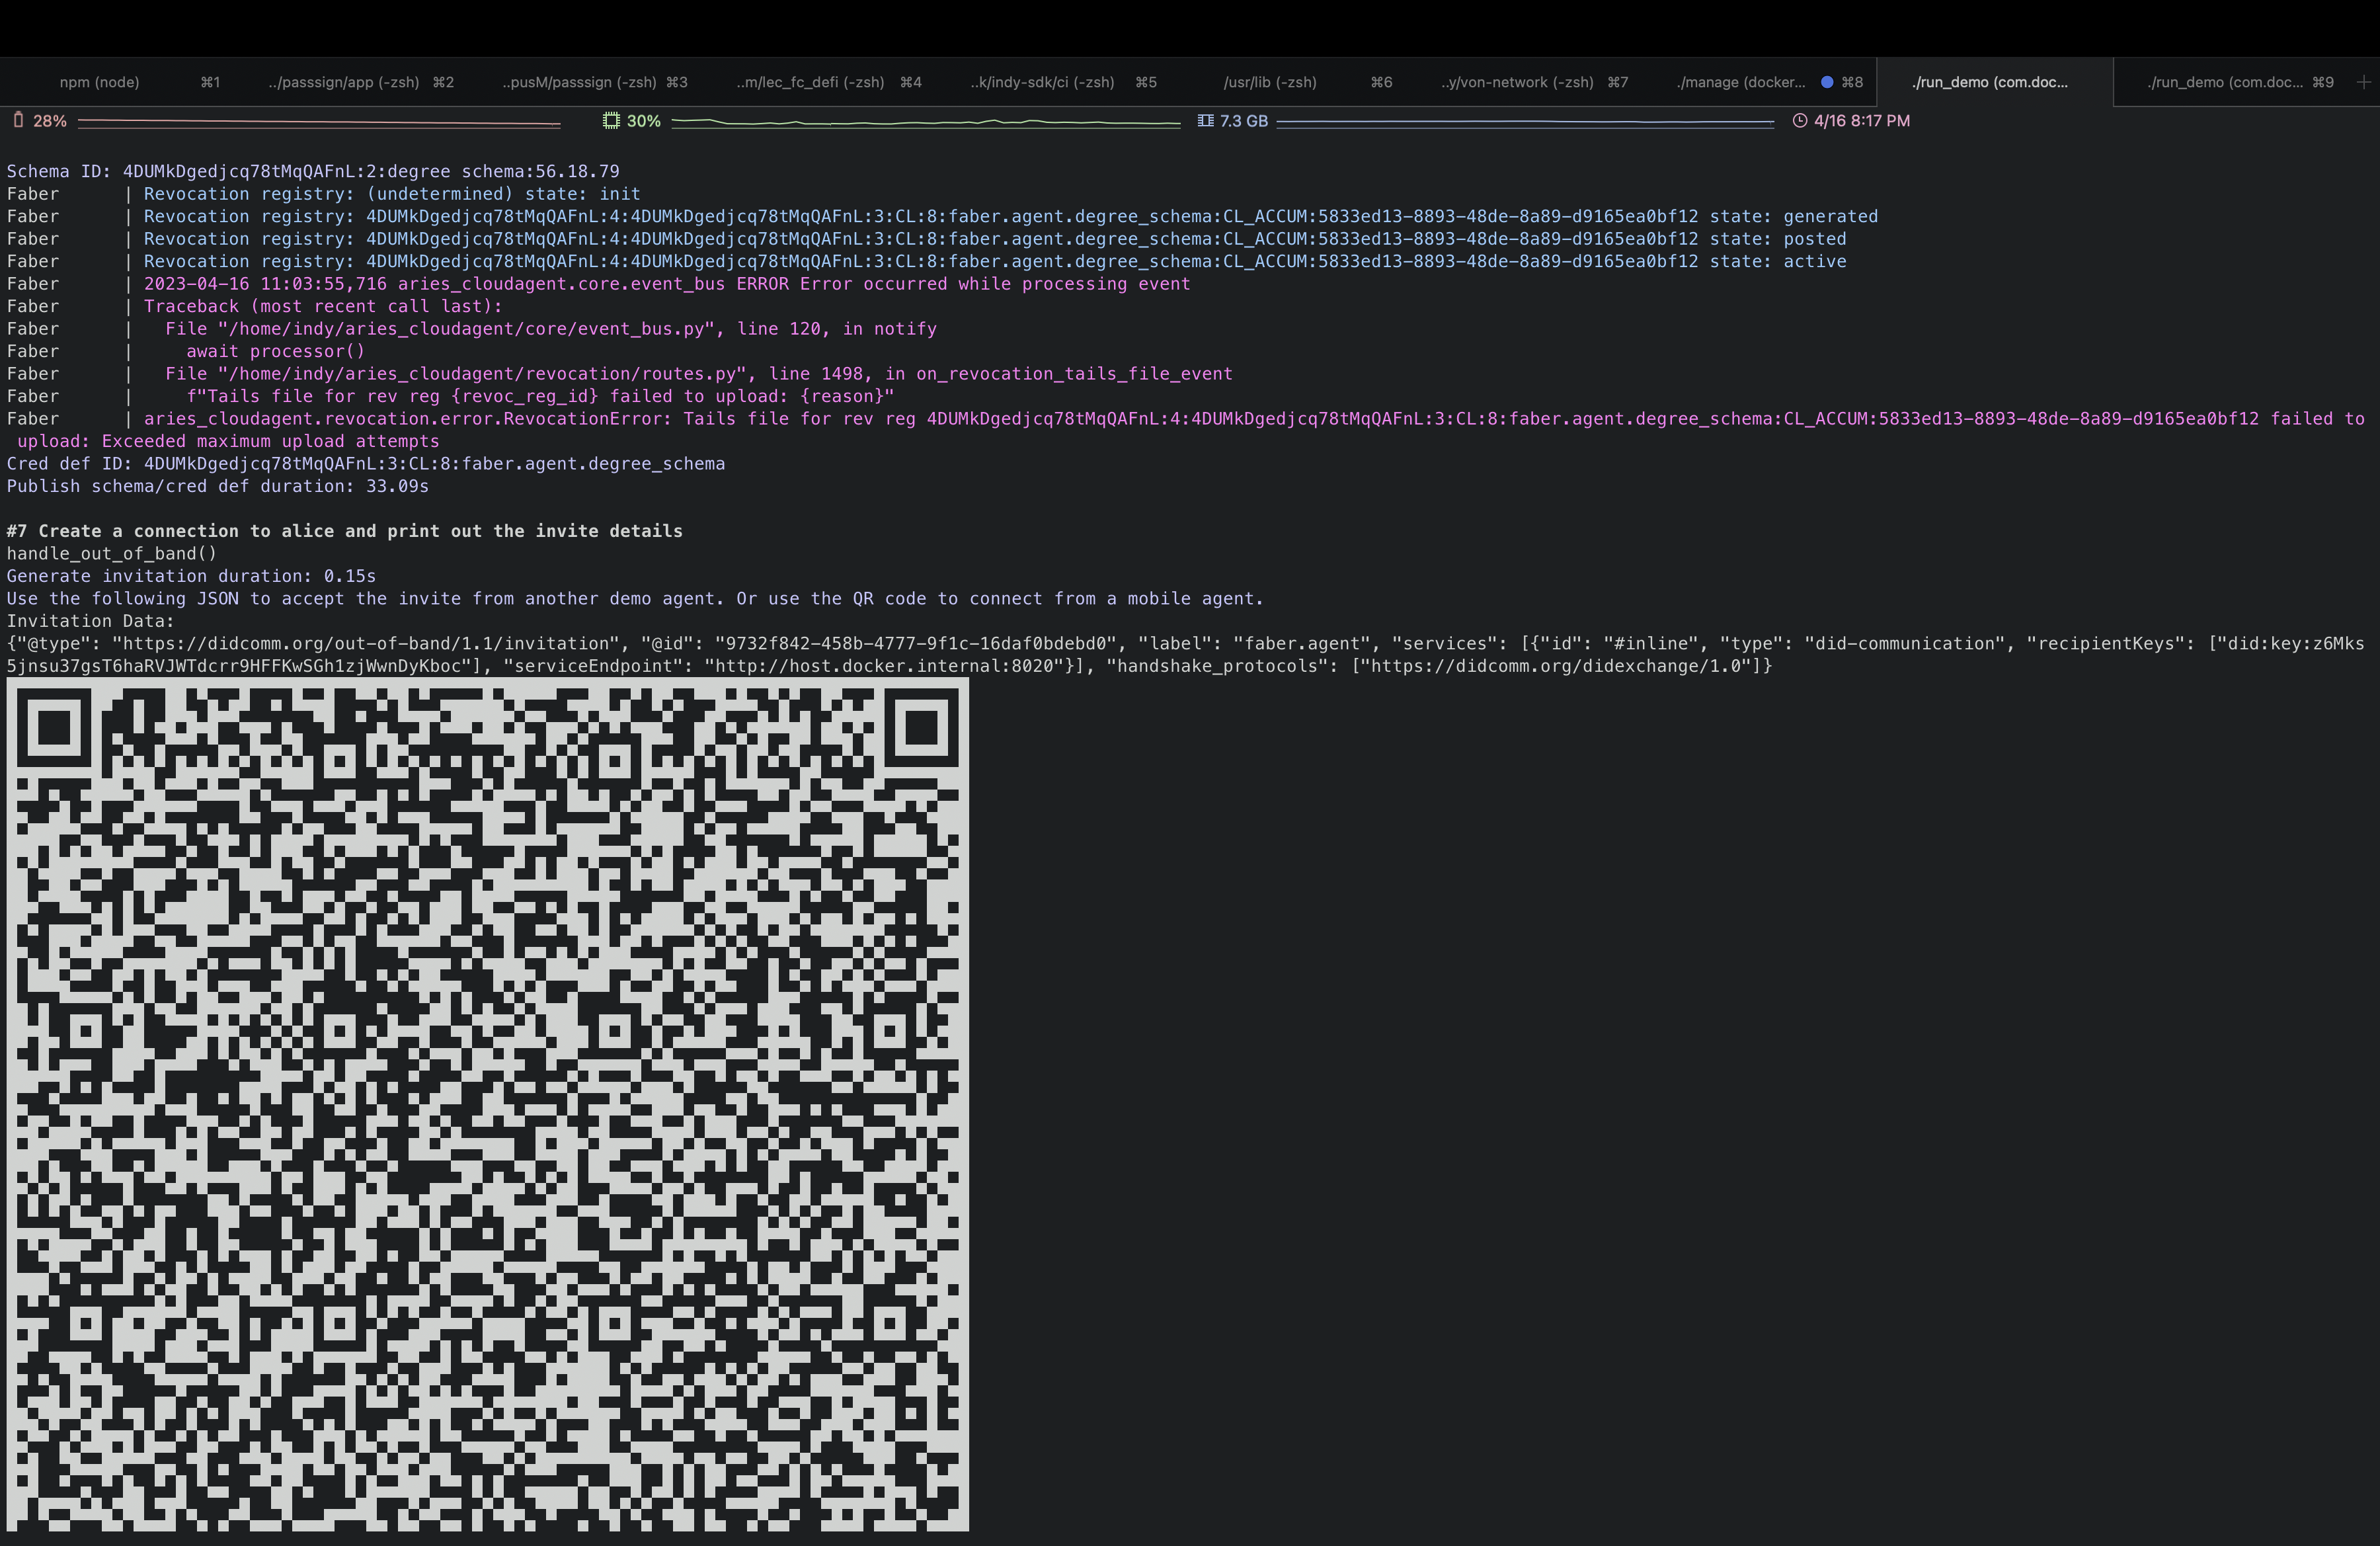
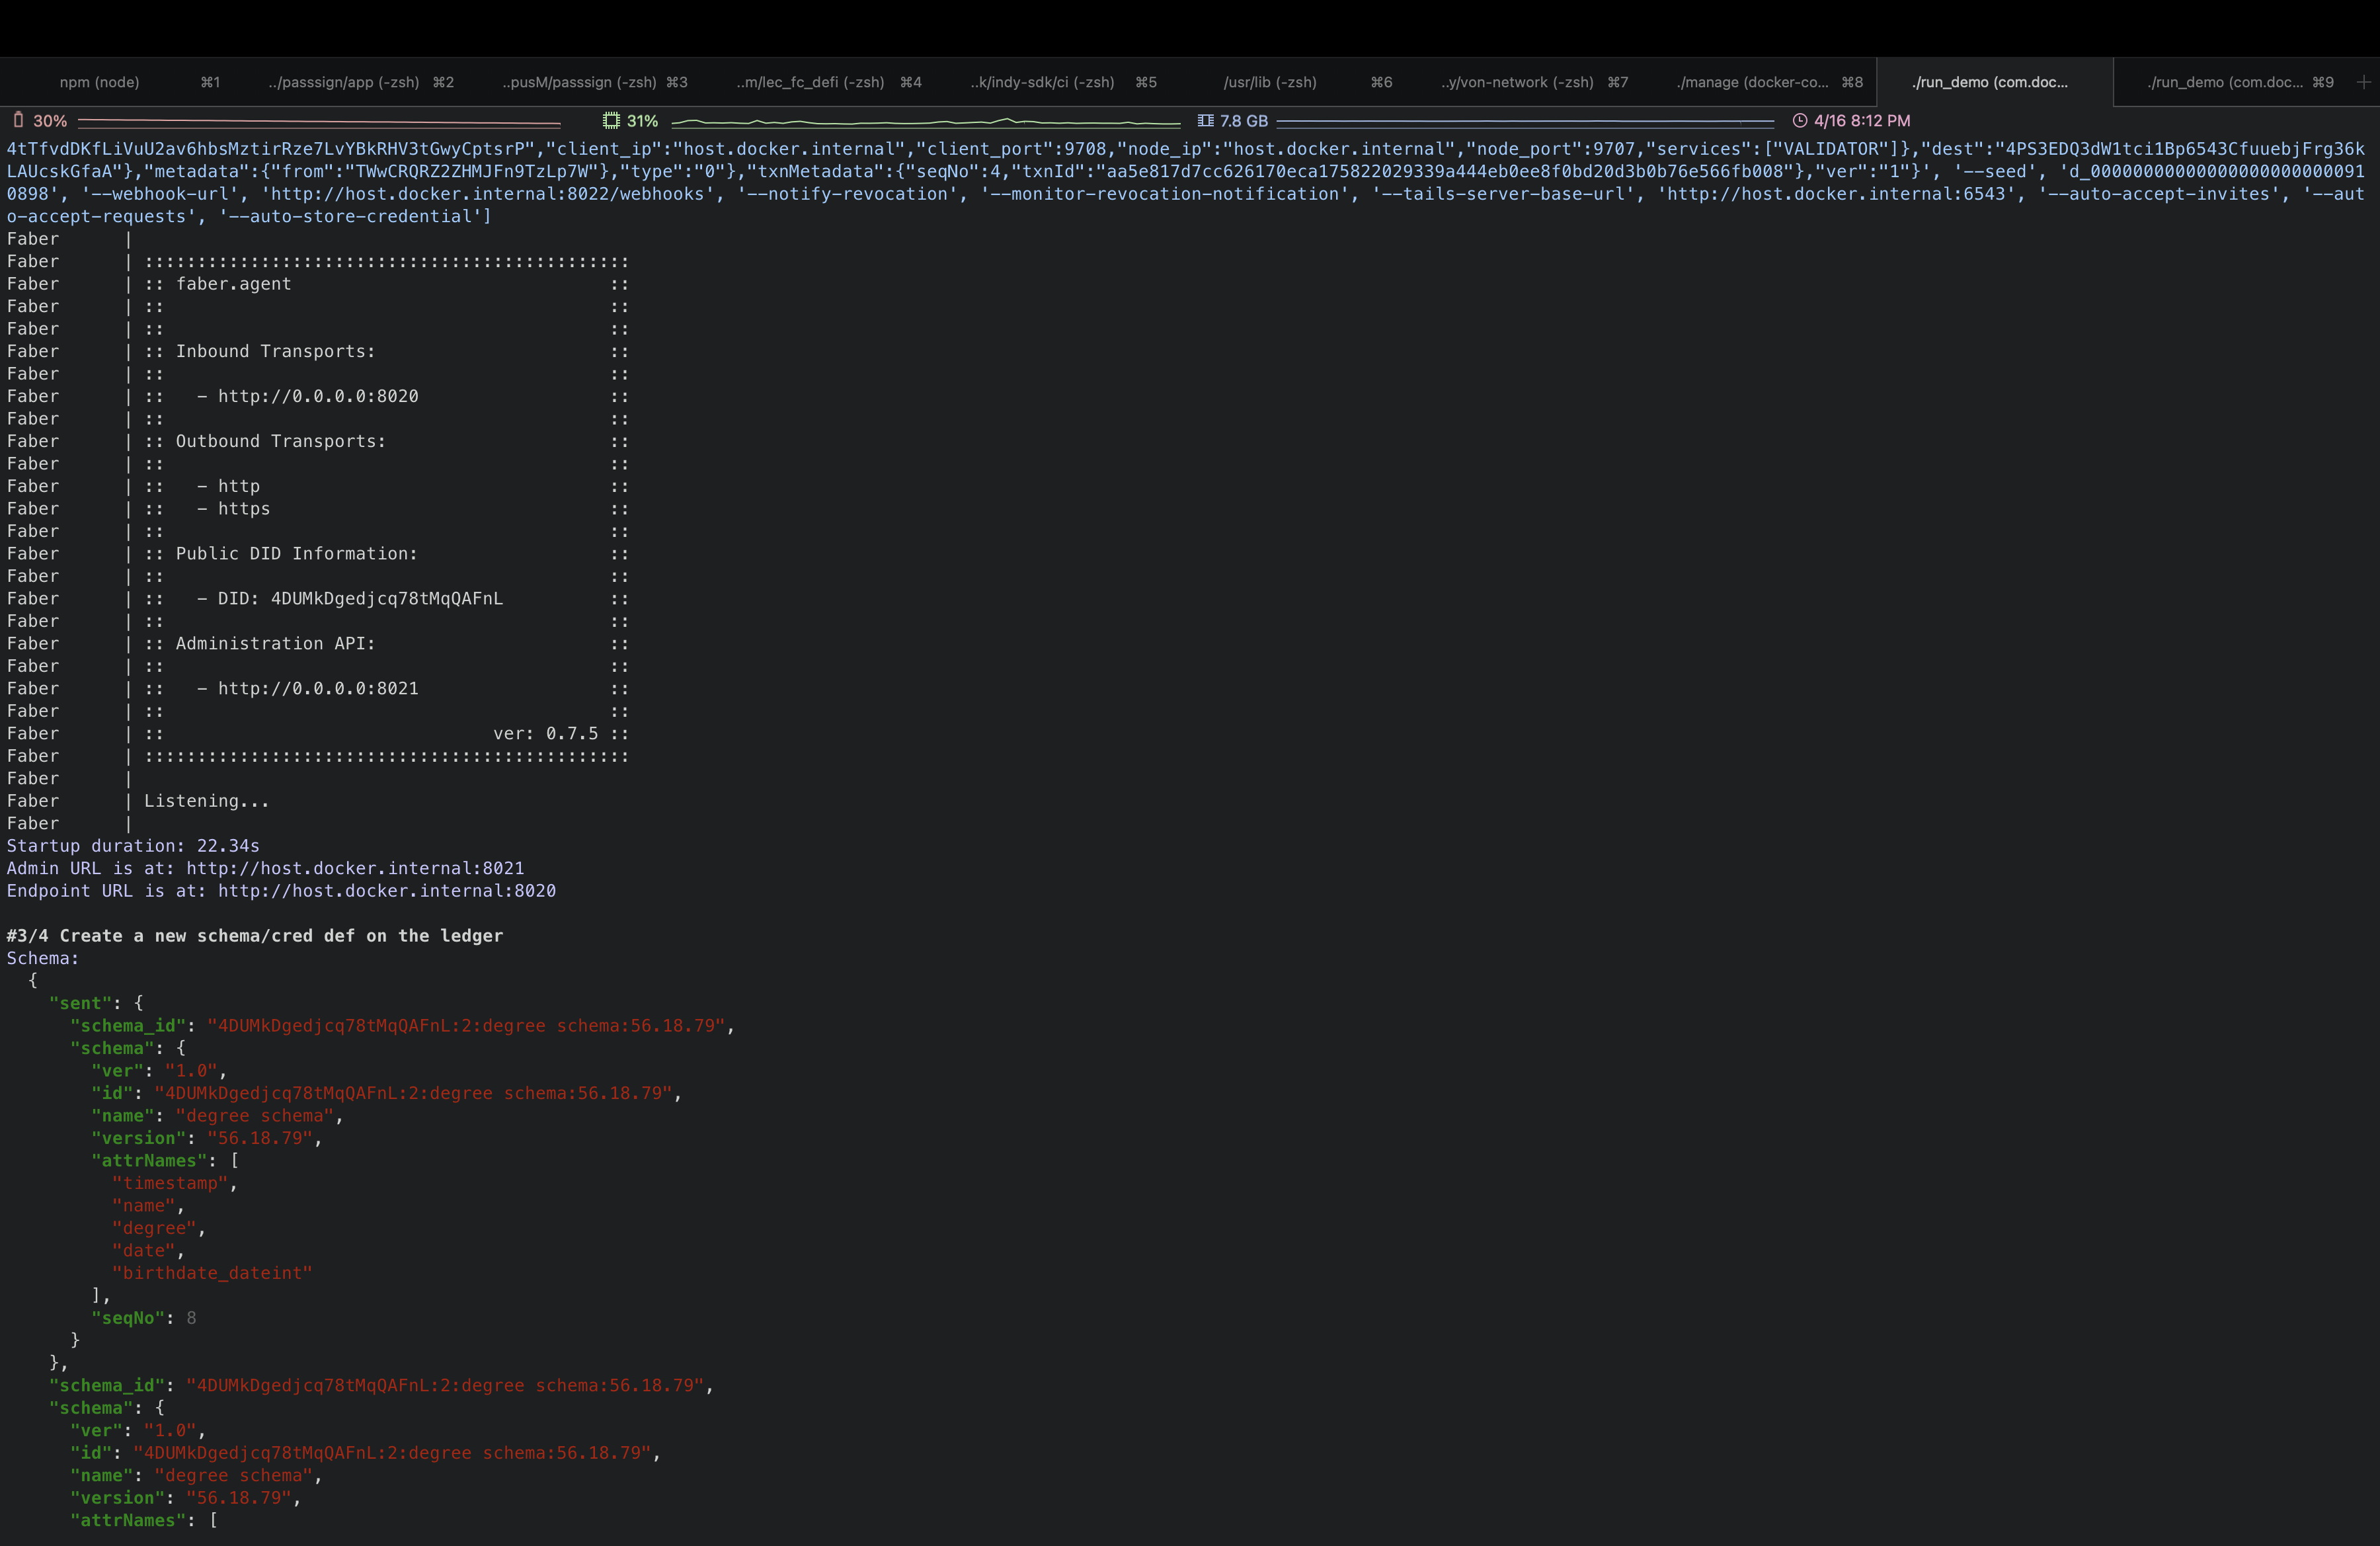
데모 Agent 실행
# demo folder
# Faber Agent
./run_demo faber --revocation
# Alice Agent
./run_demo alice

# docker folder
# Faver agent
./manage demo faber --revocation
# Alice agent
./manage demo alice
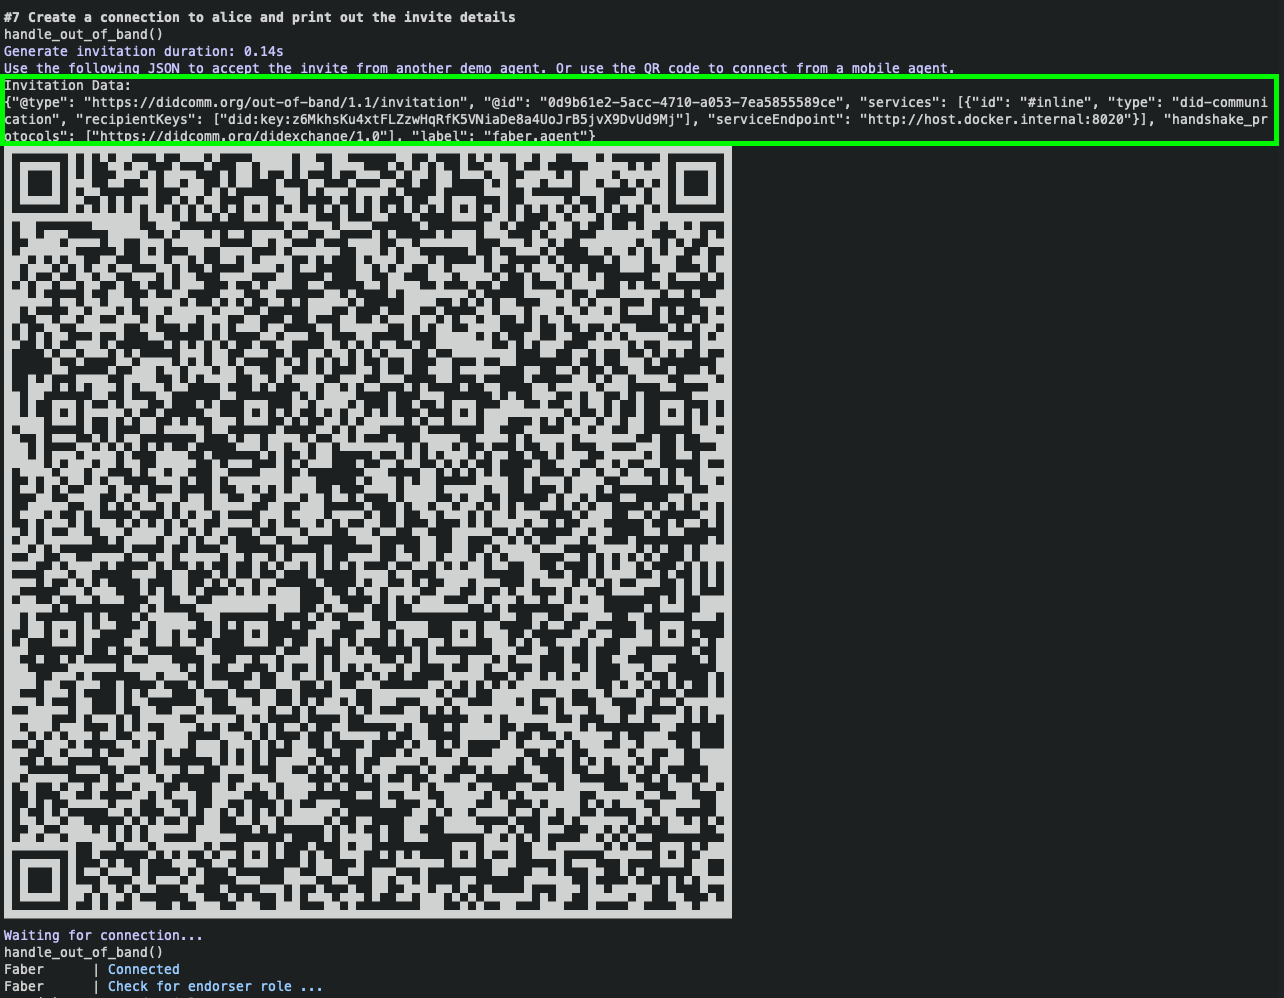
실행 화면
Faber Agent
Alice Agent

- Faber Agent QR코드 상단 Invitation Data를 Alice Agent에 입력해서 연결
Faber Agent
연결 확인 화면
Alice Agent

Faber Agent

- Credential 발급
연결 확인 후 Faber Agent에서 (1) Issue Credential 입력
Faber Agent

Alice Agent

- 발급 받은 DID 확인
http://localhost:8031/api/doc 으로 이동하여 credentaials 항목에서 GET:/credentials요청 실행

//실행 시 받은 Response Body
{
"results": [
{
"referent": "8d395fb5-e30d-456a-9fe3-7b46dbd7b3d9",
"schema_id": "V1r4FtM8wfMrTFJ1qq2kSq:2:degree schema:47.20.18",
"cred_def_id": 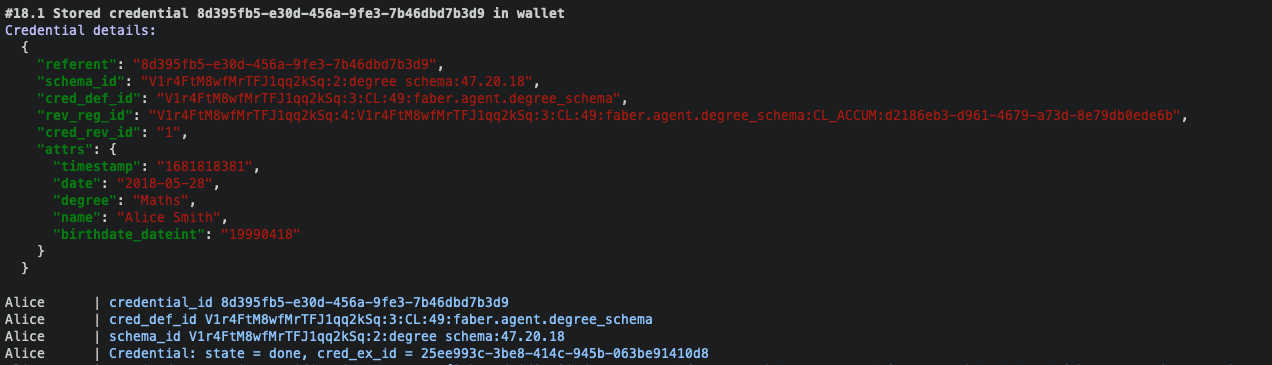
"V1r4FtM8wfMrTFJ1qq2kSq:3:CL:49:faber.agent.degree_schema",
"rev_reg_id": "V1r4FtM8wfMrTFJ1qq2kSq:4:V1r4FtM8wfMrTFJ1qq2kSq:3:CL:49:faber.agent.degree_schema:CL_ACCUM:d2186eb3-d961-4679-a73d-8e79db0ede6b",
"cred_rev_id": "1",
"attrs": {
"birthdate_dateint": "19990418",
"name": "Alice Smith",
"degree": "Maths",
"timestamp": "1681818381",
"date": "2018-05-28"
}
}
]
}Alice

- 발급받은 Credential revoke
Faber Agent로 돌아가서 (5) Revoke Credential 입력 후 Registry ID , credential revocation ID입력
Faber

- revoke된 Credential확인
http://localhost:8031/api/doc 으로 이동하여 credentaials 항목에서 GET:/credential/revoked/{credential_id} 에 아까 확인한 JSON에서 “referent”항목을 파라미터로 넣어서 요청
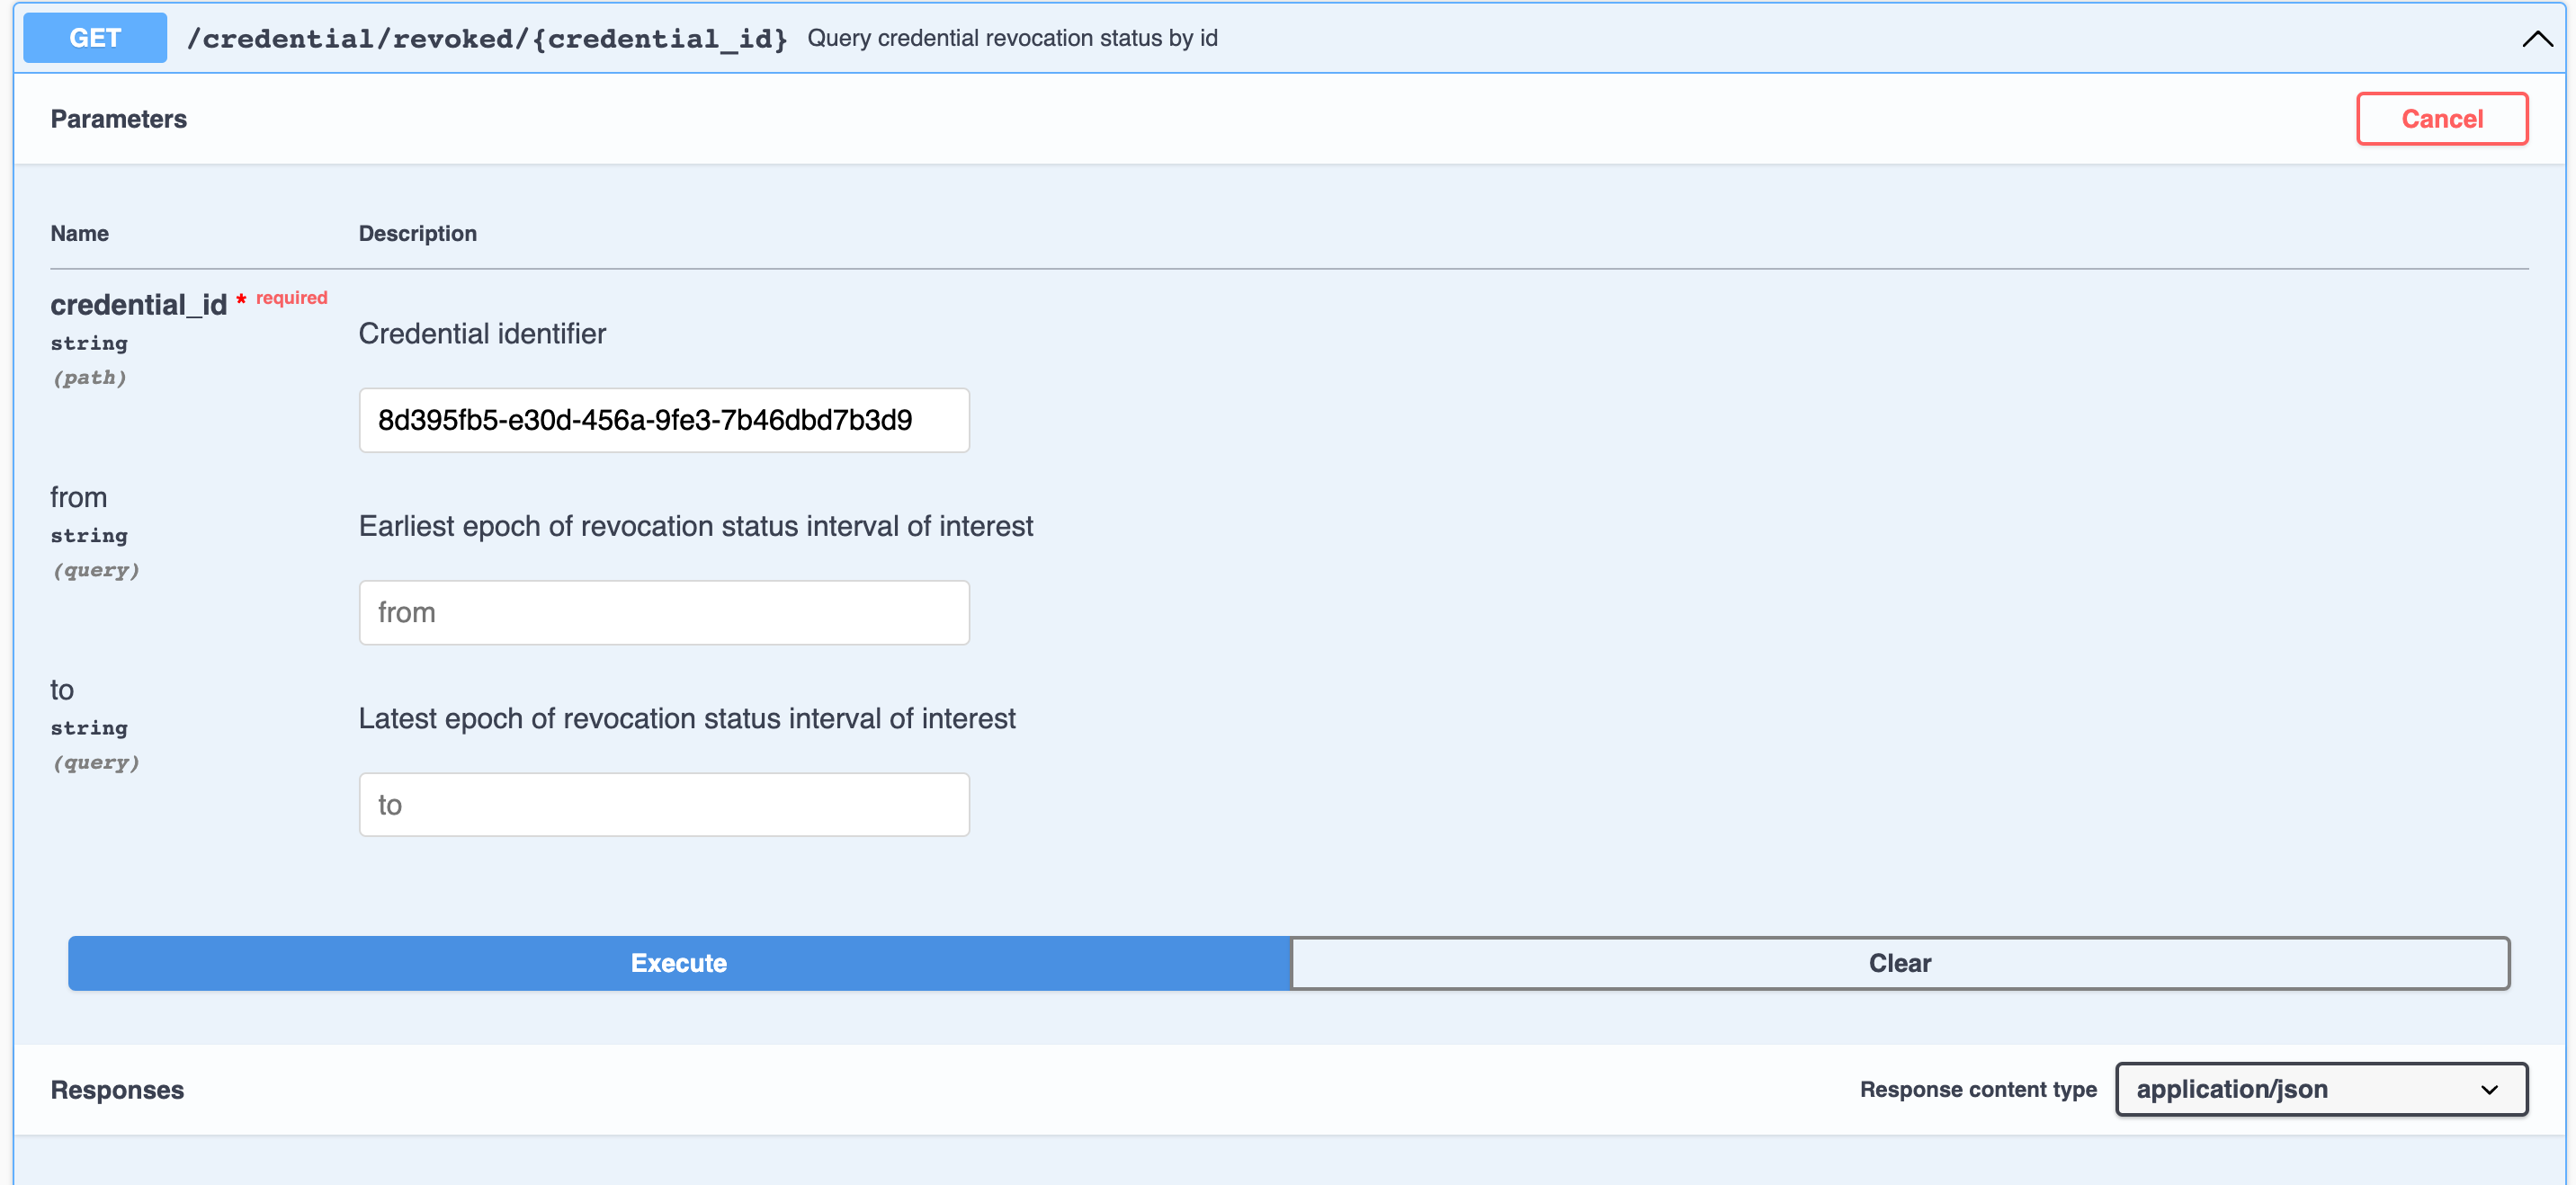
// 실행 시 받은 Response Body
{
  "revoked": true
}
마치며
여기까지가 간단하게 Hyperledger를 이용하여 간단하게 Demo를 이용해서 Credential 발급 및 회수까지의 시나리오 및 진행 방법이었다. http://localhost:8031/api/doc, http://localhost:8021/api/doc에 들어가보면 해당 Agent에서 사용가능한 API목록을 볼 수 있으니 API를 보면서 여러가지 스터디를 진행해 봐야겠다 🙂🙂
Refer.
