온프레미스 프로덕션 환경으로 Kubernetes, kubeflow 구축하기!(Vagrant 없이, 중단)
- 따라하지 마시고 이것부터 읽으시길 바랍니다. Ancible과 Vagrant를 함께 사용해야 컨트롤 플레인과 워커 노드를 편리하게 구축할 수 있습니다. 다음 포스팅에서 구축 방법만 간략하게 정리하겠습니다!
- 이번 포스팅은 kubespray의 대략적인 개념과 사전준비 사항만 확인해보시면 되겠습니다.
서론
안녕하세요!
그동안 Minikube를 활용해서 쉽게 쿠버플로를 구축하고 잘 사용하고 있었는데..
프로젝트 특성 상 실제 프로덕션을 진행해야하기 때문에 Minikube를 버려야 할 상황입니다.
Minikube는 기본적으로 로컬에서 쿠버네티스를 쉽게 구축하고 연습, 연구 등을 진행할 수 있습니다. 다만 실제로 구축한 서비스를 외부로 노출하고 프로덕션 하는데는 적합하지 않습니다.
다중 노드나, 로드밸런서 서비스를 받쳐주기 위한 metallb addons, minikube start 시 listion_address 조정 등 다양한 시도를 해보았지만 서비스를 외부로 노출하는 것이 쉽지 않았습니다.
또한 프로덕션 환경은 들어오는 트래픽에 따라 리소스를 유연하게 증설하는 등의 가용성이 필요하고, 보안 역시 놓칠 수 없다.
프로덕션 환경에서 고려할 다양한 요소에 대해서는 링크를 참고해서 읽어보시면 좋겠습니다.
이러한 이유 때문에 kubespray를 이용해서 kubenetes와 kubeflow를 한 단계씩 구축해겠습니다!
본론
- 참고 : 배포 도구 비교
- kubeadm vs kubespray- kops : 클라우드 환경에서 배포 도구로 유리해보입니다. 다만 AWS같이 EKS 등을 지원하는 클라우드에서 굳이 kops로 배포해야 하는 이유가 따로 있을지 궁금하네요.
- kubeadm
- Kubernetes 클러스터 설정의 세 가지 주요 단계 중 하나인 가상 머신 프로비저닝에 관여하지 않음
- 도구에 인프라 종속성이 없다는 점에서 kubeadm은 Kubernetes 베어메탈 설치에 적합하거나 사용자가 수동 설정 중에 사용할 수 있는 다른 도구에 대한 보완책
- Kubernetes 클러스터 설정의 세 가지 주요 단계 중 하나인 가상 머신 프로비저닝에 관여하지 않음
배포 도구로 쿠버네티스 설치하기
저는 Kubespray를 활용해서 쿠버네티스를 배포해보고자 합니다.
이유는 kubespray가 kubeadm을 기반하여 만들어진 툴이기도 하고,
kubeadm에서 일일이 해줘야하는 다양한 설정을 kubespray에서는 스크립트로 자동화시켜주는 것 같아서입니다.
저는 kubespray 공식 github에 따라 클러스터 배포를 해보겠습니다.
구글링을 몇 시간 해보았는데, 다들 vagrant 등의 VM 머신을 이용해서 리눅스 서버를(컨트롤 플레인, 워커 노드) 4~5개 구성하여 사용하더라고요.
하지만 온프레미스 서버(ubuntu 18.04)가 이미 있는데, 왜 또 그 안에 VM을 여러개 두어야하는지, 자동으로 가상머신을 생성해주지 않을지 하는 마음에 일단 quick start 방식을 따라해봤습니다.(특히 kubespray가 사용하는 Ansible이 프로비저닝, 자동화 도구이니까요)
- 프로비저닝(provisioning)은 사용자의 요구에 맞게 시스템 자원을 할당, 배치, 배포해 두었다가 필요 시 시스템을 즉시 사용할 수 있는 상태로 미리 준비해 두는 것을 말한다.
사전 환경설정
-
CLI 사용시 자동으로 conda가 활성화 될 때 비활성화 하는 법
-conda config --set auto_activate_base false -
쿠버네티스 공식 홈페이지 kubespray를 이용한 클러스터 배포 요구사항
언더레이(underlay) 요건을 만족하는 프로비전 한다.

Ansible의 명령어를 실행하기 위해 Ansible v 2.9와 Python netaddr 라이브러리가 머신에 설치되어 있어야 한다
Ansible 플레이북을 실행하기 위해 2.11 (혹은 그 이상) 버전의 Jinja가 필요하다
타겟 서버들은 docker 이미지를 풀(pull) 하기 위해 반드시 인터넷에 접속할 수 있어야 한다. 아니라면, 추가적인 설정을 해야 한다 (오프라인 환경 확인하기)
타겟 서버들의 IPv4 포워딩이 활성화되어야 한다
SSH 키가 인벤토리의 모든 서버들에 복사되어야 한다
방화벽은 관리되지 않는다. 사용자가 예전 방식대로 고유한 규칙을 구현해야 한다. 디플로이먼트 과정에서의 문제를 방지하려면 방화벽을 비활성화해야 한다
만약 kubespray가 루트가 아닌 사용자 계정에서 실행되었다면, 타겟 서버에서 알맞은 권한 확대 방법이 설정되어야 한다. 그 뒤 ansible_become 플래그나 커맨드 파라미터들, --become 또는 -b 가 명시되어야 한다- 아래의 모든 과정은 온프레미스 ubuntu 18.04 서버에서 진행합니다. 목적은 서버에 쿠버네티스 클러스터와 쿠버플로를 구축해놓고, 서비스해서 다른 클라이언트에서 접속해 사용하기 위함입니다.
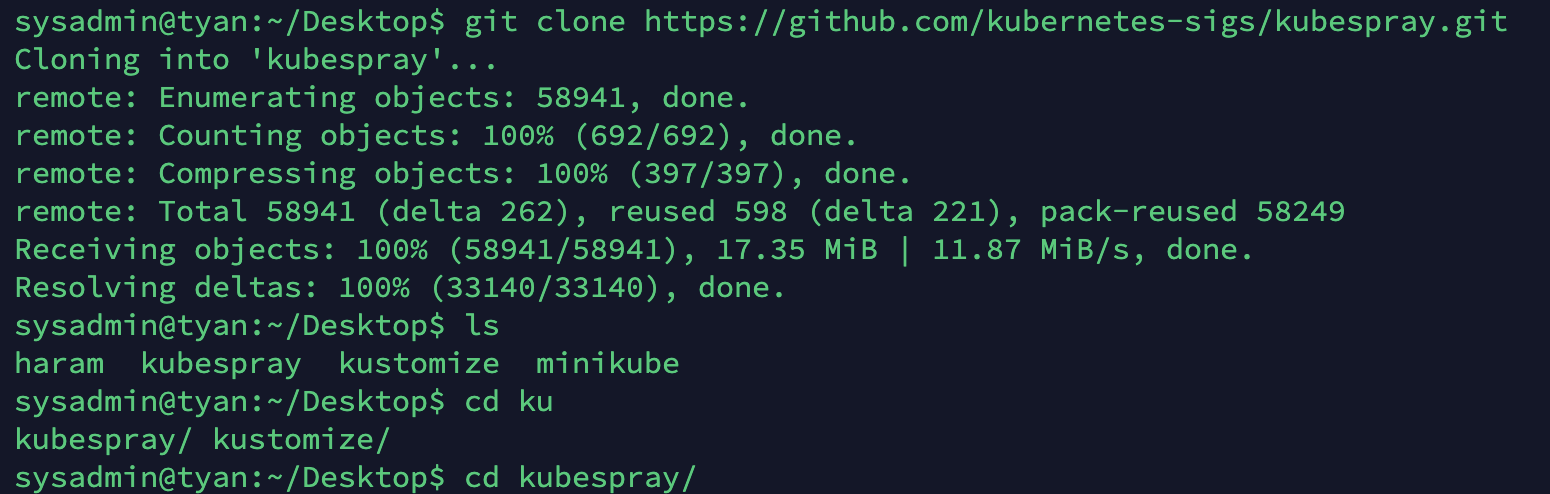
- git clone
cd Desktopgit clone https://github.com/kubernetes-sigs/kubespray.gitcd kubespray
- python 3.x 이상 (우분투 18.04에서 기본 제공하는 3.6.9버전 사용)
python --version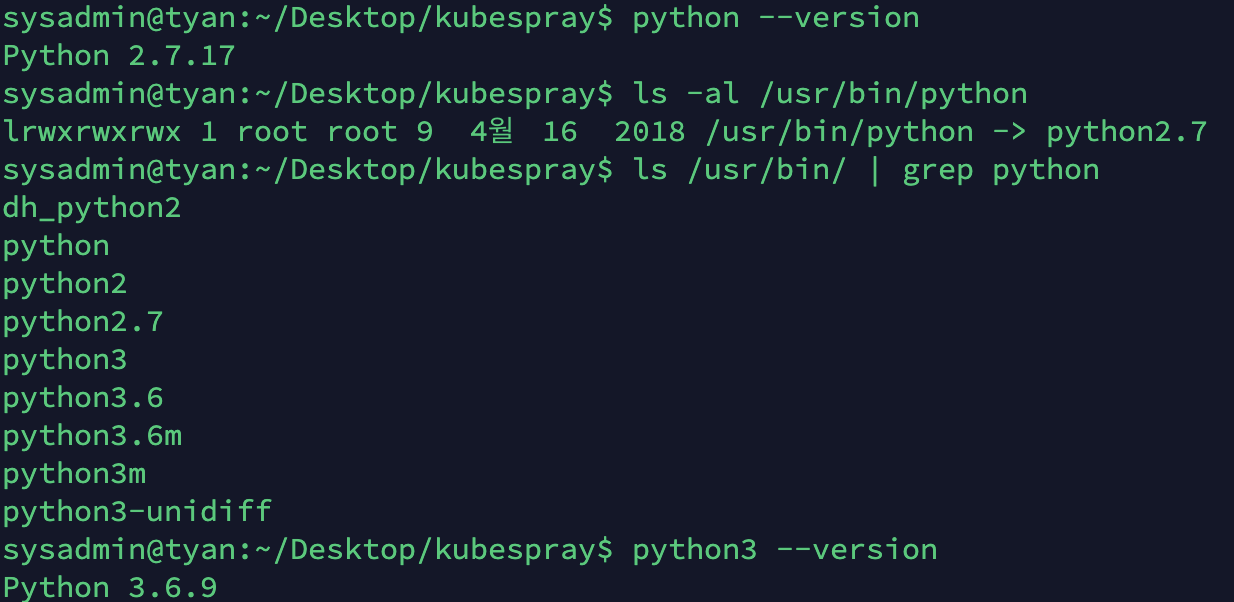
- 우분투는 다양한 파이썬 버전을 지원하고,
update-alternatives명령어를 활용해서 기본 버전을 변경할 수 있습니다.
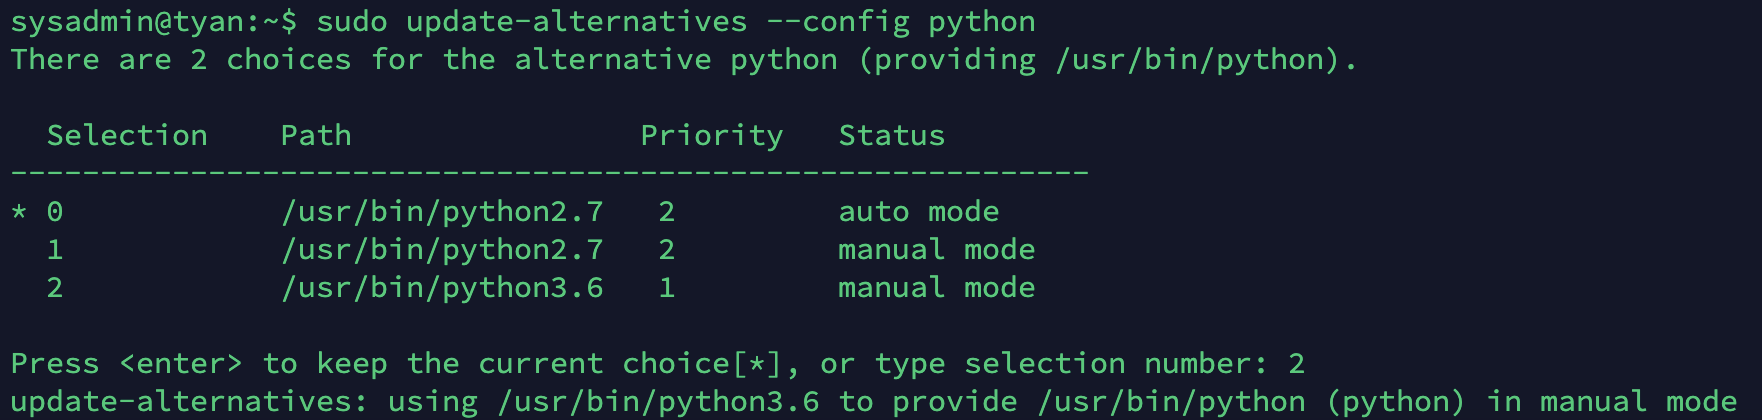
- 파이썬 버전 등록 확인(아직 미설정) :
sudo update-alternatives --config python

- 버전 변경 실행파일 등록 :
update-alternatives --install [symbolic link path] python [real path] number
-sudo update-alternatives --install /usr/bin/python python /usr/bin/python3.6 1
-sudo update-alternatives --install /usr/bin/python python /usr/bin/python2.7 2

- 변경 적용 :
update-alternatives --config python
- install pip
- 설치후 pip도 pip3로 작동할 수 있도록 bashrc에 alias를 추가해줍니다.
sudo apt install python3-pipvim ~/.bashrc
- 파일 맨 하단에alias pip=pip3등록
- 적용 :source ~/.bashrc
- docker v20.10
Ansible로 클러스터 배포하기
- Ansible을 이용하기 위한 의존성 패키지를 설치해줍니다. 위에서 설명한 공식페이지의 요구사항에 적합한 버전의 어플리케이션들이 적혀있습니다. requirements 내용 확인
cd Desktop/kubespray
sudo pip3 install -r requirements.txt
inventory/sample을inventory/mycluster로 복사합니다.
cp -rfp inventory/sample inventory/mycluster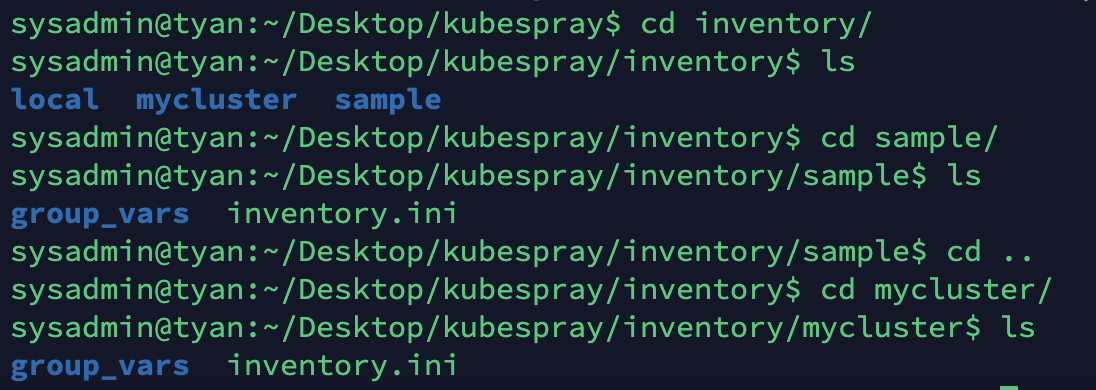
- 인벤토리 빌더로 Ansible 인벤토리 파일 업데이트
- 인벤토리 파일에서 group, control_plane, worker_node, etcd, k8s_cluster, calico 등의 정보와 호스트 노드가 그룹별로 추가되는 것을 확인할 수 있습니다. 역시 굳이 vagrant 설치와 vm 생성을 거치지않고 진행하는 것이 맞군요.
# declare -a IPS=(10.10.1.3 10.10.1.4 10.10.1.5)
declare -a IPS=(192.168.25.41 192.168.25.42 192.168.25.43 192.168.25.44 192.168.25.45)
CONFIG_FILE=inventory/mycluster/hosts.yaml python3 contrib/inventory_builder/inventory.py ${IPS[@]}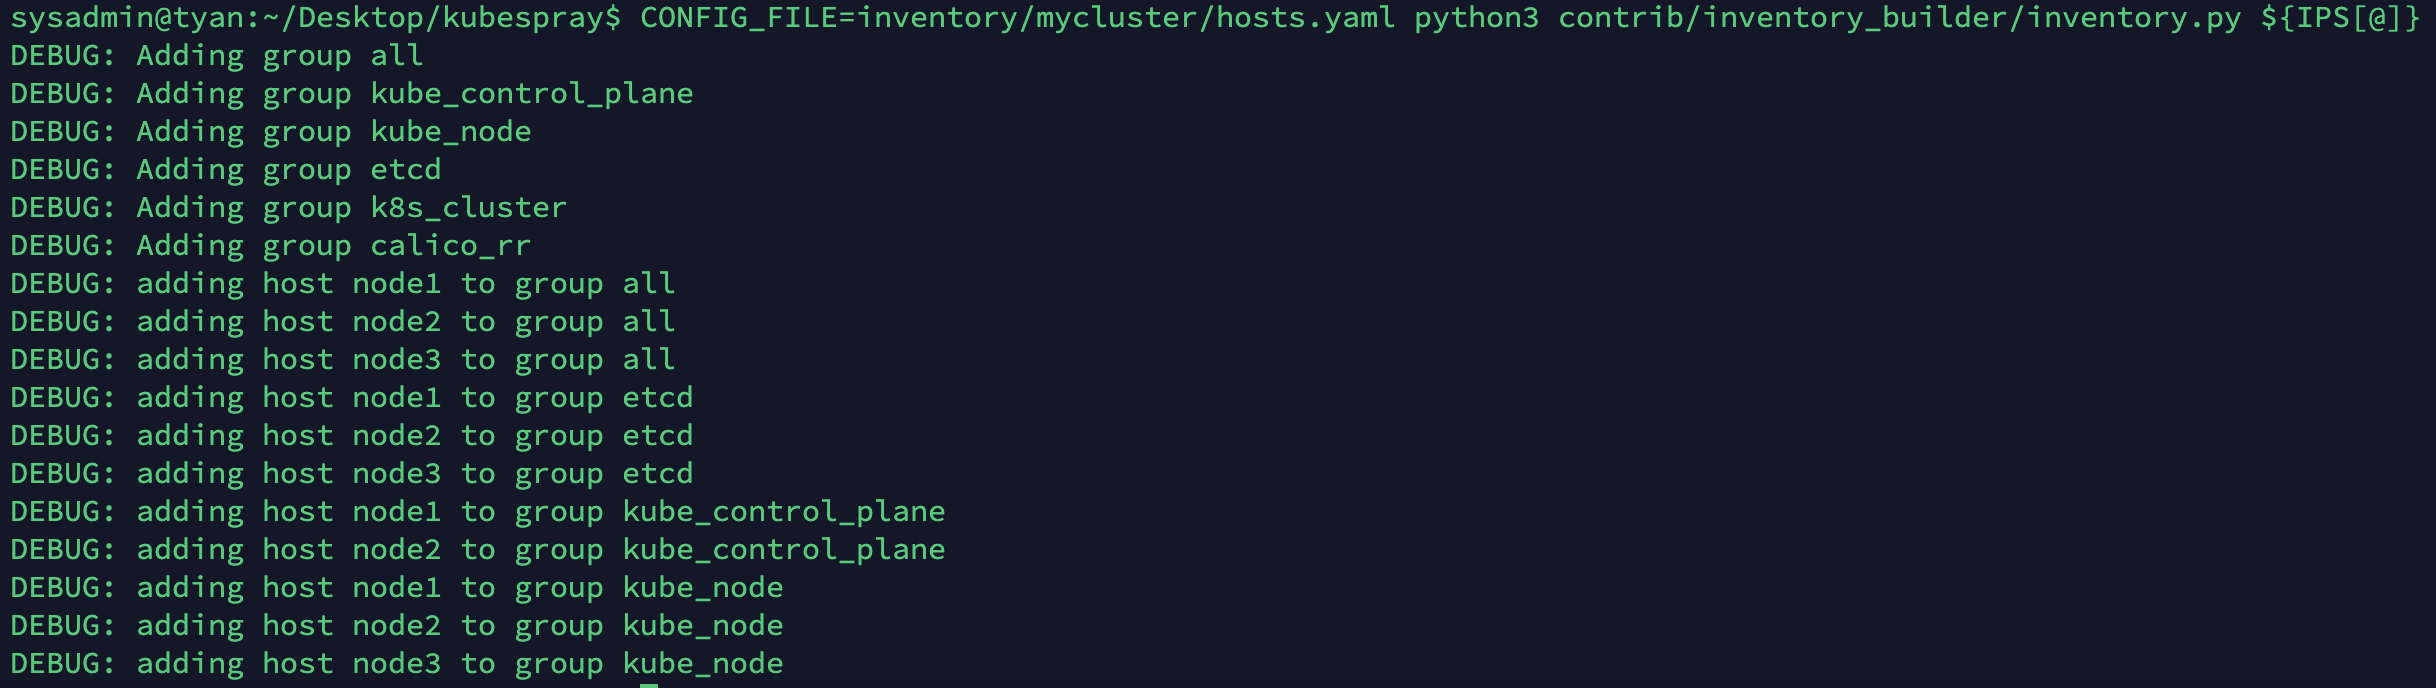
inventory/mycluster/group_vars에서 매개변수 검토 및 변경- 필요한 대부분의 설정은 이 두 파일을 통해 이루어집니다.
- 일단 기본 기능 확인을 위해 변경하지 않고 진행해보겠습니다. 변경이 필요한 부분은 아래 다른 섹션에서 따로 다루겠습니다.
cat inventory/mycluster/group_vars/all/all.yml
cat inventory/mycluster/group_vars/k8s_cluster/k8s-cluster.yml- 매개변수 내용
---
## Directory where etcd data stored
etcd_data_dir: /var/lib/etcd

## Experimental kubeadm etcd deployment mode. Available only for new deployment
etcd_kubeadm_enabled: false

## Directory where the binaries will be installed
bin_dir: /usr/local/bin

## The access_ip variable is used to define how other nodes should access
## the node.  This is used in flannel to allow other flannel nodes to see
## this node for example.  The access_ip is really useful AWS and Google
## environments where the nodes are accessed remotely by the "public" ip,
## but don't know about that address themselves.
# access_ip: 1.1.1.1


## External LB example config
## apiserver_loadbalancer_domain_name: "elb.some.domain"
# loadbalancer_apiserver:
#   address: 1.2.3.4
#   port: 1234

## Internal loadbalancers for apiservers
# loadbalancer_apiserver_localhost: true
# valid options are "nginx" or "haproxy"
# loadbalancer_apiserver_type: nginx  # valid values "nginx" or "haproxy"

## If the cilium is going to be used in strict mode, we can use the
## localhost connection and not use the external LB. If this parameter is
## not specified, the first node to connect to kubeapi will be used.
# use_localhost_as_kubeapi_loadbalancer: true

## Local loadbalancer should use this port
## And must be set port 6443
loadbalancer_apiserver_port: 6443

## If loadbalancer_apiserver_healthcheck_port variable defined, enables proxy liveness check for nginx.
loadbalancer_apiserver_healthcheck_port: 8081

### OTHER OPTIONAL VARIABLES

## Upstream dns servers
# upstream_dns_servers:
#   - 8.8.8.8
#   - 8.8.4.4

## There are some changes specific to the cloud providers
## for instance we need to encapsulate packets with some network plugins
## If set the possible values are either 'gce', 'aws', 'azure', 'openstack', 'vsphere', 'oci', or 'external'
## When openstack is used make sure to source in the openstack credentials
## like you would do when using openstack-client before starting the playbook.
# cloud_provider:

## When cloud_provider is set to 'external', you can set the cloud controller to deploy
## Supported cloud controllers are: 'openstack' and 'vsphere'
## When openstack or vsphere are used make sure to source in the required fields
# external_cloud_provider:

## Set these proxy values in order to update package manager and docker daemon to use proxies
# http_proxy: ""
# https_proxy: ""

## Refer to roles/kubespray-defaults/defaults/main.yml before modifying no_proxy
# no_proxy: ""

## Some problems may occur when downloading files over https proxy due to ansible bug
## https://github.com/ansible/ansible/issues/32750. Set this variable to False to disable
## SSL validation of get_url module. Note that kubespray will still be performing checksum validation.
# download_validate_certs: False

## If you need exclude all cluster nodes from proxy and other resources, add other resources here.
# additional_no_proxy: ""

## If you need to disable proxying of os package repositories but are still behind an http_proxy set
## skip_http_proxy_on_os_packages to true
## This will cause kubespray not to set proxy environment in /etc/yum.conf for centos and in /etc/apt/apt.conf for debian/ubuntu
## Special information for debian/ubuntu - you have to set the no_proxy variable, then apt package will install from your source of wish
# skip_http_proxy_on_os_packages: false

## Since workers are included in the no_proxy variable by default, docker engine will be restarted on all nodes (all
## pods will restart) when adding or removing workers.  To override this behaviour by only including master nodes in the
## no_proxy variable, set below to true:
no_proxy_exclude_workers: false

## Certificate Management
## This setting determines whether certs are generated via scripts.
## Chose 'none' if you provide your own certificates.
## Option is  "script", "none"
# cert_management: script

## Set to true to allow pre-checks to fail and continue deployment
# ignore_assert_errors: false

## The read-only port for the Kubelet to serve on with no authentication/authorization. Uncomment to enable.
# kube_read_only_port: 10255

## Set true to download and cache container
# download_container: true

## Deploy container engine
# Set false if you want to deploy container engine manually.
# deploy_container_engine: true

## Red Hat Enterprise Linux subscription registration
## Add either RHEL subscription Username/Password or Organization ID/Activation Key combination
## Update RHEL subscription purpose usage, role and SLA if necessary
# rh_subscription_username: ""
# rh_subscription_password: ""
# rh_subscription_org_id: ""
# rh_subscription_activation_key: ""
# rh_subscription_usage: "Development"
# rh_subscription_role: "Red Hat Enterprise Server"
# rh_subscription_sla: "Self-Support"

## Check if access_ip responds to ping. Set false if your firewall blocks ICMP.
# ping_access_ip: true- Ansible Playbook으로 Kubespray 배포
- 플레이북을 루트로 실행 : 예를 들어 /etc/에 SSL 키 작성, 패키지 설치 및 다양한 systemd 데몬과의 상호 작용과 같이
--become옵션이 필요합니다. --become가 없으면 플레이북이 실행되지 않습니다!- 노드들에 오류가 발생하는데.. 혹시 vm구성을 안해놓아서 그런건지 모르겠습니다. 일단 더 확인해봅시다.
- 플레이북을 루트로 실행 : 예를 들어 /etc/에 SSL 키 작성, 패키지 설치 및 다양한 systemd 데몬과의 상호 작용과 같이
ansible-playbook -i inventory/mycluster/hosts.yaml --become --become-user=root cluster.yml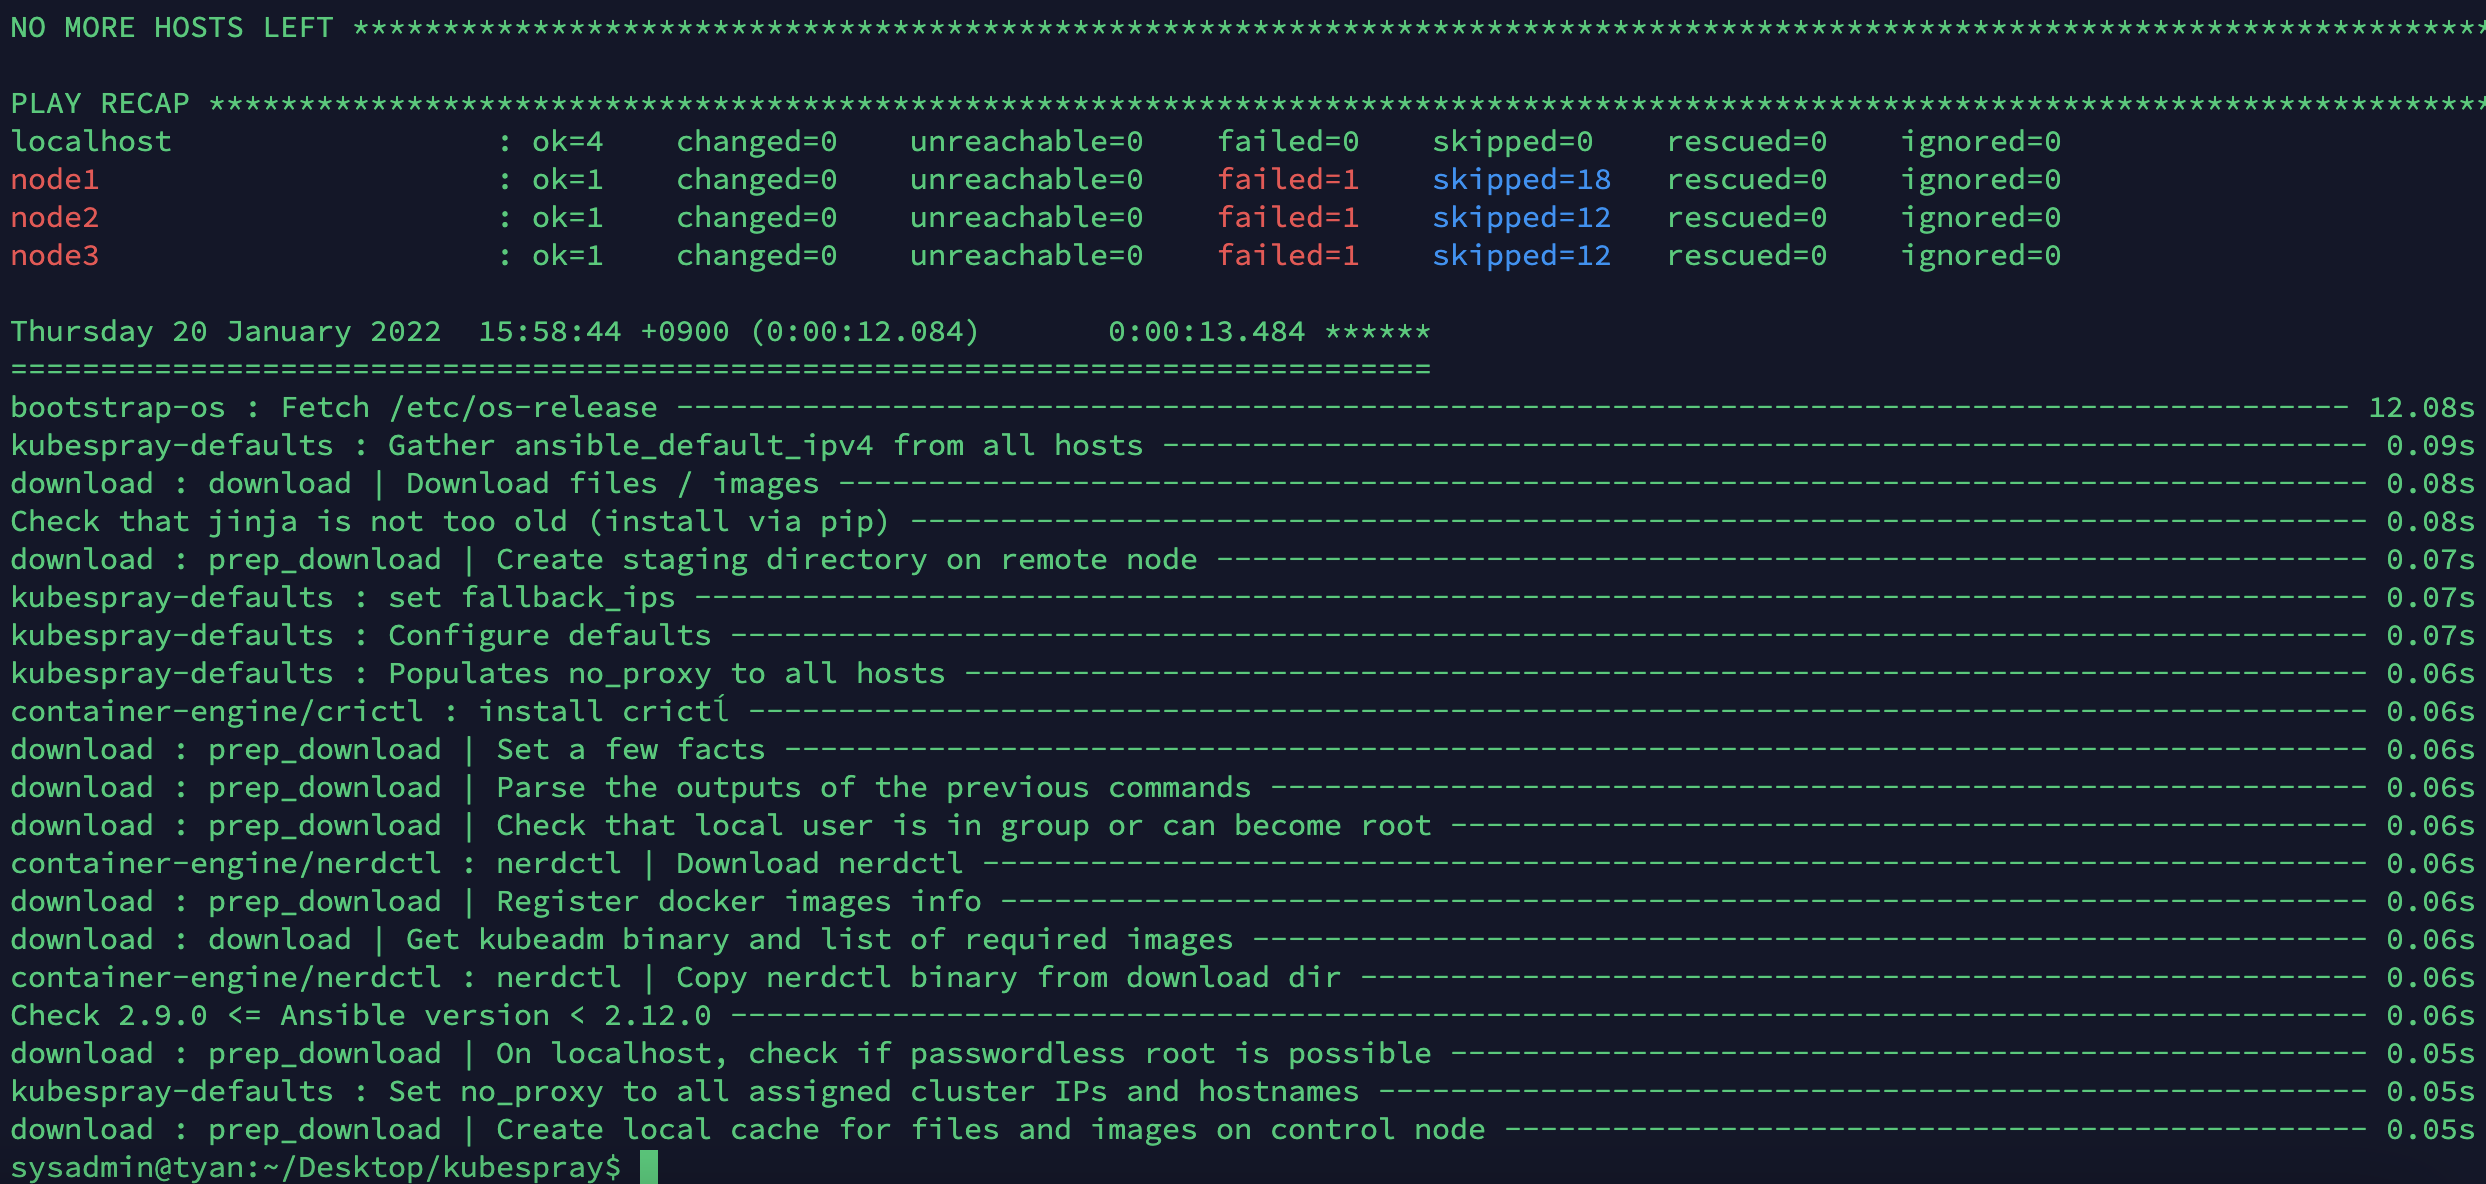

이슈 해결
kubespray 배포 후
connection was refused
- The connection to the server localhost:8080 was refused - did you specify the right host or port?
해당 오류는 아래의 명령어를 통해 해결할 수 있을겁니다.
mkdir -p $HOME/.kube
sudo cp -i /etc/kubernetes/admin.conf $HOME/.kube/config
sudo chown $(id -u):$(id -g) $HOME/.kube/config
저는 여기서 멈추고, Vagrant를 활용한 설치가 훨씬 간편하여 해당 방법을 이용하였습니다. 다음 포스팅을 참고해주세요!