💡Spring Data REST
API를 빠르게 만들기 위해 Spring Data REST 기능을 이용한다.
Spring Data 안에 있는 부속 기능이다.
엔티티와 리포지토리 클래스를 이용해서 빠르게 RESTful한 API를 만들 수 있다.
기본적인 데이터는 Data REST로 하고, 복잡한 데이터 전달은 별도로 만들어서 보충할 수 있다.
API란 (application programming interface)
- API는 컴퓨터나 컴퓨터 프로그램 사이의 연결이다. 일종의 소프트웨어 인터페이스이며 다른 종류의 소프트웨어에 서비스를 제공한다.
- API란 음식점의 점원같은 것이다.
- API는 프로그램들이 서로 상호작용하는 것을 도와주는 매개체로 볼 수 있다.
💡RESTful API / REST API
[AWS | RESTful API란 무엇인가요?]
- RESTful API는 두 컴퓨터 시스템이 인터넷을 통해 정보를 안전하게 교환하기 위해 사용하는 인터페이스이다.
- REST 아키텍처 스타일을 따르는 API를 REST API라고 한다.
[네트워크] REST API란? REST, RESTful이란?
- REST API란 REST를 기반으로 만들어진 API를 의미한다.
- RESTFUL이란 REST의 원리를 따르는 시스템을 의미한다. 하지만 REST를 사용했다 하여 모두가 RESTful 한 것은 아니다.
- REST API의 설계 규칙을 올바르게 지킨 시스템을 RESTful하다 말할 수 있으며 모든 CRUD 기능을 POST로 처리 하는 API 혹은 URI 규칙을 올바르게 지키지 않은 API는 REST API의 설계 규칙을 올바르게 지키지 못한 시스템은 REST API를 사용하였지만 RESTful 하지 못한 시스템이라고 할 수 있다.
💡RESTful API 설정
의존성 추가
start.spring.io에 가서 Rest Repositories와 Rest Repositories HAL Explorer 디펜던시를 가져온다.
(HAL Explorer는 우리가 만든 API를 간단하게 테스트하기 위해 받는다.)
implementation 'org.springframework.boot:spring-boot-starter-data-rest'
implementation 'org.springframework.data:spring-data-rest-hal-explorer'
그리고 위 두 문장을 build.gradle에 추가해준 후 refresh 해준다.
yaml 파일에 옵션 추가
그 후엔 application.yaml 파일에 옵션을 추가해준다.
data.rest:
 base-path: /api
detection-strategy: annotateddetection-strategy의 기본값은 default이다.
이와 관련된 정보는 여기에서 확인 가능하다. (detection으로 검색하면 쉽게 찾을 수 있다.)
우리가 가지고 있는 repo를 확인하는데, 이 repo를 실제로 REST API로 노출시킬건지 전략을 정하는 것이다.
- DEFAULT
-
ALL
모든repo를API로 노출시킨다. -
ANNOTATED
에너테이션으로 지정한 것만을 노출시킨다. -
VISIBILITY
public으로 설정한repo만 노출시킨다.
Repository에 어노테이션 추가
detection-strategy 옵션을 annotated로 설정한 경우, 레포지토리에 @RepositoryRestResource 어노테이션을 추가해준다.
💡HAL Explorer 사용하기
서버를 실행하고 패스로 가면 HAL Explorer 화면이 뜬다.
나의 경우는 localhost:8080/api이다.
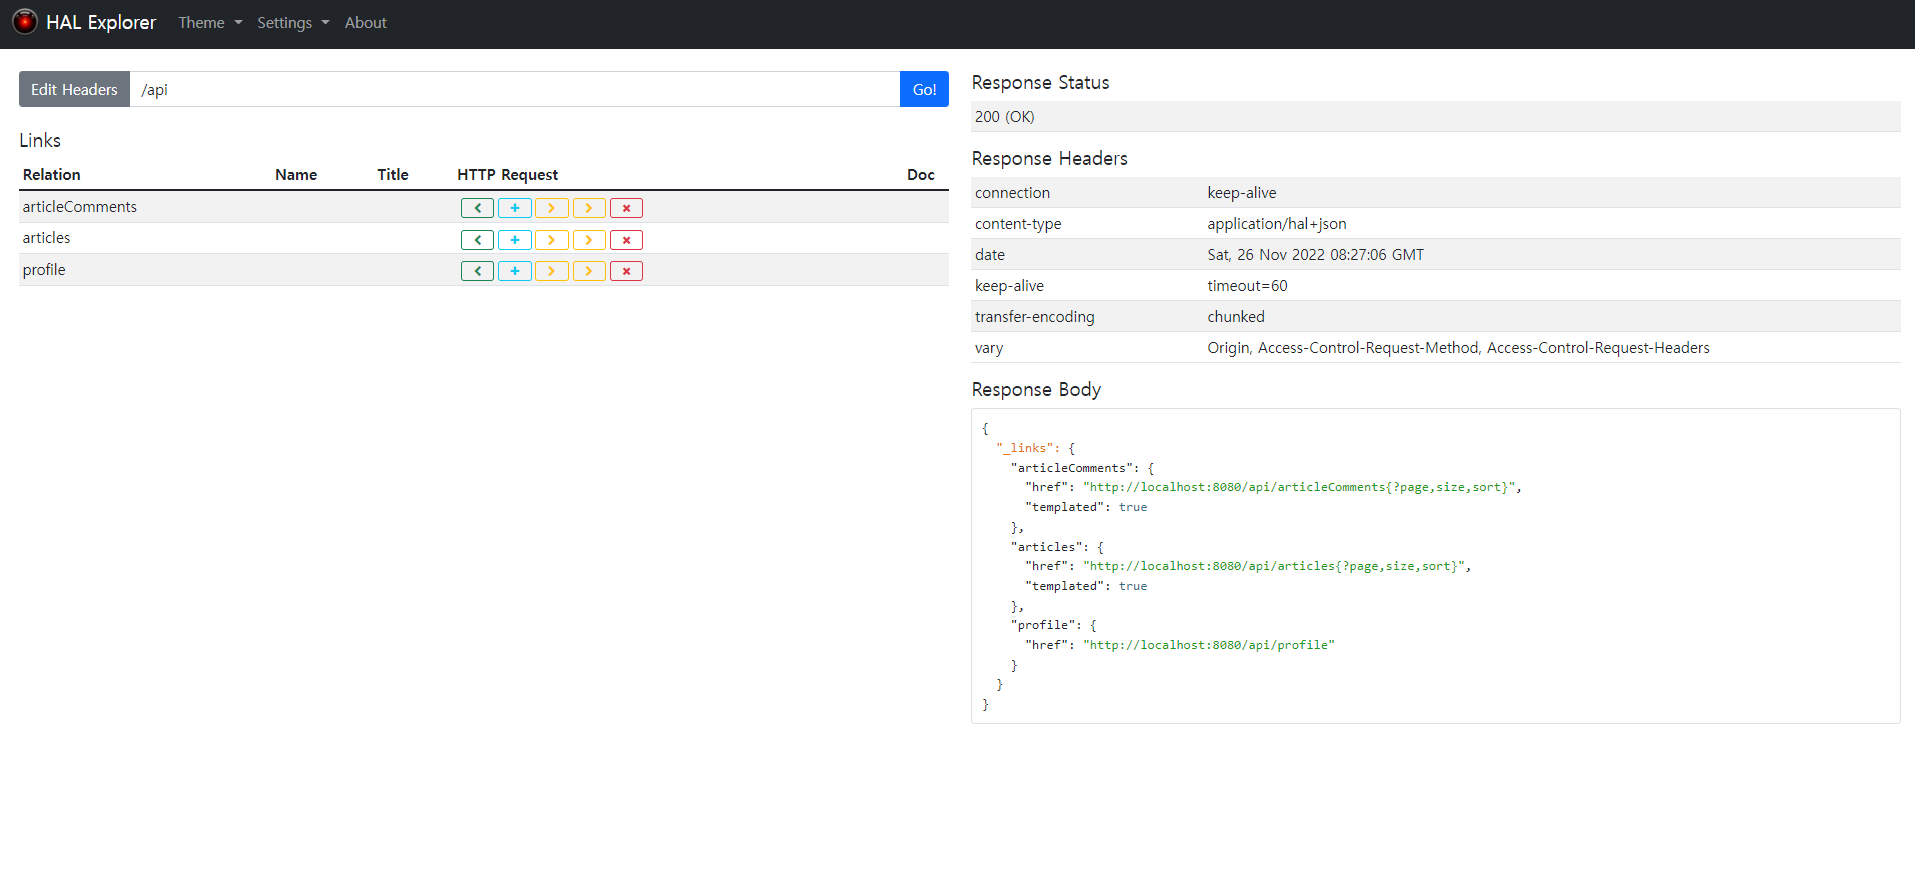
HTTP Request 부분에 있는 버튼은 각각 select, create, update, delete를 의미한다.
select(초록색) 클릭 시 모달창이 뜨는데, 아무것도 입력하지 않은 상태로 Go를 클릭하면 전체 데이터를 볼 수 있다.
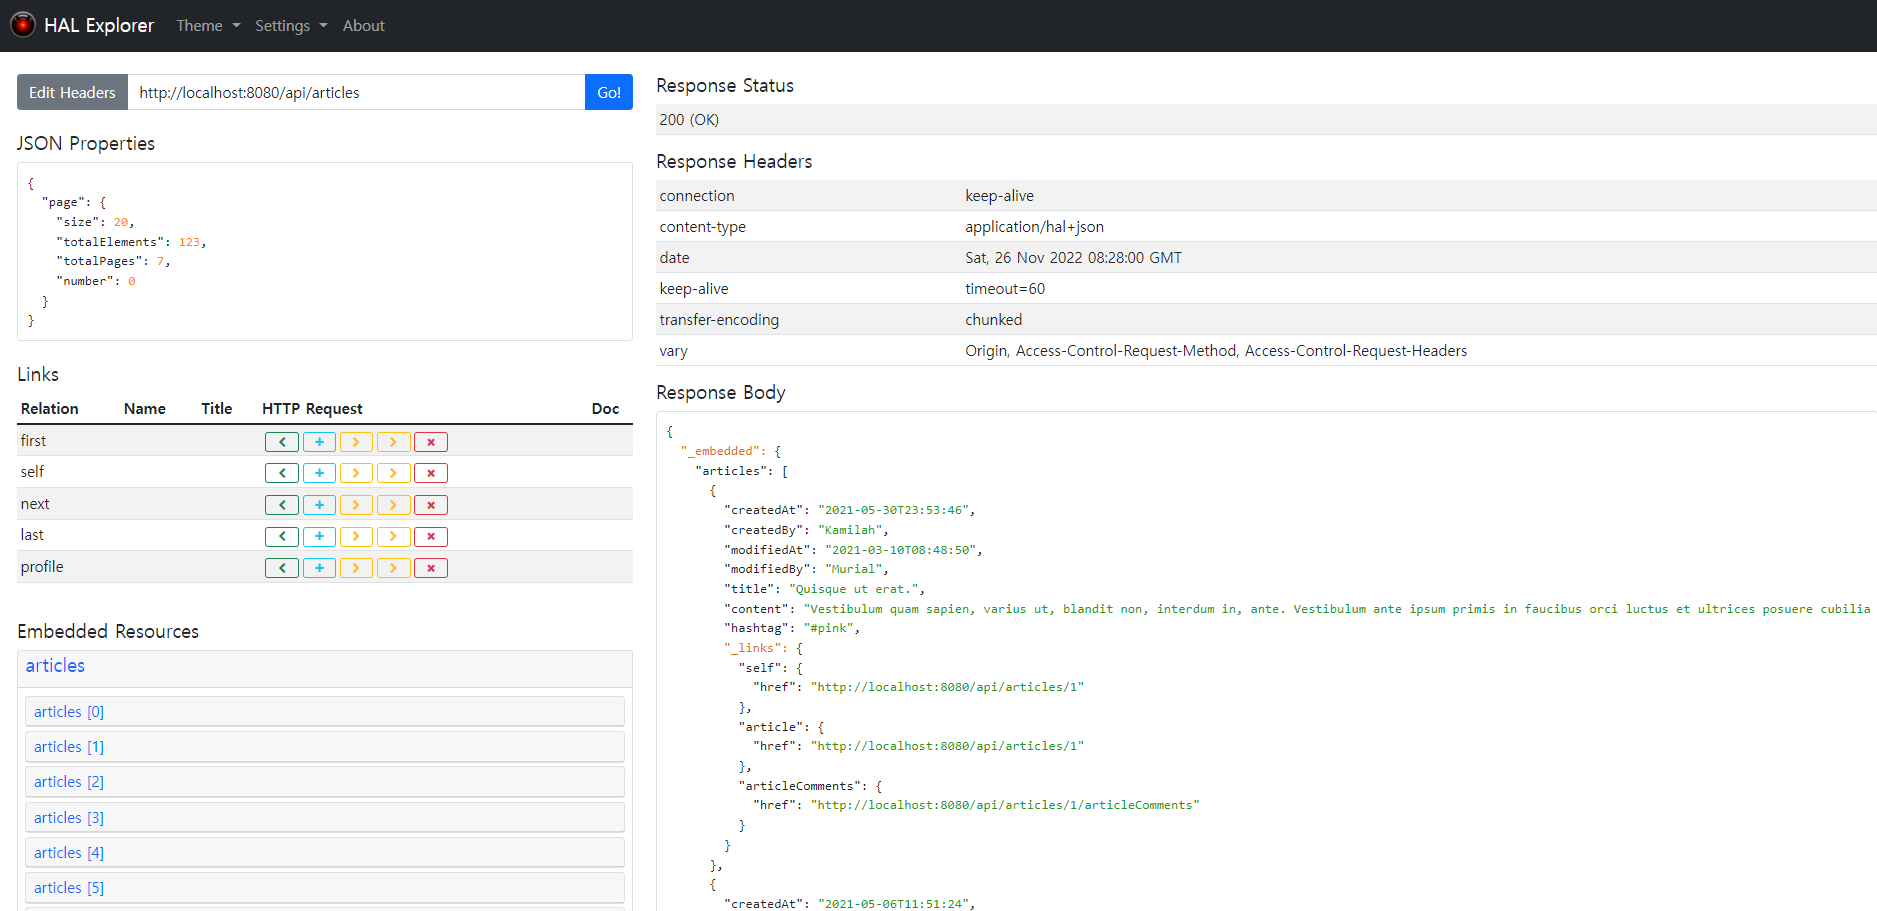
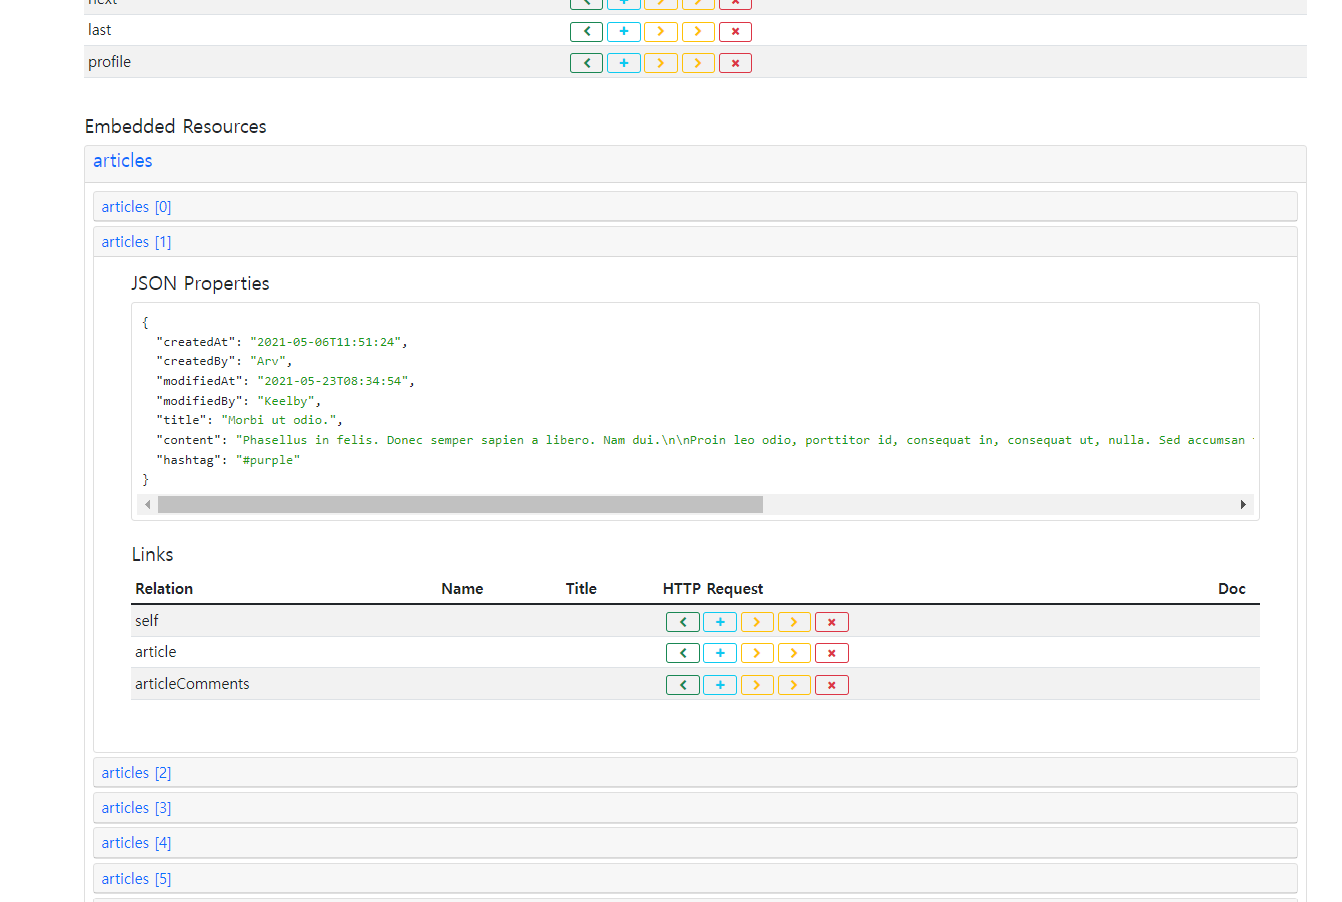
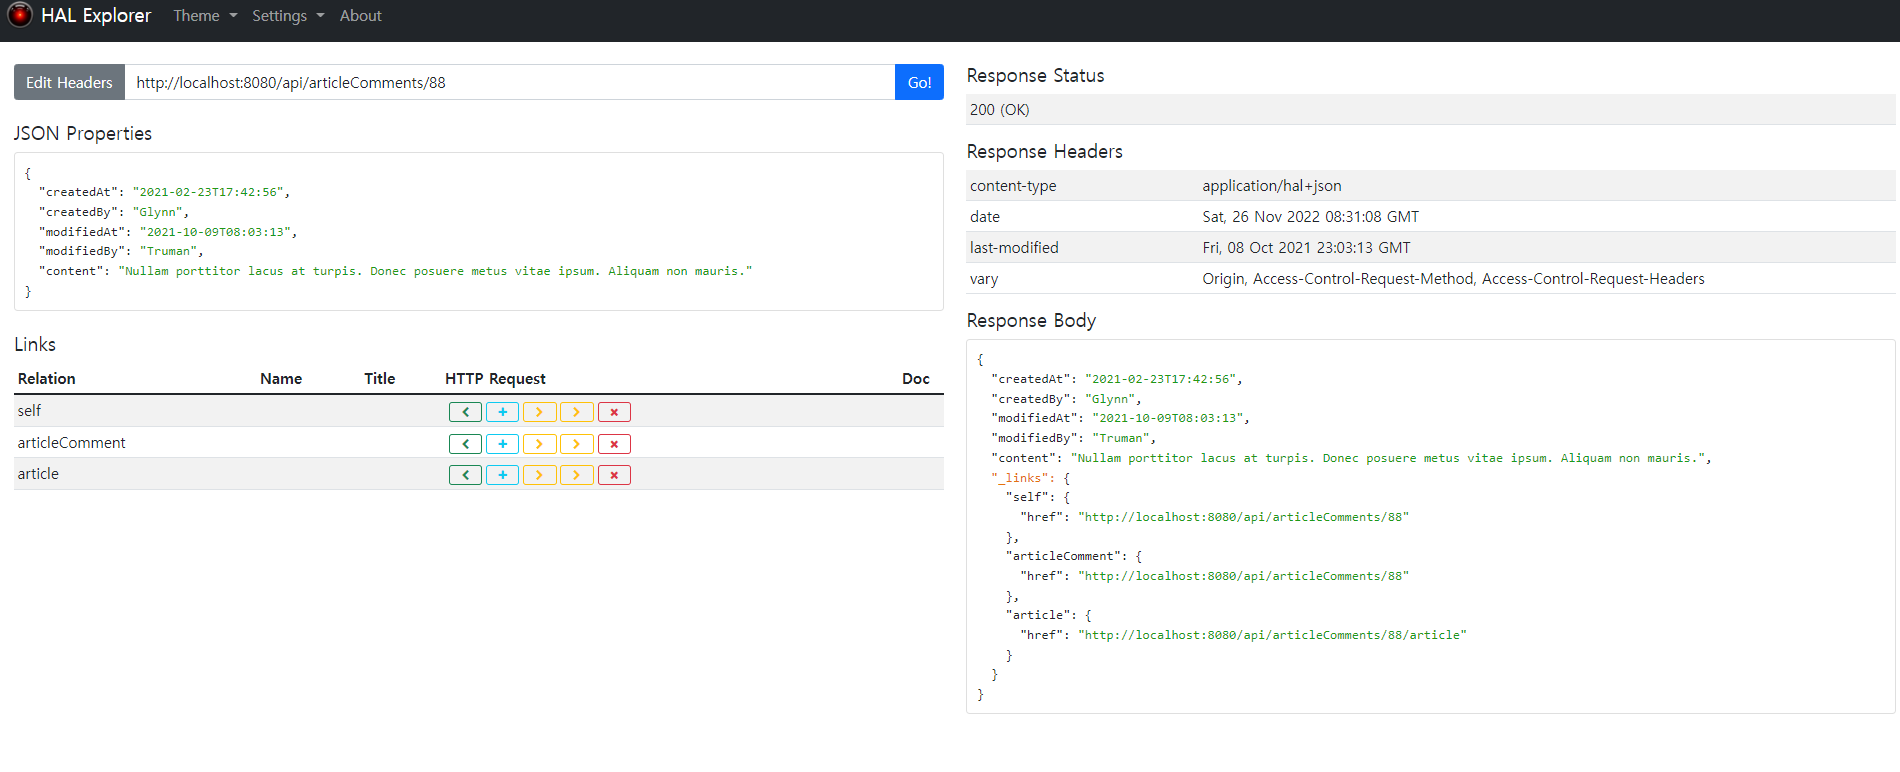
기본적으로 20개씩 페이징처리되어 나오고, 각 게시글에 달린 댓글도 select할 수 있다.
💡슬라이스 테스트하기
슬라이스 테스트란 각 레이어를 독립적으로 테스트하는 것을 말한다.
@WebMvcTest와 MockMvc를 사용해서 Controller 단위로 테스트할 수 있다.
테스트 코드
package com.fastcampus.projectboard.controller;

import org.junit.jupiter.api.DisplayName;
import org.junit.jupiter.api.Test;
import org.springframework.beans.factory.annotation.Autowired;
import org.springframework.boot.test.autoconfigure.web.servlet.AutoConfigureMockMvc;
import org.springframework.boot.test.context.SpringBootTest;
import org.springframework.http.MediaType;
import org.springframework.test.web.servlet.MockMvc;
import org.springframework.transaction.annotation.Transactional;

import static org.springframework.test.web.servlet.request.MockMvcRequestBuilders.get;
import static org.springframework.test.web.servlet.result.MockMvcResultMatchers.content;
import static org.springframework.test.web.servlet.result.MockMvcResultMatchers.status;

@DisplayName("Data REST - API 테스트")
@Transactional
@AutoConfigureMockMvc
@SpringBootTest
public class DataRestTest {

    private final MockMvc mvc;

    public DataRestTest(@Autowired MockMvc mvc){
        this.mvc = mvc;
    }

    @DisplayName("[api] 게시글 리스트 조회")
    @Test
    void givenNothing_whenRequestingArticles_thenReturnArticlesJsonResponse() throws Exception {

        mvc.perform(get("/api/articles"))
                .andExpect(status().isOk())
                .andExpect(content().contentType(MediaType.valueOf("application/hal+json")));
    }

    @DisplayName("[api] 게시글 단건 조회")
    @Test
    void givenNothing_whenRequestingArticle_thenReturnArticleJsonResponse() throws Exception {

        mvc.perform(get("/api/articles/1"))
                .andExpect(status().isOk())
                .andExpect(content().contentType(MediaType.valueOf("application/hal+json")));
    }

    @DisplayName("[api] 게시글 -> 댓글 리스트 조회")
    @Test
    void givenNothing_whenRequestingArticleCommentsFromArticle_thenReturnArticleCommentsJsonResponse() throws Exception {

        mvc.perform(get("/api/articles/1/articleComments"))
                .andExpect(status().isOk())
                .andExpect(content().contentType(MediaType.valueOf("application/hal+json")));
    }

    @DisplayName("[api] 댓글 리스트 조회")
    @Test
    void givenNothing_whenRequestingArticleComments_thenReturnArticleCommentsJsonResponse() throws Exception {

        mvc.perform(get("/api/articleComments"))
                .andExpect(status().isOk())
                .andExpect(content().contentType(MediaType.valueOf("application/hal+json")));
    }

    @DisplayName("[api] 댓글 단건 조회")
    @Test
    void givenNothing_whenRequestingArticleComment_thenReturnArticleCommentJsonResponse() throws Exception {

        mvc.perform(get("/api/articleComments/1"))
                .andExpect(status().isOk())
                .andExpect(content().contentType(MediaType.valueOf("application/hal+json")));
    }
}
MockMvc는 생성자를 사용해 주입했다.
contentType은 기본적으로 제공되는 옵션에 HAL이 없어서 직접 입력해주었다.
처음에는 @WebMvcTest를 사용했다가 에러가 발생해서 @SpringBootTest와 @AutoConfigureMockMvc로 변경했다.
[Java/Springboot] @WebMvcTest를 사용한 슬라이스 테스트 시 발생한 404에러 (Not Found)에서 관련 내용을 볼 수 있다.
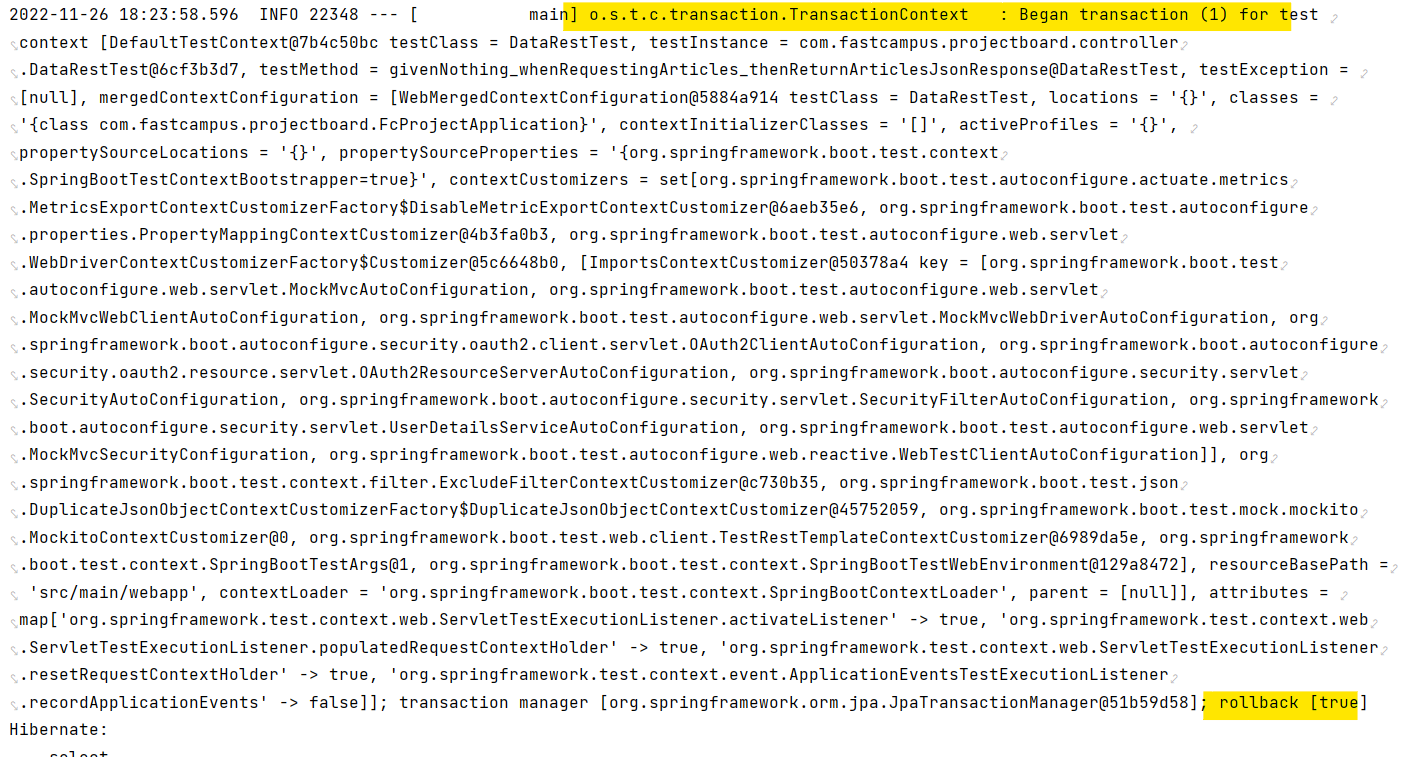
테스트를 실행하면 이 api를 실행한 결과가 Repository까지 실행시켜서 콘솔에 Hibernate 쿼리도 나오는 것을 볼 수 있다.
이 말인 즉슨, db에 영향을 주는 test라는 것이고, @Transactional을 붙이면 좋다.
test에서 동작하는 트랜잭션의 기본동작은 rollback이다.
어노테이션을 적용하고 콘솔을 보면 잘 적용된 것을 볼 수 있다.
참고 링크
[Spring Boot] Controller 단위 테스트 (@WebMvcTest, MockMvc)
API란? 비개발자가 알기 쉽게 설명해드립니다!
AWS | RESTful API란 무엇인가요?
[네트워크] REST API란? REST, RESTful이란?