
사진을 1장 포함하는 게시글 사진 s3 업로드하기
1. 사전 작업
AWS계정에 S3 bucket을 생성해야 합니다.
해당 내용은 구글링해보면 자세하게 설명해놓은 블로그가 많을테니 그것을 참고해주세요.
2. build.gradle
build.gradle에 다음과 같은 의존성을 추가해주세요.
다른 기능들 때문에 추가했던 의존성은 모두 생략하고 AWS S3를 사용하기 위한 의존성만 남겨놓은 상태입니다.
...

dependencies {
	implementation platform('com.amazonaws:aws-java-sdk-bom:1.11.1000')
	implementation 'com.amazonaws:aws-java-sdk-s3'
	compileOnly 'org.springframework.cloud:spring-cloud-starter-aws:2.0.1.RELEASE'
}

...
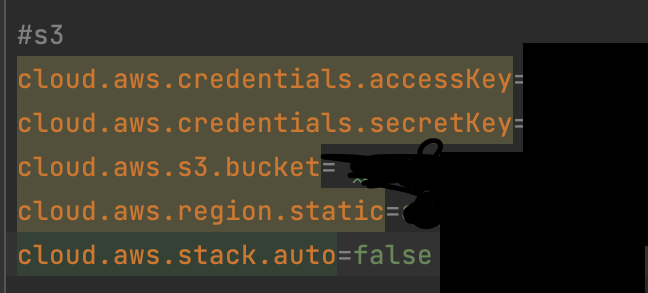
3. s3 설정
application.properties에 다음과 같이 정보를 등록합니다.
이때 중요한 점은 해당 정보를 깃허브에 절대 업로드하면 안된다는 점입니다!!! 이 정보를 깃허브에 올리는 건 자신의 아이디와 비밀번호를 사이트에 올리는 것과 같습니다 ㅠㅠ 잘못하면 AWS 해킹당해서 과금될 수 있습니다... 조심하세요!
저의 경우엔 application.properties 말고 다른 properties 파일을 파서 민감한 정보는 그곳에 옮겨 gitignore해주었습니다. application.properties에 작성하고 gitignore하셔도 무관합니다.
4. 코드 구현
S3Handler.java
@Service
@NoArgsConstructor
public class S3Uploader {
    private AmazonS3 s3Client;

    @Value("${cloud.aws.credentials.accessKey}")
    private String accessKey;

    @Value("${cloud.aws.credentials.secretKey}")
    private String secretKey;

    @Value("${cloud.aws.s3.bucket}")
    private String bucket;

    @Value("${cloud.aws.region.static}")
    private String region;

    @PostConstruct
    public void setS3Client() {
        AWSCredentials credentials = new BasicAWSCredentials(this.accessKey, this.secretKey);

        s3Client = AmazonS3ClientBuilder.standard()
                .withCredentials(new AWSStaticCredentialsProvider(credentials))
                .withRegion(this.region)
                .build();
    }

    public String upload(MultipartFile file, Post post) throws IOException {
        String fileName = file.getOriginalFilename();

        s3Client.putObject(new PutObjectRequest(bucket, fileName, file.getInputStream(), null)
                .withCannedAcl(CannedAccessControlList.PublicRead));

        String filePath =  s3Client.getUrl(bucket, fileName).toString();
        post.updateImage(file.getSize(), file.getOriginalFilename(), filePath);

        return "upload";
    }
}
Post.java
이미지와 관련된 속성은
fileSize, originalFileName, filePath입니다.
이때 filePath는 S3에 저장된 파일 경로가 저장되기 때문에 꼭 있어야 하고 나머지는 만드시는 코드에 따라 선택하여 만드시면 될 것 같습니다.
postNo는 post의 pk, user는 User와 join된 게시글 작성자, content는 게시글 내용입니다.
@Getter
@NoArgsConstructor
@Entity
@Table(name = "post")
public class Post {
    @Id
    @GeneratedValue(strategy = GenerationType.IDENTITY)
    private Long postNo;

    @ManyToOne
    @JoinColumn(name = "user")
    private User user;

    @Column
    private String content;

    @Column
    private Long fileSize;

    @Column
    private String originalFileName;

    @Column
    private String filePath;

    @Builder
    public Post(User user, String content){
        this.user = user;
        this.content = content;
    }

    public void updateImage(Long fileSize, String originalFileName, String filePath){
        this.fileSize = fileSize;
        this.originalFileName = originalFileName;
        this.filePath = filePath;
    }
}
PostRepository.java
@Repository
public interface PostRepository extends JpaRepository<Post, Long> {
}
PostRequestDto.java
@Getter
@NoArgsConstructor
public class PostRequestDto {
    private Long postNo;
    private User user;
    private String content;

    @Builder
    public PostRequestDto(Post entity){
        this.postNo = entity.getPostNo();
        this.user = entity.getUser();
        this.content = entity.getContent();
    }
}
PostService.java
@RequiredArgsConstructor
@Service
@Transactional
public class PostService {
    private final PostRepository postRepository;
    private final UserRepository userRepository;
    private final LikeRepository likeRepository;
    private final S3Uploader s3Uploader;

    @Transactional
    public String createPost(PostRequestDto requestDto, MultipartFile uploadFile) throws Exception{
        Post post = new Post(
                requestDto.getUser(),
                requestDto.getContent()
        );

        s3Uploader.upload(uploadFile, post);

        postRepository.save(post);
        return post.getPostNo().toString();
    }

}
5. POSTMAN으로 test
Request
| Method | URL | 설명 |
|---|---|---|
| POST | api/posts | 포스트 게시 |
Request 형식
| Name | type | 설명 |
|---|---|---|
| image | MultipartFile | image 파일 |
| requestDto | String | requestDto json문법에 맞게 String으로 |
request 예시
아래 사진과 같이 테스트해볼 수 있습니다.
requestDto에는 json 문법에 맞춰서 요청을 보내시면 됩니다.
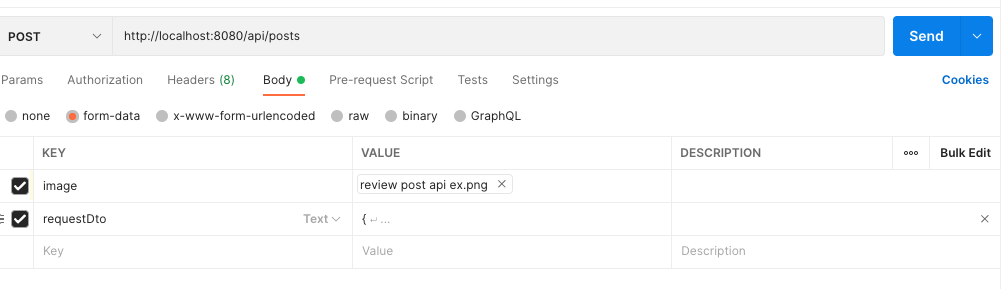
- requestDto 예시
user객체와 content를 json 문법에 맞게 입력해줍니다.
{
    "user":{
        "userNo":1,
        "userId":"mimmu"
    },
    "content":"두번게시물테스트!"
}
Response
| postNo | String | 새롭게 게시된 post 번호를 String 형태로 반환 |
|---|
👧🏻 이상으로 사진 1장을 s3에 업로드하는 방법에 대해 알아보았습니다.
다음 글에서는 비슷한 내용이지만 사진 여러장을 업로드하는 방법을 다뤄보겠습니다.