홈페이지에 들어갈 공지사항, 게시글 페이지를 위해 로그인 기능이 필요했다. 다수의 유저를 대상으로 한 로그인 페이지가 아니라, 해당 동물병원을 관리하는 원장님만 로그인을 할 수 있는 형태의 로그인 기능이면 충분했기 때문에, 그에 맞춘 간단한 로그인 기능을 구현하게 되었다.
1. 리덕스를 활용하여 로그인 정보 관리
로그인 정보를 localStorage에서 관리하기 위해 먼저 redux-toolkit과 redux-persist를 세팅해 주었다.
1-1) UserSlice 생성
import { createSlice } from '@reduxjs/toolkit';

export const UserSlice = createSlice({
  name: 'user',
  //초기값
  initialState: {
    isLoggedIn: false,
  },
  reducers: {
  	//로그인 기능
    loginUser: (state, action) => {
      state.isLoggedIn = action.payload.isLoggedIn;
    },

	//로그아웃 기능
    logoutUser: state => {
      state.isLoggedIn = false;
    },
  },
});

export const { loginUser, logoutUser } = UserSlice.actions;

export default UserSlice.reducer;
redux/reducer/userslice.js 파일을 생성한 후 createSlice를 import해 UserSlice를 생성해 주었다.
해당 유저가 로그인이 된 상태인지 아닌지만 판별하면 되기 때문에 initialState로 isLoggedIn 값만 넣어주었다.
reducers 안에는 loginUser와 logoutUser 두가지 기능이 들어간다.
1-2) sotre 생성
import {
  configureStore,
  combineReducers,
  getDefaultMiddleware,
} from '@reduxjs/toolkit';

import {
  persistStore,
  persistReducer,
  FLUSH,
  REHYDRATE,
  PAUSE,
  PERSIST,
  PURGE,
  REGISTER,
} from 'redux-persist';
import storage from 'redux-persist/lib/storage';

import { UserSlice } from '../reducer/userSlice';

//1) config 작성
const persistConfig = {
  key: 'root',
  version: 0,
  storage,
};

//2) 슬라이스 결합
const rootReducer = combineReducers({
  userReducer: UserSlice.reducer,
});

//3) persistReducer로 감싸기
const persistedReducer = persistReducer(persistConfig, rootReducer);

const store = configureStore({
  reducer: {
    persistedReducer,
  },

  //4) 미들웨어 설정
  middleware: getDefaultMiddleware({
    serializableCheck: {
      ignoreActions: [FLUSH, REHYDRATE, PAUSE, PERSIST, PURGE, REGISTER],
    },
  }),
});

export const persistor = persistStore(store);

export default store;
1) persistConfig 로 persist의 config를 정의해준다.
2) conbineReducer를 통해 사용하고자 하는 슬라이스들을 결합해준다. 현재 프로젝트 같은 경우에는 결합할 슬라이스가 없지만 나중에 새로운 슬라이스를 추가하게 되면 이 곳에 새로운 슬라이스를 추가하여 다른 슬라이스와 함께 combineReducers로 묶어 사용하면 된다.
3) persistReducer로 위에 작성해 놓았던 persist config와 combineReducer를 감싼다.
4) middleware를 생성해 에러를 방지한다.
1-3) app.js에 Provider와 persistGate 적용
import Layout from '@/components/Layout';
import '@/styles/globals.css';
import Script from 'next/script';
import { Provider } from 'react-redux';
import { PersistGate } from 'redux-persist/integration/react';
import store, { persistor } from '@/redux/store/store';
import 'react-quill/dist/quill.snow.css';
// import

export default function App({ Component, pageProps }) {
  return (
    <>
      <Script
        strategy='beforeInteractive'
        src={`https://openapi.map.naver.com/openapi/v3/maps.js?ncpClientId=${process.env.NEXT_PUBLIC_MAP_KEY}`}
      ></Script>
      <Provider store={store}>
        <PersistGate loading={null} persistor={persistor}>
          <Layout>
            <Component {...pageProps} />
          </Layout>
        </PersistGate>
      </Provider>
    </>
  );
}
store 작성까지 완료하고 나면 _app.js 페이지로 이동해 Component를 Provider와 persistGate로 감싸준다.
2. 클라이언트 사이드 코드 작성
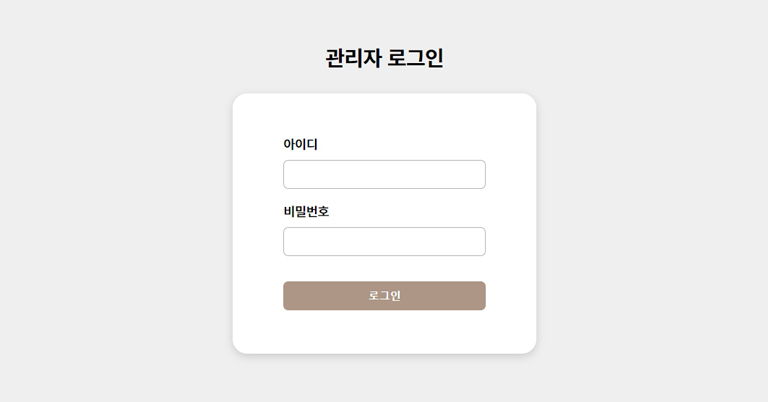
메인 페이지에서 /login 페이지로 이동하면 로그인이 가능한 간단한 로그인 페이지를 만들었다.
2-1) 인풋 코드 작성
    <Wrap>
      <LoginWrap>
        <Title>관리자 로그인</Title>
        //isLoggenIn 값에 따라 로그인 상태인지 로그아웃 상태인지 보여준다.
        {isLoggedIn === true ? (
          <LoginBox>
            <Notice>이미 로그인한 상태입니다</Notice>
            <InputButon onClick={e => onLogout(e)}>로그아웃</InputButon>
          </LoginBox>
        ) : (
          <LoginBox onSubmit={submitFormHandler}>
            <InputWrap>
              <InputLabel>아이디</InputLabel>
              <Input type='text' id='username' ref={idRef} />
            </InputWrap>
            <InputWrap marginBottom>
              <InputLabel>비밀번호</InputLabel>
              <Input type='password' id='password' ref={passwordRef} />
            </InputWrap>
            <InputButon>로그인</InputButon>
          </LoginBox>
        )}
      </LoginWrap>
    </Wrap>
input값은 ref의 value 값을 이용해 관리하였다. isLoggedIn값은 useSelector를 통해 reducer에서 가지고 오는데, 이를 통해 유저가 로그인 하지 않은 경우에는 로그인 ui를, 로그인 한 경우에는 로그아웃 ui를 보여준다.
2-2) 로그인 기능 생성
const submitFormHandler = async e => {
    e.preventDefault();

    const enteredId = idRef.current.value;
    const enteredPassword = passwordRef.current.value;

    const reqBody = {
      id: enteredId,
      password: enteredPassword,
    };

    try {
      const res = await axios.post('/api/login', reqBody, {
        headers: {
          'Content-Type': 'application/json',
        },
      });

      if (res.data.code === 1000) {
        dispatch(
          loginUser({
            isLoggedIn: true,
          })
        );
        //로그인 완료 시 공지사항 페이지로 이동
        router.push('/news/notice');
      }
    } catch (err) {
     //에러 시 에러문구 띄움
     alert(err);
    }
  };
InputButton을 클릭하면 submitFormHandler가 발동한다.
enteredId와 enteredPassword 변수를 함수안에 만들어 ref의 current.value값을 할당해준다.
해당 정보를 reqBody에 담아 서버로 보낸다. 로그인에 성공하는 경우에는 router.push를 이용해서 자동으로 글쓰기 페이지로 이동시켜 주도록 로직을 짰다.
2-3) 로그아웃 기능 생성
  const onLogout = e => {
    e.preventDefault();
    dispatch(logoutUser());

    alert('로그아웃이 완료되었습니다.');
  };
로그아웃 기능은 redux의 userSlice에 미리 작성해놓은 logoutUser기능을 dispatch로 가져와 실행시켜 준다.
전체 코드
import { useRef } from 'react';
import { Wrap } from '../introduce/about';
import { useDispatch, useSelector } from 'react-redux';
import { loginUser, logoutUser } from '@/redux/reducer/userSlice';
import { useRouter } from 'next/router';
import styled from 'styled-components';
import axios from 'axios';

const LoginPage = () => {
  const router = useRouter();

  //ref 값
  const idRef = useRef();
  const passwordRef = useRef();

  //redux
  const dispatch = useDispatch();
  const isLoggedIn = useSelector(
    state => state.persistedReducer.userReducer.isLoggedIn
  );

  //로그인 기능 실행함수
  const submitFormHandler = async e => {
    e.preventDefault();

    const enteredId = idRef.current.value;
    const enteredPassword = passwordRef.current.value;

    const reqBody = {
      id: enteredId,
      password: enteredPassword,
    };

    try {
      const res = await axios.post('/api/login', reqBody, {
        headers: {
          'Content-Type': 'application/json',
        },
      });

      if (res.data.code === 1000) {
        dispatch(
          loginUser({
            isLoggedIn: true,
          })
        );
        router.push('/news/notice');
      }
    } catch (err) {
      console.log(err);
    }
  };

  //로그아웃 기능 실행함수
  const onLogout = e => {
    e.preventDefault();
    dispatch(logoutUser());

    alert('로그아웃이 완료되었습니다.');
  };

  //페이지 ui
  return (
    <Wrap>
      <LoginWrap>
        <Title>관리자 로그인</Title>

        //isLoggenIn 값에 따라 로그인 상태인지 로그아웃 상태인지 보여준다.
        {isLoggedIn === true ? (
          <LoginBox>
            <Notice>이미 로그인한 상태입니다</Notice>
            <InputButon onClick={e => onLogout(e)}>로그아웃</InputButon>
          </LoginBox>
        ) : (
          <LoginBox onSubmit={submitFormHandler}>
            <InputWrap>
              <InputLabel>아이디</InputLabel>
              <Input type='text' id='username' ref={idRef} />
            </InputWrap>
            <InputWrap marginBottom>
              <InputLabel>비밀번호</InputLabel>
              <Input type='password' id='password' ref={passwordRef} />
            </InputWrap>
            <InputButon>로그인</InputButon>
          </LoginBox>
        )}
      </LoginWrap>
    </Wrap>
  );
};

// styled-components 코드
const LoginWrap = styled.div`
  height: 100vh;
  width: 100%;
  display: flex;
  flex-direction: column;
  justify-content: center;
  align-items: center;
  background-color: #efefef;
`;

const LoginBox = styled.form`
  width: 420px;
  height: 360px;
  background-color: white;
  border-radius: 20px;
  display: flex;
  flex-direction: column;
  justify-content: center;
  align-items: center;
  box-shadow: rgba(0, 0, 0, 0.15) 0px 4px 12px;
`;

const Title = styled.div`
  font-size: 30px;
  font-weight: 700;
  margin-bottom: 30px;
`;

const InputWrap = styled.div`
  display: grid;
  grid-template-columns: 100%;
  width: 280px;
  margin-bottom: ${props => (props.marginBottom ? '35px' : '20px')};
`;

const InputLabel = styled.label`
  margin-bottom: 10px;
  font-size: 18px;
  font-weight: 600;
`;

const Input = styled.input`
  width: 100%;
  height: 40px;
  border-radius: 7px;
  border: 1px solid #b5b5b5;
  padding: 15px;
  box-sizing: border-box;
  font-size: 15px;

  &:focus {
    outline: none;
    border: 2px solid #ad9686;
  }
`;

const InputButon = styled.button`
  width: 280px;
  height: 40px;
  background-color: #ad9686;
  border-radius: 7px;
  color: white;
  display: flex;
  justify-content: center;
  align-items: center;
  border: none;
  font-size: 15px;
  font-weight: 700;
  cursor: pointer;
`;

const Notice = styled.div`
  margin: 40px 0 50px 0;
  font-size: 22px;
  font-weight: 500;
`;

export default LoginPage;
3. 서버 사이드 코드 작성
nextJS의 API-routes기능을 사용해 서버사이드 코드를 작성하였다.
API-routes는 project/pages/api 폴더에 login.js 파일을 만드는 것 만으로도 간단하게 api를 생성할 수 있다.
login.js 코드
const handler = (req, res) => {
  //요청이 POST인 경우에만 코드 실행
  if (req.method === 'POST') {
  	//클라이언트에서 받아온 req값을 변수에 저장
    const id = req.body.id;
    const password = req.body.password;

	//env파일에 저장해놓은 아이디 비번이, req로 받은 아이디 비번과 일치하는지 대조
    if (
      id === process.env.ADMIN_ID &&
      password === process.env.ADMIN_PASSWORD
      //성공시
    ) {
      res.status(200).json({ message: '로그인이 완료되었습니다.', code: 1000 });
      //실패시
    } else {
      res.status(400).json({
        message: '아이디 혹은 비밀번호가 일치하지 않습니다',
        code: 3003,
      });
    }
  } else {
    res.status(400).json({ error: '잘못된 요청입니다' });
  }
};

export default handler;
한명만 로그인하면 되기 때문에 미리 정해놓은 아이디와 비밀번호를 대조해서 일치하는 경우에만 성공 코드를 보내주도록 간단하게 로직을 짰다.
