Photo by Kostiantyn Li on Unsplash
로컬스토리지 사용해서 로그인유지하기
//Context.js
import { createContext, useEffect, useReducer } from "react";
import Reducer from "./Reducer";
const INITIAL_STATE = {
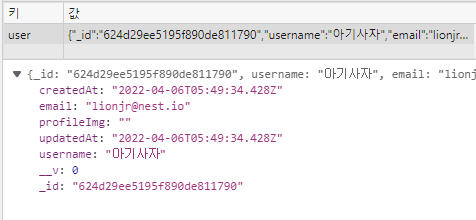
user: JSON.parse(localStorage.getItem("user")) || null,
inFetching: false,
error: false,
}
export const Context = createContext(INITIAL_STATE);
export const ContextProvider = ({children}) => {
const [state, dispatch] = useReducer(Reducer, INITIAL_STATE);
useEffect(()=> {
localStorage.setItem("user",JSON.stringify(state.user));
},[state.user])
return(
<Context.Provider value={{
user:state.user,
isFetching:state.isFetching,
error:state.error,
dispatch,
}}>{children}</Context.Provider>
)
}-
useEffect로state.user가 바뀔때마다 로컬스토리지에 유저상태저장 -
JSON.stringify()하는 이유 -> 로컬스토리지 값엔 string만 들어갈 수 있다.- localStorage.setItem("user",state.user); (x)

- localStorage.setItem("user",JSON.stringify(state.user)); (o)
- localStorage.setItem("user",state.user); (x)
-
반대로 INITIAL_STATE에 집어넣을때는
JSON.parse()를 사용해서 객체로 되돌린다.
user: JSON.parse(localStorage.getItem("user")) || null,스토리지에user가 있으면 가져오고 없으면null
isFetching 값으로 작업과정 확인하기
//Login.jsx
import "./login.scss"
import { Link } from "react-router-dom"
import axios from "axios";
import { useContext, useRef } from "react";
import { Context } from "../../context/Context";

export default function Login() {

  const userRef = useRef();
  const passwordRef = useRef();
  const { user, dispatch, isFetching } = useContext(Context);

  const handleSubmit = async (e) => {
    e.preventDefault();
    dispatch({type:"LOGIN_START"});
    try {
      const res = await axios.post("http://localhost:5000/api/auth/login", {
        username: userRef.current.value,
        password: passwordRef.current.value,
      })
      dispatch({ type:"LOGIN_SUCCESS", payload: res.data });
    } catch (err) {
      console.log(err.response.data);
      dispatch({ type:"LOGIN_FAILURE" })
    }
  }
  console.log(user);
  console.log(isFetching);
  return (
    <div className="login">
        <span className="login-title">환영합니다.</span>
        <form className="login-form" onSubmit={handleSubmit}>
            <label>username</label>
            <input ref={userRef} type="text" placeholder="이름을 입력해주세요 ..." className="login-input" />
            <label>Password</label>
            <input ref={passwordRef} type="password" placeholder="비밀번호를 입력해주세요 ..." className="login-input"/>
            <button type="submit" className="login-button">로그인</button>
        </form>
        <button className="login-register-button">
            <Link to="/register" className="link">회원가입</Link>
        </button>
    </div>
  )
}
auth 라우터 변경
저난번에 고친 login 라우터에 문제가 있어서 다시 작성했다.
헤더 에러때문에 if문을 사용했는데, 그러다보니 에러핸들링에서 문제가 생겼다.

지난번에 고친 코드
패스워드를 검증할때 아이디에서 받았던 요청값을 받아서 써야하는데, 아이디와 패스워드 검증을 미리 선언을 하면 아이디검증까지는 if문이 처리해주는데 if문에 도달하기 전에 패스워드 검증변수인 validate가 null이되면 바로 catch문으로 넘어가버려서 500에러로 처리되었다.
결국 if문을 중첩해서 짜야했다.
if else 지옥이 되어버렸다..처음에 깔끔했던 코드가 두배로 늘어나버리니 가슴이 아프다...
--> 아이디 비밀번호 입력유무 -> 프론트에서 처리 해서 미리 막아놓고
--> 아이디 , 비밀번호 검증 -> 서버에서 처리하기로 했다.
//LOGIN
router.post("/login", async (req, res) => {
try {
const user = await User.findOne({username: req.body.username});
if (user) {
try {
const validate = await bcrypt.compare(req.body.password, user.password);
if(validate) {
const {password, ...나머지정보들} = user._doc;
res.status(200).json(나머지정보들);
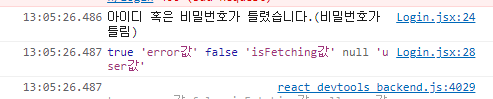
} else {
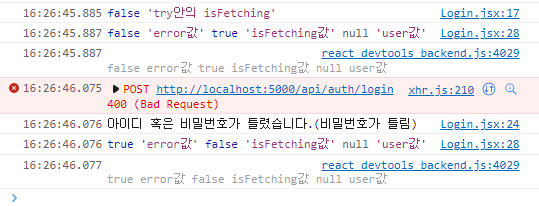
res.status(400).json("아이디 혹은 비밀번호가 틀렸습니다.(비밀번호가 틀림)");
}
} catch (err) {
res.status(500).json(err);
}
} else {
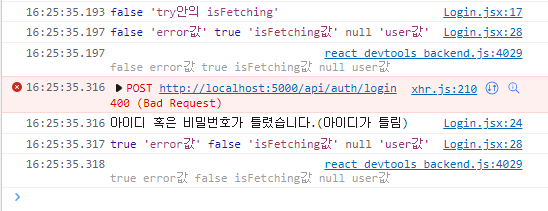
res.status(400).json("아이디 혹은 비밀번호가 틀렸습니다.(아이디가 틀림)");
}
} catch (err) {
res.status(500).json(err);
}
});isFetching이용하기
이번엔 콘솔에 isFetching 을 넣어서 응답결과마다 작업이 어떻게 진행되는지 알아보자.
-
fetching은 작업이 실패하든 성공하든 false(초기값)->true(로그인시작)->false(로그인종료)
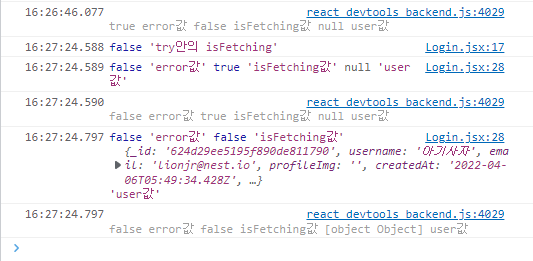
-
error 발생시 error값의 변화
<button type="submit" className="login-button" disabled={isFetching}>로그인</button>isFetching이 true일 경우 버튼 disabled비활성화
        .login-button {
        	margin-top: 1em;
            @include button-basic;

            &:disabled {
                cursor: not-allowed;
                background-color: #52635b;
            }
        }
구분을 위한 스타일 적용 후 테스트
로그인 작업이 진행중일때 (isFetching이 true일때마다) 버튼이 비활성화된다.

sudo user 만들고 로그인 상태관리하기
import { useContext } from "react";
import { Context } from "./context/Context";

function App() {
  const {user} = useContext(Context);
  return (
    <BrowserRouter>
      <TopBar />
      <Routes>
        <Route path="/" element={<Home />} />
        <Route path="/register" element={ user ? <Home /> : <Register /> } />
        <Route path="/login" element={ user ? <Home /> : <Login /> } />
        <Route path="/write" element={ user ? <Write /> : <Home /> } />
        <Route path="/settings" element={ user ? <Settings /> : <Home /> } />
        <Route path="/post/:postId" element={<Single />} />
      </Routes>
    </BrowserRouter>
  );
}

export default App;
const {user} = useContext(Context);
이제 컨텍스트의 state.user값에 따라 true/false로 로그인 유무에 따라 보여줄 컴포넌트를 컨트롤 할 수 있다.
상단 네비게이션에도 user 컨텍스트값을 줘서 로그인 유무에 따라 게인메뉴나 로그인버튼을 표시할 수 있다.
export default function TopBar() {
    const { user } = useContext(Context);
    return (
로그아웃 구현하기
로그아웃 액션 작성
//Action.js
const Logout = () => ({
	type:"LOGOUT",
})
로그아웃 리듀서 작성
초기값인 INITIAL_STATE 와 같은 값으로 설정한다.
//Reducer.js
case "LOGOUT":
            return {
                user: null,
                isFetching: false,
                error: false,
            }
이렇게 되면 Context에 있는 user.state값이 null로 바뀌면서 로그아웃을 각 컴포넌트에 전달할 수 있다.
로그아웃 버튼에 적용시켜보자.
import React, { useContext } from "react"
import { Link } from "react-router-dom";
import { Context } from "../../context/Context";

const { user, dispatch } = useContext(Context);

    const handleLogout = () => {
        dispatch({ type:"LOGOUT" });
    }

//...
//...

<div className="top-right">
  {
    user ?
      (
      <ul className="top-right-list">
        <li className="top-right-item">
          { user && <Link to="/" className="link" onClick={handleLogout}>LOGOUT</Link> }
        </li>
        <li className="top-right-item">
          <img
            className="top-img"
            src={user.profileImg}
            alt="내 프로필 이미지"
            />
        </li>
      </ul>
    )
    : (
      <ul className="top-list">
        <li className="top-list-item">
          <Link to="/login" className="link">LOGIN</Link>
        </li>
        <li className="top-list-item">
          <Link to="/register" className="link">REGISTER</Link>
        </li>
      </ul>
    )
  }
  <i className="top-search-icon fas fa-search"></i>
</div>
유저 정보가 있다면 로그아웃 버튼과 프로필사진을 렌더링하고 없다면 로그인과 회원가입버튼을 렌더링한다.
포스트 작성 페이지 만들기
//wirte.jsx
import "./write.scss"
import axios from "axios";
import { useContext, useState } from "react";
import { Context } from "../../context/Context";

export default function Write() {
    const [title,setTitle] = useState("");
    const [desc,setDesc] = useState("");
    const [file,setFile] = useState(null);
    const user = useContext(Context);

    const handleSubmit = async (e) => {
        e.preventDefault();
        const newPost = {
            username: user.username,
            title,
            desc,
        };
        if(file) {
            const data = new FormData();
            const filename = Date.now() + file.name;
            data.append("name",filename)
            data.append("file",file)
            newPost.photo = filename;
            try {
                await axios.post("http://localhost:5000/api/upload", data);
            } catch (err) {
                console.log(err);
            }
        }
        try {
            const res = await axios.post("/post", newPost);
            window.location.replace("/post/" + res.data._id);
        } catch (err) {
            console.log(err);
        }
    }
  return (
    <div className="write">
        { file && (
            <img src={URL.createObjectURL(file)} alt="업로드 사진" className="write-img"/>
        )}
        <form className="write-form" onSubmit={handleSubmit}>
            <div className="write-form-group">
                <label htmlFor="file-input">
                    <i className="write-icon fa-solid fa-file-circle-plus"></i>
                </label>
                <input type="file" id="file-input" style={{display:"none"}} onChange={(e)=>setFile(e.target.files[0])}/>
                <input
                type="text" placeholder="제목을 적어주세요..."
                autoFocus={true} className="write-input"
                onChange={(e)=>setTitle(e.target.value)} />
            </div>
            <div className="write-form-group">
                <textarea
                placeholder="당신의 이야기를 들려주세요..." type="text"
                className="write-input write-text" onChange={(e)=>setDesc(e.target.value)}></textarea>
            </div>
            <button className="write-submit">출판하기</button>
        </form>
    </div>
  )
}
파일이 있는 경우 폼데이터로 만들어서 업로드 라우터에 보내기
const [file,setFile] = useState(null);
  //...
  //...

const handleSubmit = async (e) => {
  //...
  //...

if(file) {
  const data = new FormData();
  const filename = Date.now() + file.name;
  data.append("name",filename)
  data.append("file",file)
  newPost.photo = filename;
  try {
    await axios.post("http://localhost:5000/api/upload", data);
  } catch (err) {
    console.log(err);
  }
}
const [file, setFile] = useState(null);
파일 상태를null값으로 초기화해서 처음접속시 아무 이미지도 뜨지 않게한다.input의 파일 업로드 창에서 취소를 누르면 다시 null값으로 돌아간다.
<input type="file" id="file-input" style={{display:"none"}} onChange={(e)=>setFile(e.target.files[0])}/> setFile의 상태를 e.target.files[0](인풋의 파일에 접근)으로 바꾼다.
- file state에 file이 있는경우 이미지 엘레멘트를 렌더링한다.
{ file && (
  <img src={URL.createObjectURL(file)} alt="업로드 사진" className="write-img"/>
)}URL.createObjectURL()()안의 인수를 가리키는 URL을 만든다.const data = new FormData()
data라는 폼데이터 생성 new를 반드시 붙여야 함const filename = Date.now() + file.name;
기본적으로 쓰는방법 - 현재시각 + 파일이름 (id값을 사용해도 됨)data.append("name",filename)
data.append("file",file)
폼데이터는 이름과 값이 짝지어진 데이터를 받는다.append()는 폼데이터 안에 필드를 만들어 넣겠다는 것
폼데이터는 여러 필드를 받을 수 있고 , 이름중복을 허용한다. 단,set()을 사용할 경우 해당데이터를 빼고 중복되는 이름을 가진 필드는 삭제된다.newPost.photo = filename;
router에서 정한post.photo필드에 들어갈 값을 새 포스트 객체인newPost.photo로 추가하고, 값은 파일명filename으로 한다.
const newPost = {
            username: user.username,
            title,
            desc,
};- api의 index에 작성해놓은 upload라우터(뮬터)를 통해 스토리지 경로로 이미지를 업로드한다.
try {
  await axios.post("http://localhost:5000/api/upload", data);
} catch (err) {
  console.log(err);
}
index 안의 upload(뮬터)
//api/index.js
const upload = multer({storage:storage});
app.post("/api/upload", upload.single("file"),(req,res) => {
    res.status(200).json("파일이 업로드 되었습니다.")
})
새 포스트 객체를 만들어서 axios를 통해 서버에 post요청을 보낸다.
포스트 객체의 username은 Context로 부터 받은 user객체에서 가져온다.
title과 desc는 각각 state를 만들어 가지고온다.
    const [title,setTitle] = useState("");
    const [desc,setDesc] = useState("");

const user = useContext(Context);state의 상태는 텍스트필드의 value에 의해 바뀐다.
<input
  type="text" placeholder="제목을 적어주세요..."
  autoFocus={true} className="write-input"
  onChange={(e)=>setTitle(e.target.value)} />
</div>
<div className="write-form-group">
  <textarea
    placeholder="당신의 이야기를 들려주세요..." type="text"
    className="write-input write-text"
    onChange={(e)=>setDesc(e.target.value)}>
  </textarea>
마지막으로 완성된 폼데이터객체(newPost)를 보내고 신규 게시물의 정보를 담은 응답객체를 받은 뒤 post/id값 로 해당 신규포스트로 바로 이동한다.
try {
  const res = await axios.post("/post", newPost);
  window.location.replace("/post/" + res.data._id);
} catch (err) {
  console.log(err);
}
앱을 실행시키고 포스트를 작성해본다.
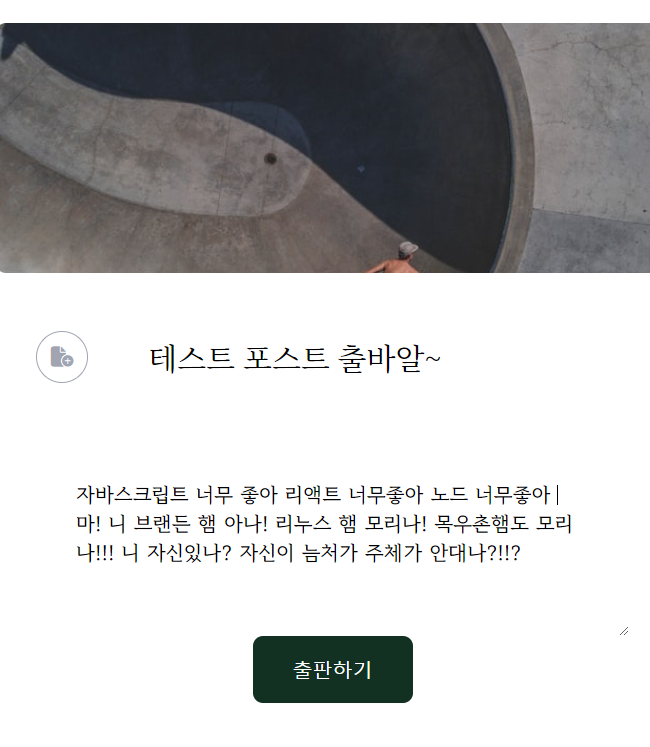
내용은 보이지만 이미지가 보이지 않는다.

포스트 상세페이지로 가서 path를 이용해서 이미지 경로를 지정해줘야 한다.
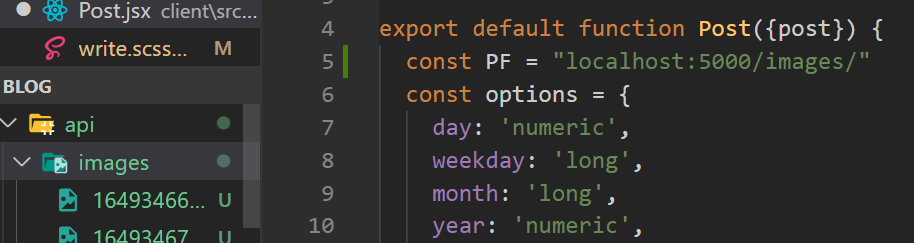
path를 이용해 이미지 경로 설정하기
const PF = "localhost:5000/images/";
return (
  <div className="post">
    { post.photo && (
      <img src={ PF + post.photo } alt="포스트이미지" className="post-img" />
    )}
const PF = "localhost:5000/images/";
post 컴포넌트로 돌아가서 PF(퍼블릭폴더)변수를 만들고 경로를 지정한다. 경로는 api 뮬터에서 설정한 image폴더경로로 설정하면 된다.
이제 이미지 요소를 포스트객체에 그림이 있을때만 출력되도록 하고,
퍼블릭폴더(PF) + 응답받은 포스트객체 (Home.jsx -> Posts.jsx -> Post.jsx로 넘어온 프롭)의 이미지 주소를 더해서 src 경로를 설정한다.
nodejs doc
path는 경로설정을 도와주는 노드모듈이다.
//api/index.js
const path = require("path");
//...
app.use("/images", express.static(path.join(__dirname,"/images")))__dirname은 현재 프로젝트 디렉토리 경로를 반환한다.
이제 localhost:5000/images/이미지이름 으로 브라우저로 접속해보면
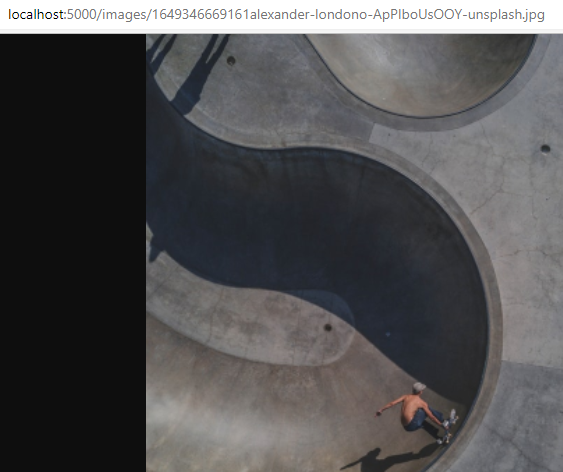
이미지가 나오는걸 확인 할 수 있다.
다시 post 컴포넌트로 돌아가서 PF 경로에 http://를 붙여준다
const PF = "localhost:5000/images/";
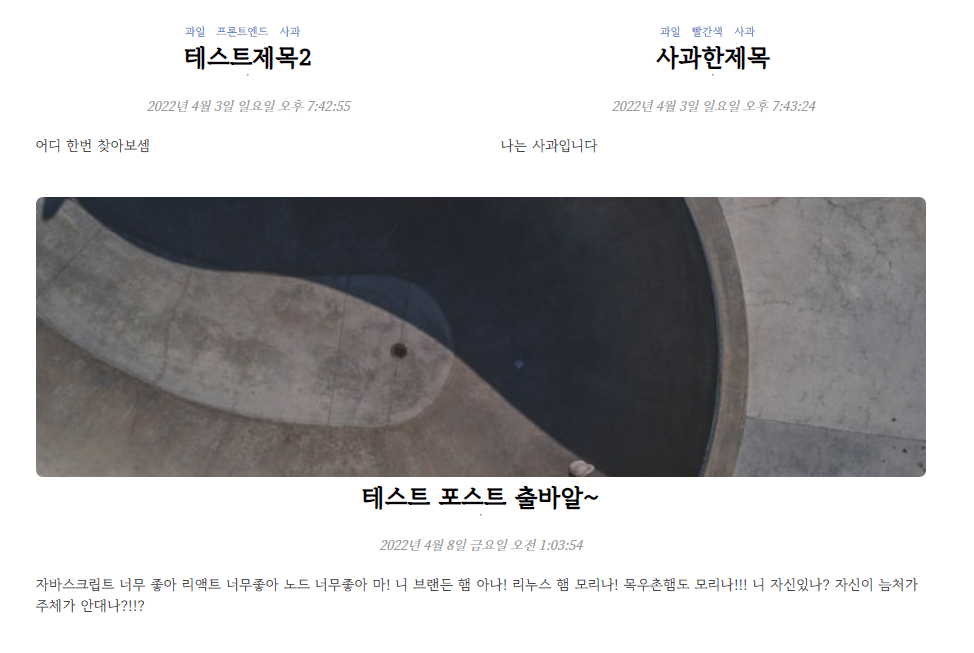
이제 포스트상세페이지에서도 이미지가 나올 수 있도록 상세페이지를 편집한다.
여기서도 PF를 선언하고 이미지 경로에 PF경로를 붙여준다.
//SinglePost.jsx
const PF = "localhost:5000/images/";
//...
//...
<div className="single-post-wrapper">
  {post.photo !== undefined ?
    (
    <img src={ PF + post.photo } alt="포스트이미지" className="single-post-img" />
  )
  : null}
이제 상세페이지에서도 업로드 된 이미지를 볼 수 있다.