axios로 데이터 가져오기 / 라우터 연결하기
https://axios-http.com/kr/docs/intro 엑시오스 공식문서 (한국어)
Axios란?
Axios는 node.js와 브라우저를 위한 Promise 기반 HTTP 클라이언트 입니다. 그것은 동형 입니다(동일한 코드베이스로 브라우저와 node.js에서 실행할 수 있습니다). 서버 사이드에서는 네이티브 node.js의 http 모듈을 사용하고, 클라이언트(브라우저)에서는 XMLHttpRequests를 사용합니다.
home.jsx로 가서 엑시오스를 불러온다.
npm install axios npm으로 axios 설치
//home.jsx
import { useState, useEffect } from "react";
import Header from "../../components/header/Header"
import Posts from "../../components/posts/Posts"
import Sidebar from "../../components/sidebar/Sidebar"
import "./home.scss"


export default function Home() {
    const [posts, setPosts] = useState([]);

    useEffect(() => {
        const fetchPosts = async () => {
            axios.get("/")
        }
    },[])
    return (
        <>
            <Header />
            <div className="home">
                <Sidebar />
                <Posts />
            </div>
        </>
    )
}
const [posts, setPosts] = useState([]);
포스트 상태를 관리할 state, 초기값은 빈 배열로
useEffect의 콜백에 빈 배열([])을 넣으면 페이지가 완전히 렌더링 되었을때 axios가 데이터를 가져온다.
axios.get("/")은 fetchAPI 처럼 async await을 사용할 수 있다.
package.json 파일을 열어서 서버프록시를 지정해준다.

API에서 설정해놓은 라이브서버 포트 5000번으로 설정해놓는다.
이렇게 하면 get url을 단축해서 사용할 수 있다.
http://localhost:5000/api/post ---> /post
서버를 열고 포스트 정보 불러오기 테스트

파워셸 터미널을 하나 더 열어서 API서버(localhost:5000)을 열어준다.
//Home.jsx
import { useState, useEffect } from "react";
import Header from "../../components/header/Header"
import Posts from "../../components/posts/Posts"
import Sidebar from "../../components/sidebar/Sidebar"
import "./home.scss"


export default function Home() {
    const [posts, setPosts] = useState([]);

    useEffect(() => {
        const fetchPosts = async () => {
            const res = await axios.get("/post");
          	console.log(res);
        }
        fetchPosts();
    },[])
    return (
        <>
            <Header />
            <div className="home">
                <Sidebar />
                <Posts />
            </div>
        </>
    )
}
개발서버 CORS 허용
이런식으로 에러가 뜰때가 있는데 캐시때문에 그런다고 한다.
https://stackoverflow.com/questions/48291950/proxy-not-working-for-react-and-node

해결법은 package-lock.json을 삭제하고 vscode를 재실행하거나
그래도 안되면 node_modules 폴더와 package-lock.json파일을 모두 삭제하고 npm install 명령으로 재설치 하면된다.
그러면 또 이런 에러가 뜨는데
이건 또 통신사 문제라고 한다.

해결하고 나면 또 CORS 문제가 생긴다.
https://create-react-app.dev/docs/proxying-api-requests-in-development/ 리액트 프록싱 문서

서버에 porxy-middle-ware를 설치하는 방법과 직접 single router를 지정하는 방법이 있다.
내가 선택한 방법은 다른 방법은 방법은 express에서 제공하는 cors 설치인데
npm install cors
https://github.com/expressjs/cors#readme
뭐가 문제인지 지정 호스트만 허용이 안되서 모든 호스트를 허용으로 해놨다.
//api/index.js
const cors = require("cors");
app.use(cors());
일단 넘어가서 요청부터 해보자..😢
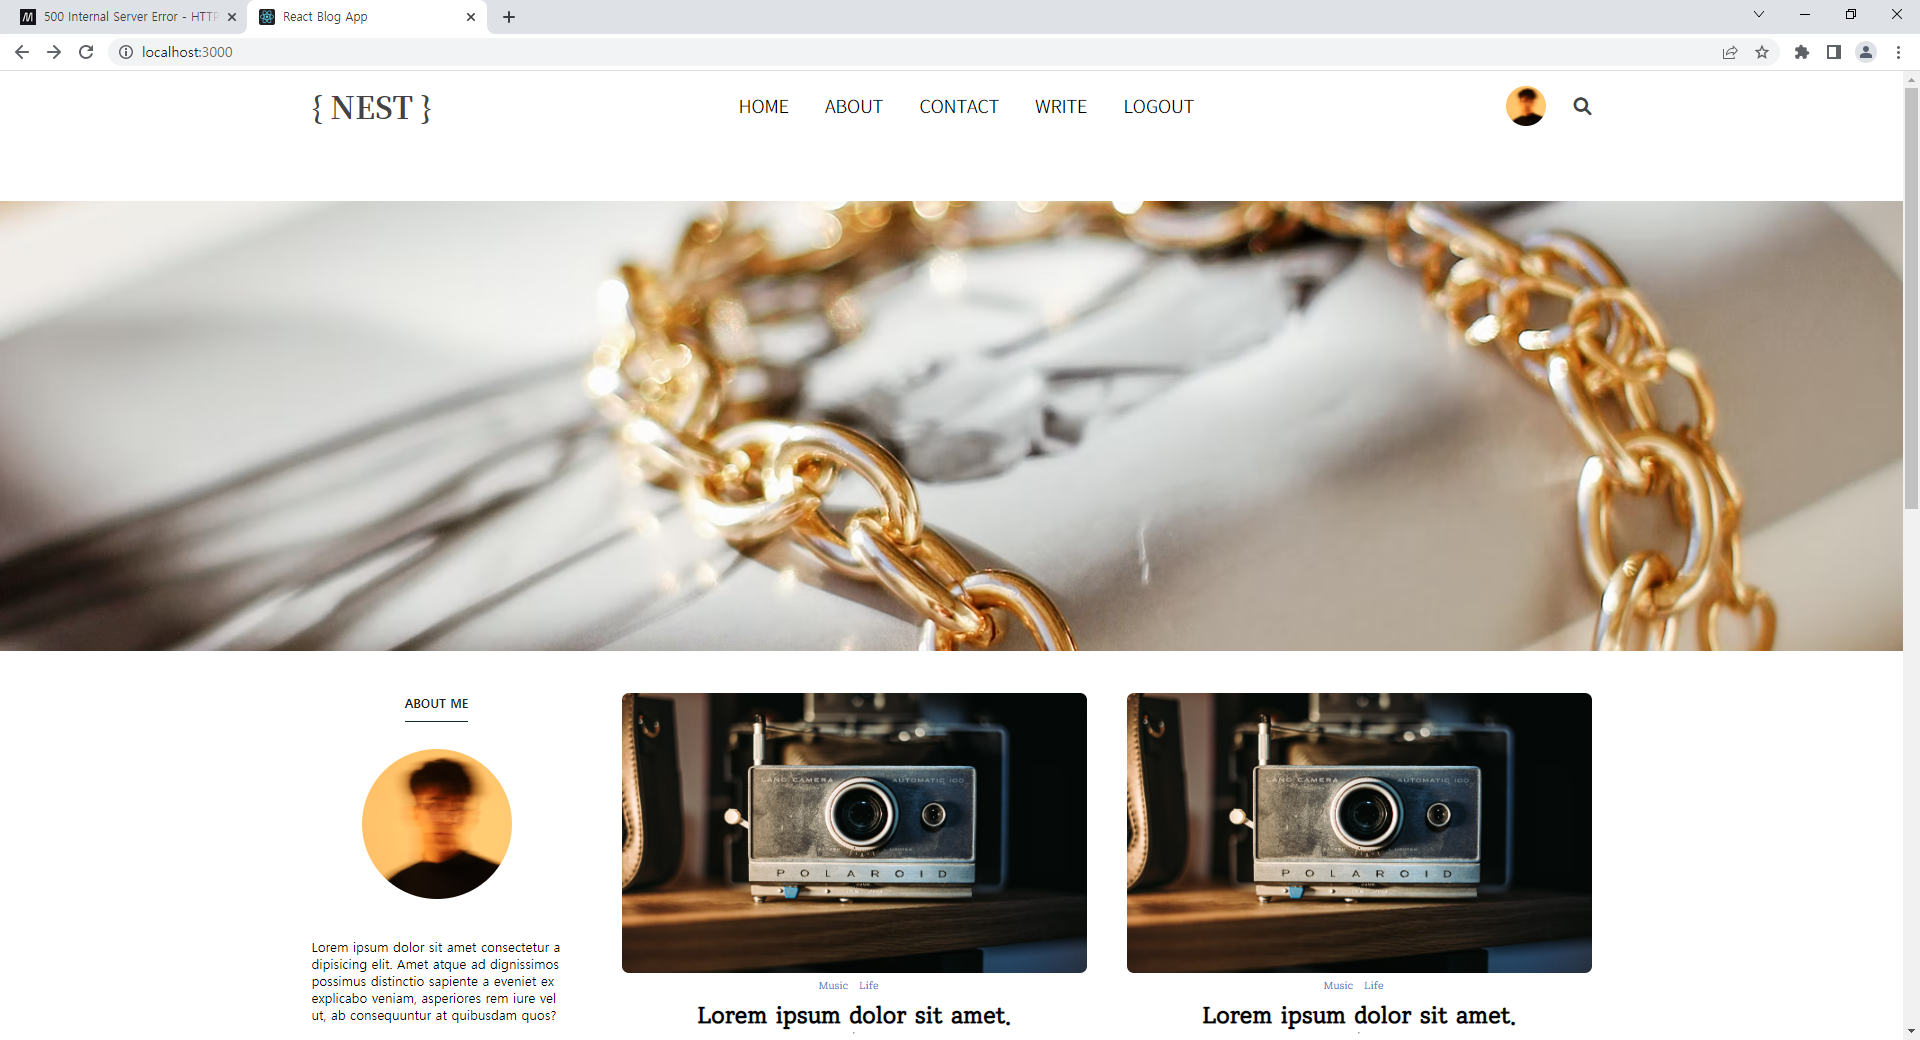
메인페이지

콘솔에 데이터가 들어온걸 확인할 수 있다.
Home ---> Posts
들어온 데이터를 setPosts(res.data)로 posts의 상태를 변경하고
<Posts> 컴포넌트에 프롭으로 보낸다.
//Home.jsx
// ...
export default function Home() {
    const [posts, setPosts] = useState([]);

    useEffect(() => {
        const fetchPosts = async () => {
            const res = await axios.get("http://localhost:5000/api/post");
            setPosts(res.data)
        }
        fetchPosts();
    },[])
    return (
        <>
            <Header />
            <div className="home">
                <Sidebar />
                <Posts posts = {posts}  />
            </div>
        </>
    )
}
Posts ---> Post
이제 프롭을 보낸 Posts 컴포넌트로 가서 map()으로 데이터 수 만큼 Post컴포넌트를 만듦과 동시에 컴포넌트(<Post>)마다 해당 포스트내용(contents)을 프롭으로 전달한다.
//Posts.jsx
// ...
export default function Posts({posts}) {
  return (
    <div className="posts">
      {posts.map((contents) => <Post post={contents} />)}
    </div>
  )
}
Post - 받은 프롭으로 데이터 나눠주기
export default function Post({contents}) {
  return (
    <div className="post">
        <img src="https://images.unsplash.com/photo-1648350405746-16ab80c37907?ixlib=rb-1.2.1&ixid=MnwxMjA3fDB8MHxwaG90by1wYWdlfHx8fGVufDB8fHx8&auto=format&fit=crop&w=2070&q=80" alt="포스트이미지" className="post-img" />
        <div className="post-info">
            <div className="post-cats">
                <span className="post-cat">Music</span>
                <span className="post-cat">Life</span>
            </div>
            <span className="post-title">
                {contents.title}
            </span>
            <hr />
            <span className="post-date">1 hour ago</span>
        </div>
        <p className="post-desc">Lorem ipsum dolor sit amet consectetur adipisicing elit. Quos deleniti suscipit iure doloribus fuga, sint in animi dolorem quidem odio, exercitationem ex saepe facere voluptatum incidunt cupiditate, natus sed neque?
        Lorem ipsum dolor sit amet consectetur adipisicing elit. Quos deleniti suscipit iure doloribus fuga, sint in animi dolorem quidem odio, exercitationem ex saepe facere voluptatum incidunt cupiditate, natus sed neque?
        Lorem ipsum dolor sit amet consectetur adipisicing elit. Quos deleniti suscipit iure doloribus fuga, sint in animi dolorem quidem odio, exercitationem ex saepe facere voluptatum incidunt cupiditate, natus sed neque?
        Lorem ipsum dolor sit amet consectetur adipisicing elit. Quos deleniti suscipit iure doloribus fuga, sint in animi dolorem quidem odio, exercitationem ex saepe facere voluptatum incidunt cupiditate, natus sed neque?
        Lorem ipsum dolor sit amet consectetur adipisicing elit. Quos deleniti suscipit iure doloribus fuga, sint in animi dolorem quidem odio, exercitationem ex saepe facere voluptatum incidunt cupiditate, natus sed neque?</p>
    </div>
  )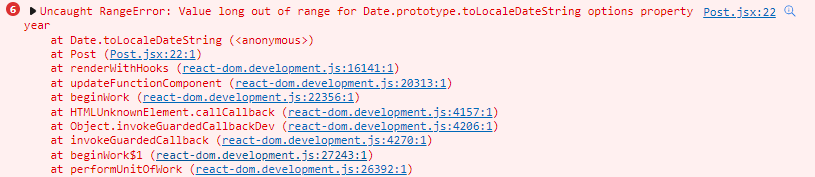
}post-date를 표시할때 post.createdAt을 그대로 불러오면 toISOString()형태로 뜬다.

새 Date객체를 만들어서 .toDateString 을 이용하면 미국식으로 정리된 텍스트를 얻을 수 있다.
{new Date(post.createdAt).toDateStirng}

대신 .toLocaleString 사용하면 한국식으로 표현할 수 있다.

option을 사용하면 한글로도 표현가능하다.
const options = {
    day: 'numeric',
    weekday: 'long',
    month: 'long',
    year: 'numeric',
  }

new Date(post.createdAt).toLocaleDateString('ko-KR',options)
{ post.photo && (<img src={ post.photo } alt="포스트이미지" className="post-img" />)}
이미지가 있다면post.photo && post.photo를 src값으로 갖는 img요소를 출력하도록 만든다.
지금은 DB에 이미지가 없으므로 이미지를 출력하지 않는다.

카테고리도 바꿔준다.
{post.categories.map((category) => (<span>{category}</span>))}

포스트 내용으로 이동할 수 있게 제목에 post._id 주소로 링크를 건다.
<Link to={`/post/${post._id}`}>
  <span className="post-title">{post.title}</span>
</Link>


포스트마다 가진 _id주소로 가진 url로 보내지게 된다.
지금은 리액트 라우터로 :id 설정해놓았기 때문에 블로그포스트 페이지로 이동한다.
포스트 상세페이지
포스트 페이지로 넘어가서 useLocation()의 콘솔로그를 보면
export default function SinglePost() {
    const location = useLocation();
    console.log(location);
다음과 같은 객체를 볼 수 있다.

여기서 pathname키가 가진 값을 잘라내서 포스트id값으로 사용할 수 있다.
location.pathname.split("/")[2];
pathname값을 / 을 기준으로 나누어서 배열에 넣고(split("/")) 배열 안에서 3번째([2])값 선택

useEffect(() => {
      const getPost = async () => {
          const res = await axios.get(`http://localhost:5000/api/post/${path}`);
          console.log(res);
      }
      getPost();
}, [path])-
useEffect(()=>{},[path])
path값이 변경되었을때만getPost실행 -
axios.get('http://localhost:5000/api/post/' + path);
post/뒤에 path값(id)을 붙여서get요청을 보낸다.

새 스테이트 const [post, setPost] = ({}); 를 만든 후
받아온 data를 setPost(res.data)로 채워준다.
이 데이터로 다시 요소마다 필요한 내용을 뿌려준다.
포스트링크마다 내용이 바뀌는지 확인한다.
.png)
좌측 프로필 메뉴

카테고리를 유저 데이터에서 가져와 작업한다.
카테고리 라우터로 요청을 get요청을 보낸다.
const [cats,setCats] = useState([]);

    useEffect(()=> {
        const getCats = async() => {
            const res = await axios.get("http://localhost:5000/api/category");
            setCats(res.data);
        };
        getCats();
    },[])
//...
//...
<ul className="sidebar-list">
    {cats.map((cat)=>(<li className="sidebar-list-item">{cat.name}</li>))}
</ul>
이렇게 하는것 보단 유저정보에 카테고리를 추가한 후에 같이 들여와야 할것 같다...
자기소개도, SNS정보나 그런것들도..
리퀘스트 쿼리 이용하기
Post 라우터 다시 살펴보기
//GET ALL POSTS
router.get("/", async (req, res) => {
    const username = req.query.user;
    const catName = req.query.cat;
    try {
        let posts;
        if(username) {
            posts = await Post.find({username:username})
        } else if(catName) {
            posts = await Post.find({categories: {
                $in:[catName]
            }})
        } else {
            posts = await Post.find();
        }
        res.status(200).json(posts);
    } catch (err) {
        res.status(500).json(err);
    }
})
지난 포스트 복습
블로그용 API 만들기 -3 #게시글 모두 가져오기
...
파라미터에 추가될 값이 username:"철수"인 경우
const username = req.query.user 이렇게 선언하면
----> router.get("/?user=철수"), async ...
이런식으로 쿼리로 바꿔준다.
Post페이지에서 사용한 리액트라우터돔의 useLocation 기능을 사용해 포스트에서 글쓴이를 눌러서 홈으로 넘어왔을때 넘겨받은 쿼리내용으로 홈에서 다시 포스트내용을 받기
useLocation()의 search프로퍼티
home.jsx에서 useLocation을 사용하도록 하고
//home.jsx
const location = useLocation();
console.log(location);
주소창에 localhost:5000/?user=패스워드맨을 입력했을때

search프로퍼티에서 쿼리형태의 유저이름을 찾을 수 있다.
//home.jsx
const {search} = useLocation();
console.log(search);
이렇게 하면 바로 uselocation이 반환하는객체의 search프로퍼티에 접근가능하다.
이제 유저이름을 알아내었으니 홈에서 해당유저의 포스트만 불러오도록 요청을 보낼 수 있다.
useEffect(() => {
        const fetchPosts = async () => {
            const res = await axios.get("http://localhost:5000/api/post" + search);
            setPosts(res.data)
        }
        fetchPosts();
    },[search])
요청url에 쿼리주소를 덧붙여서 해당 유저의 포스트만 받을 수 있도록 한다.
또한 디펜던시에 search를 추가해서 search프로퍼티값(유저이름)이 바뀔때만 데이터를 받아오도록 만든다.
또한 프로필바의 카테고리에서도 카테고리를 클릭했을때 해당 카테고리에 연관된 포스트만 나오게 된다.
-
localhost:5000/?user=사과맨으로 접속했을때 -->사과맨 게시물만 가져오기

-
localhost:5000/?cat=과일로 접속했을때

-
localhost:5000으로 접속했을때 --> 모든 게시물 다 가져오기

포스트상세 페이지의 작성자 링크도 쿼리문주소로 바꿔주자
//SinglePost.jsx
<address className="single-post-author">Author :<Link to={`/?user=${post.username}`} rel="author">{post.username}</Link></address>
이제 작성자를 누르면 해당 작성자의 포스트만 받아서 볼 수 있다.
순서 정리해보기..
-
첫 접속시 Home.jsx
url은localhost:5000이고search값은 빈값이다

다음으로fetchPosts함수가 실행되고http://localhost:5000/api/post로 요청을 보내고Post라우터에서 모든 게시물을 받아와 출력한다. -
두번째 게시물을 클릭해서 들어갔을 때Post.jsx의Link엘리먼트에 걸린
url은localhost:5000/post/post._id이고App.js에서 설정한 라우트 path로"/post/:postId"<Single />(포스트상세페이지) 컴포넌트가 렌더링 된다. -
포스트 상세페이지 SinglePost.jsx 에서
const path = location.pathname.split("/")[2];로path값에 주소창에 있던 포스트id값을 넘겨받는다.path값이 바뀌었음으로 useEffect()안의 요청함수getPost가 작동하고http://localhost:5000/api/post/${path}로 데이터를 받아온다.
<Link to={`/?user=${post.username}`} rel="author">{post.username}</Link>
- Author 클릭했을때 URL ---> localhost:5000/?user=패스워드맨
다시 쿼리를 포함한채App.js의"/"라우트인<Home />컴포넌트(home.jsx)가 렌더링 된다. 그리고 첫 접속과 달리useLocation()의search프로퍼티가 값을 가지고 ,

useEffect()안의fetchPosts가 이번에는"http://localhost:5000/api/post" + search(넘겨받은username)"로 요청을 보내게 된다.
이제 해당 유저(패스워드맨)의 포스트만 출력되게 된다.